As I get nearer to test flight authorisation there are always some bits to complete and get ready.
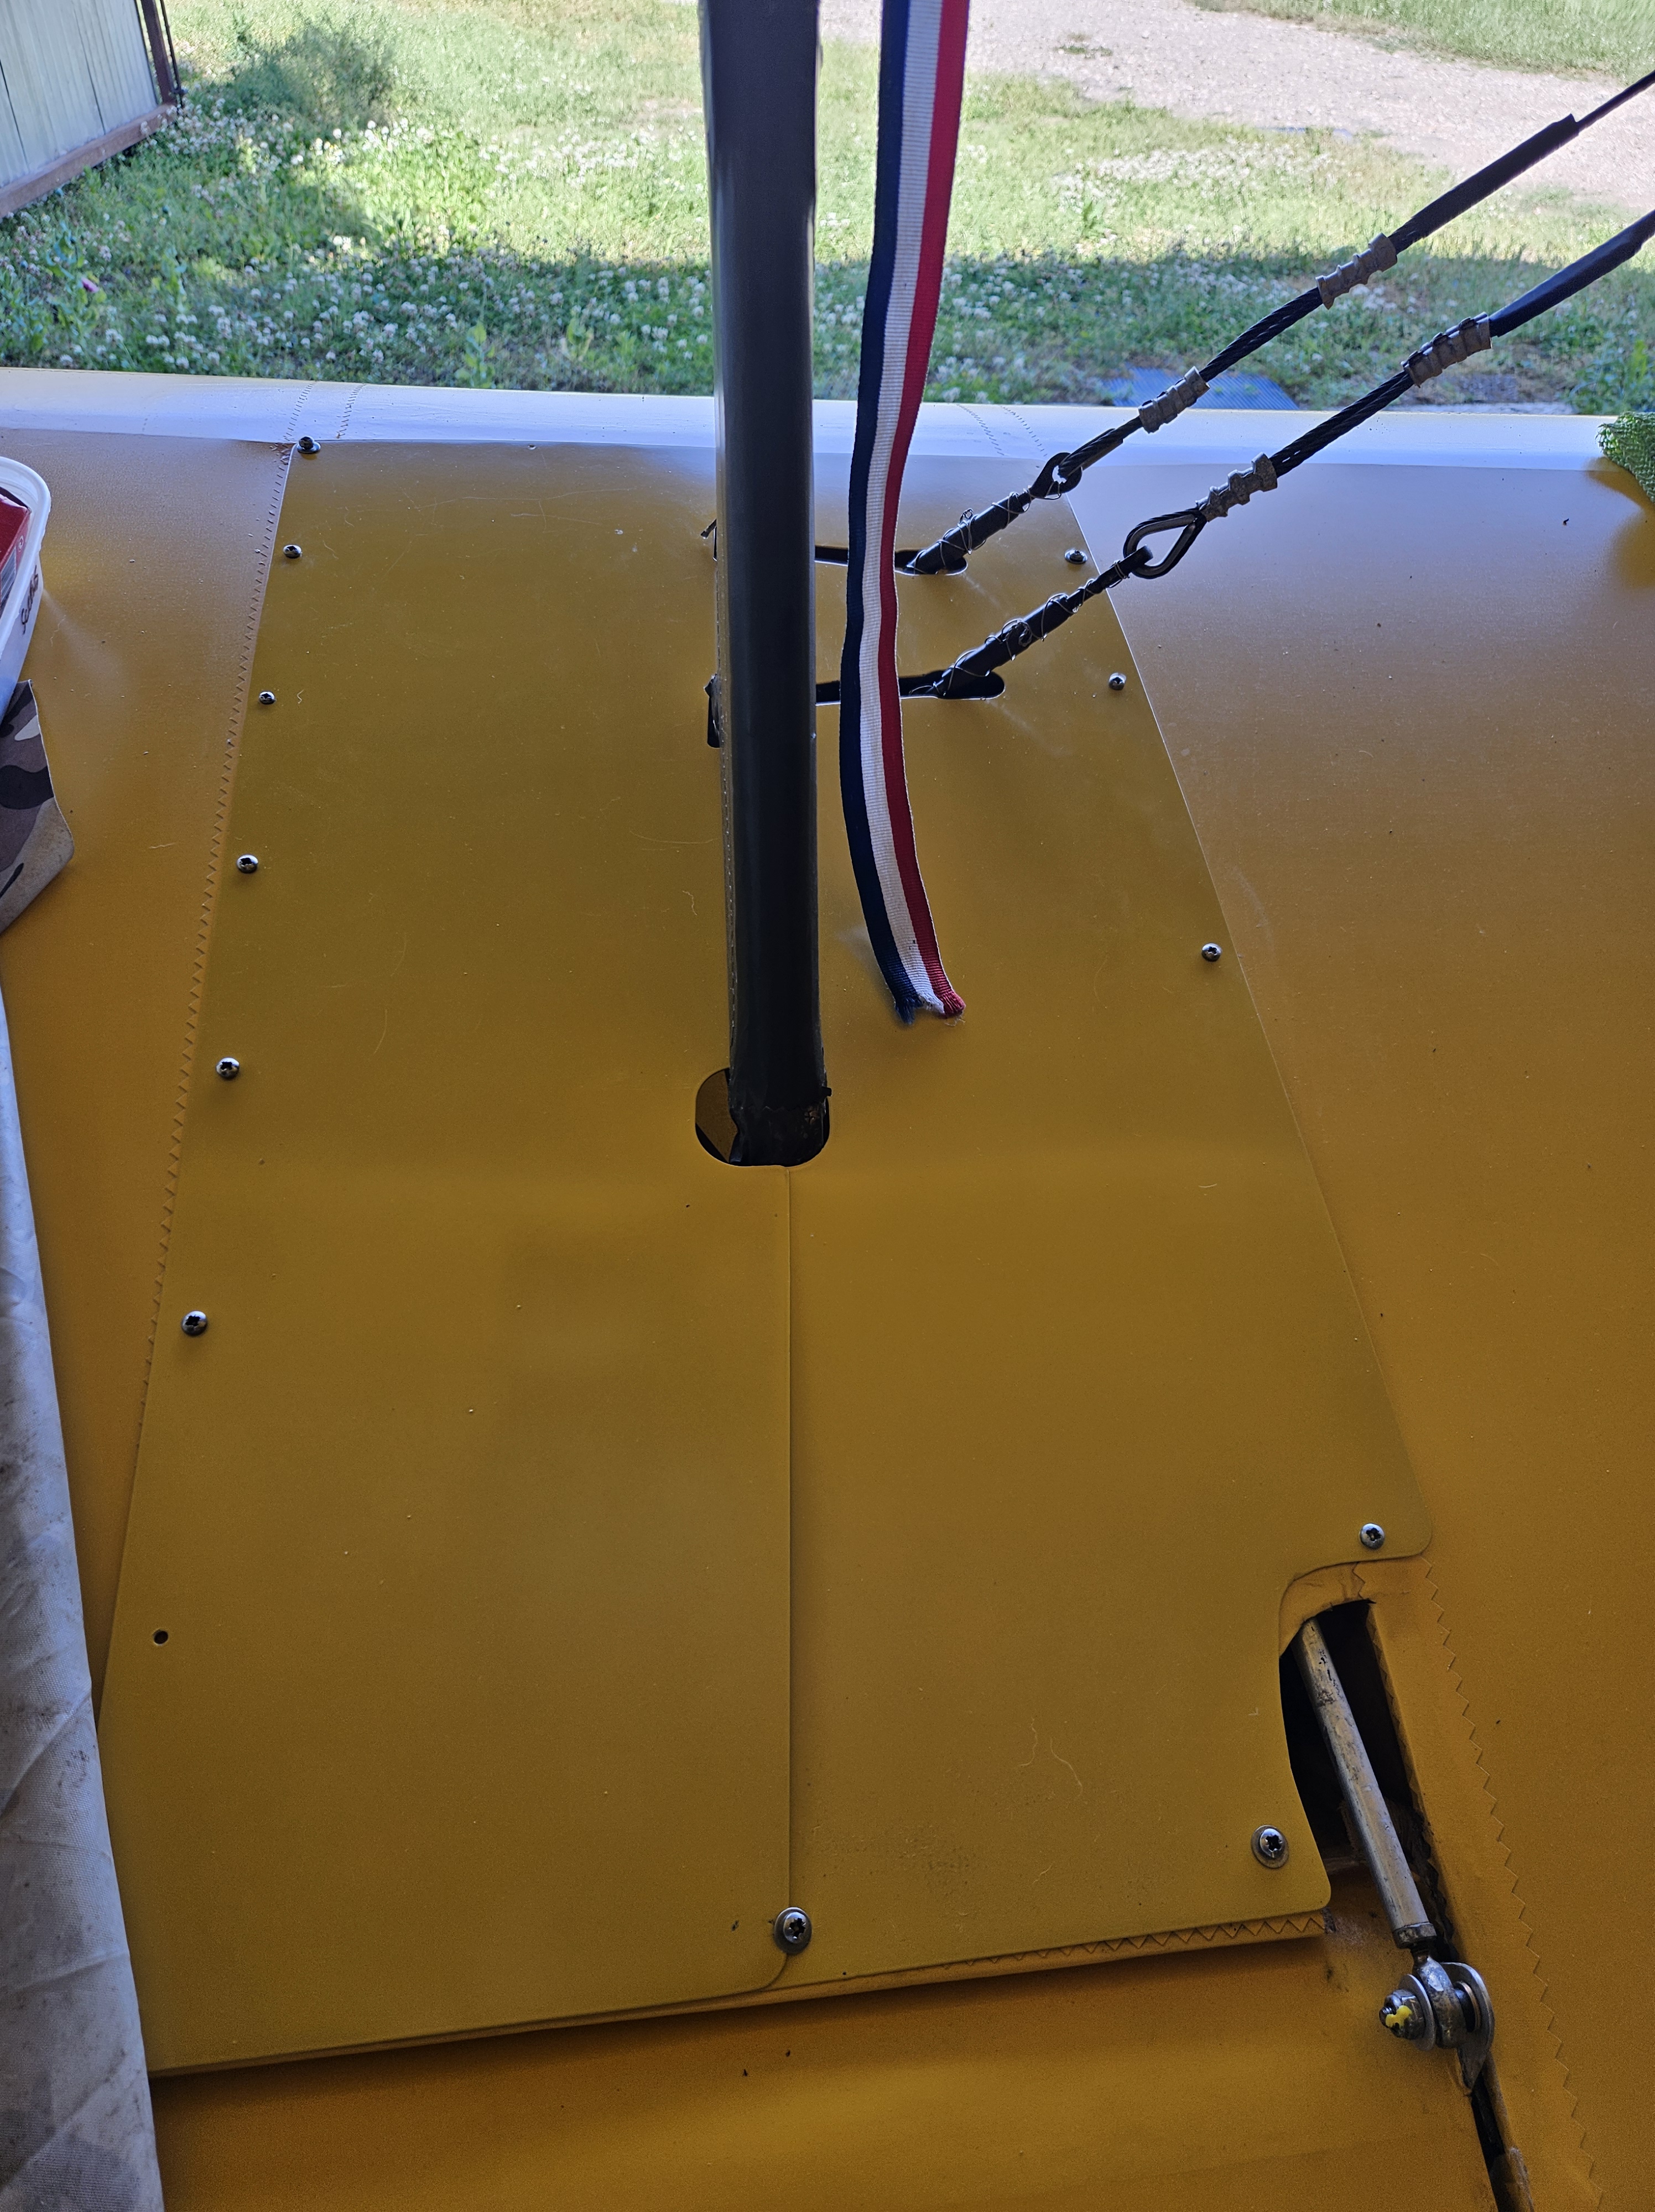
The inspection panels have been off for some time so needed a tidy and clean and then refit.
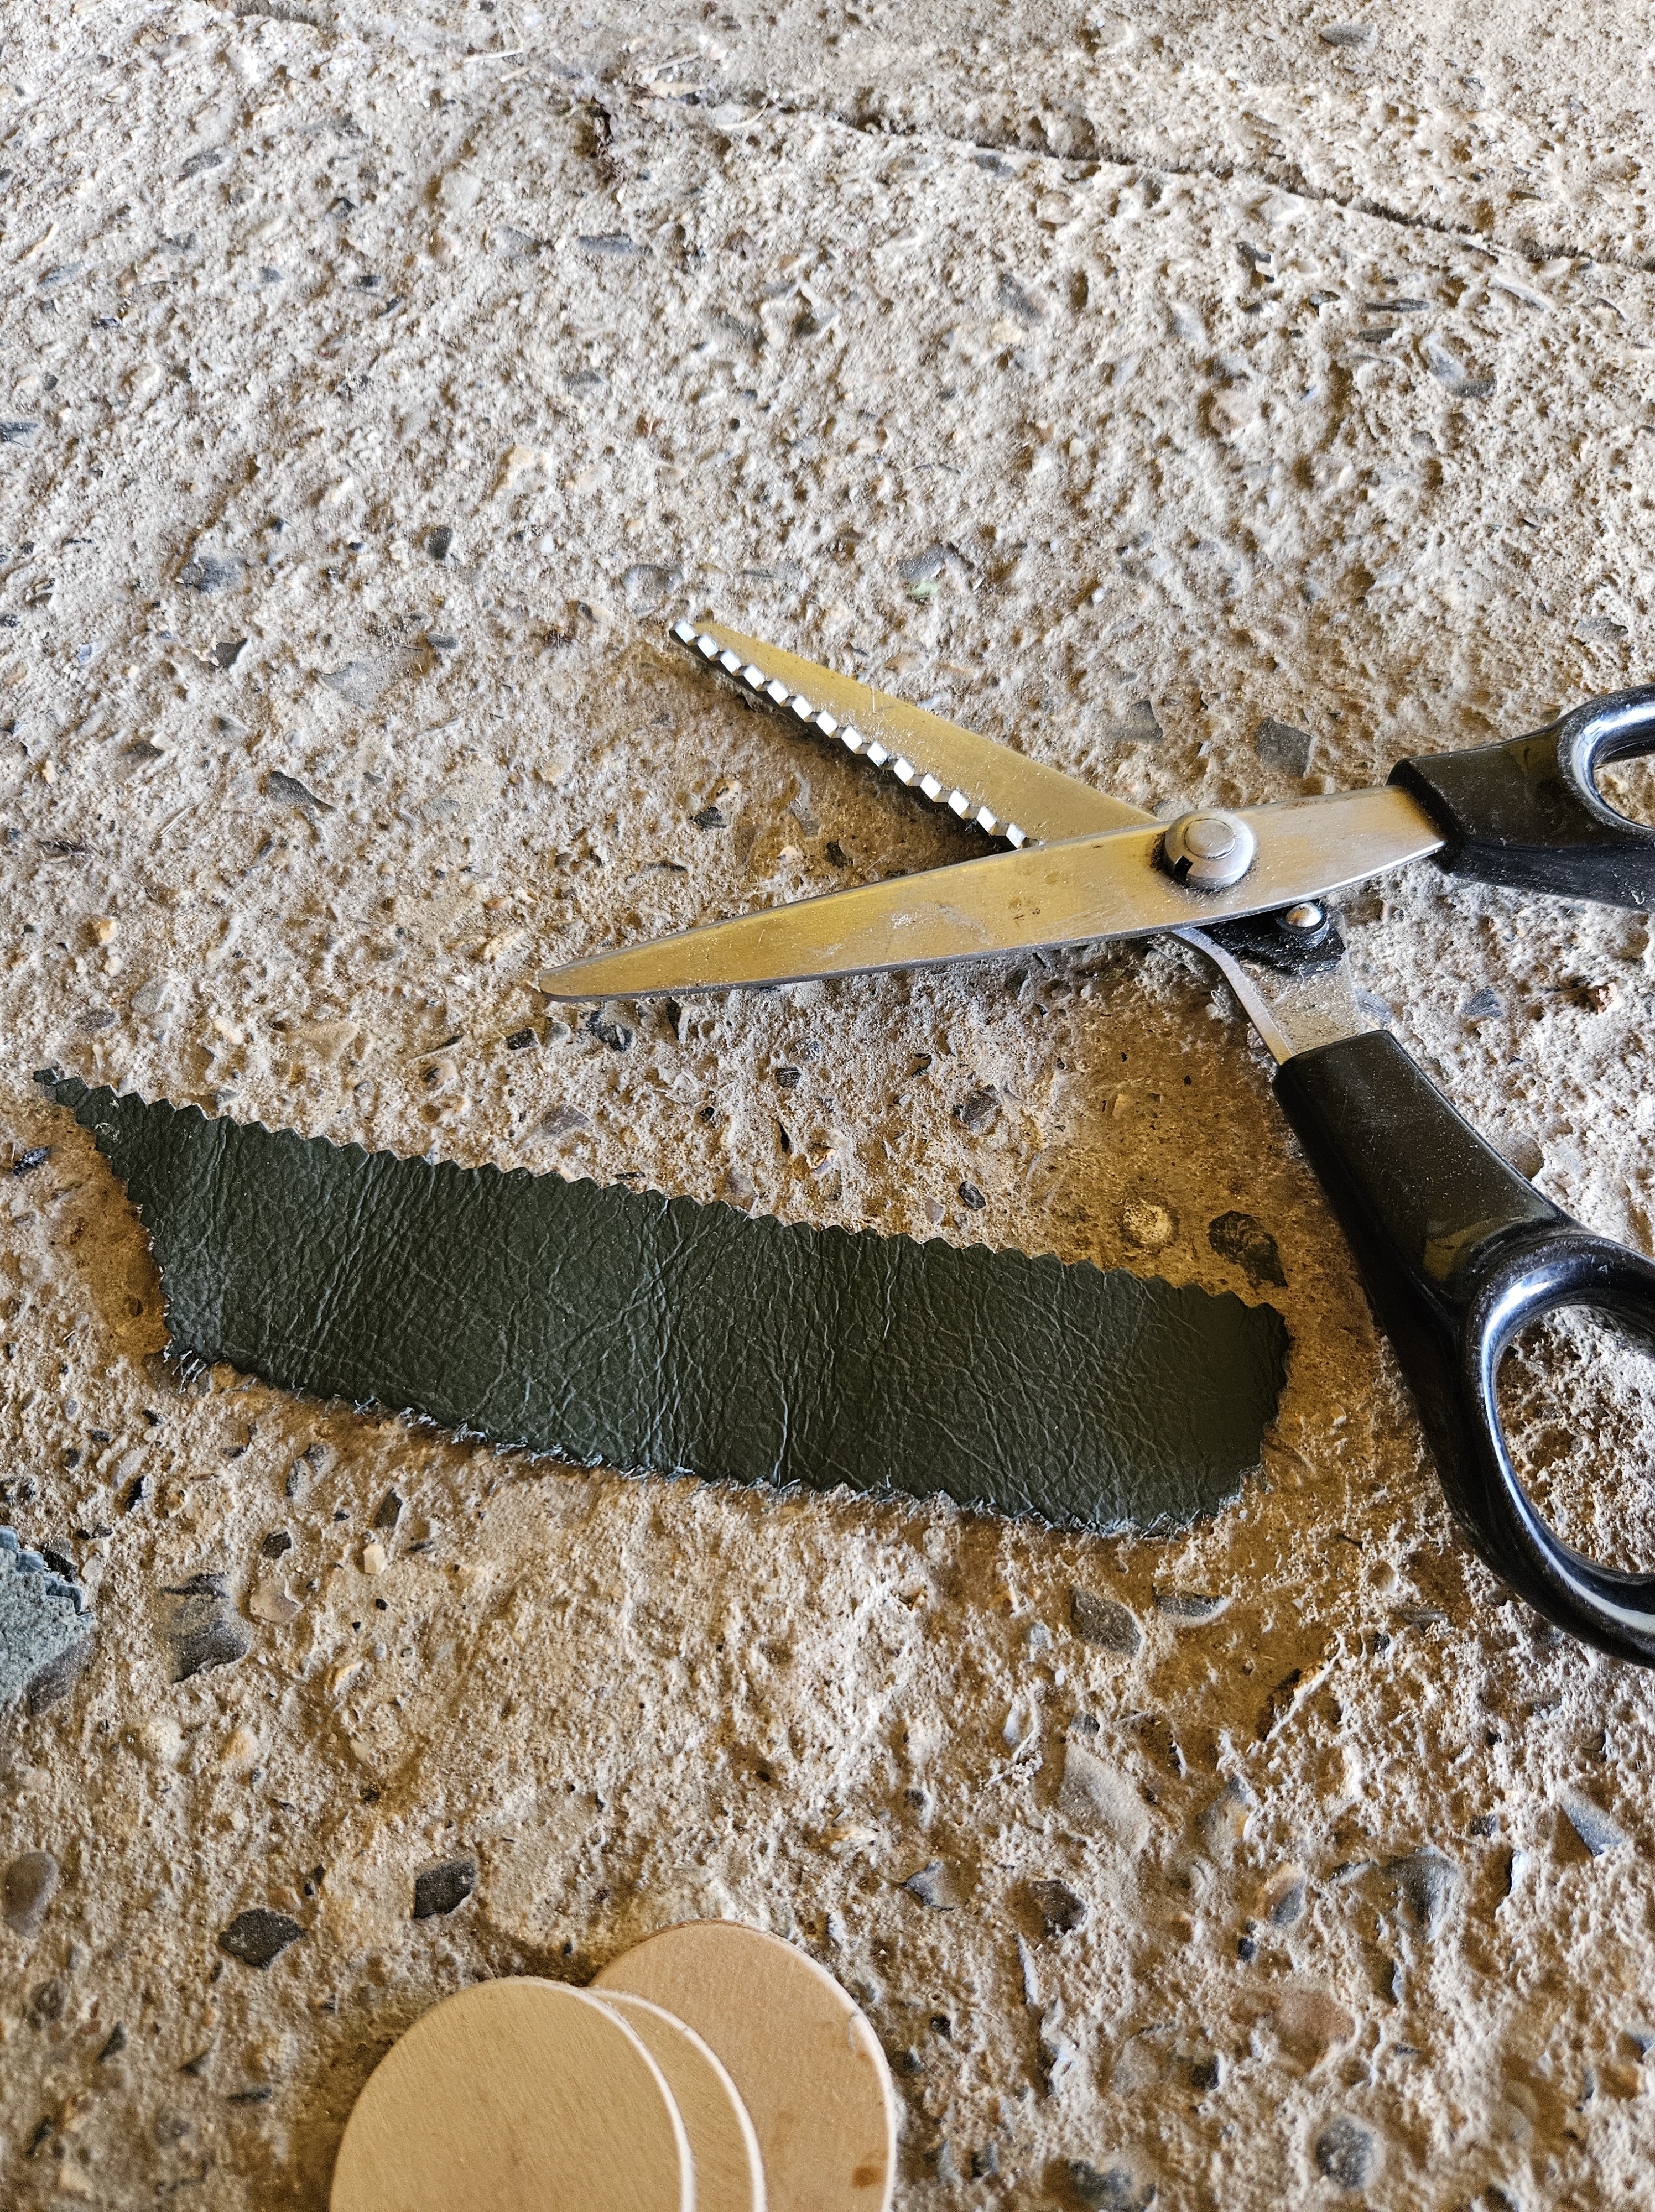
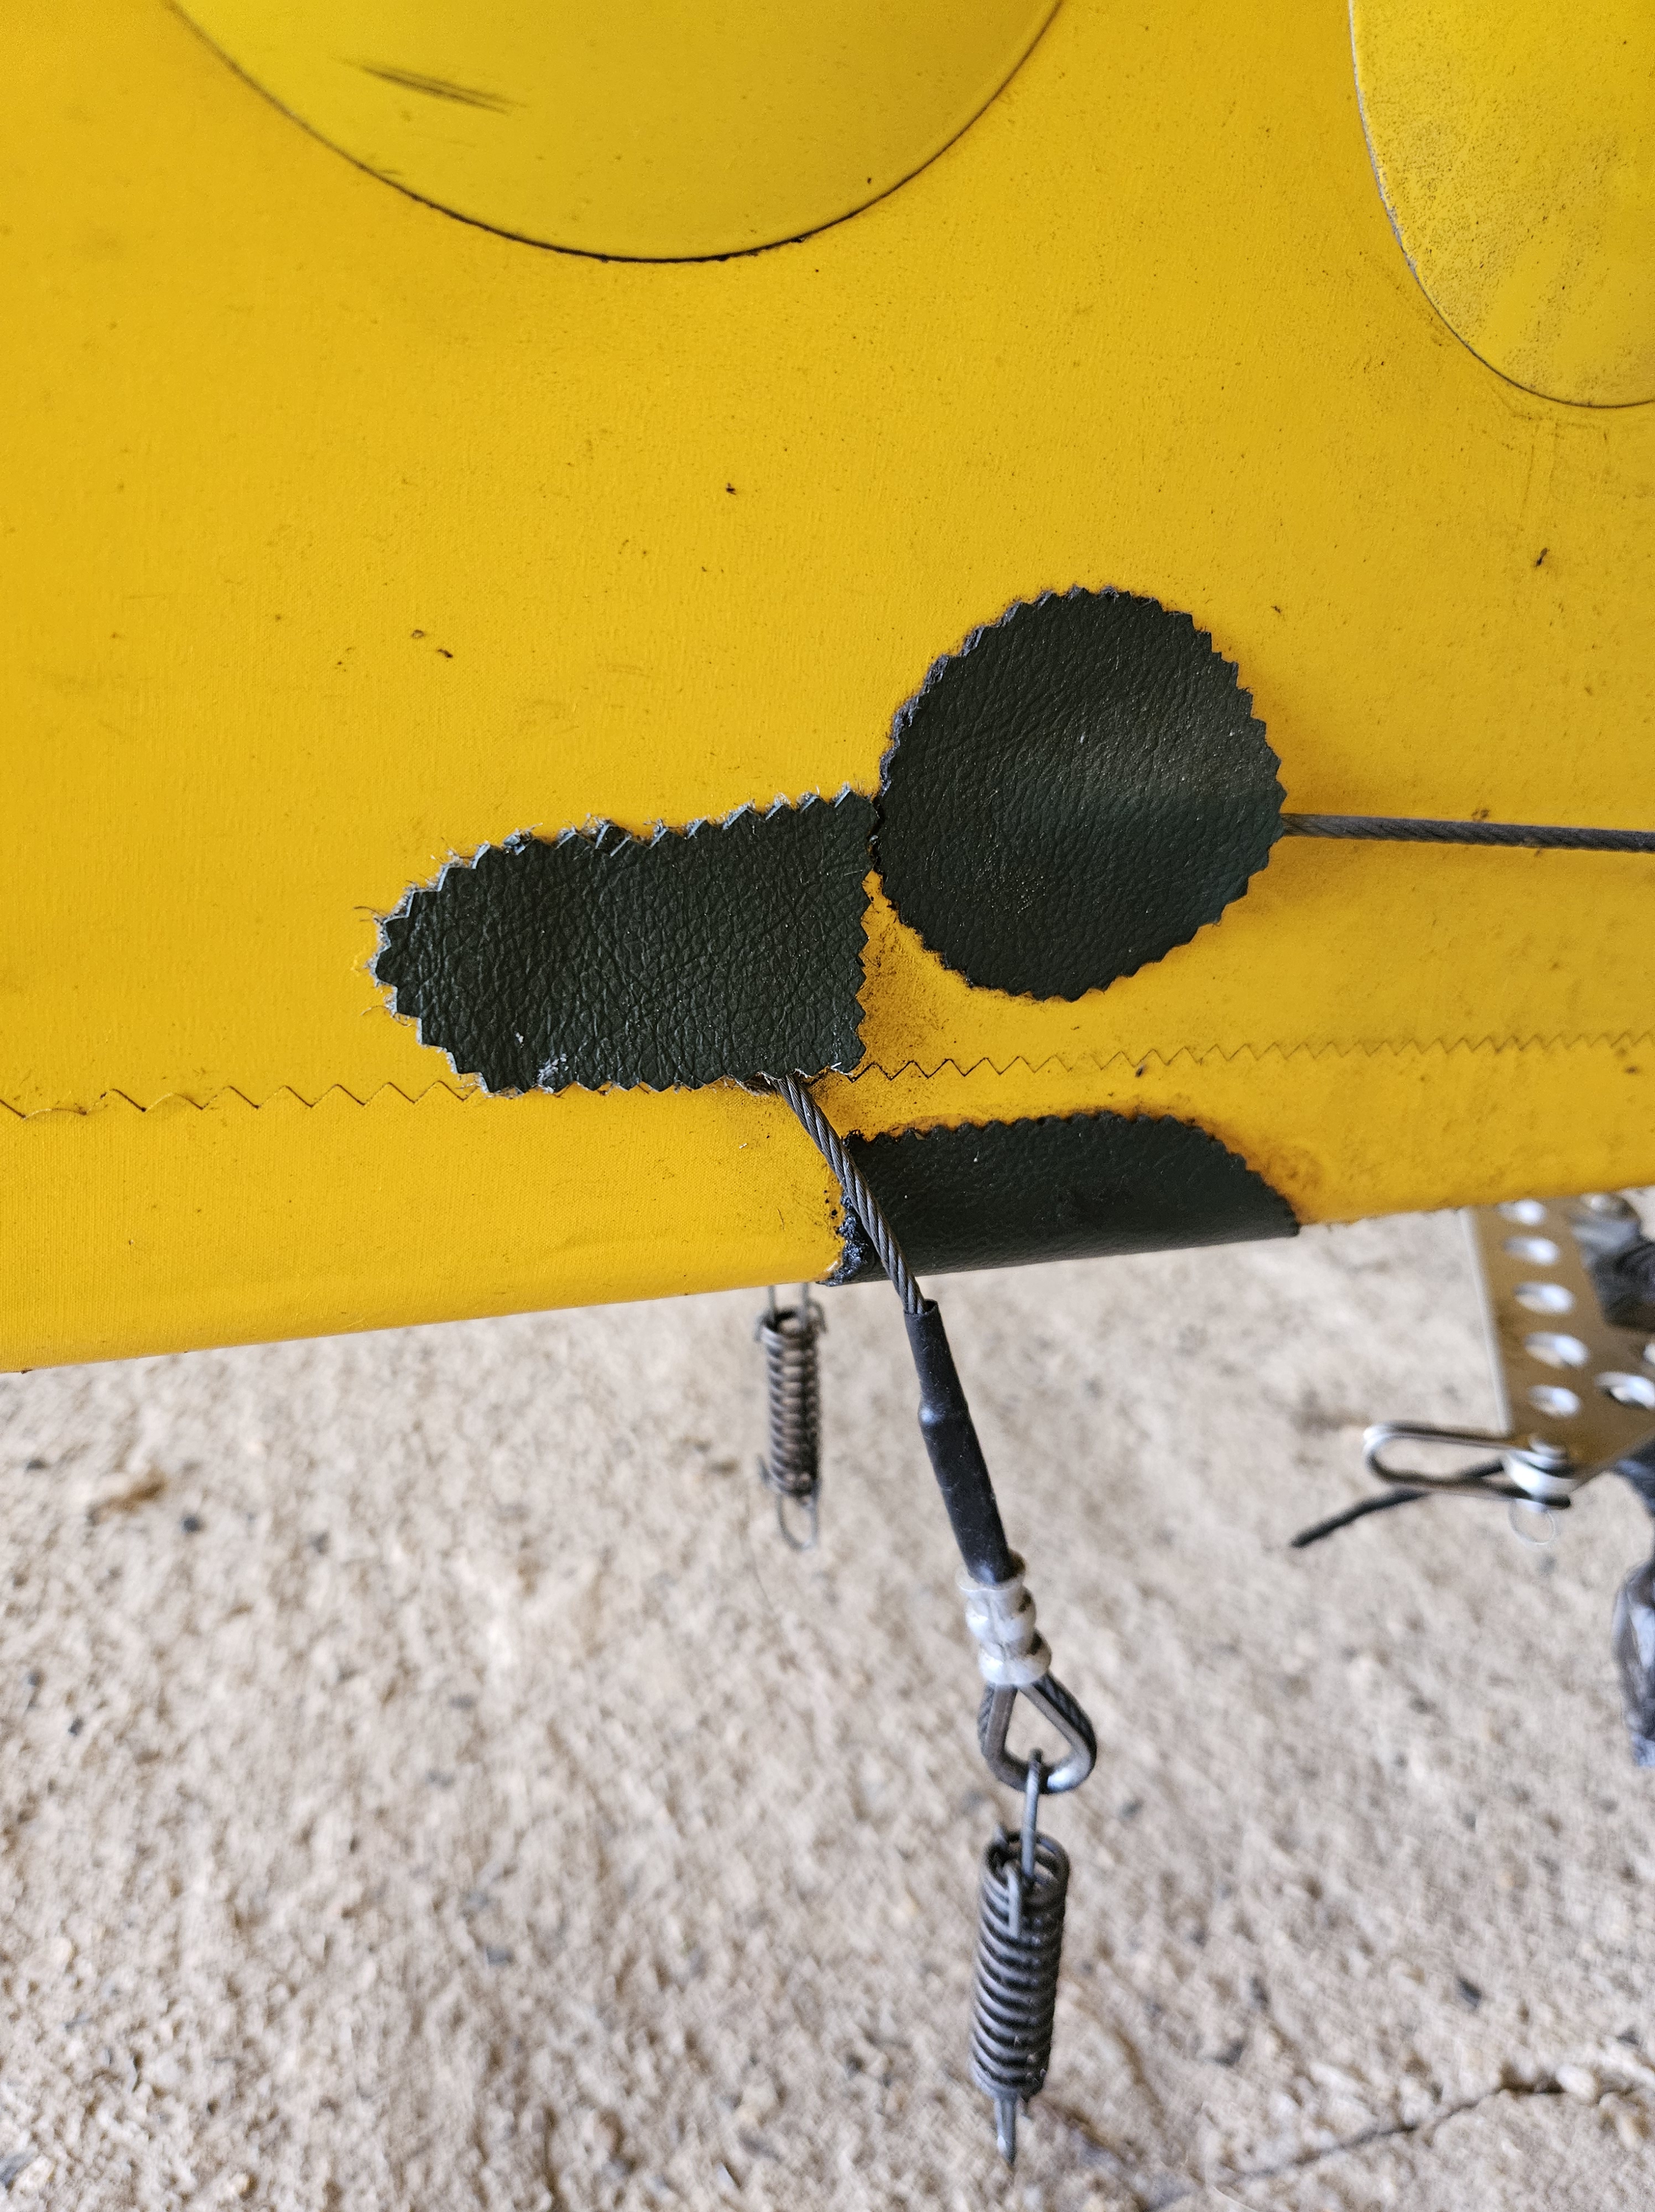
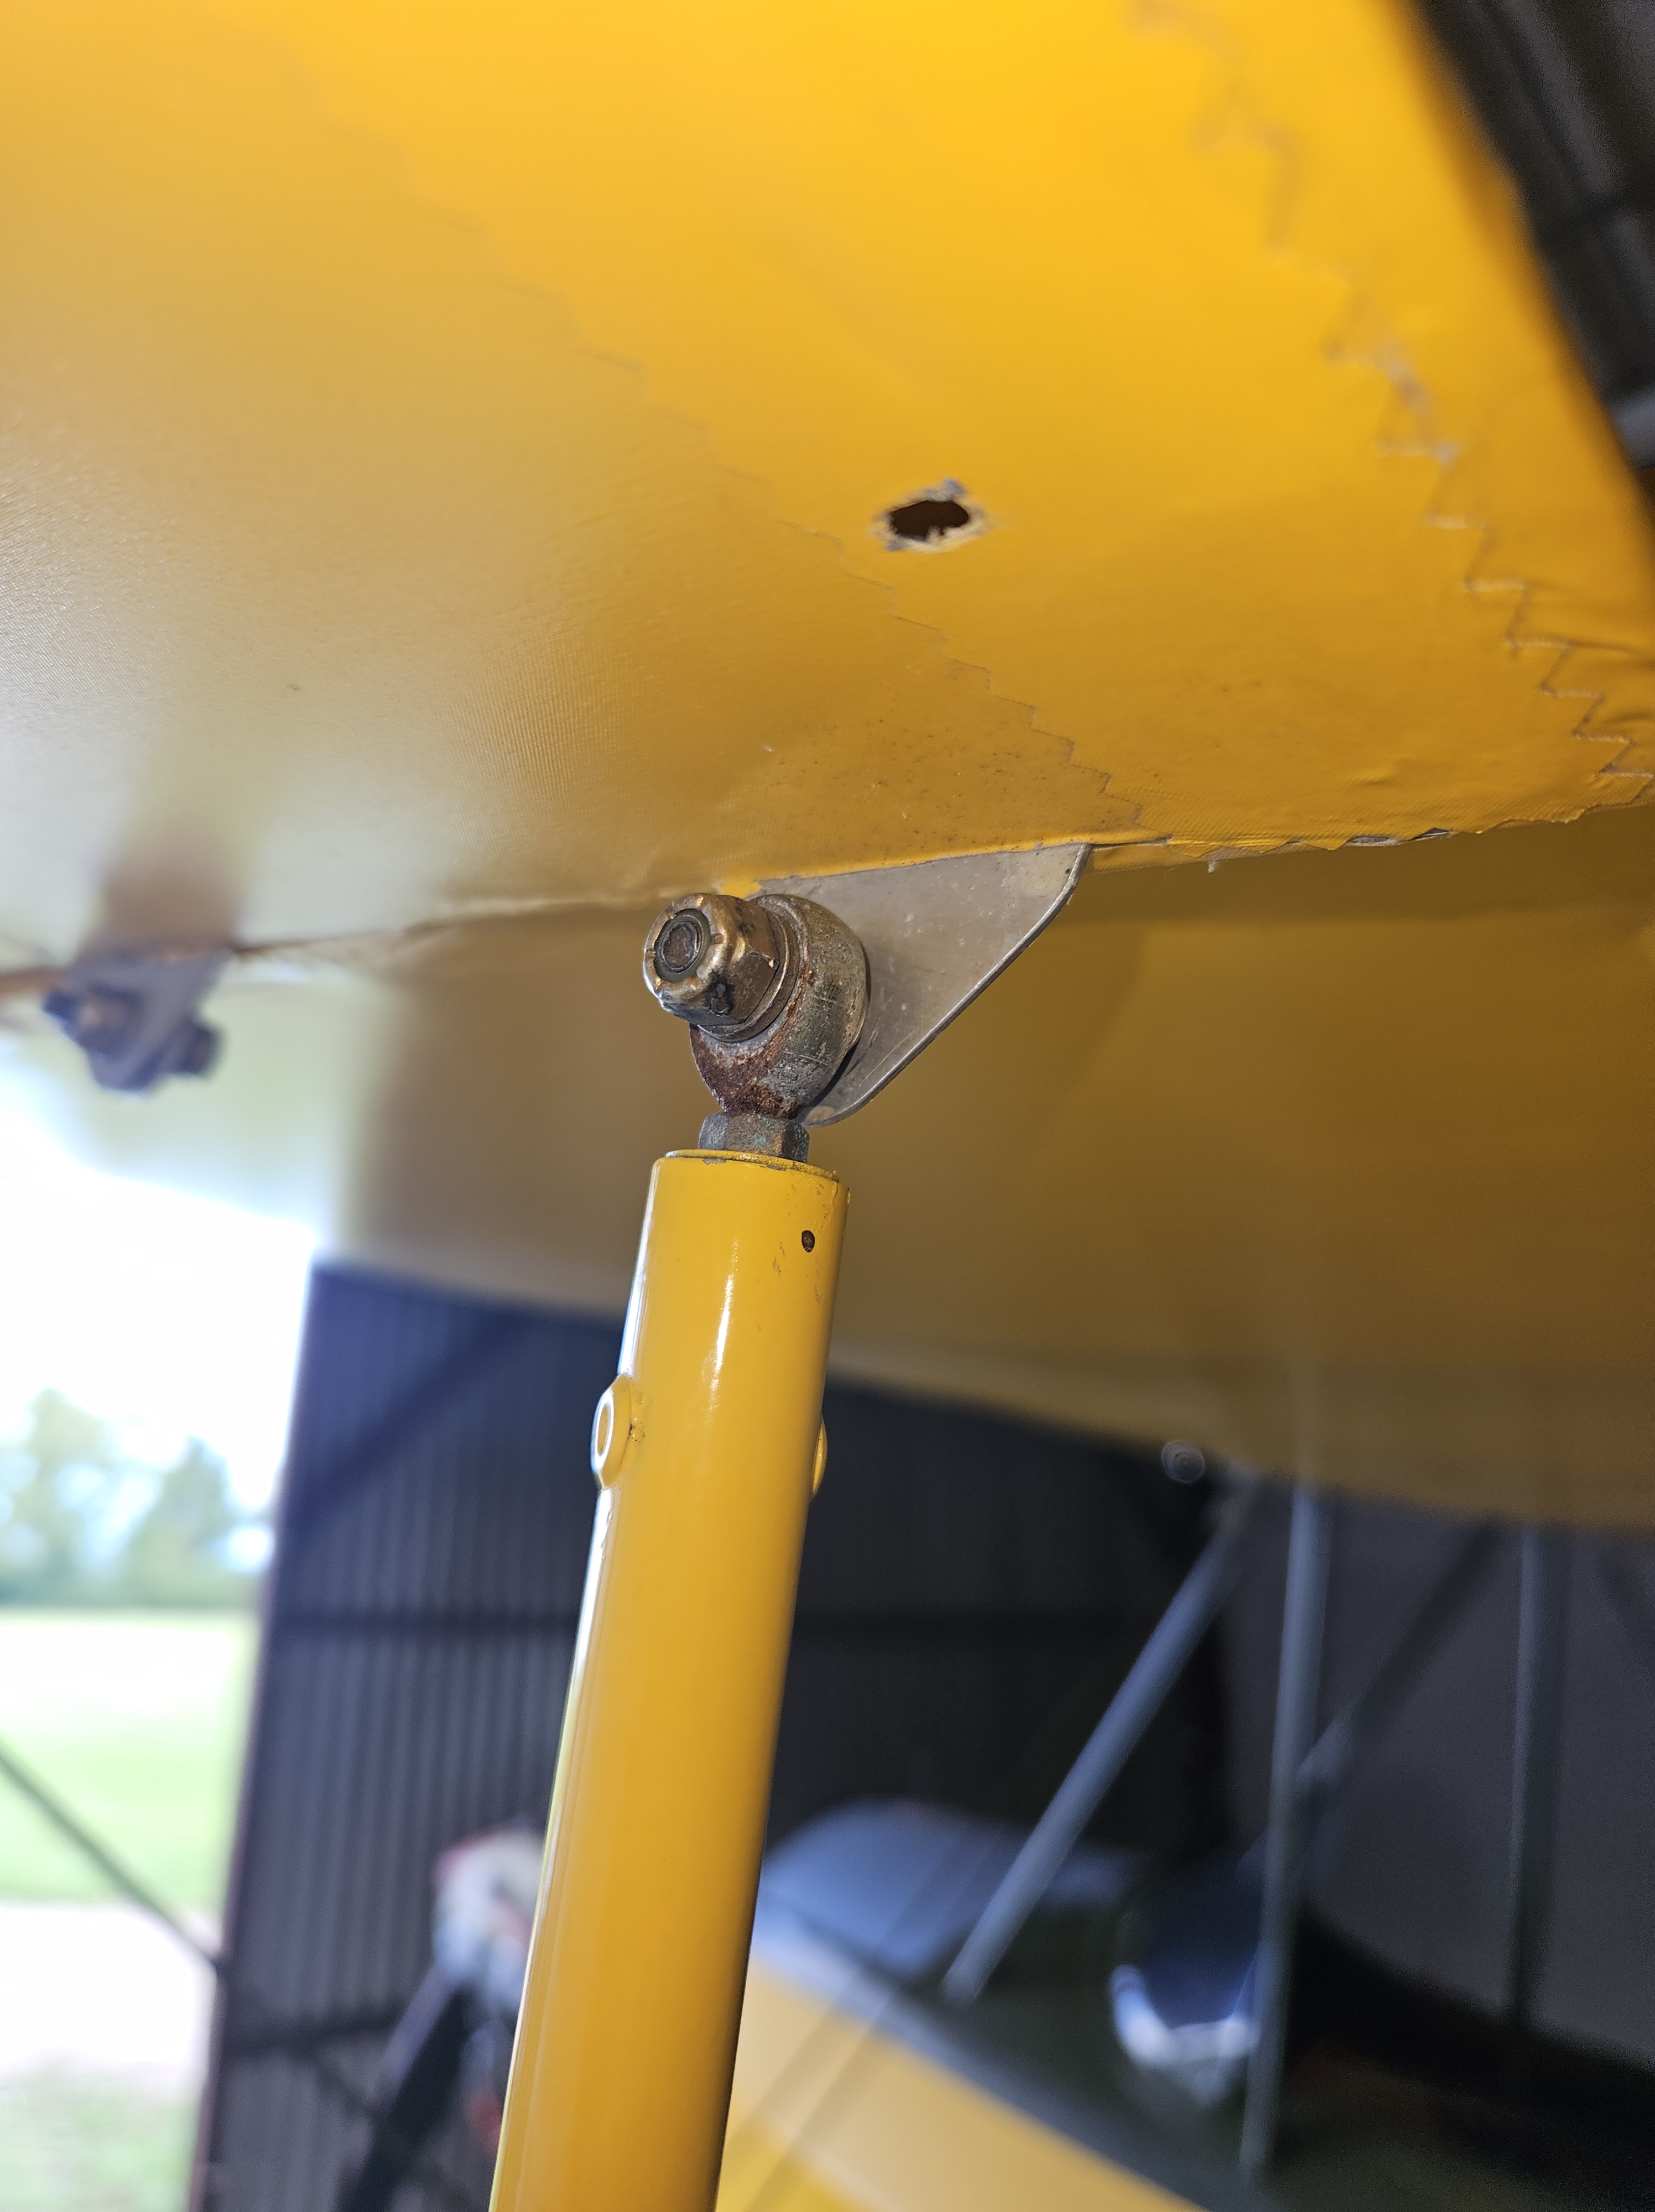
Then, there were the leather fairleads that needed to be repaired and replaced. These are glued on top of the Oratex using contact adhesive and linked around the edges to make them look less obstructive
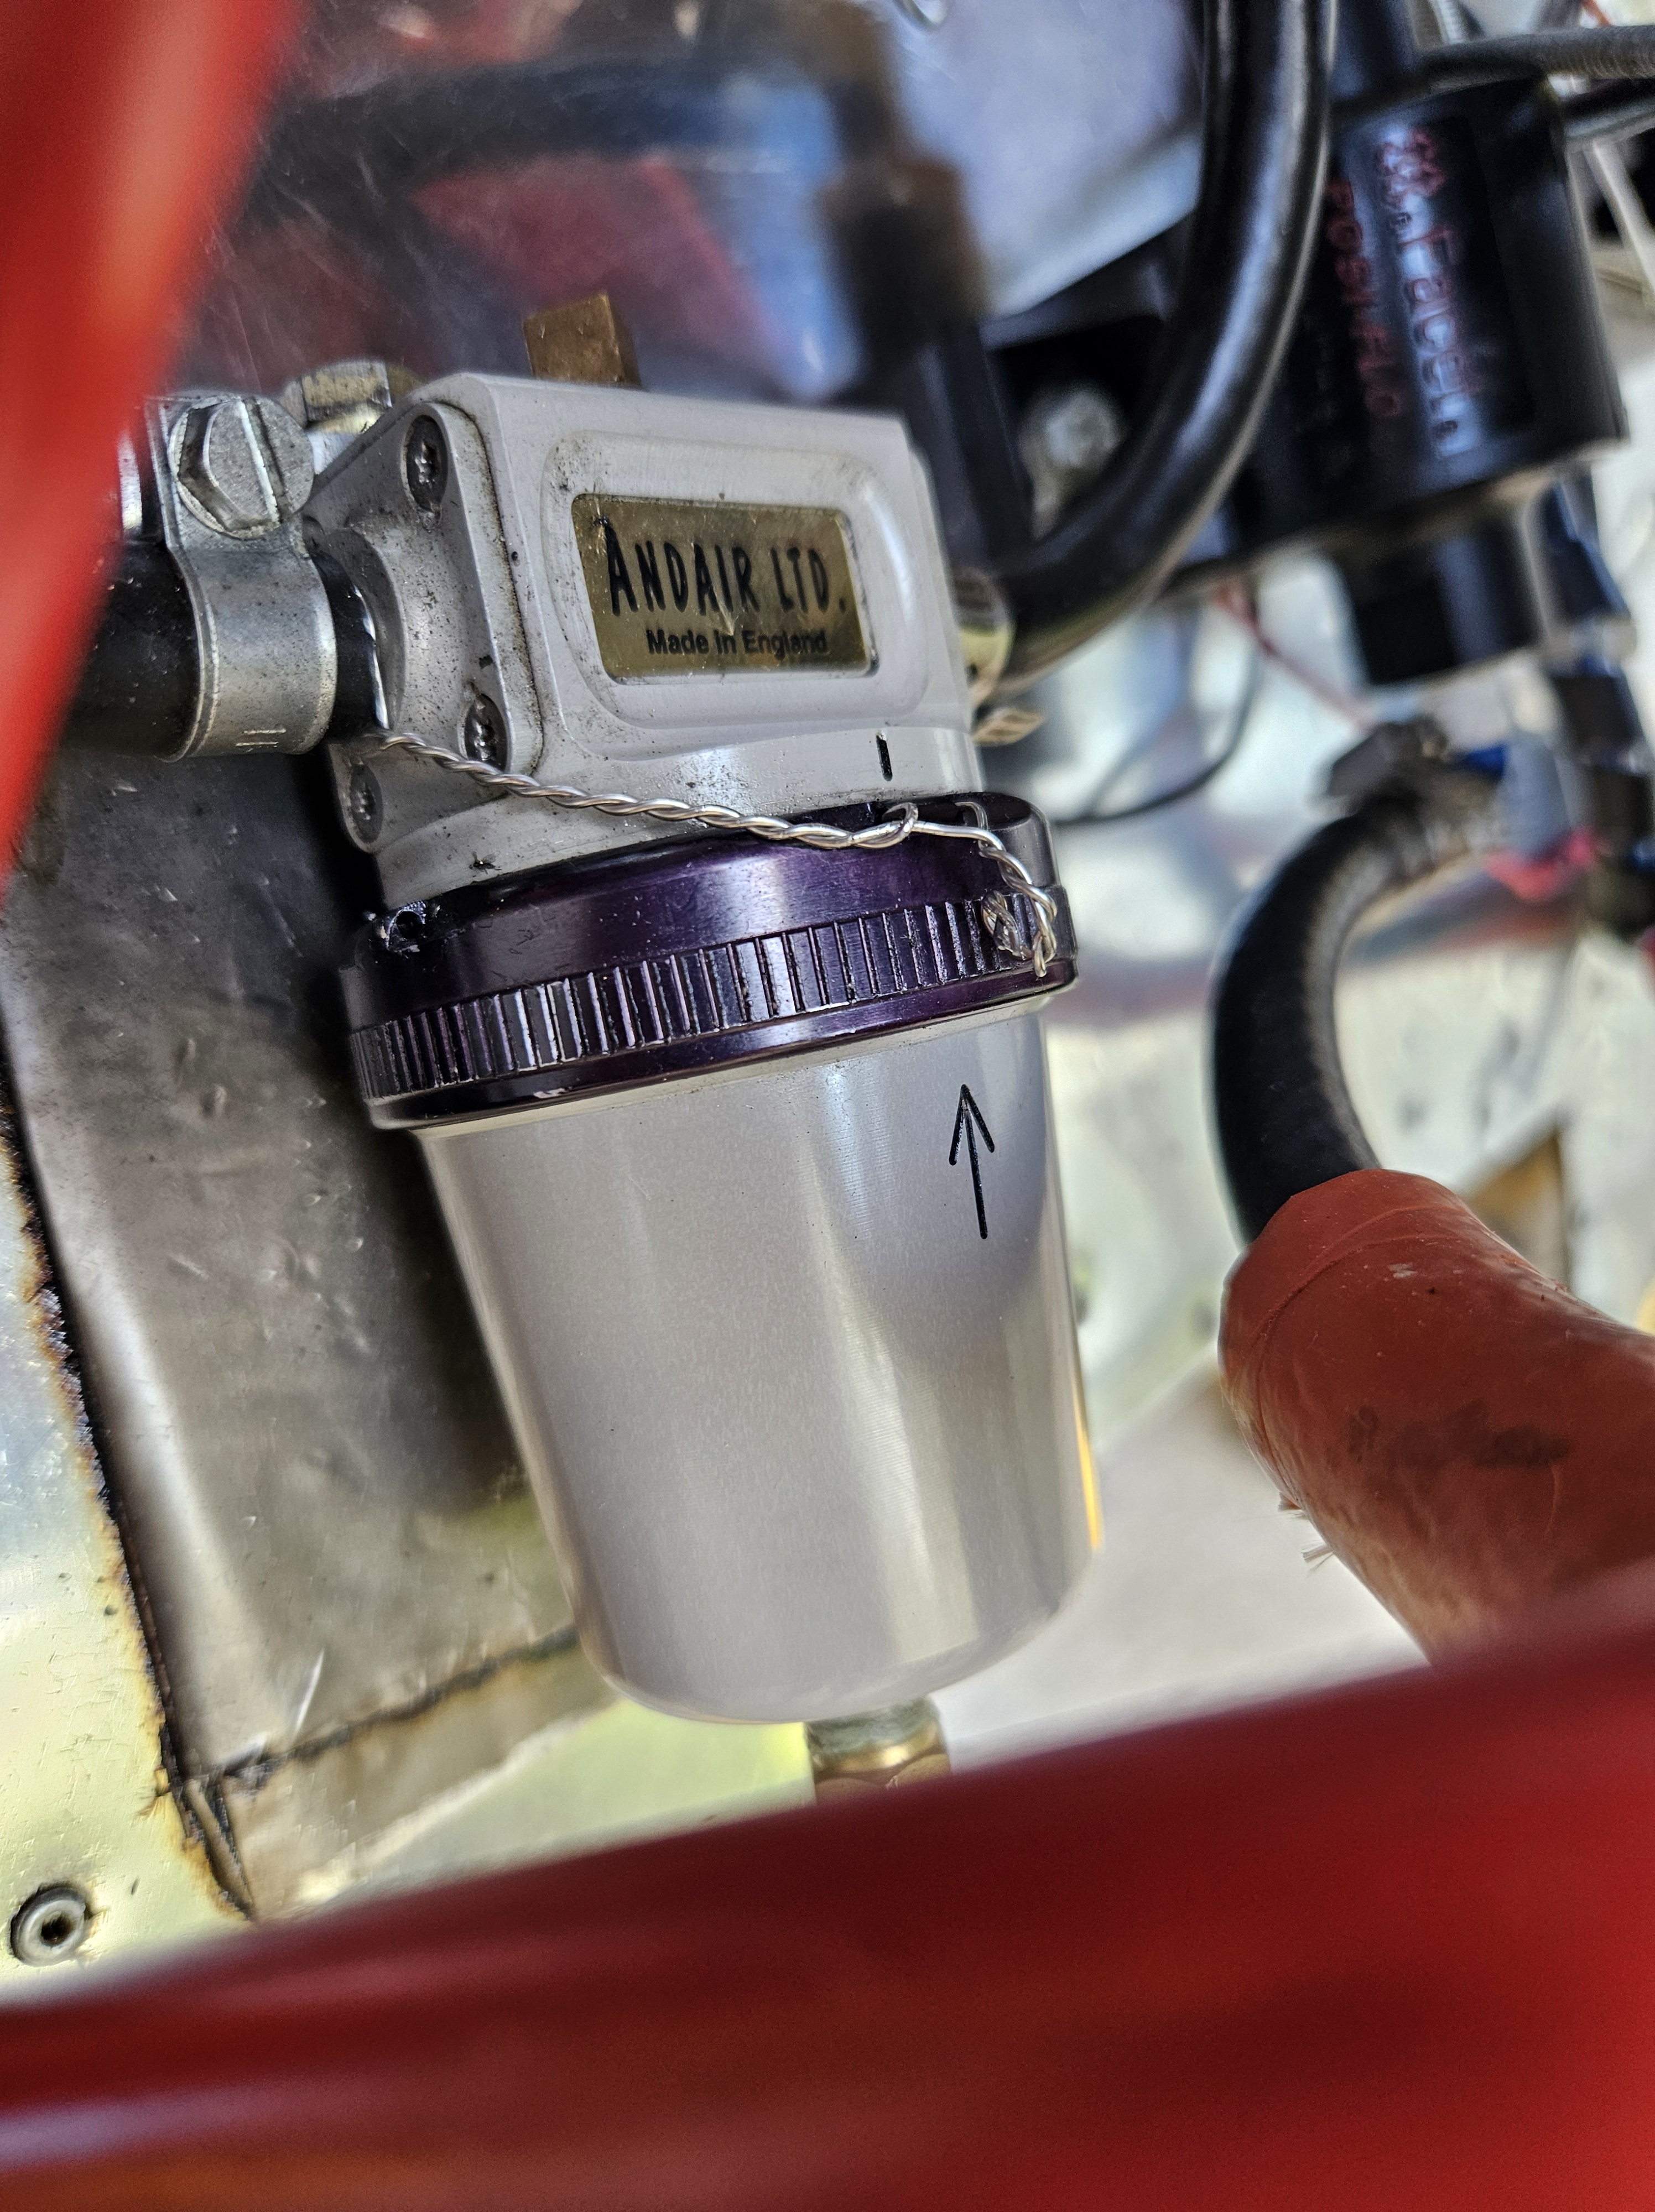
One thing I’d missed on the pre inspection was the fuel bowl wire locking. I’d seen the wire locking in position but failed to see id snipped in 12 months ago when I undid the bowl to inspect for impurities. Having found it clean as a whistle .. amd it should be as there is a pre strainer up stream at the bottom of the tank, id forgotten to re wire.
Cutting away the 2 sections i added new, twisted and looped through the bowl to secure
At last..ive reached the point where I can engage with the local inspector.
Tom (Woodhouse) covers a number roof aircraft at Priory Farm and so I thought it would be nice to ask him to look.
What a really nice, genuine guy.. nothing was too much trouble to look at and talk through.
Tom found a few bolts out of safety ..where little or no thread was showing through the nut-bolt combination..
On checking back through the original build manual I realised I had been a little over zealous with use of washers! I’d managed to put washers under the bolt head as well as under the nut .. removing all these put all the bolts into safety !
The image above shows it flush … post washer removal..2 threads showing
The same was found on 1 cross bracing wire in the front cabane. This had been covered for the last 5 years so clearly not visible.
Quite why I used so many washers is a mystery… washers in these positions (on bracing wires) are great for ‘finer’ adjustment .. where you have a fixed length of bracing cable .. removing washers has the effect of tightening the cable (quite significantly per washer) and adding slackens
3 washers! I think that was excessive !
Remove tang … tricky but it cam out relatively easily
Back to single washer, cable nice and taught and colour marked
Inevitably, the arrival of an aircraft into a field of wheat..no matter how slowly … is going to make some marks on the paint and.materail
I have to say, the Oratex was incredible!
Thinking back, there wasn’t one scratch on the fabric! At all !
I had to remove all the fabric from the Port upper (for inspection to identify it was indeed repairable) .. i removed all underside from P1 back to the leading edge of the tailplane ..
But it simply didn’t have a mark on it.
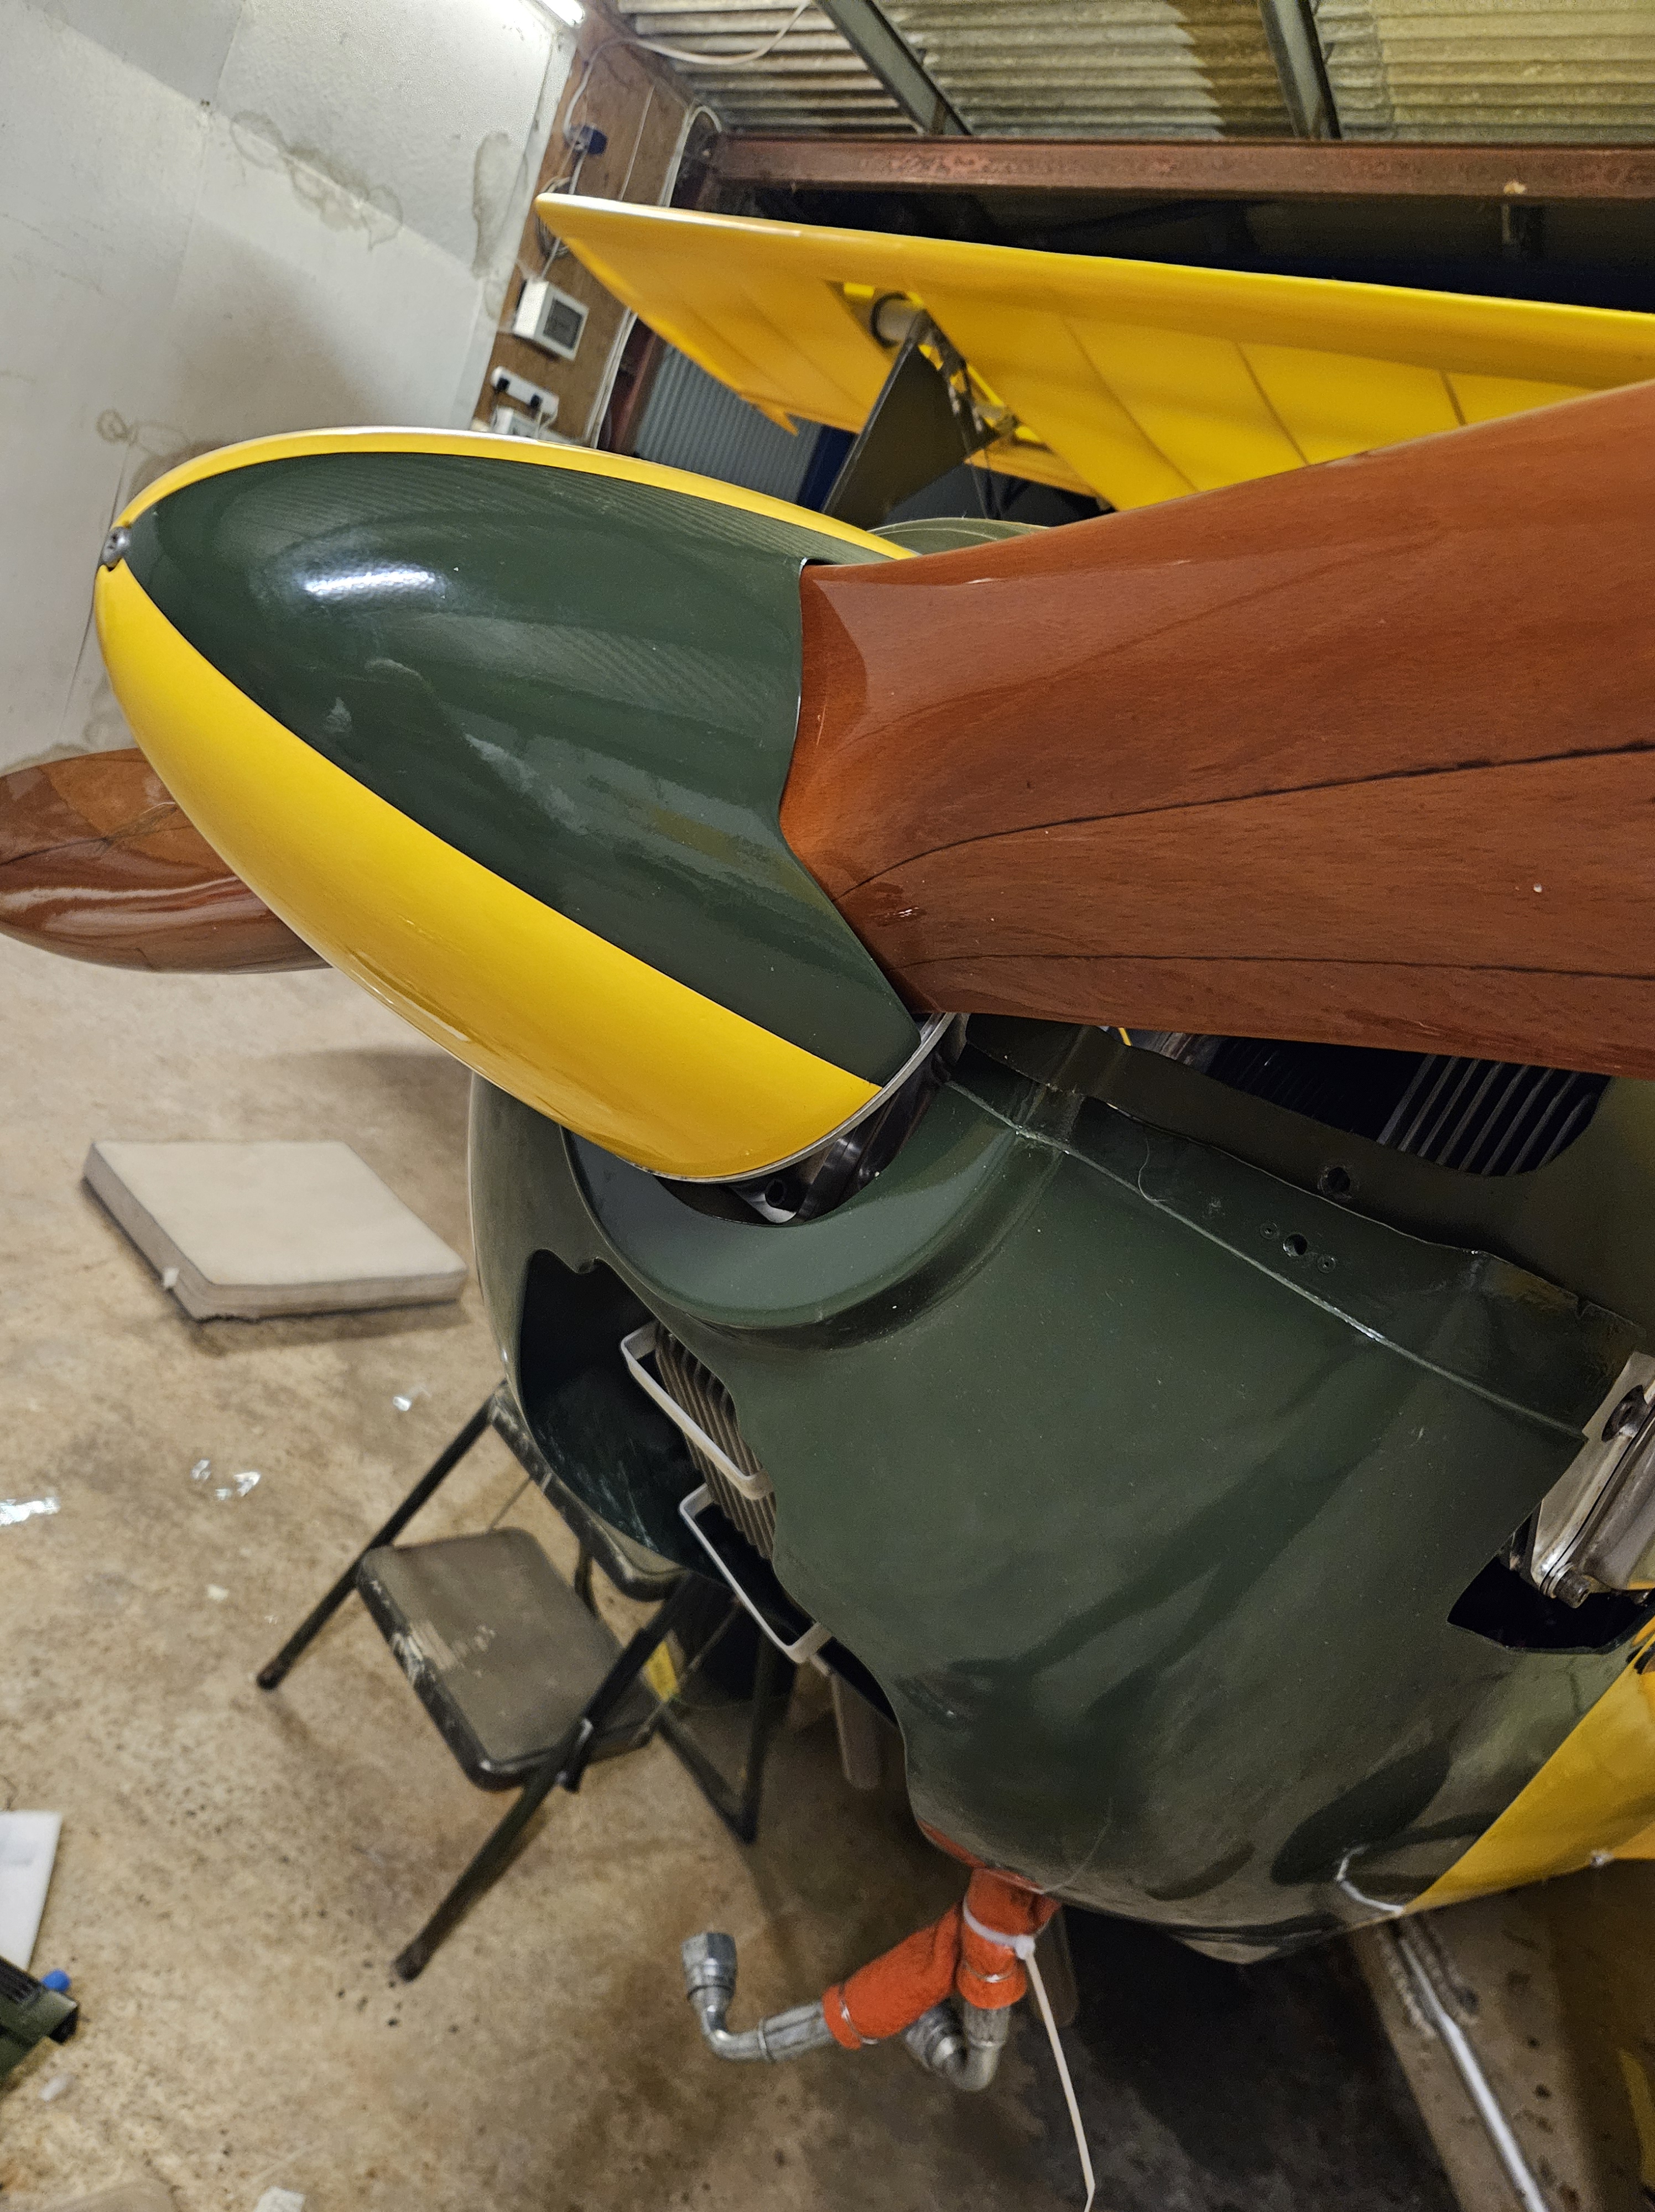
The lower cowl took the brunt from the crushing of ine of the most forward part ..the oil cooler matrix.
The spinner had quite a graze but I suspect that was from the recovery.. where we pirouetteed to take her back onto her main wheels
Roger, a great painting expert based at Priory Farm, stepped in and has done a amazing job.
The lower cowl, which had a number of holes to accommodate the exhausts and oil matrix, was reinforced with fibreglass matting before colour matching the olive Oratex and what a superb job !
Ironically, one of the most time consuming jobs wasn’t as a result of the incident back on 21 Jun 2024 .. the longest day !
Adding the trim tab seemed to take an inordinate amount of effort, especially as a ‘post build’ add on.
I remember asking the factory all those years ago, ‘where is the piano hinge for the trim tab’ .. we aren’t recommending it was the reply as it’s not hugely effective.
It turns out my weight (a pretty constant 75kg) means I could fly all day hands off and fuel level seems to make little difference.
Will, my son, who was slightly heavier than me found he was constantly having to hold forward ot back stick to maintain straight and level.
I offered to retro fit the tab which meant cutting into that lovely elevator curve .. mine being slightly larger as there are no tell tale pilot holes onnthe trailing edge, so just made it look ‘nice’ !
Maybe it’s that extra surface area that helps her stability ?
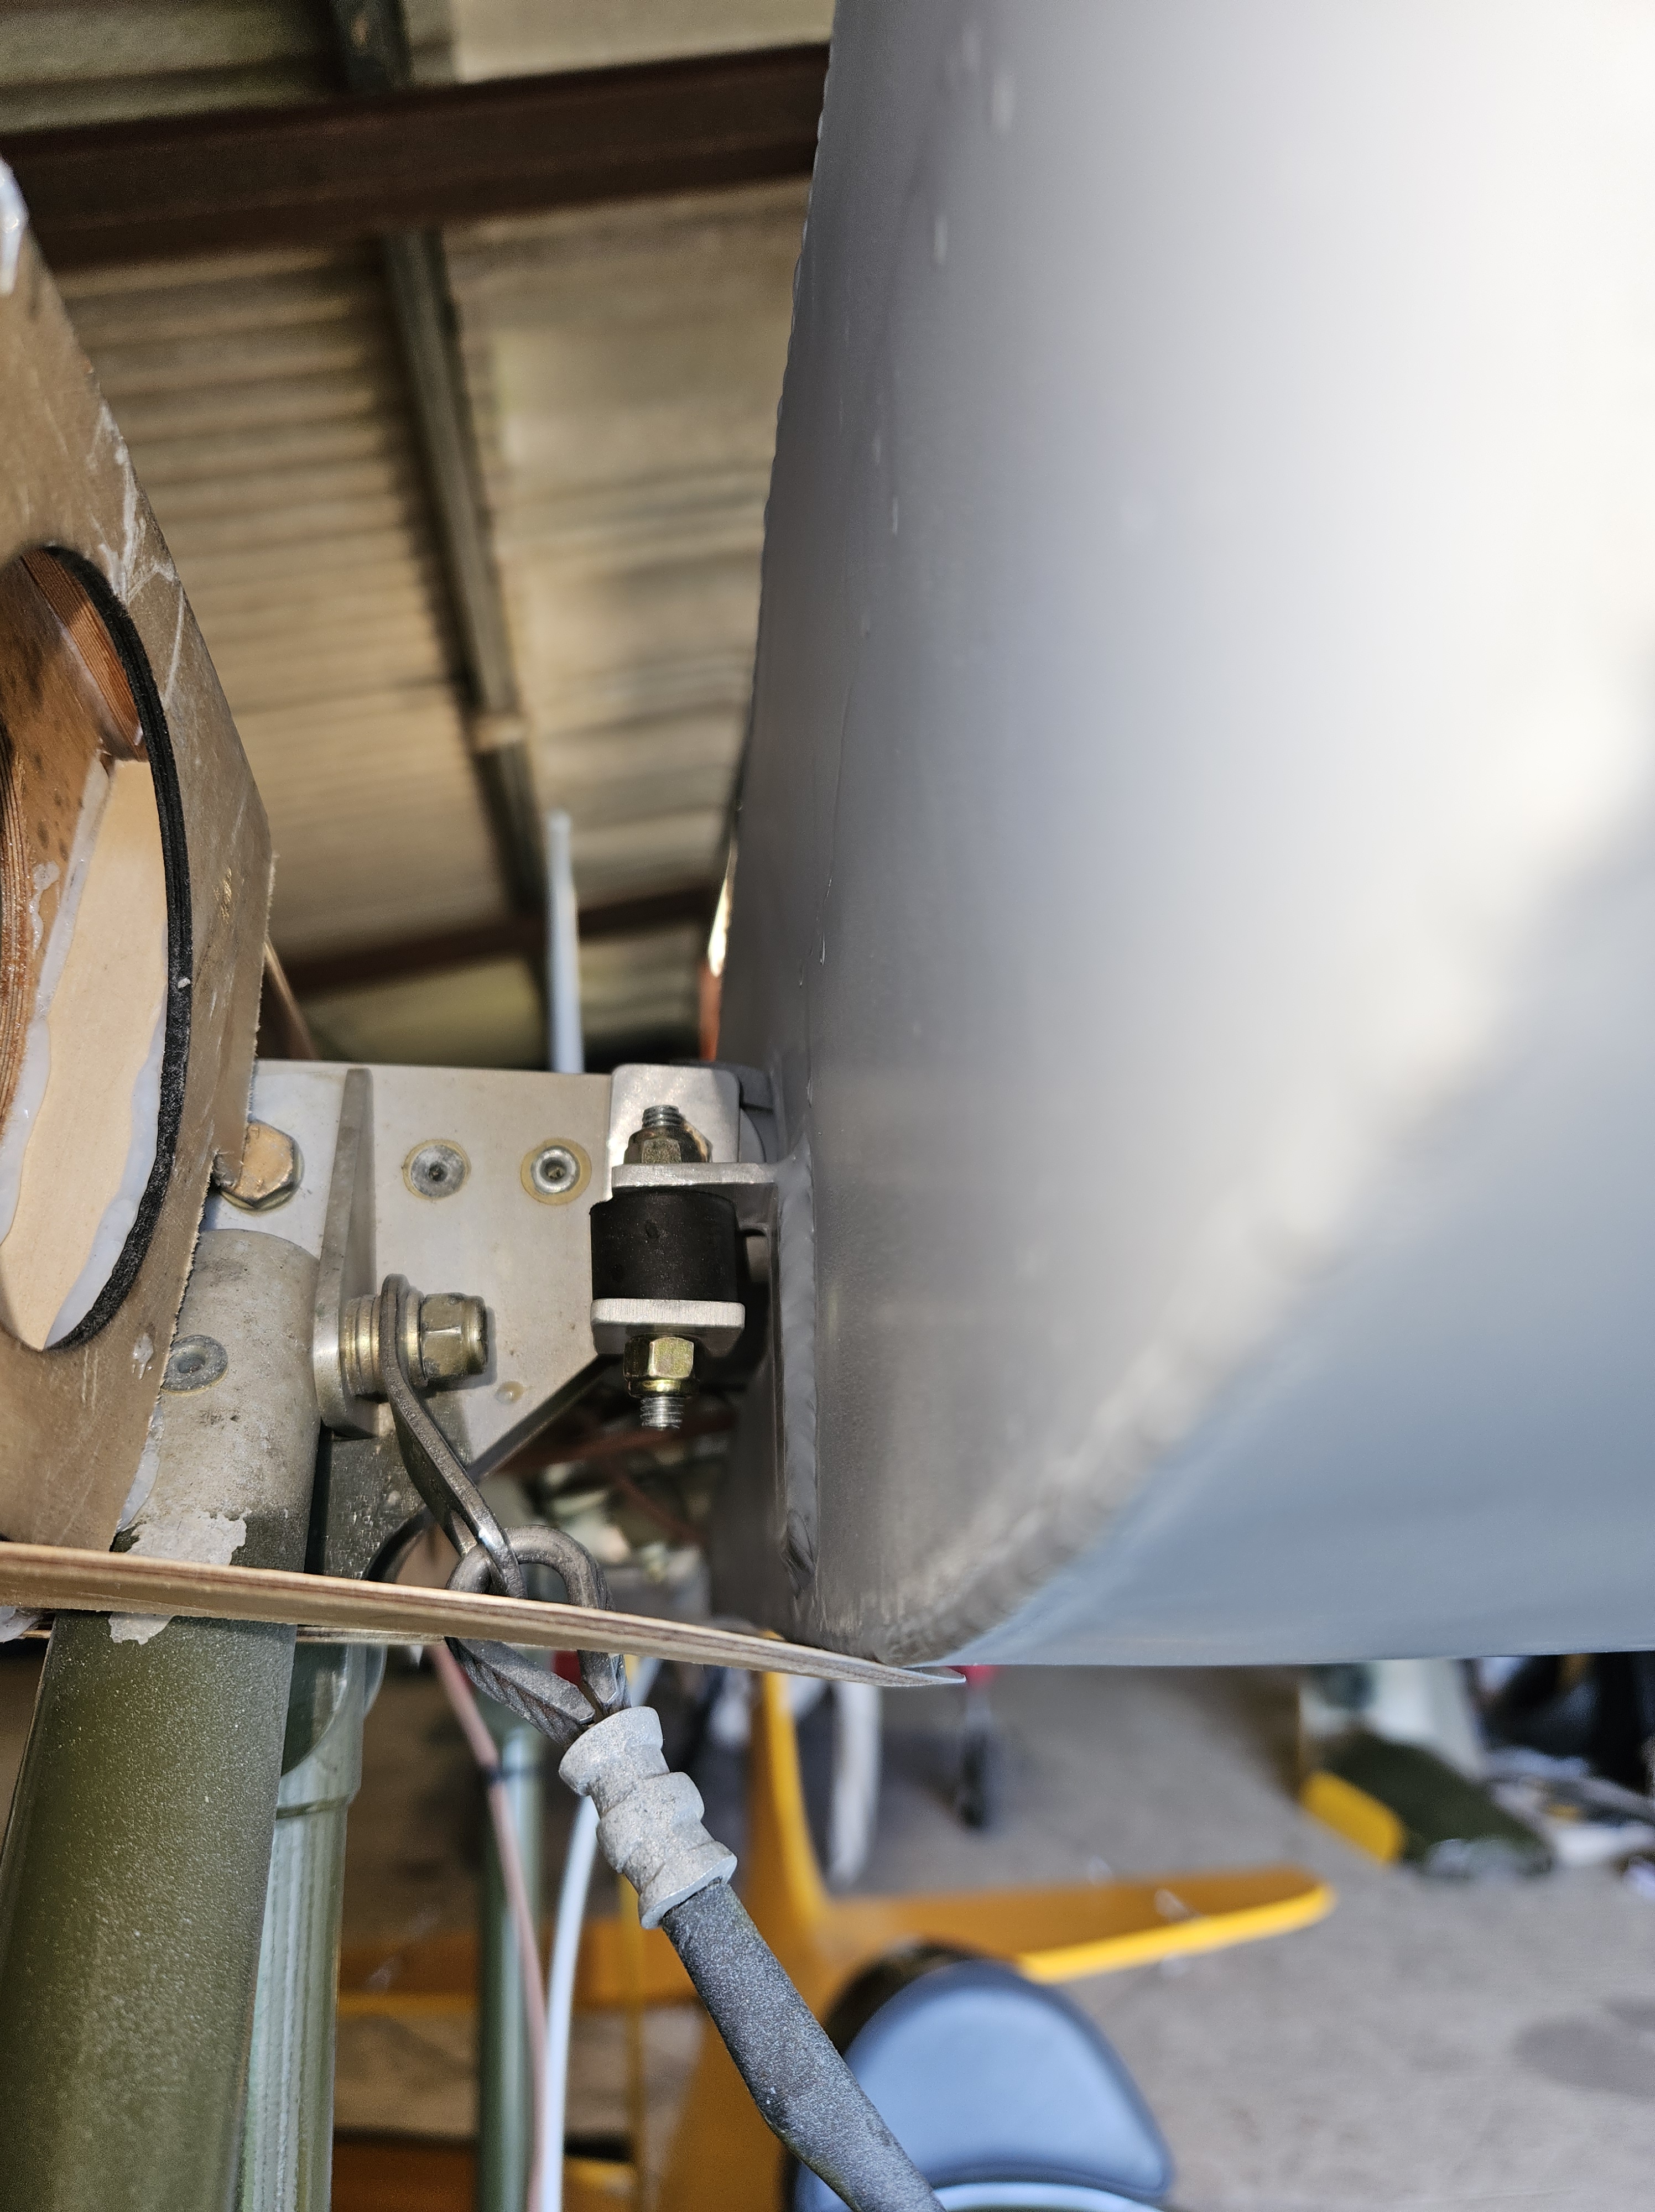
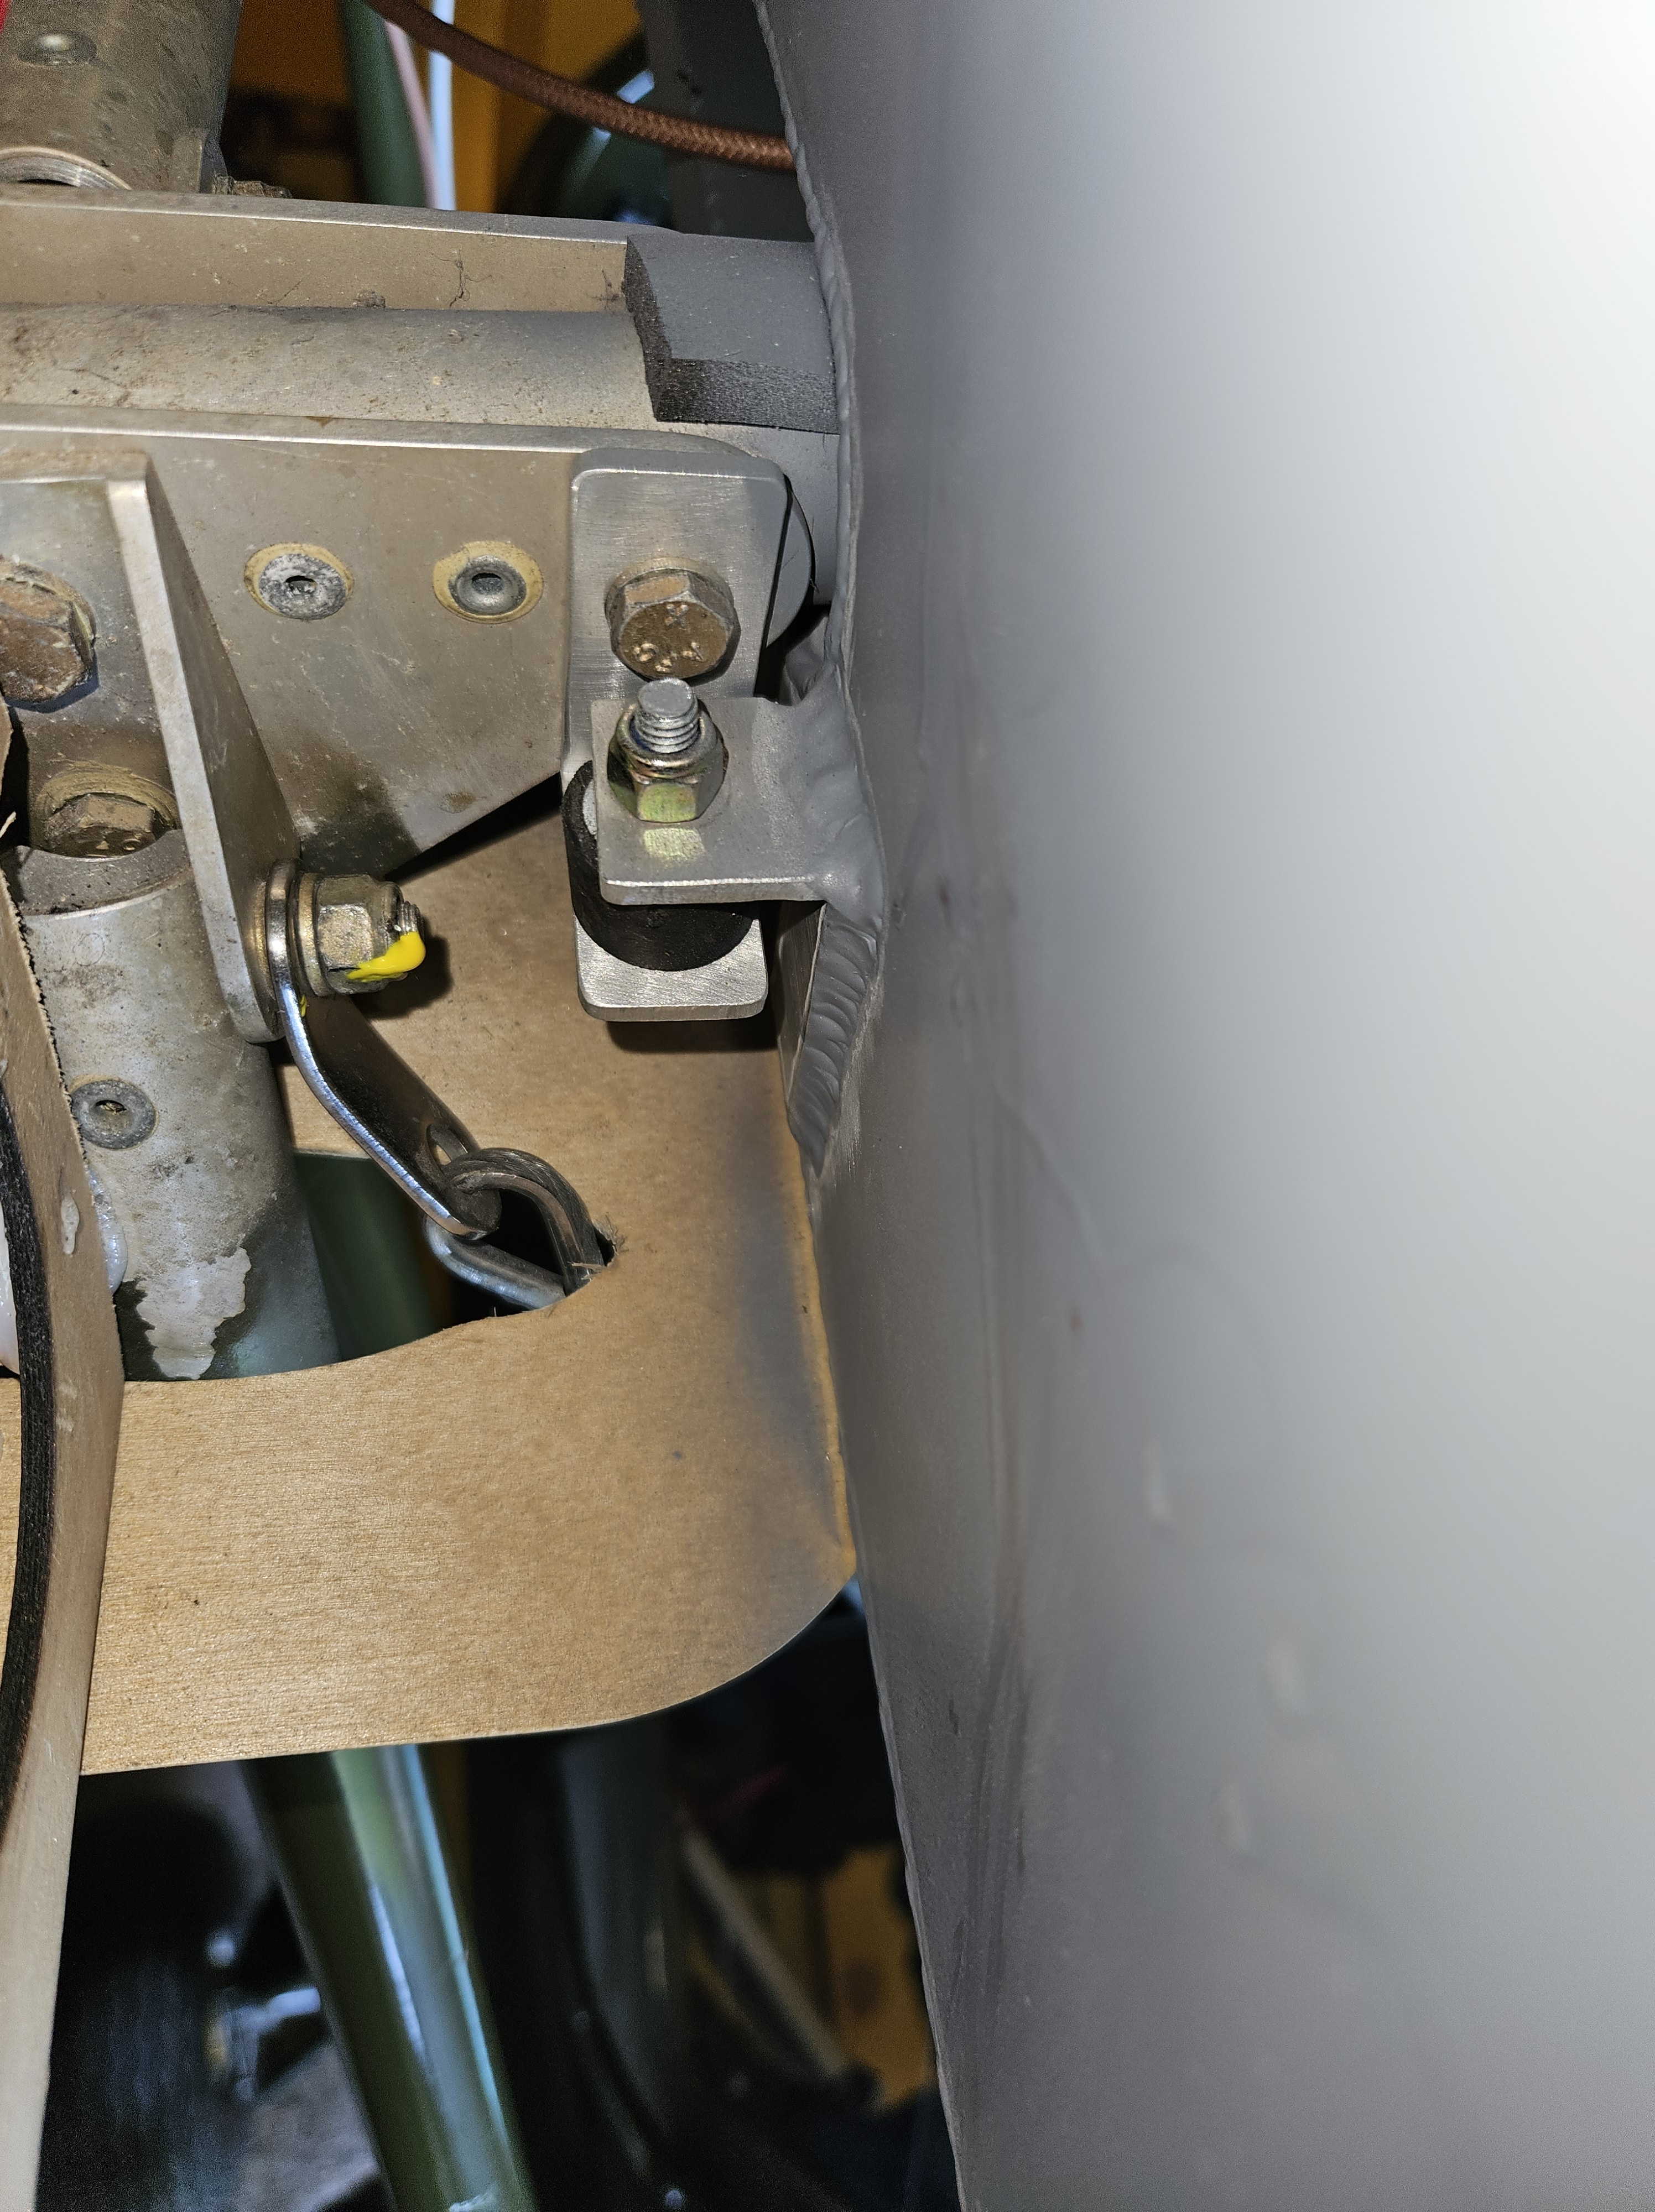
Anyway, to fit the steel cable to operate the tab and it’s outer demanded i cut access through the underside to ensure the outer cable was regularly secured and couldn’t bend… a classic radio control modelling issue with unsecured bowden cable – where you can lose anything from 50% to total movement if not secured
Now, cutting material off from a 5 year old aircraft that has been upside down and had lots of smoke oil and fuel over the years makes for an interesting challenge to cleanup and recover.
Cutting out one of the old belly pan ply landing plates and replacing it gave me a much cleaner base from which to work.
Adding panels back in to the underside will facilitate any partial re opening in future..vs one long nose to tail piece of Oratex (which the original covering was)
Final pieces going in today and doublers strips over the overlaps just for good meaurse
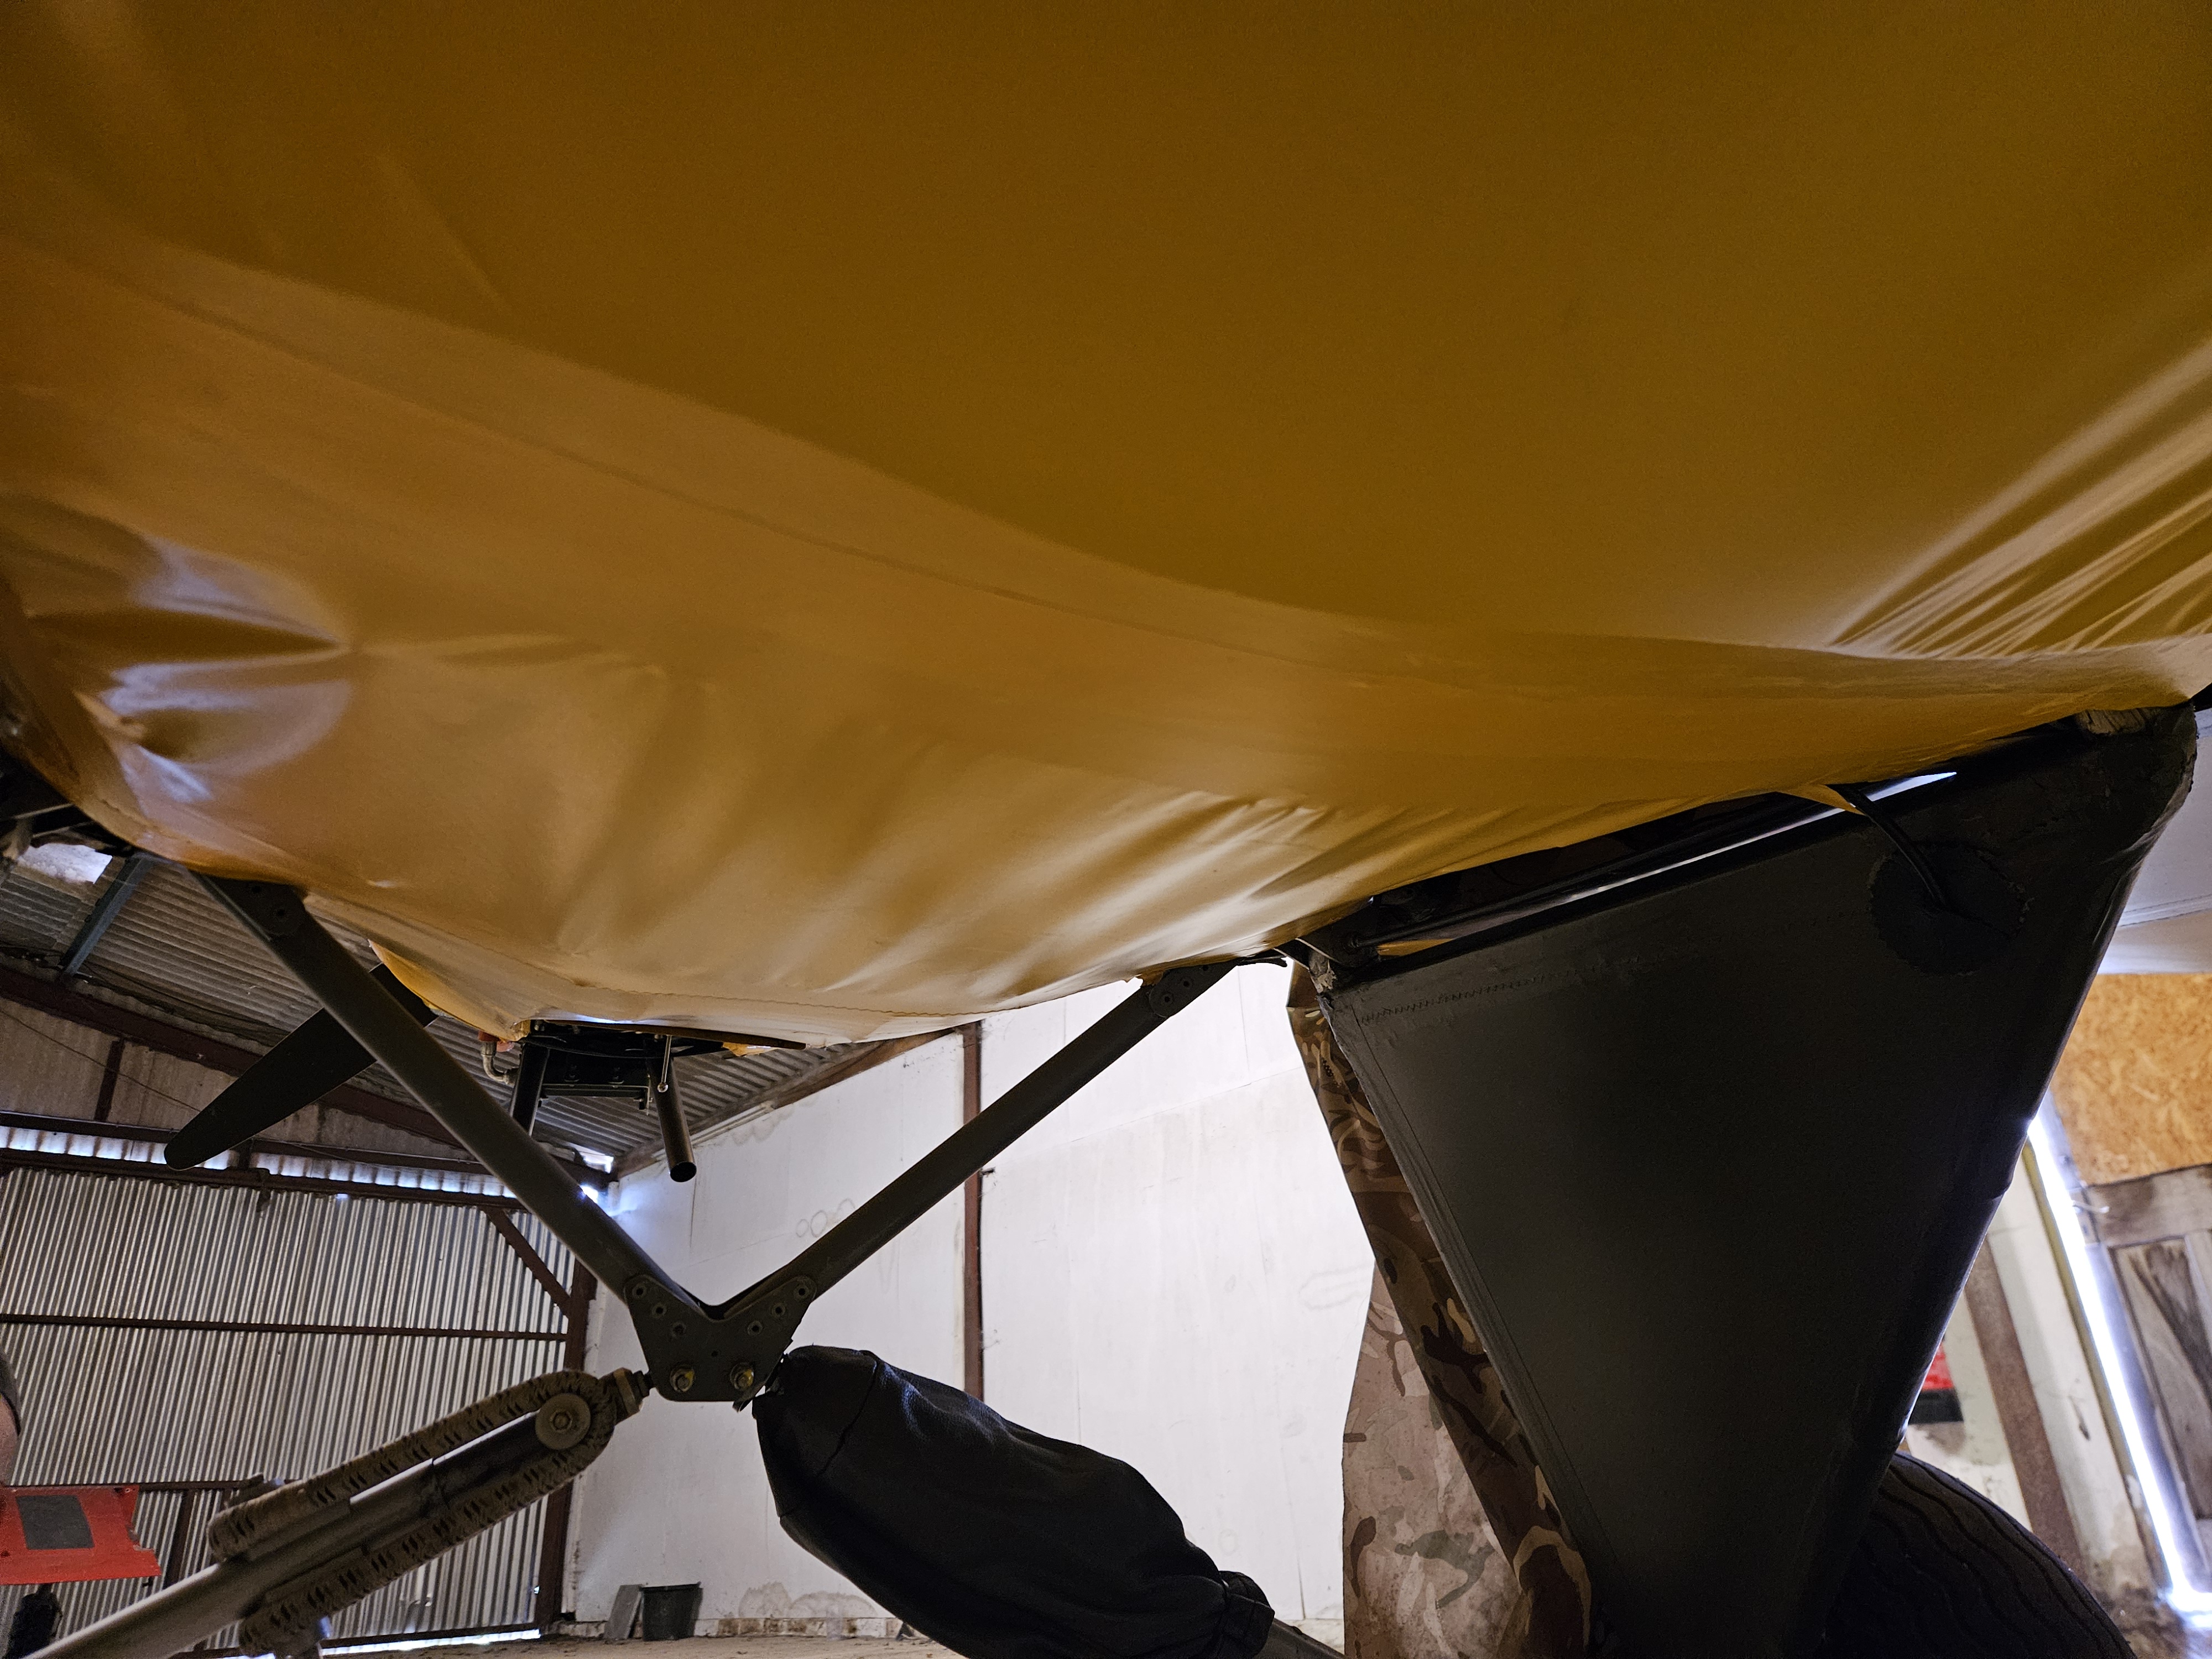
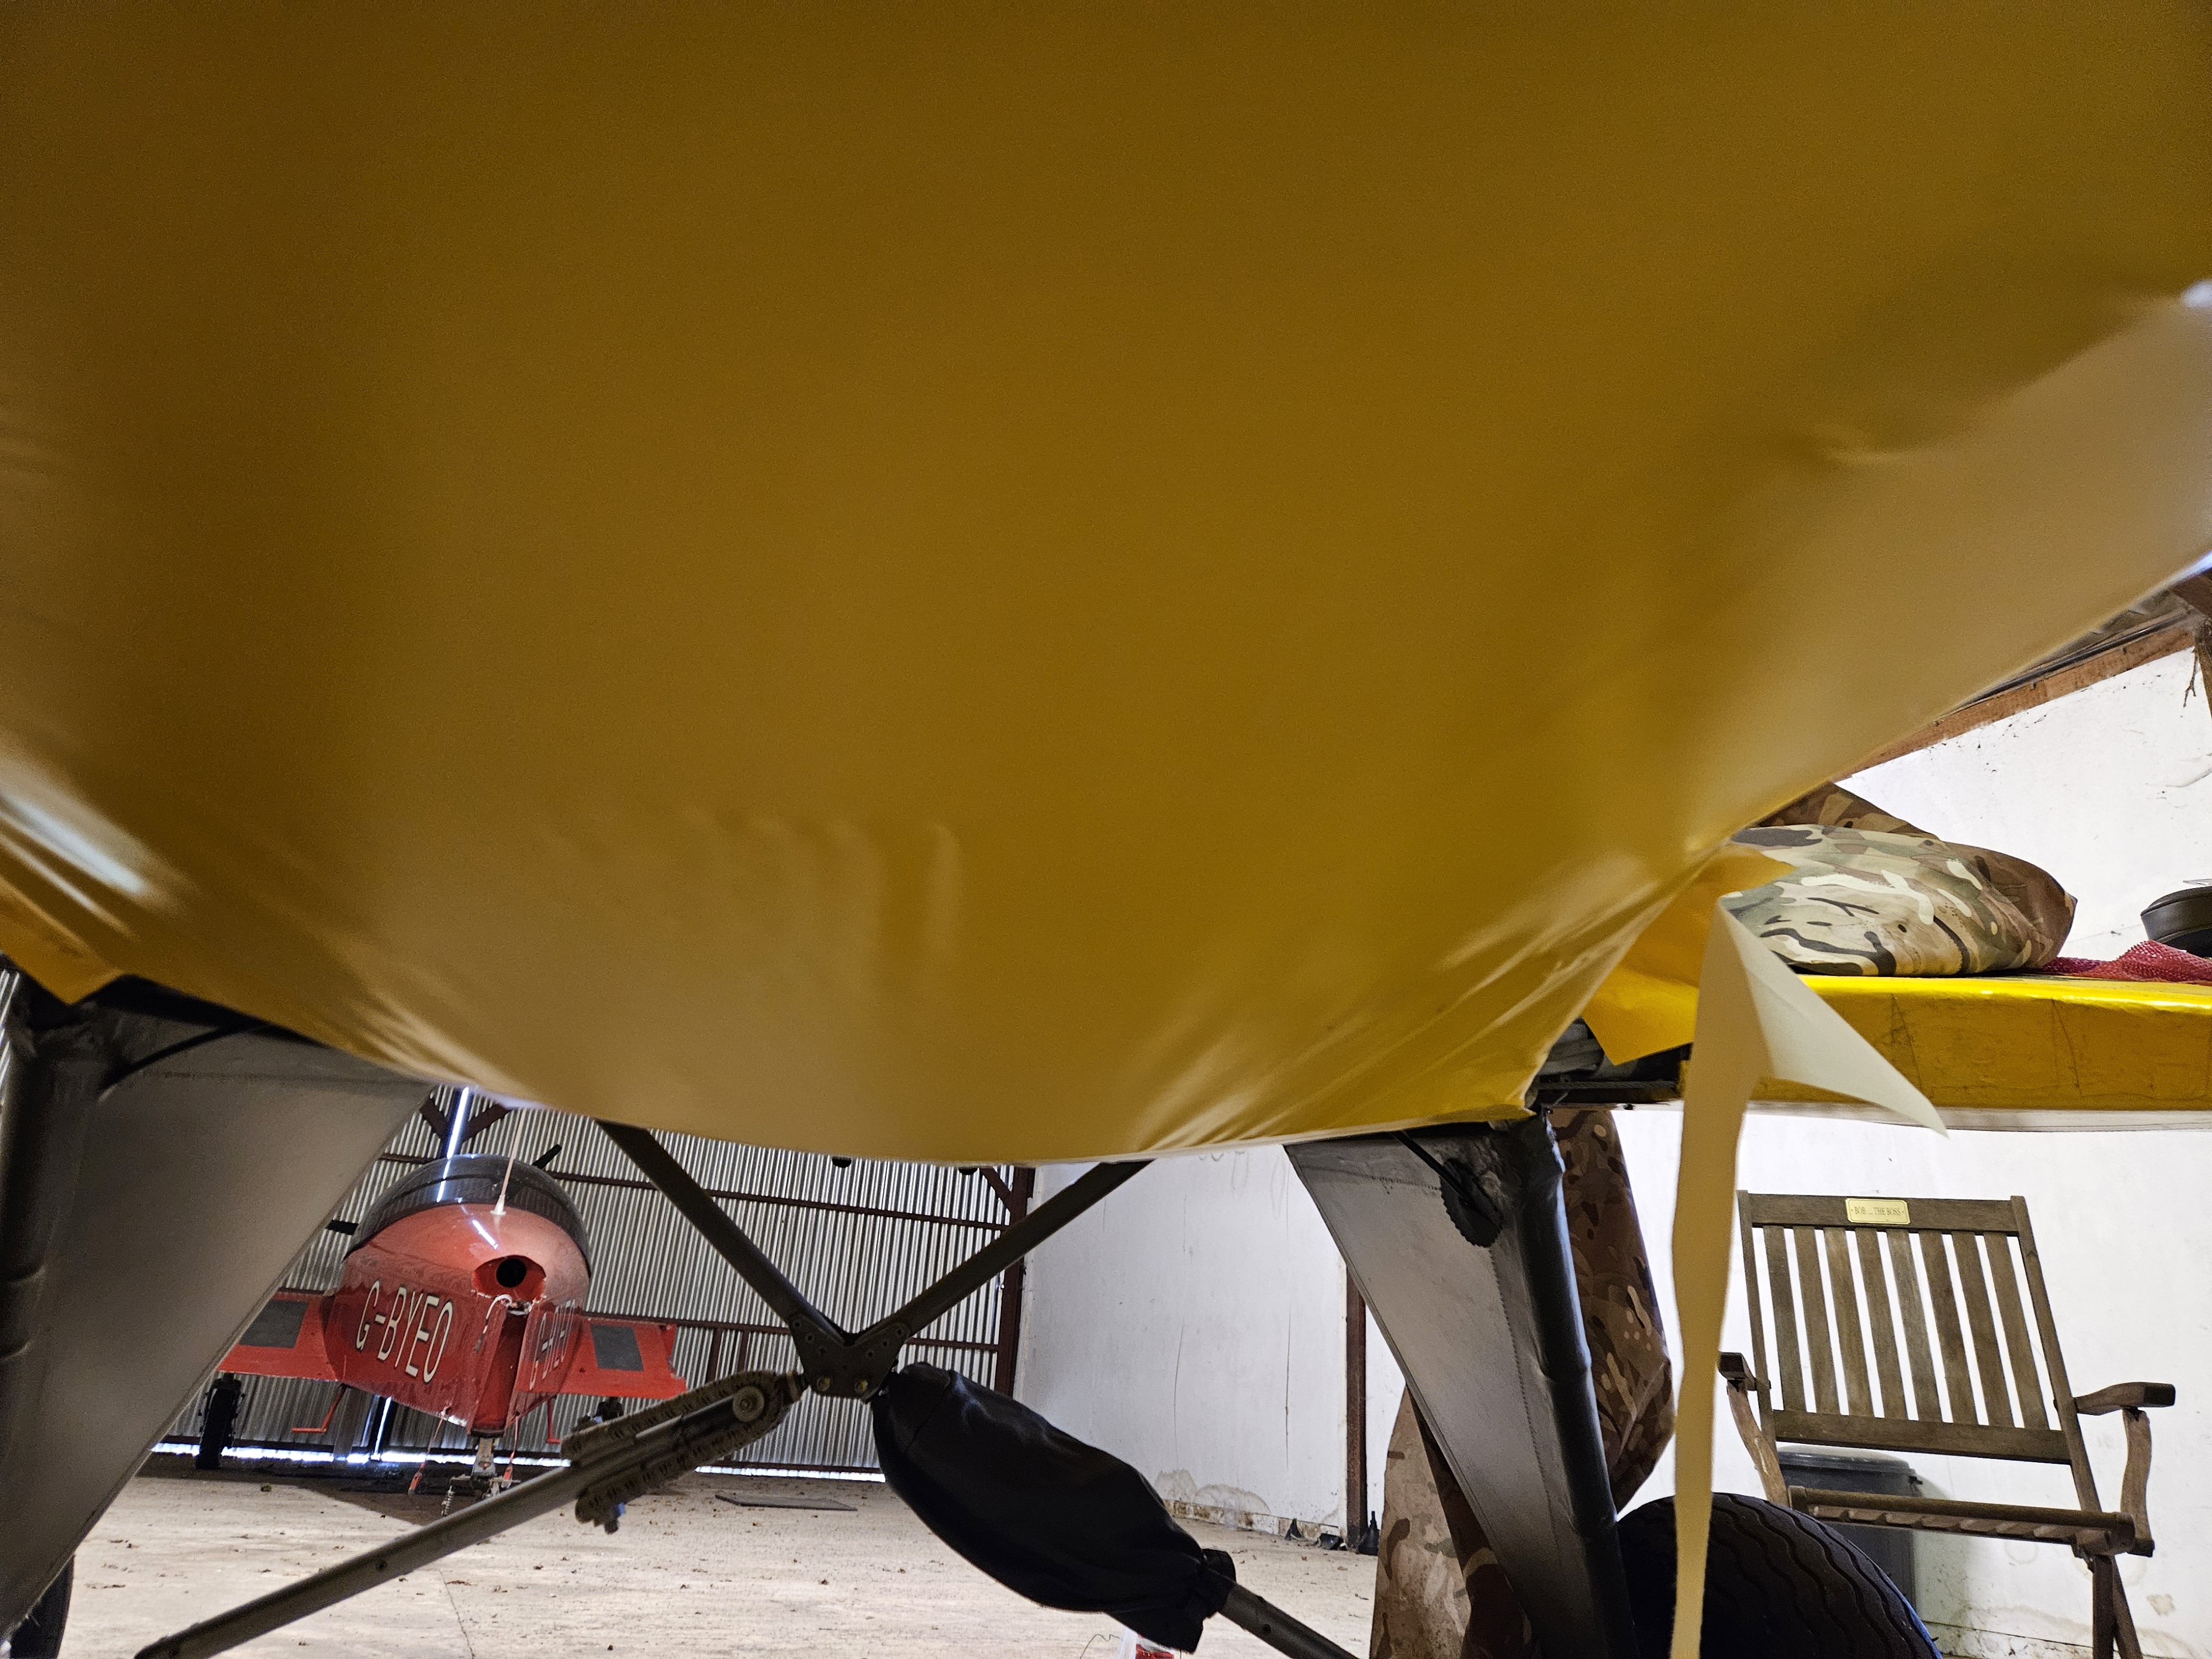
It’s a complex shape underneath with curves this way and that and undercarriage in the way .
Pre shrinkage – the aim being to get it as tight as you can before applying heat gun and iron …shrink rate is around 20% so impressive curved smooth finish
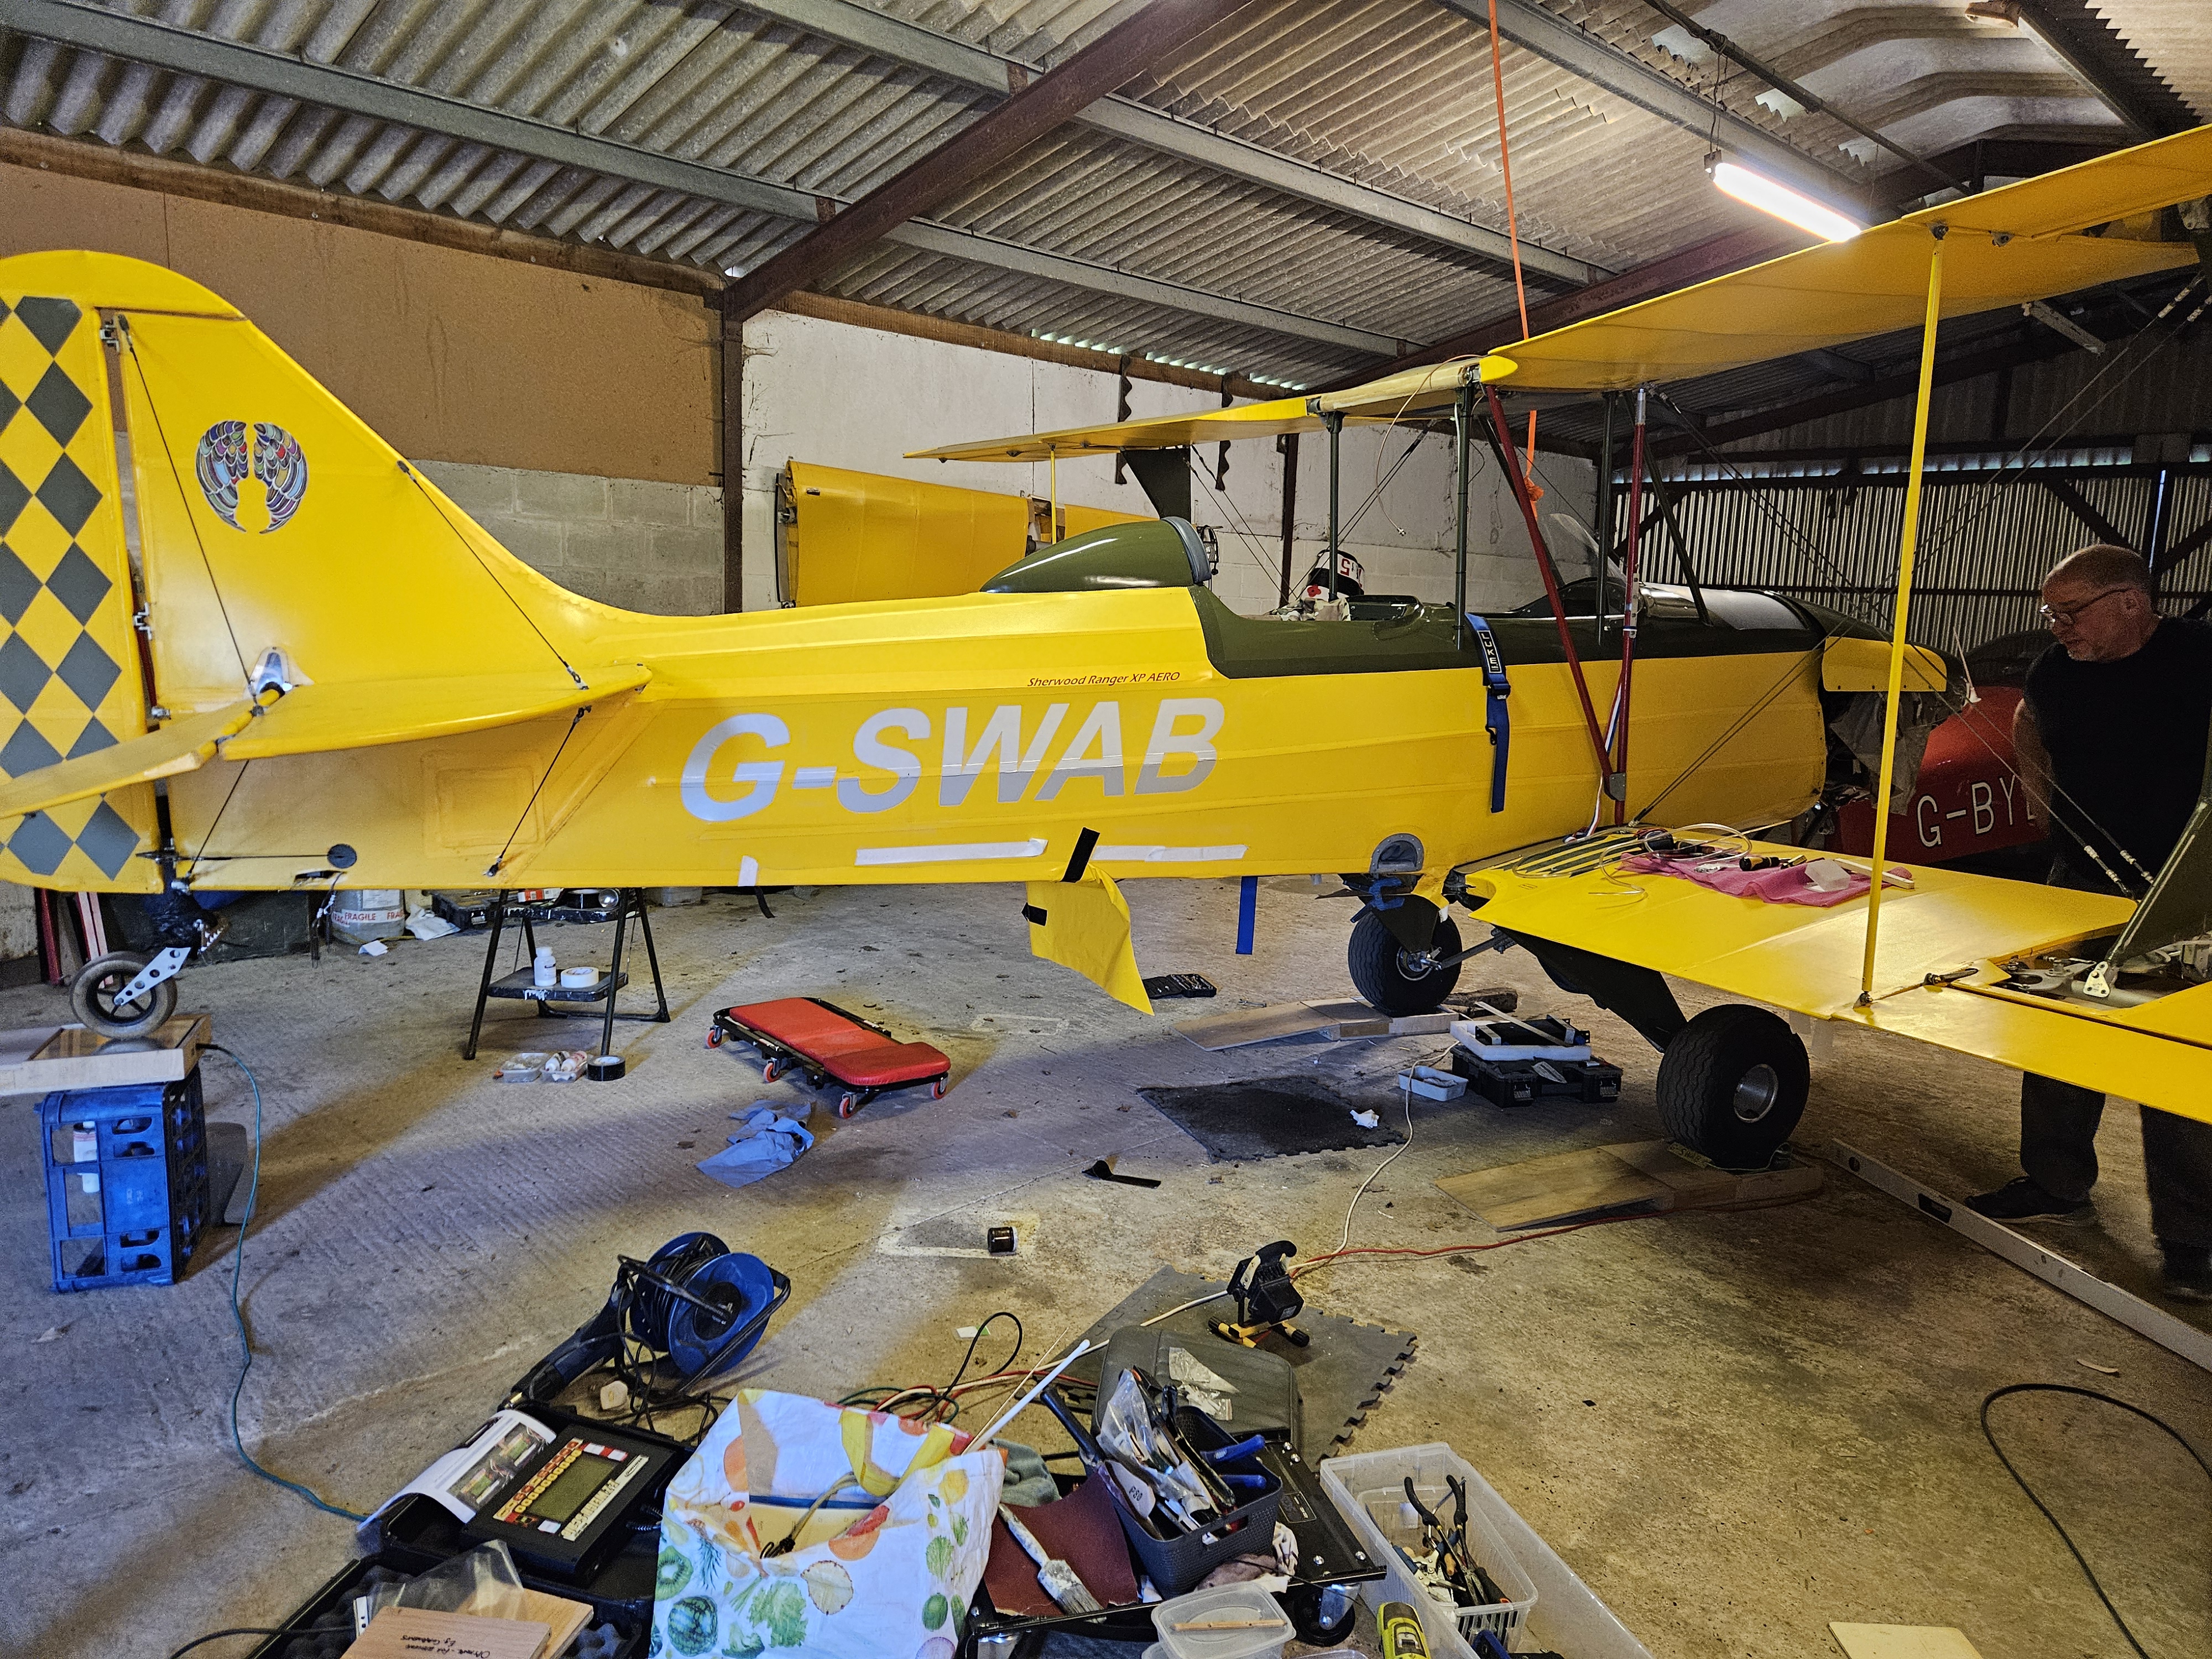
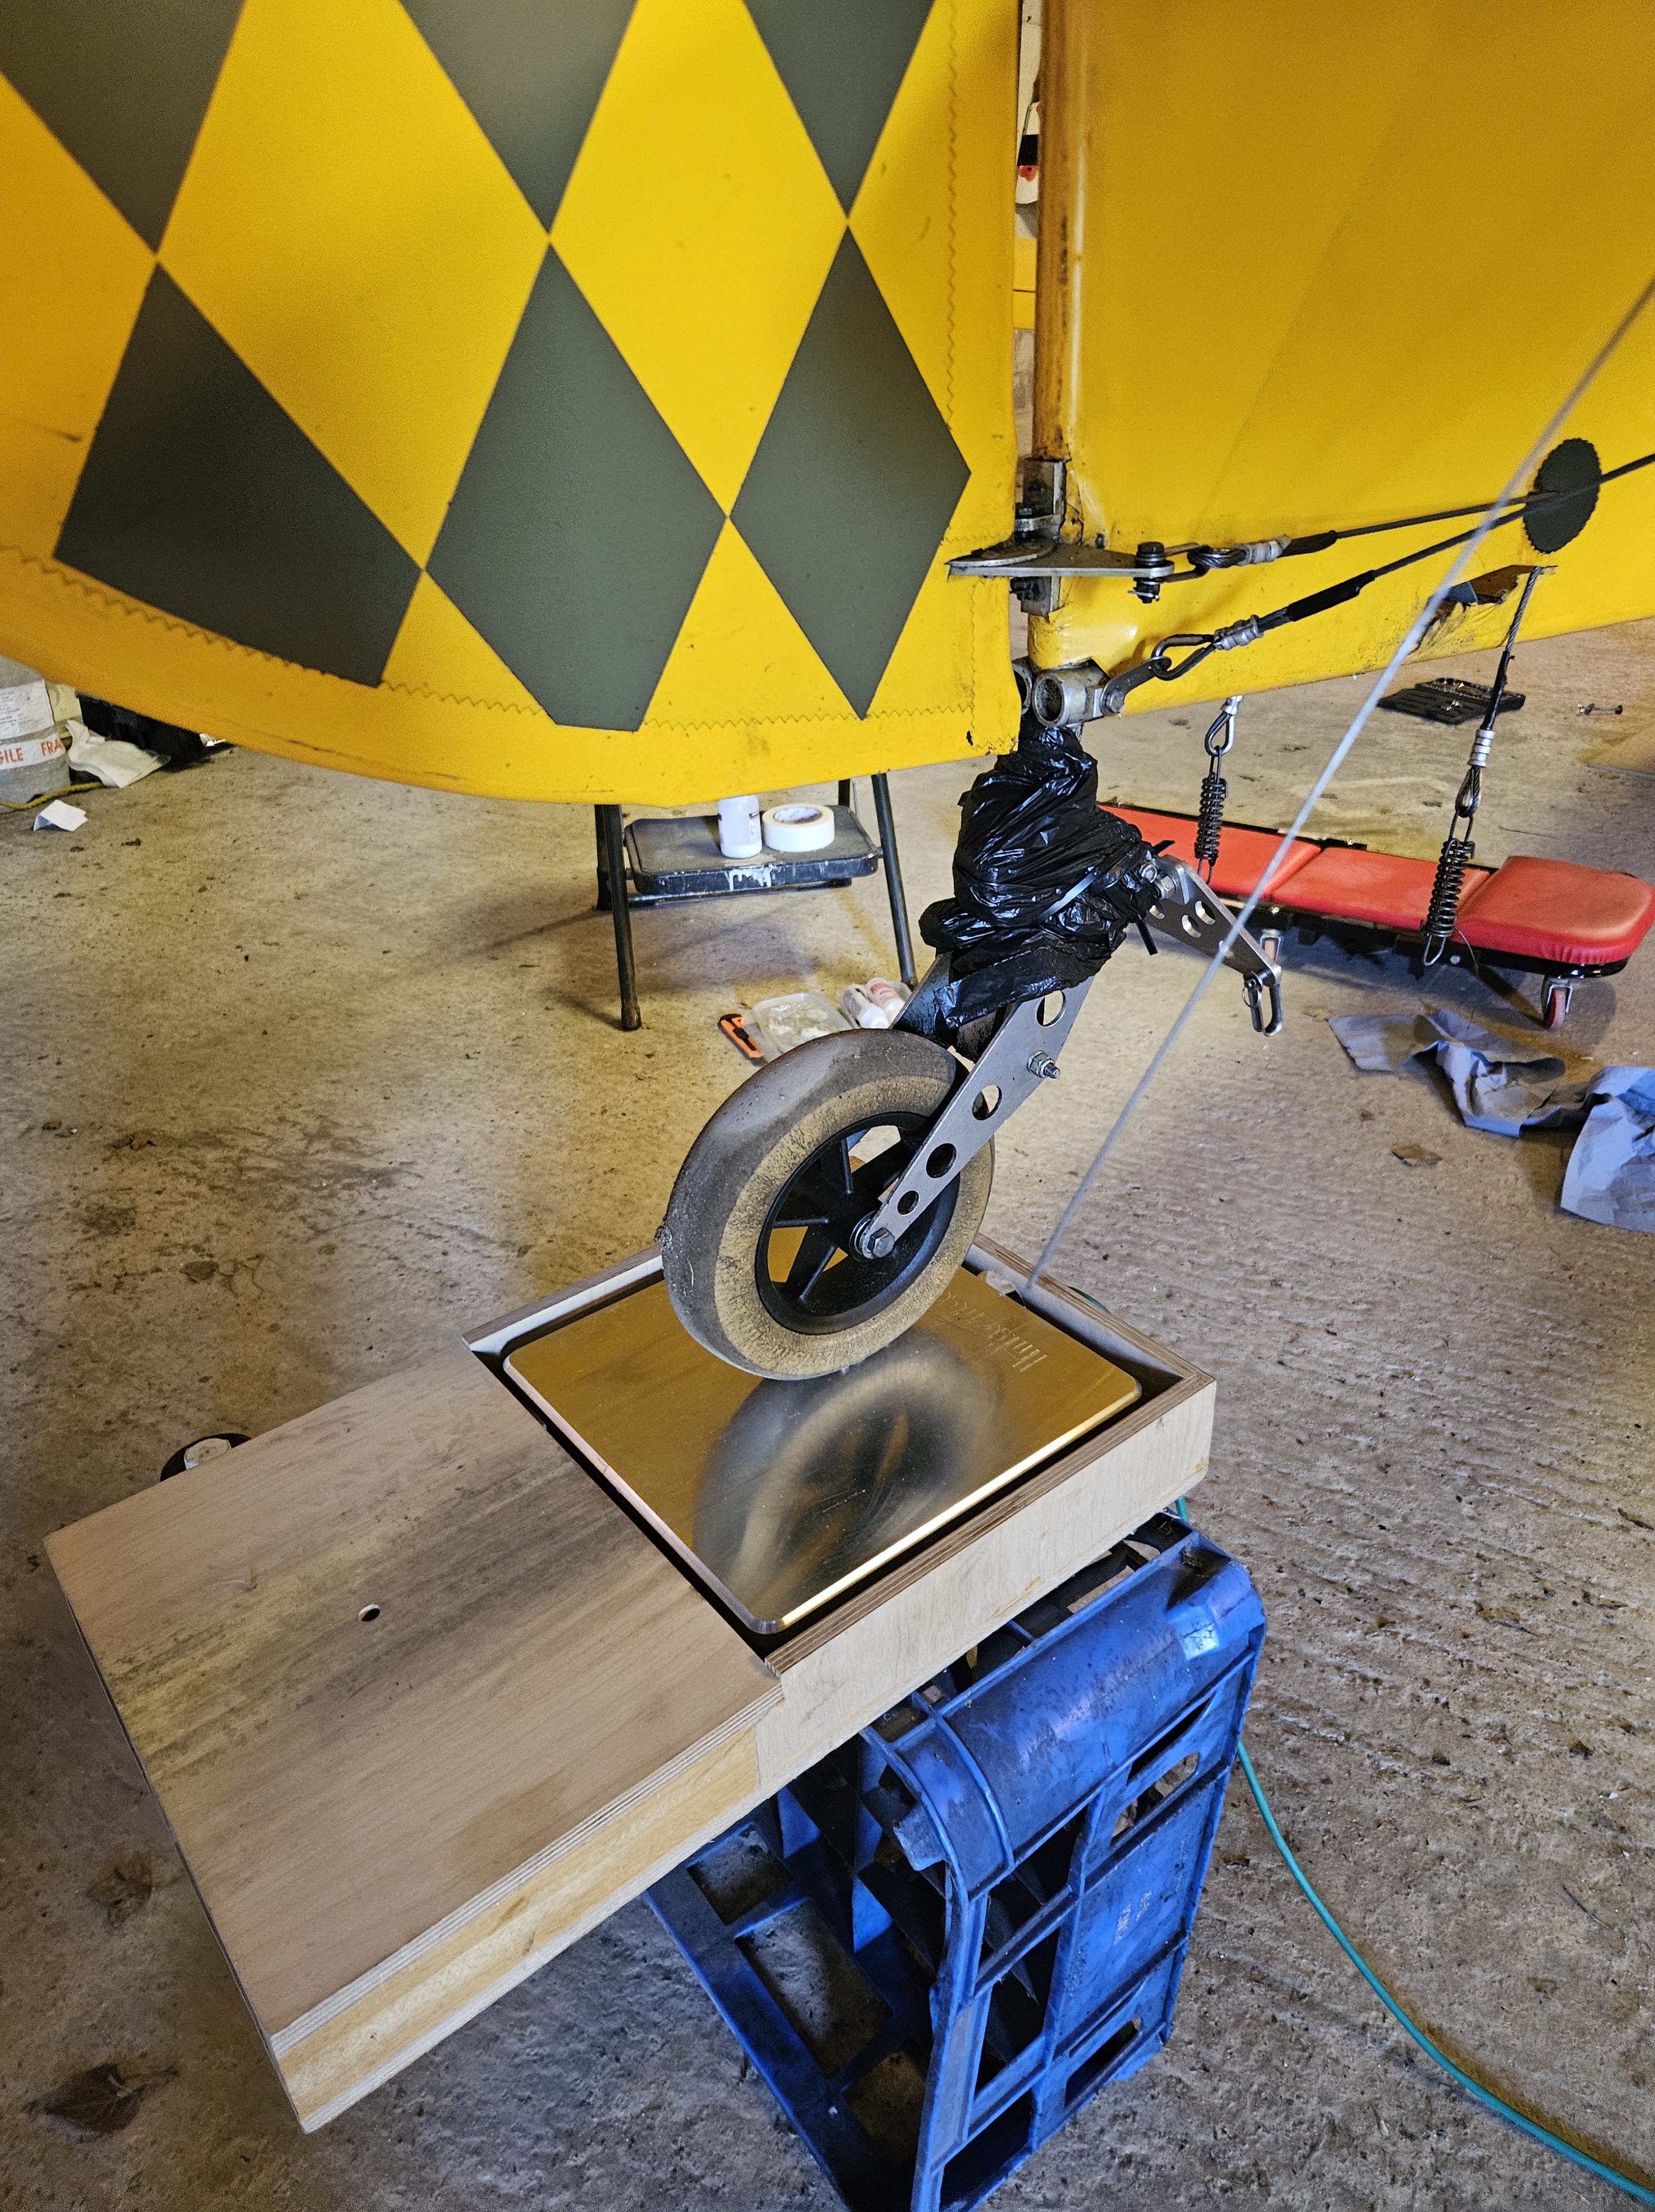
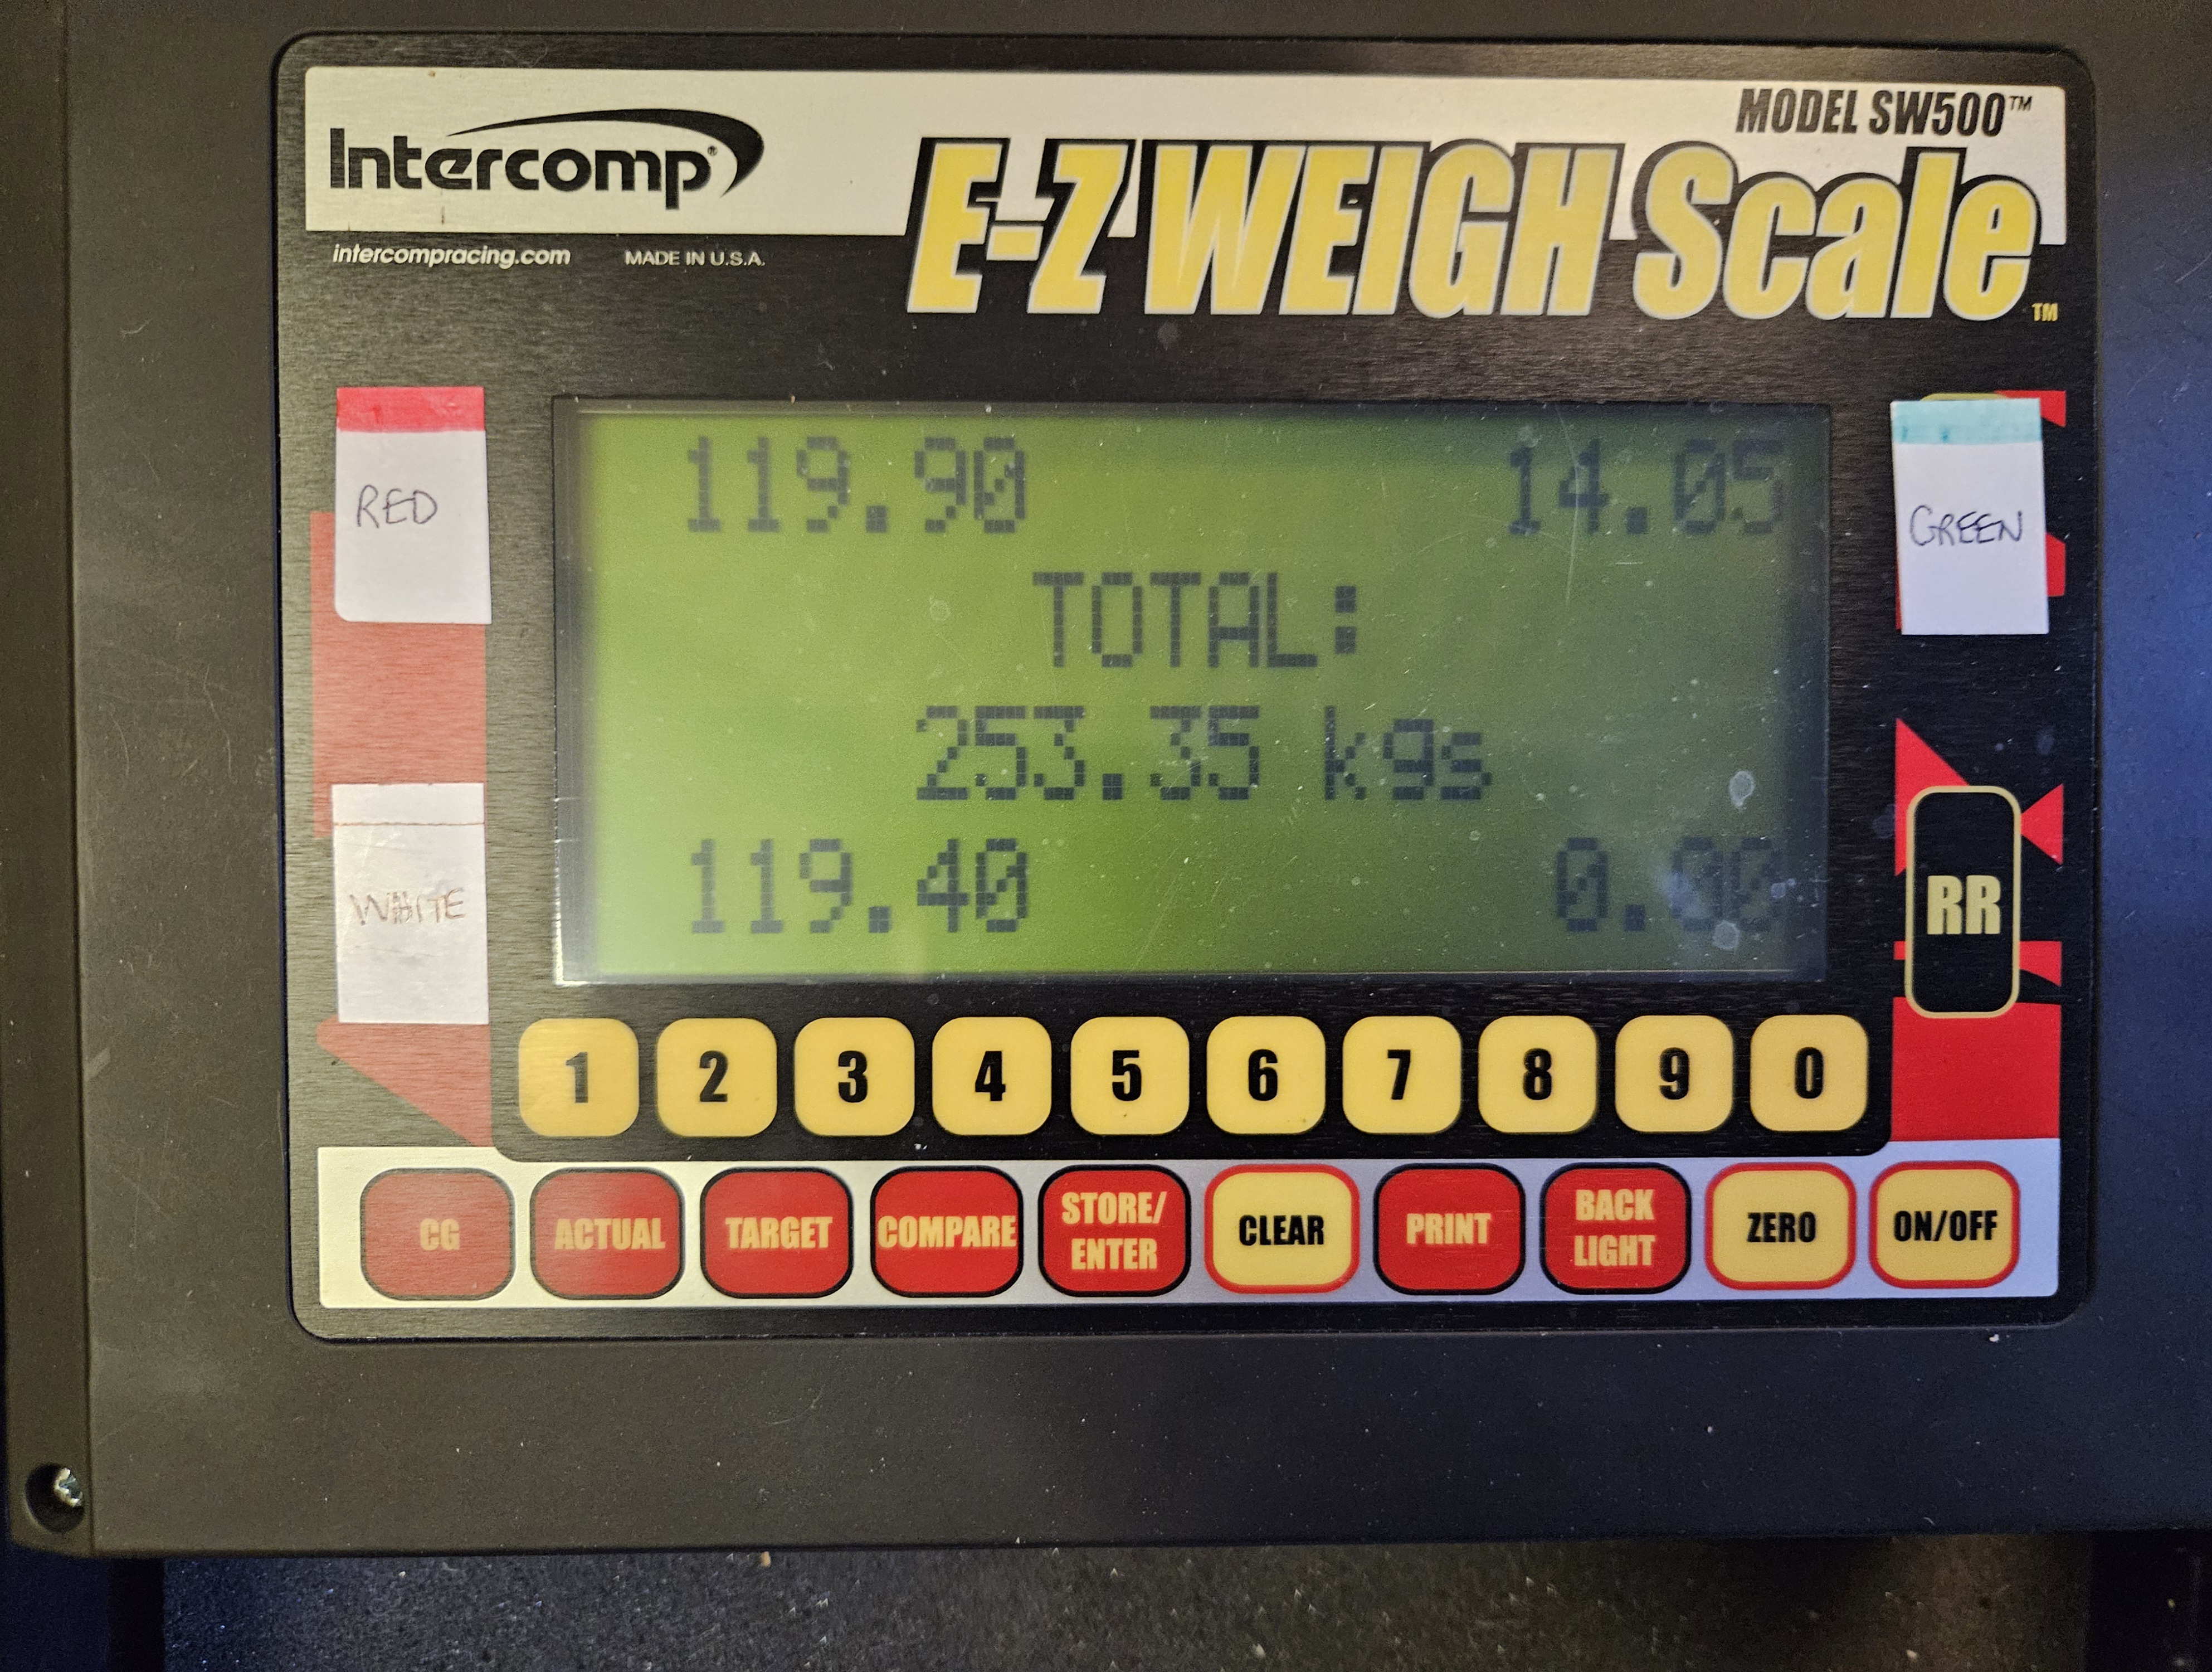
Given the changes that have been made recently it is mandated that a re weigh of the aircraft is required.
Technically the replacement wing is factory so should be the same weight.. the covering is the same … but .. a full re weigh will show up any deviations.
A Priory Farm Aviator member (Tom) very kindly offered some scales that he had hired for his flex wing check
The kit, from the BMAA is beautifully put together .. the lid of each scale doubles up as a ramp .. neat and effective!
Got the aircraft setup into flying position..then roll her onto the scales and drop her gently onto the tailwheel
The resultant weight was extremely close to the original weight check and also showed that Left and Right were really.close too
With the new upper tank in place I’ve started to focus on getting things completed and ready for the inspection.
The upper tank has taken the place of the original open structure that was formed of 3 ply ribs around the cabane cross members. This then had 1mm sheet ply sandwiching a made up radio plane (relative sheet – rather like a paper backed bacon foil). The radio plane had an allow arm that gripped the foil top and bottom and the resulting black earth was connected to the foot of the Commant arial.
It sounds (and looked) a bit odd ..BUT .. worked a treat . I got a good radio signal more than half way across the Channel..not bad for a largely wood and fabric aircraft.
Now, with the new upper alloy purpose made ‘trip’ tank, I have a ready made radio plane. The tank turned out to be insulated from the aircraft (due to its rubber seating tape). This wouldn’t be good as the rest of the aircraft would provide mass radio ‘noise’ so I needed to add the earth lead.
I ended up repurposing part of the original metal arm and fittings and ran 2 earth leads ..one for the tank to a cabane mounting bolt that had ample thread to accept one small washer more. The second earth lead (and original part) will go to the new Commant ariel. The old ariel may well be OK but was bent 45′ as she up ended.
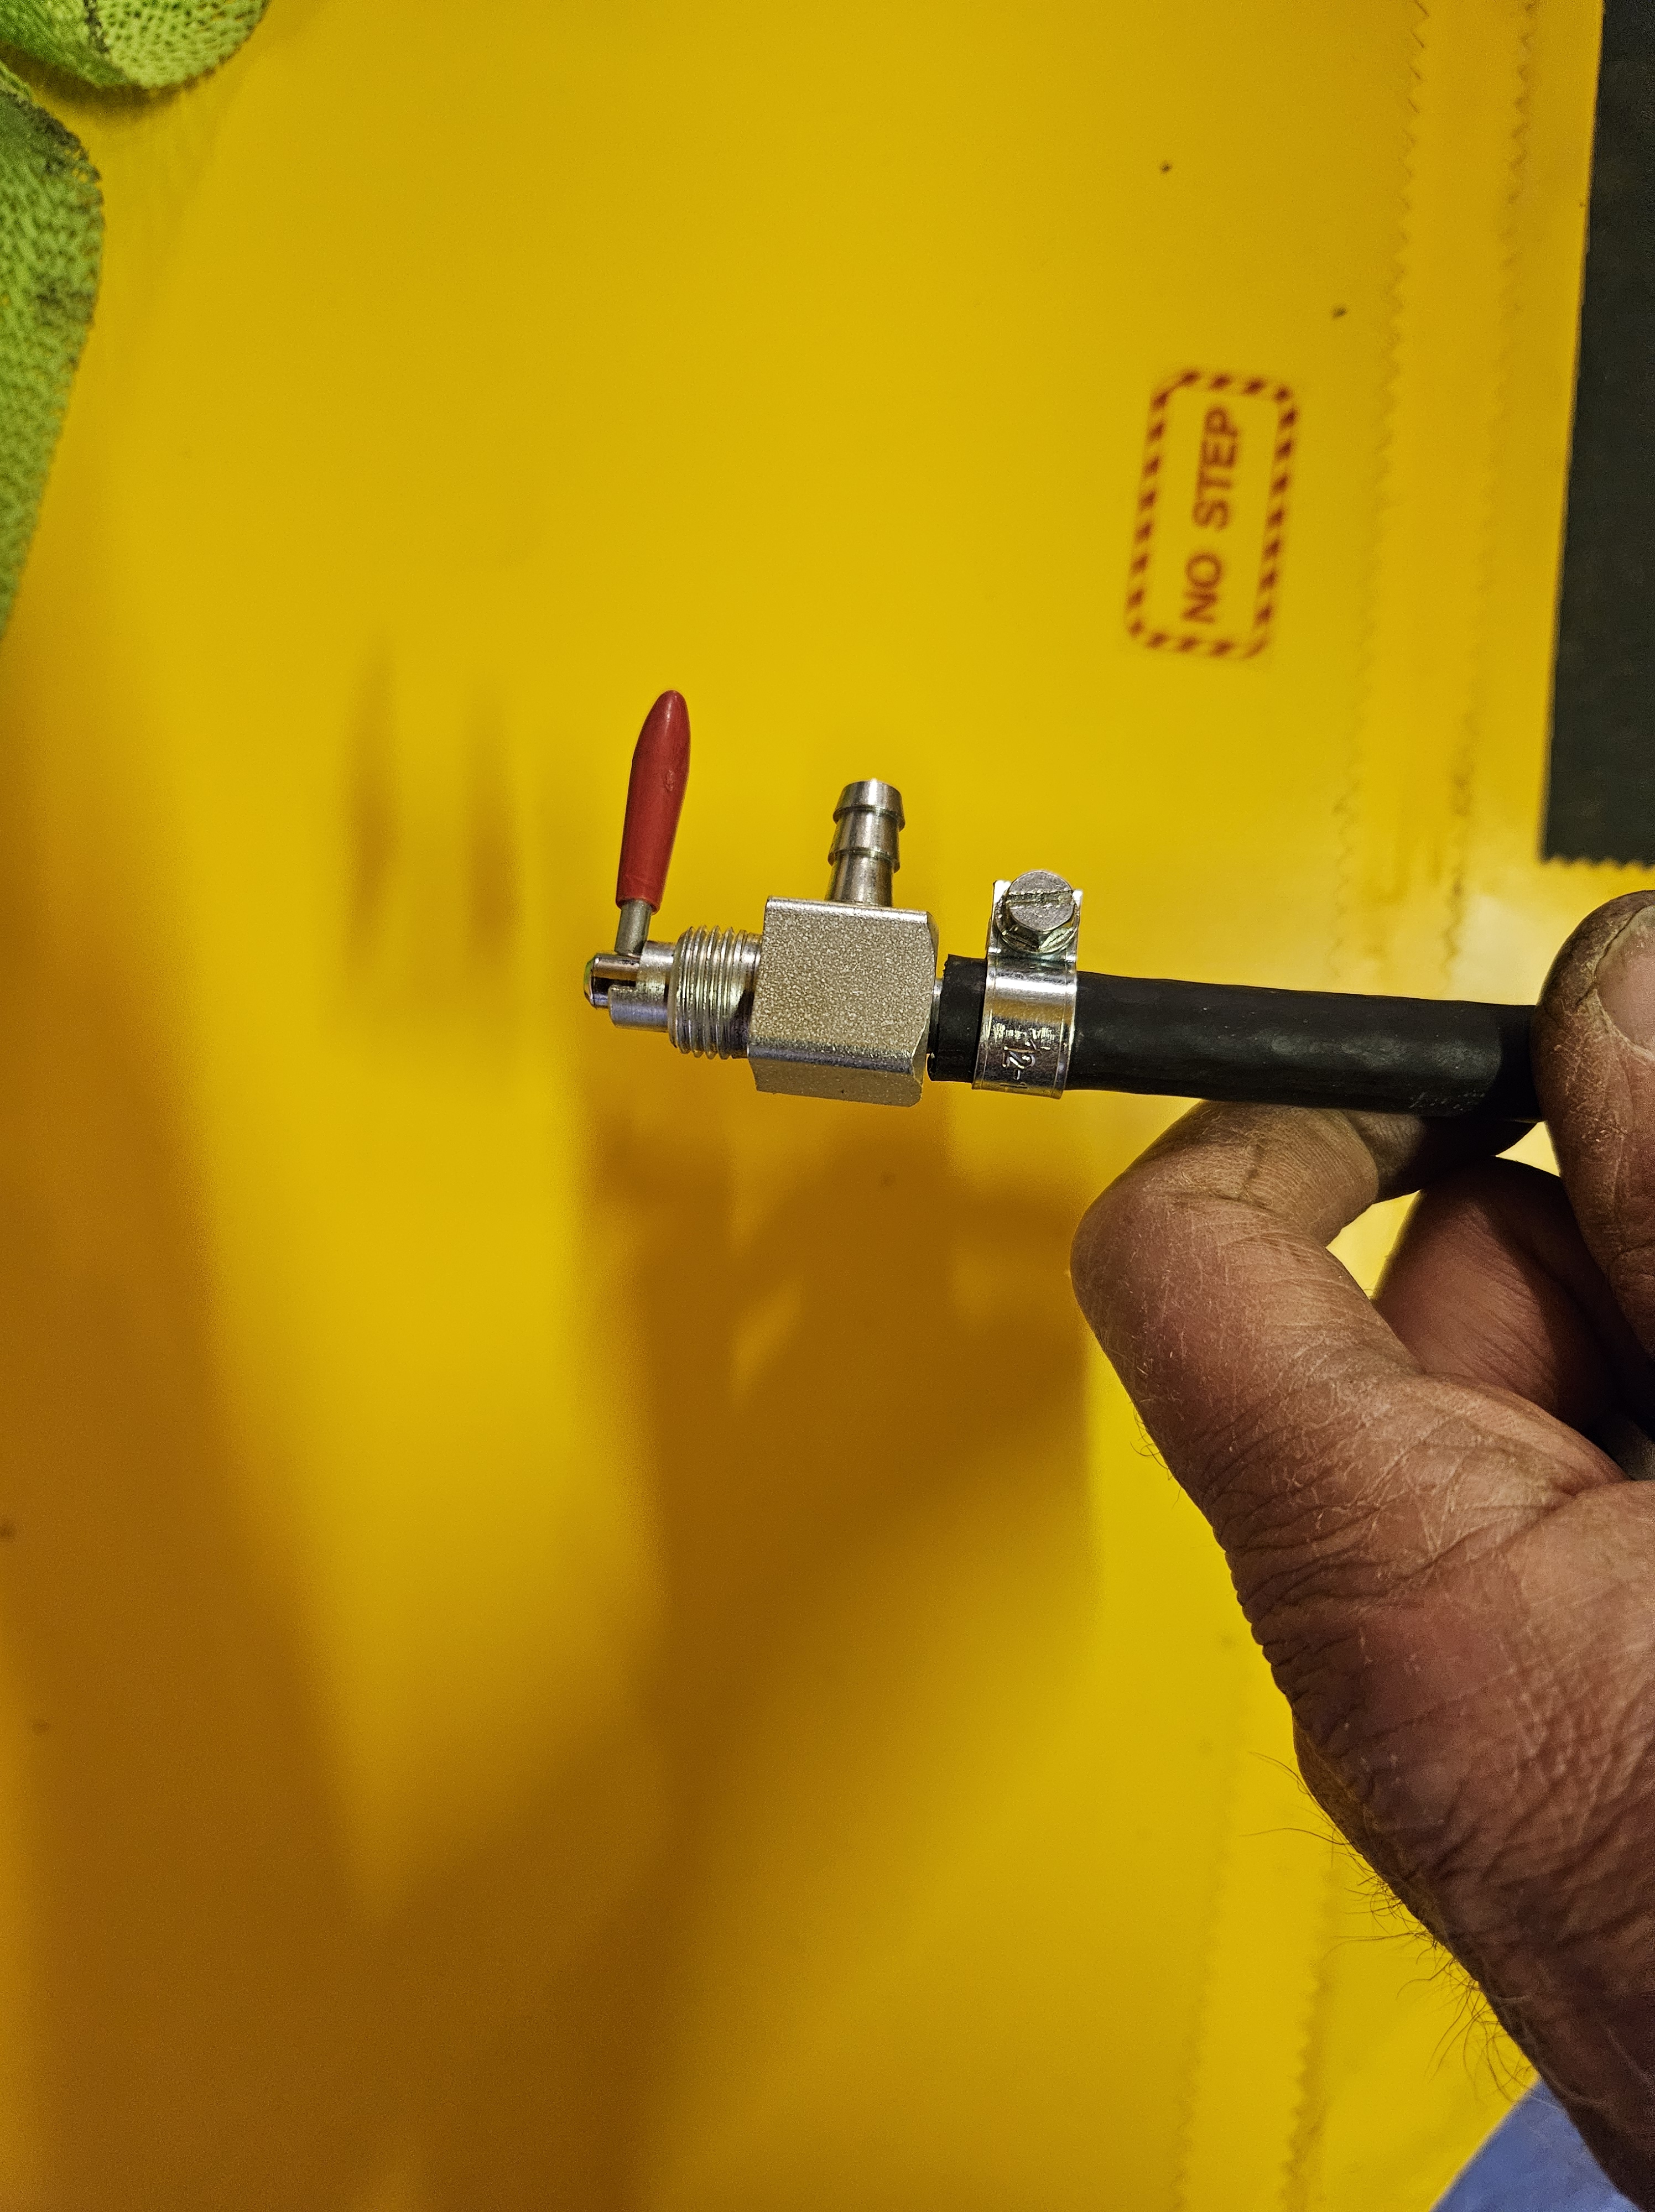
The feed from the upper tank is via a short piece of rubber fuel tubing to a ‘cut to length’ alloy tube that runs down one of the rear cabane arms and the connects to a small piece of rubber tube to the Valve selector.
I’ve got quite a ‘busy’ panel and I wanted the location of this ‘dump’ selector to be obvious and easy. I elected to move the previous side mounted mag1, 2 and push starter to the main panel.
This freed up some side coving space that allowed the chunky but purposeful fuel switch to the side.
I’ve started to run the back fuel tubing along through the side of the P2 cockpit and then lines up nicely with the feed nozzle.
I’m going to be fitting the basic fuel site gauge and so need to check if there are definitive holes to use in the new main tank.
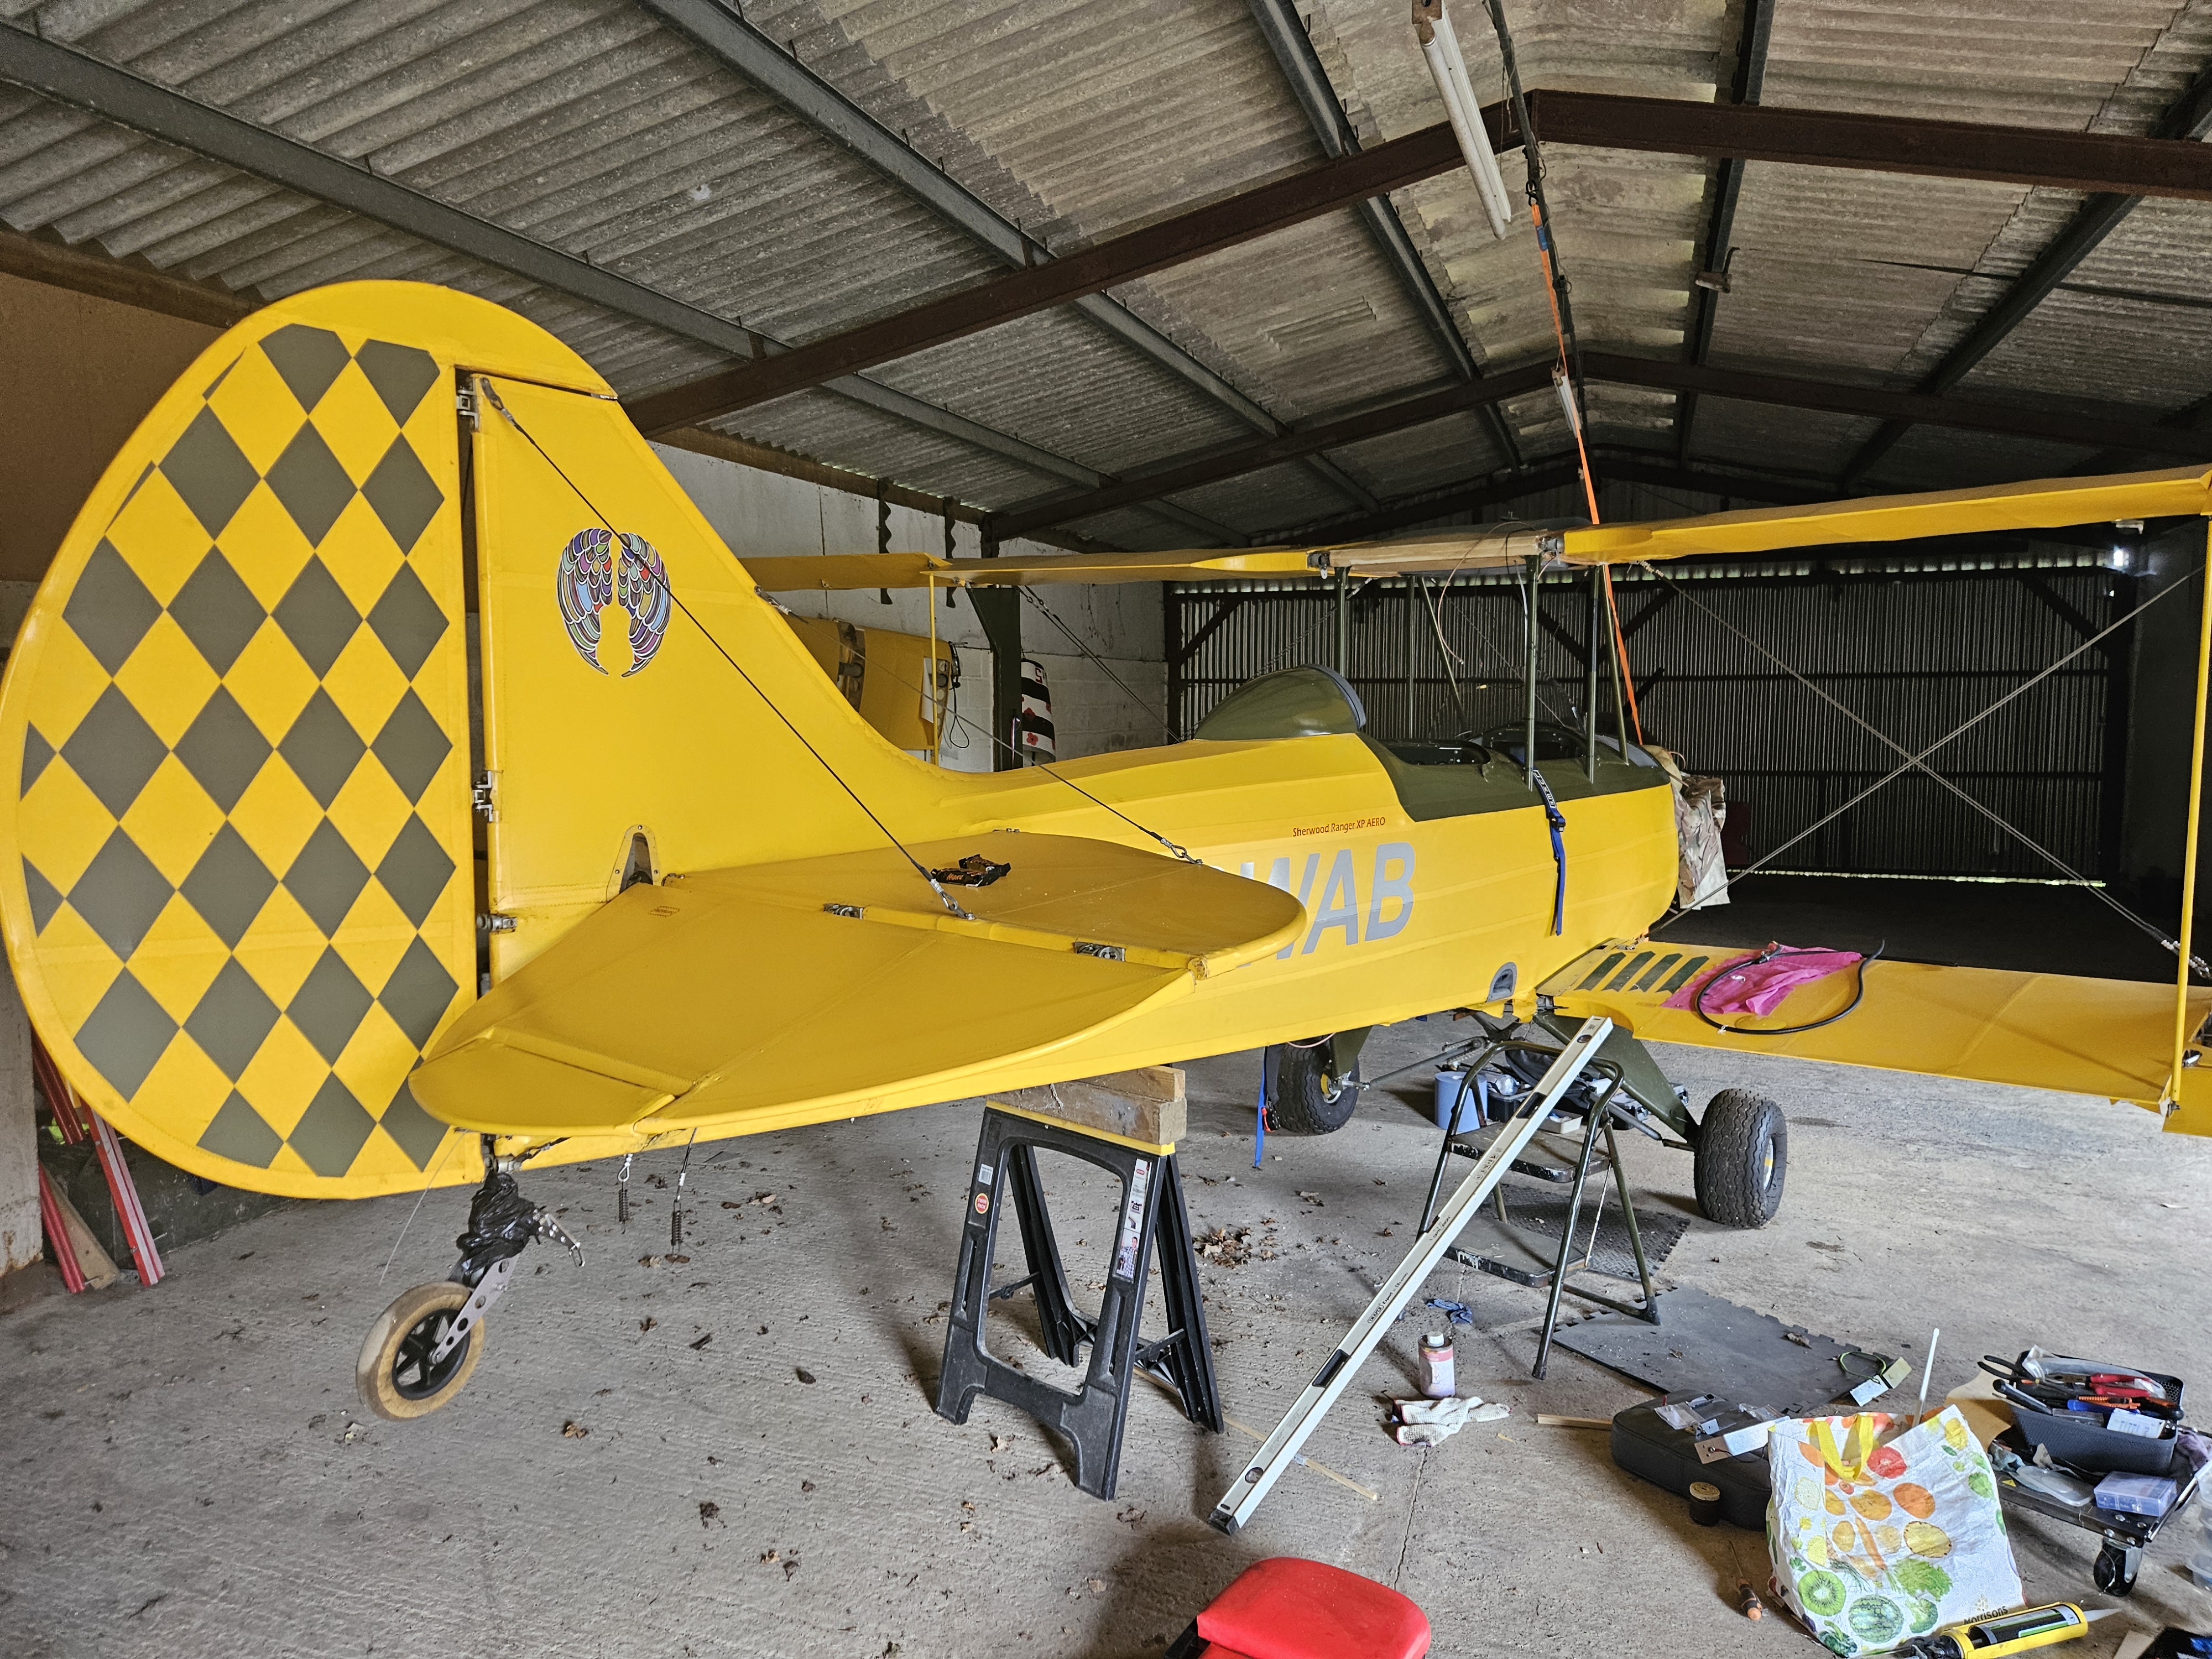
Over the years I’ve re rigged the aircraft a number of times … usually when the wings were on and off between transportation runs between the barn where I built her and the airport. Later trips were easier as I had a trailer and the folding wings were obviously a huge help !
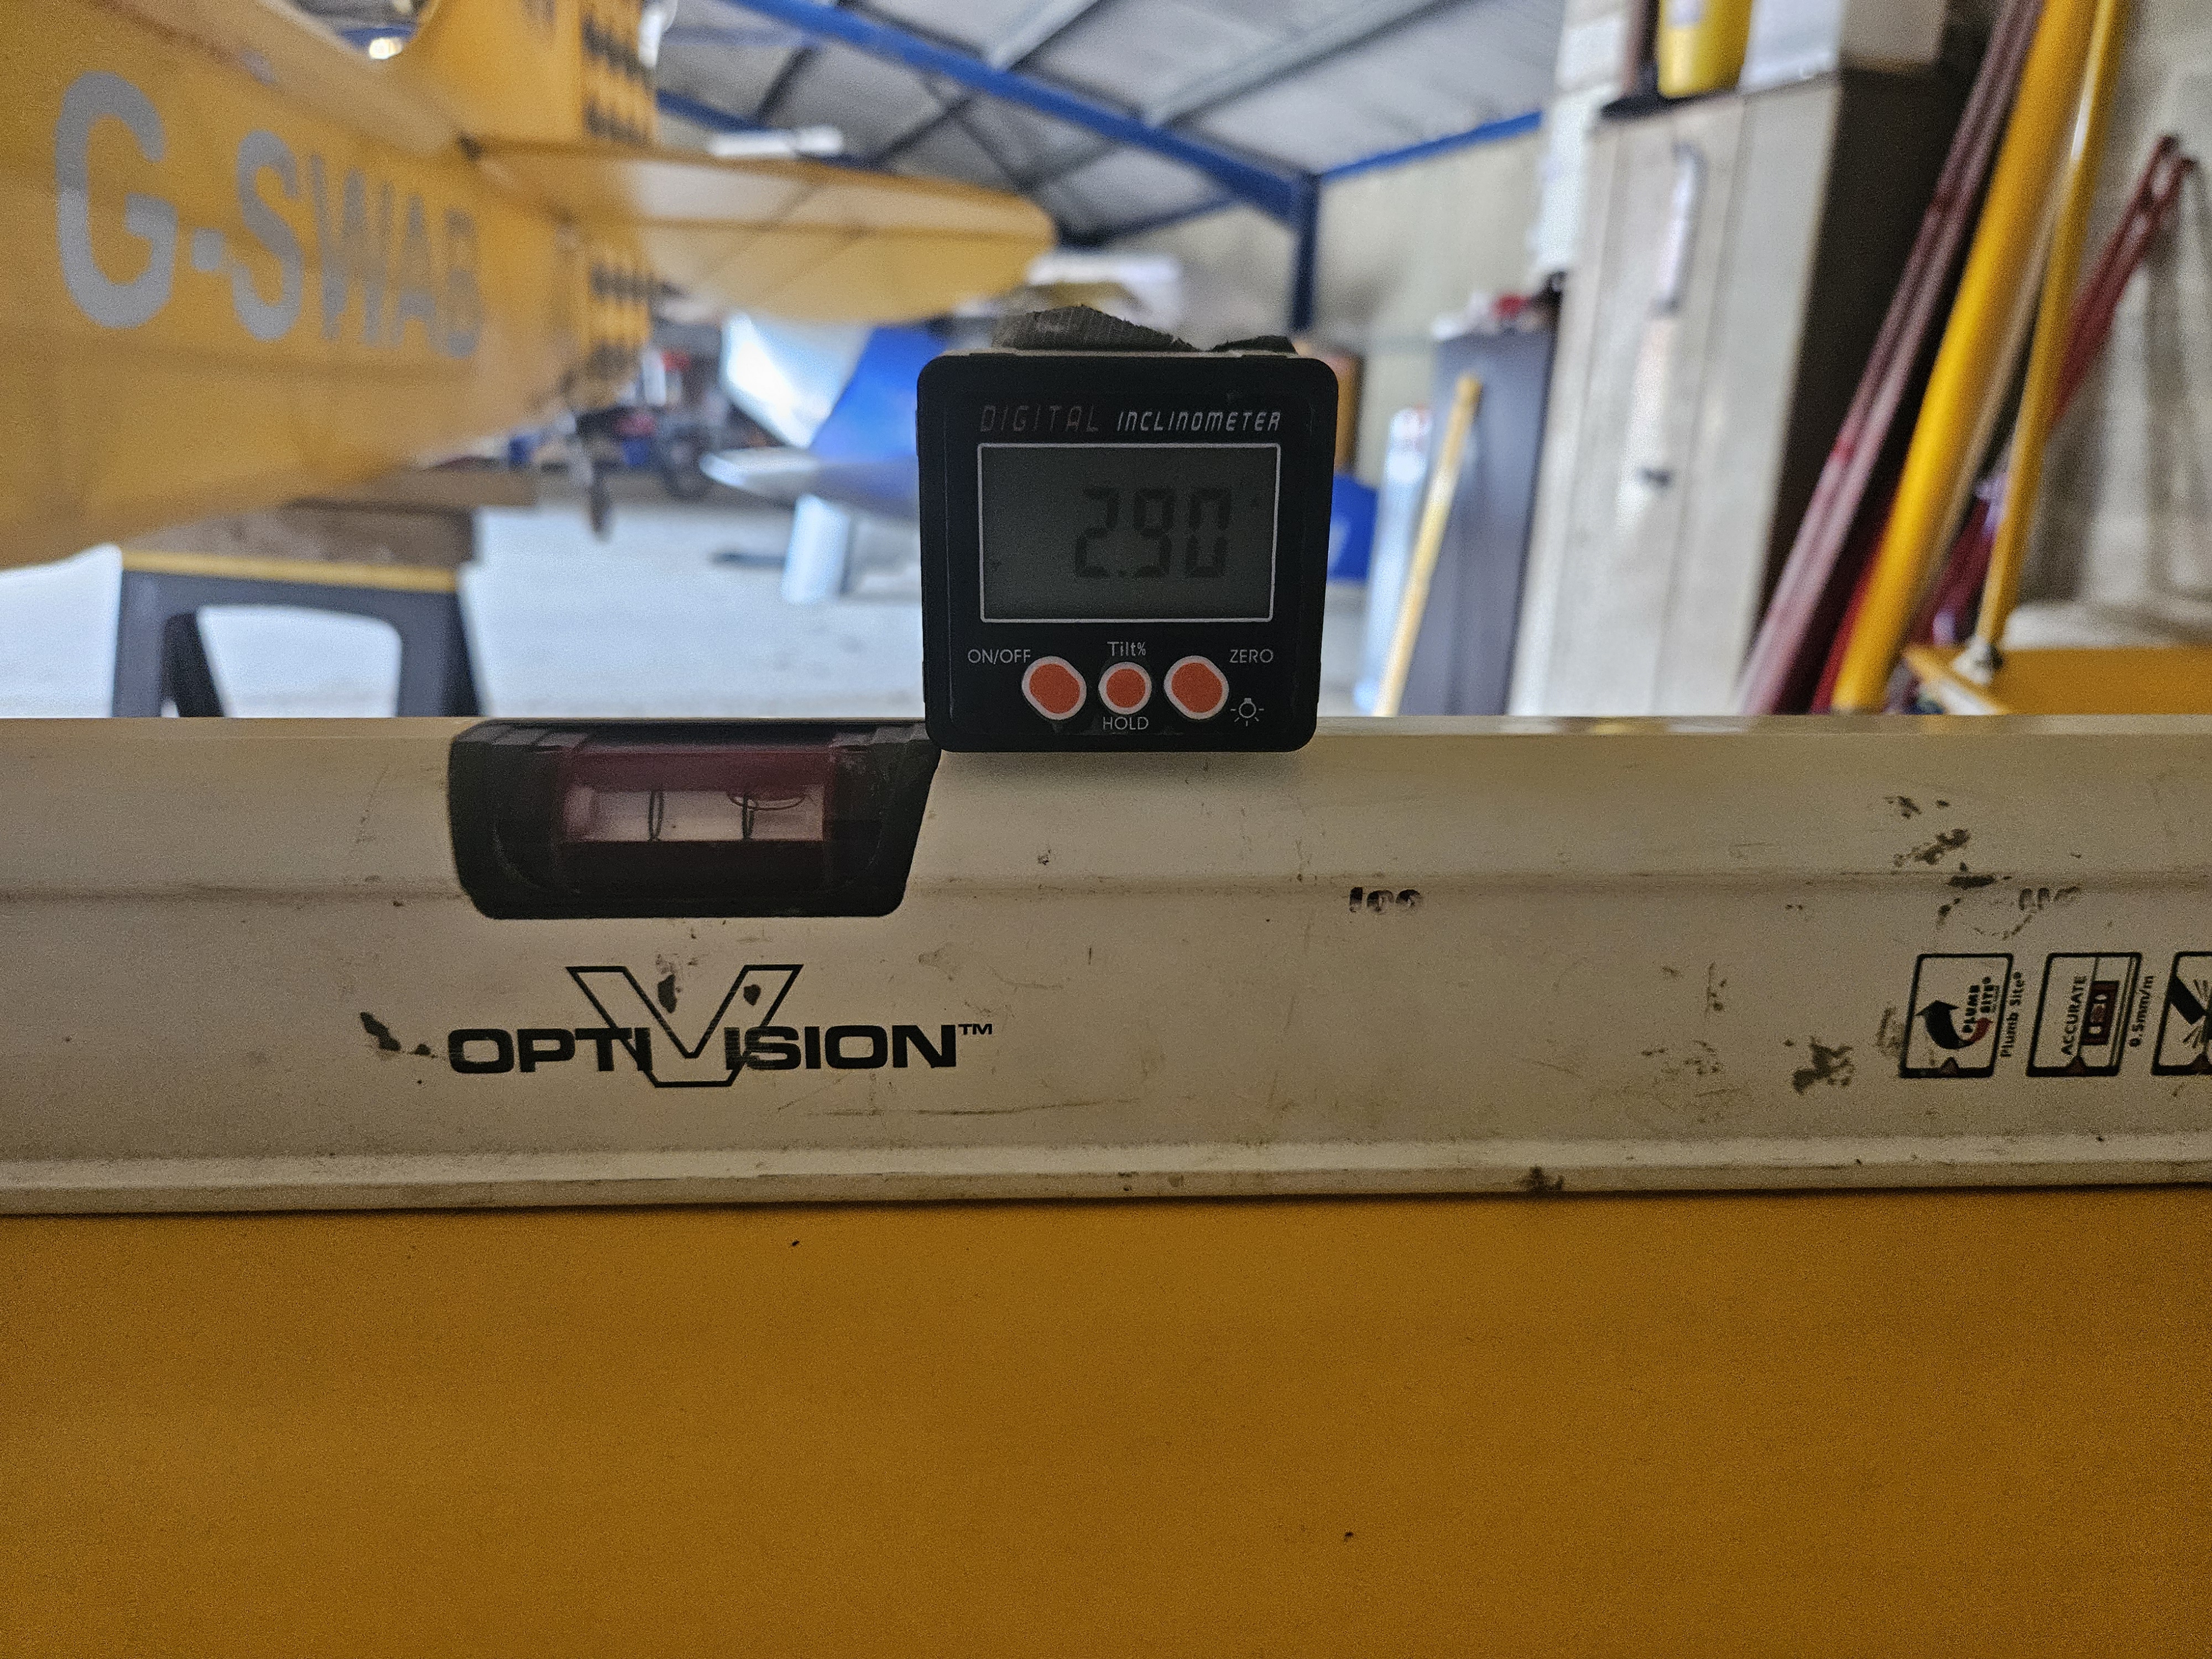
All turnbuckle wire locking removed and each wing with a trestle under to support the (almost) correct angle .. allows you to bring up the turnbuckle tension to achieve the desired angles
Lower wings – 3 degrees
Upper wings – 1 degree
It didn’t take too long before the numbers started aligning and the flying and landing wires started to ping quite nicely
Getting the aircraft straight and level and into ‘flying’ position first is key to ensuring correct settings
Part of the rebuild was a slight modification to the P1 panel.
Although I’ve (technically) not flown IMC in the Ranger ..a couple of unexpected cloudy descents … but flying any reasonable distance can be quite tiring.
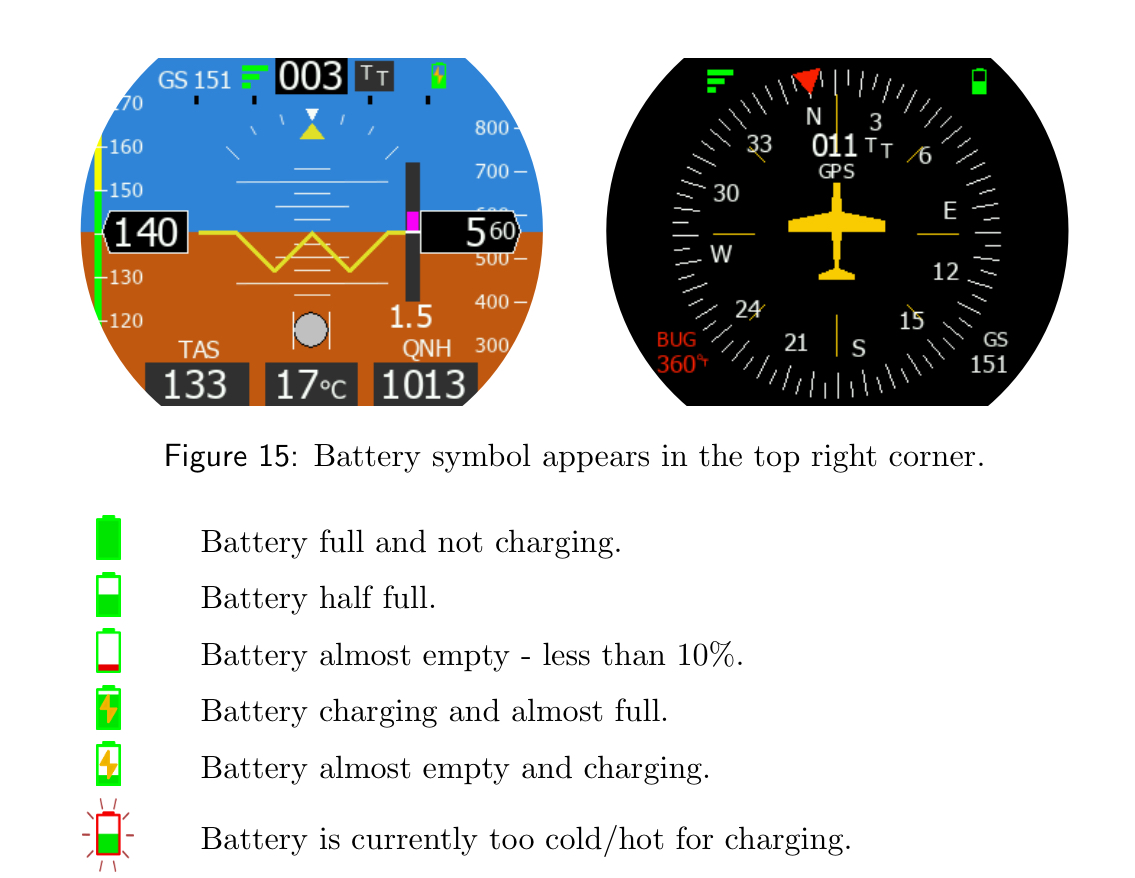
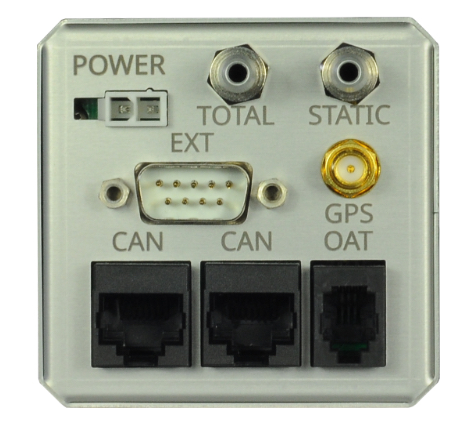
The guages aren’t exactly big or easily visible in an open cockpit with sunlight, so I invested in a multi colour Horis. This provides all the key information in one single very clear instrument.
Unboxing and checking the detail out, it looks very simple to connect. Power, a provided GPS, splitters for the static and pressure tubes and a temperature probe.
Some of the repairs are for bits that weren’t directly caused in the accident.
The port elevator was part that got the material scraped in the hoist recovery…trying to repair the scuffed material was proving a bit tricky so decided to strip and recover. At last the ambient temperatures have risen above freezing so allowing gluing to continue.
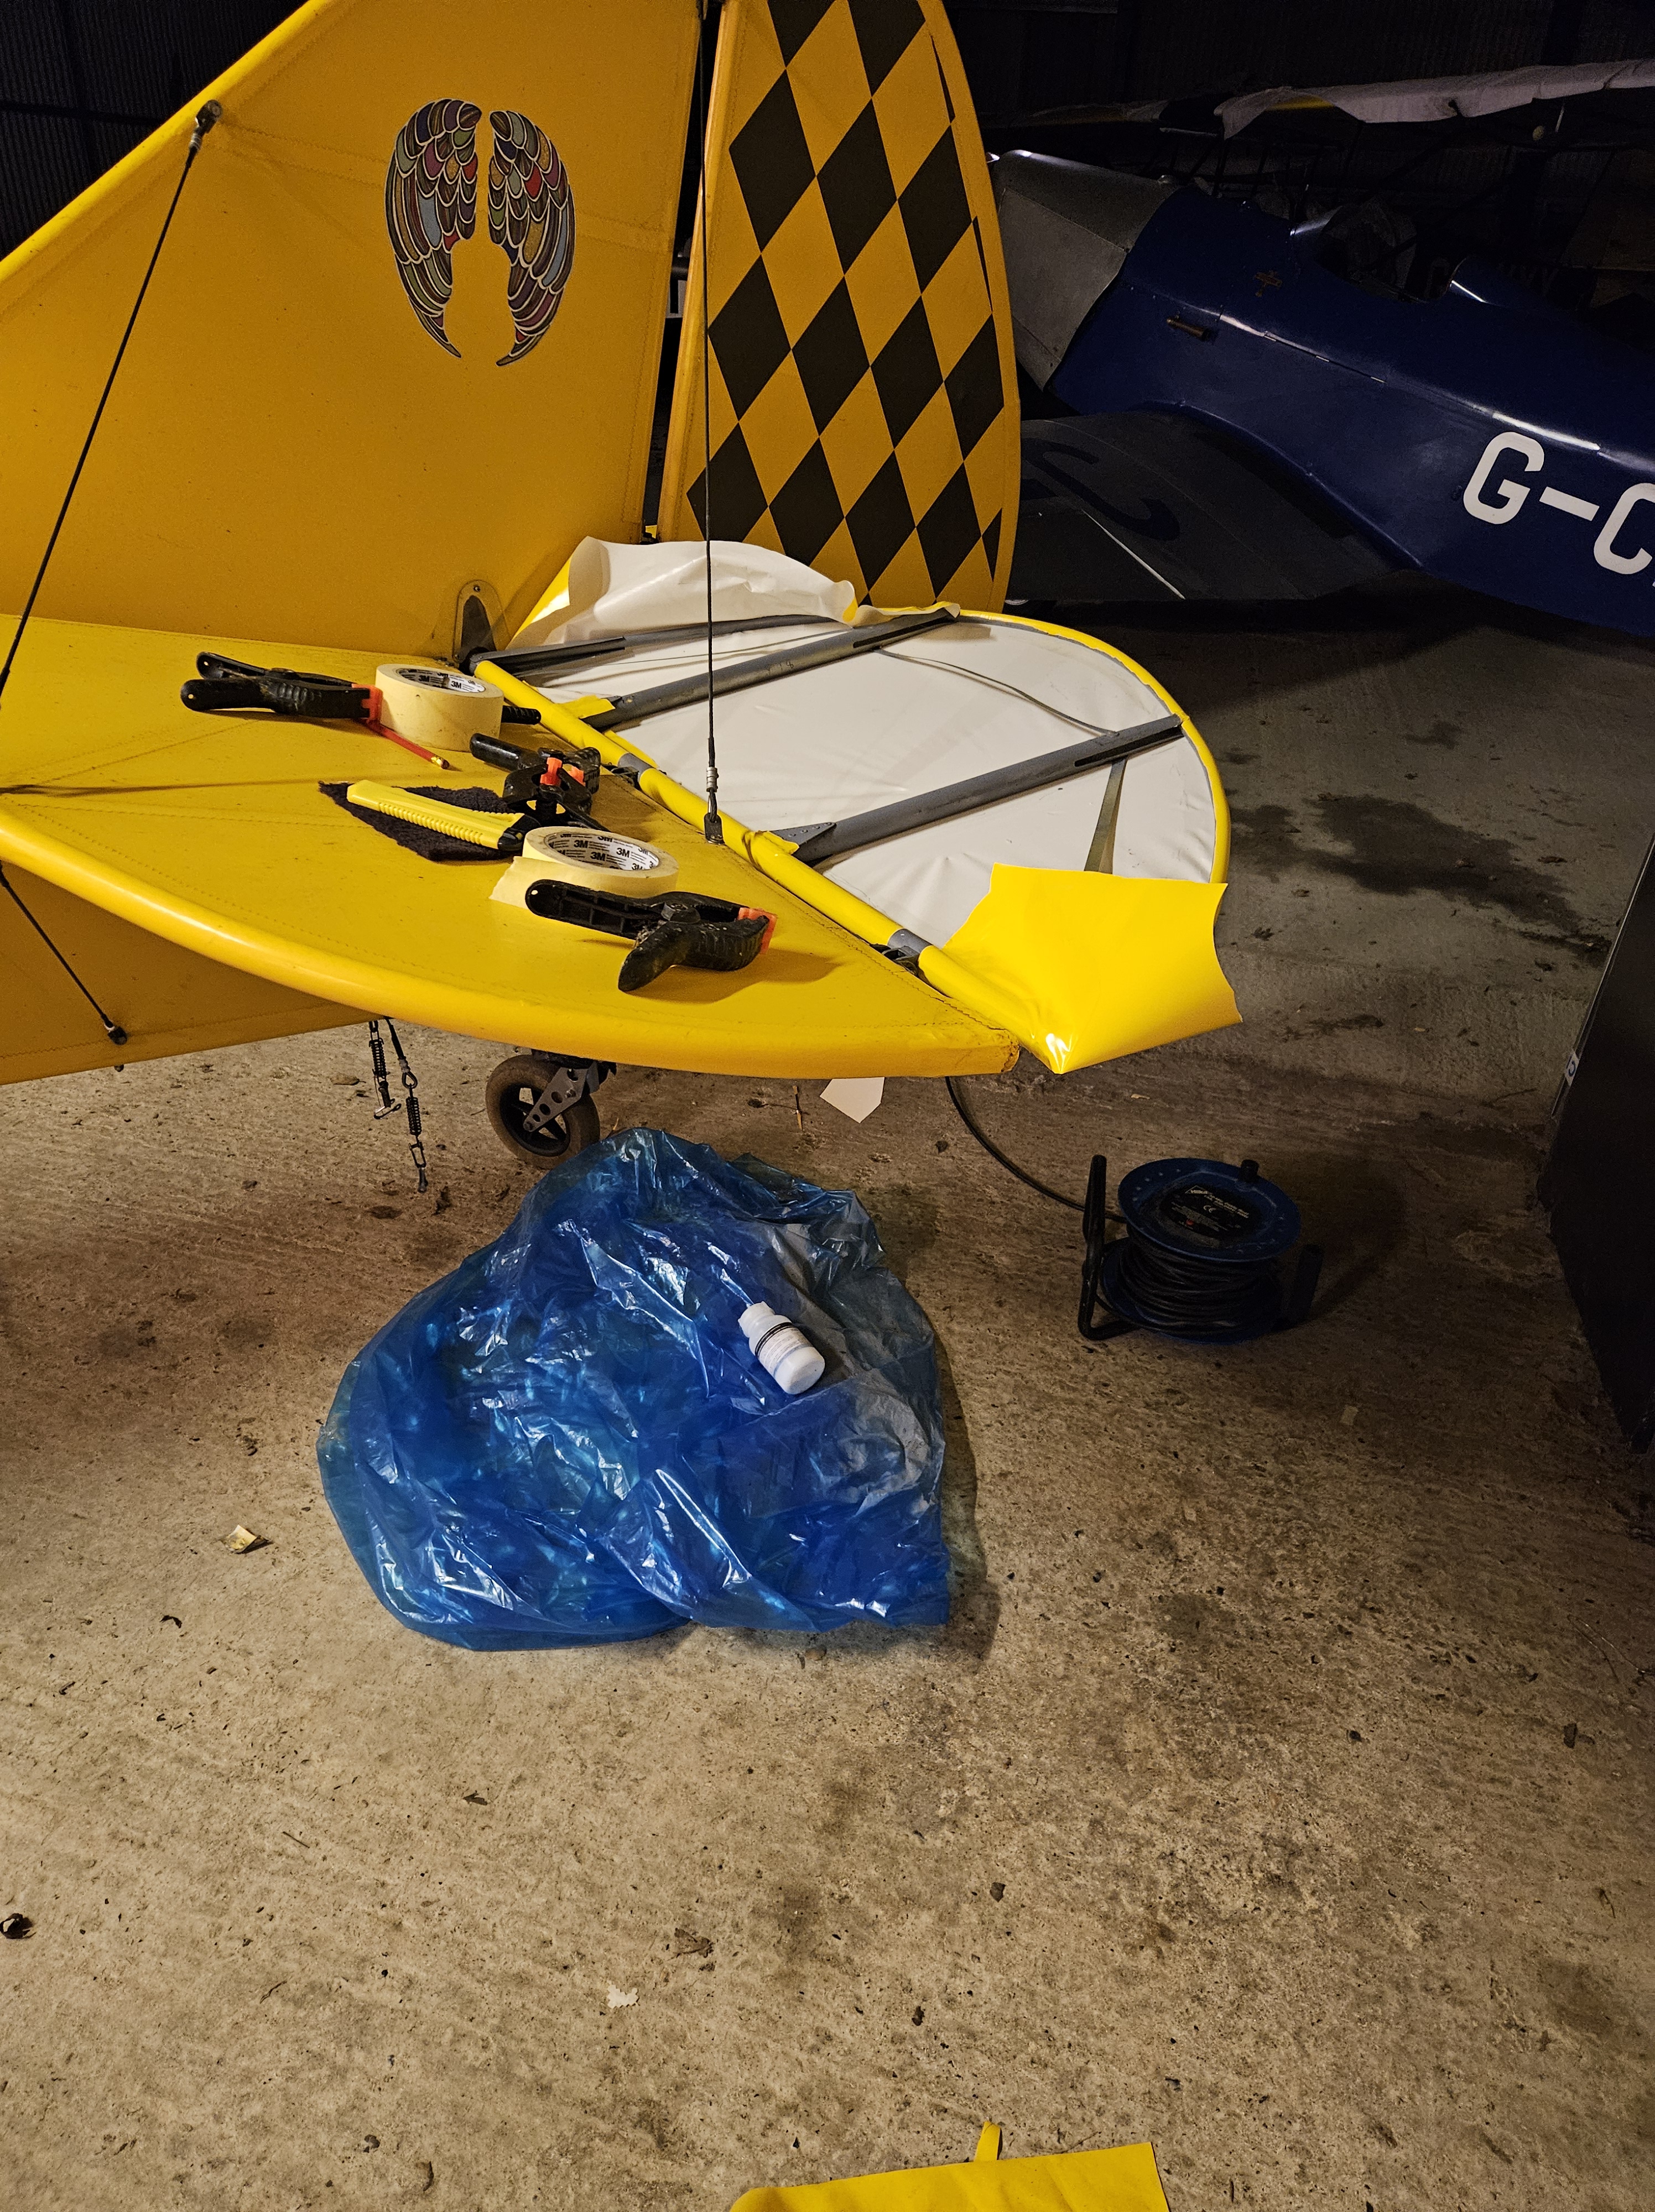
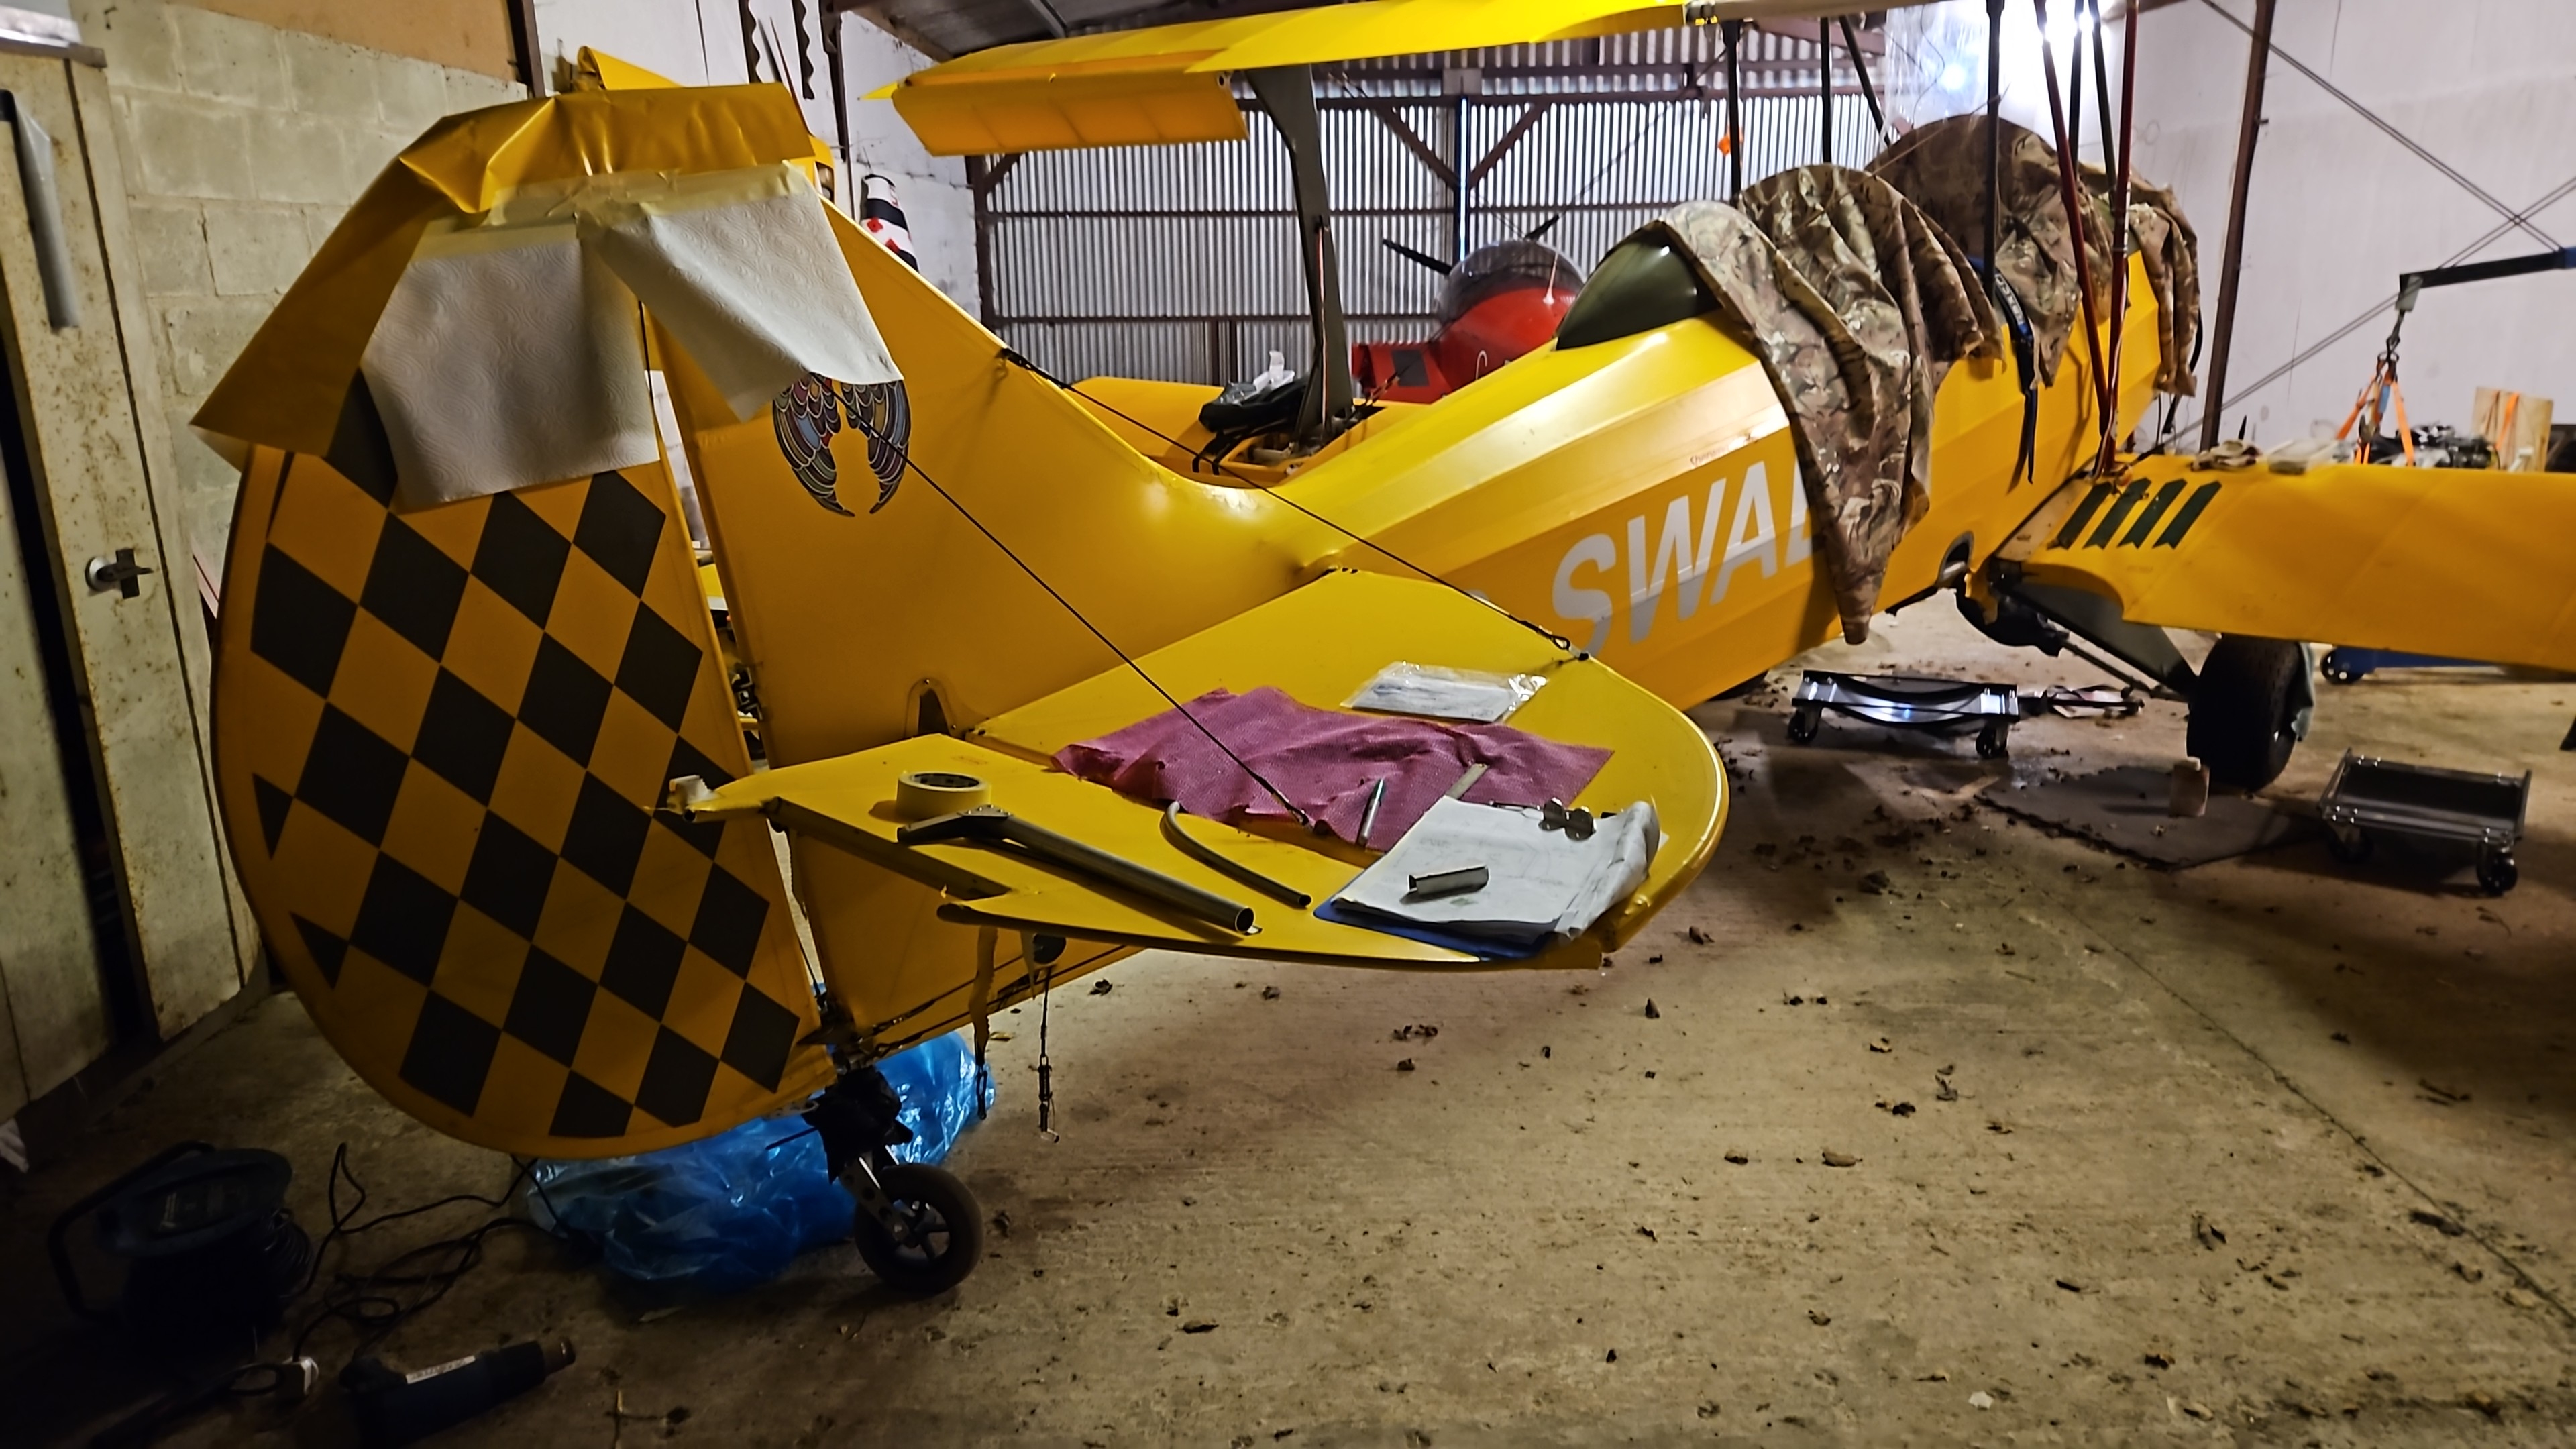
The top of the rudder showed a small crease in the material as it tipped over, so was stripped back to check.
No damage was located so the material was terminated on the top rudder rib and the metal cleaned and prepped for a small repair panel.
It’s a bit of a pain that the diamond pattern in Olive green has now been slightly trimmed ..but may ne able to source a s.all section from the Jersey company that did the original. Remember them saying they couldn’t guarantee the rudder diamond pattern sections wouldn’t peel off at speed ! They have lasted VERY well !❤️
Not too bad ‘pre shrink’ .. will let it all cool and harden and do the other side before applying heat shrinkage to tighten