One of the tests after (significant) changes to an aircraft is a full flight test … before that..you just want to know “Does it still fly straight and level” .. without too much heaving on the stick.
A small test i did on Monday was to get up to around 2,000’… wind on the ground was varying between 11 and 18kts so it would be a bit stronger up there…. and LET GO !
Looking at little like a hijack (but no gun involved 😉) i trimmed, let go of the stick and did a 1 min 14 second turn….hands off .. just judicial use of a bit of rudder to coax her around
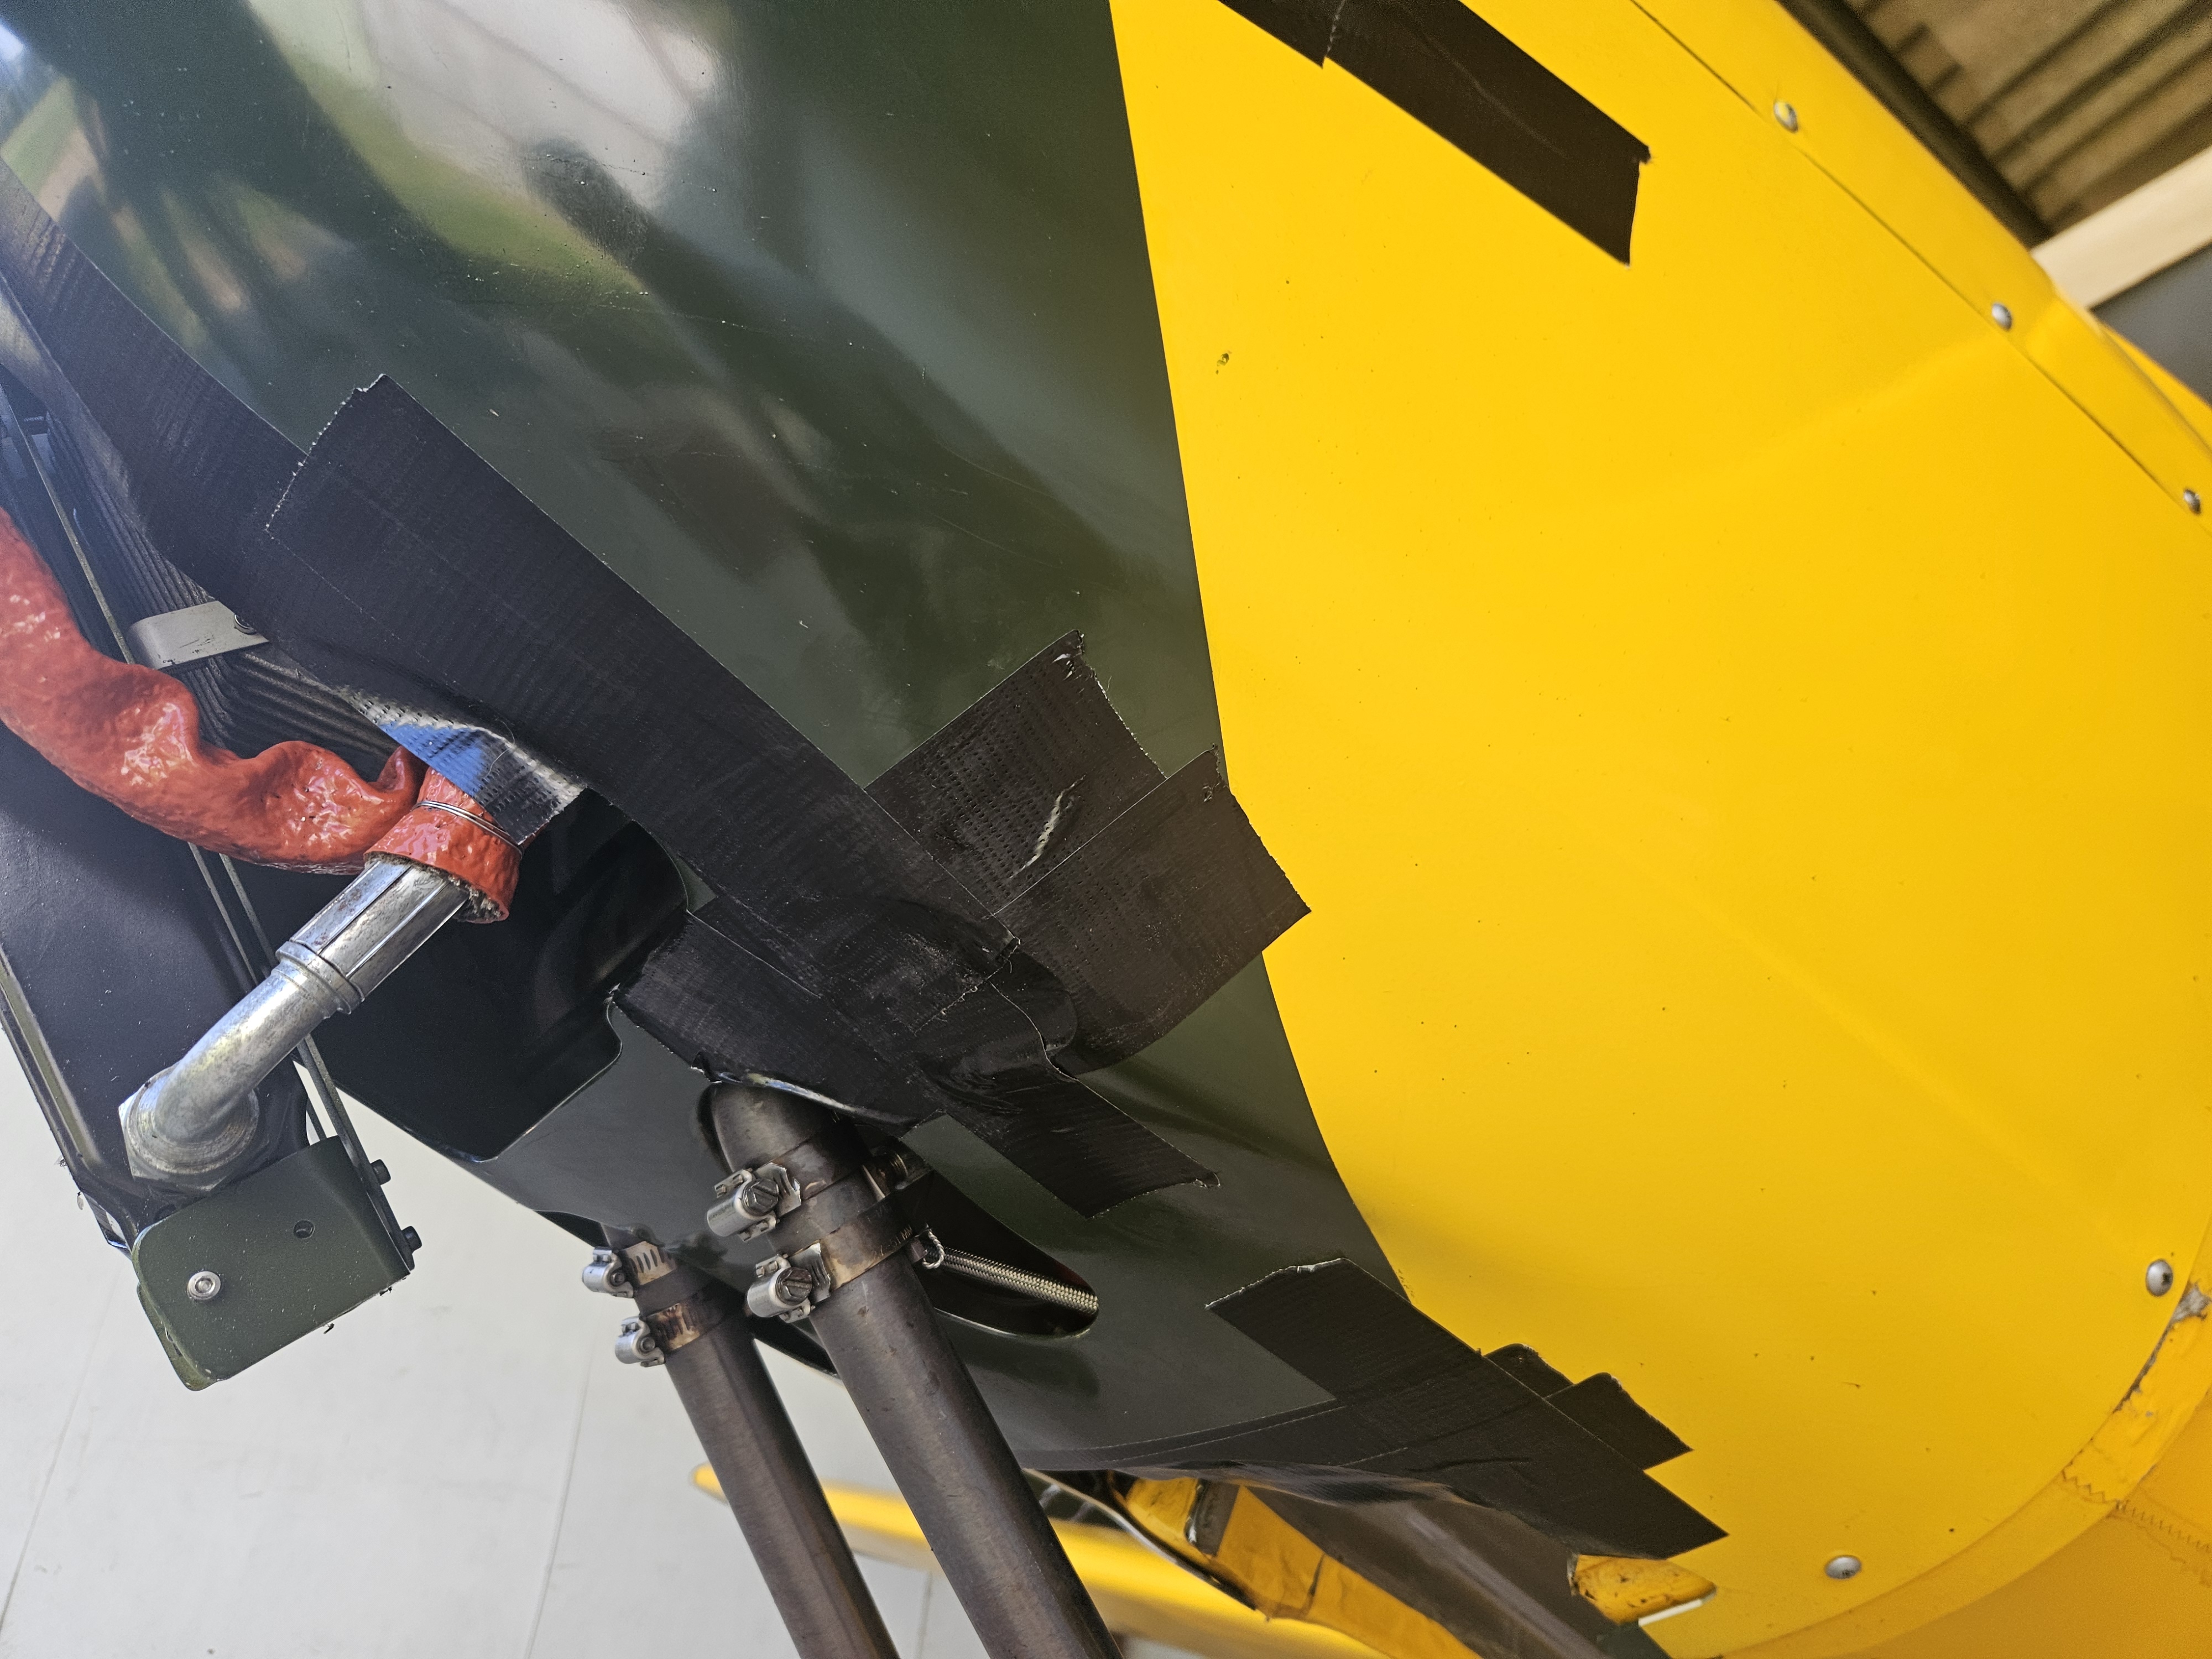
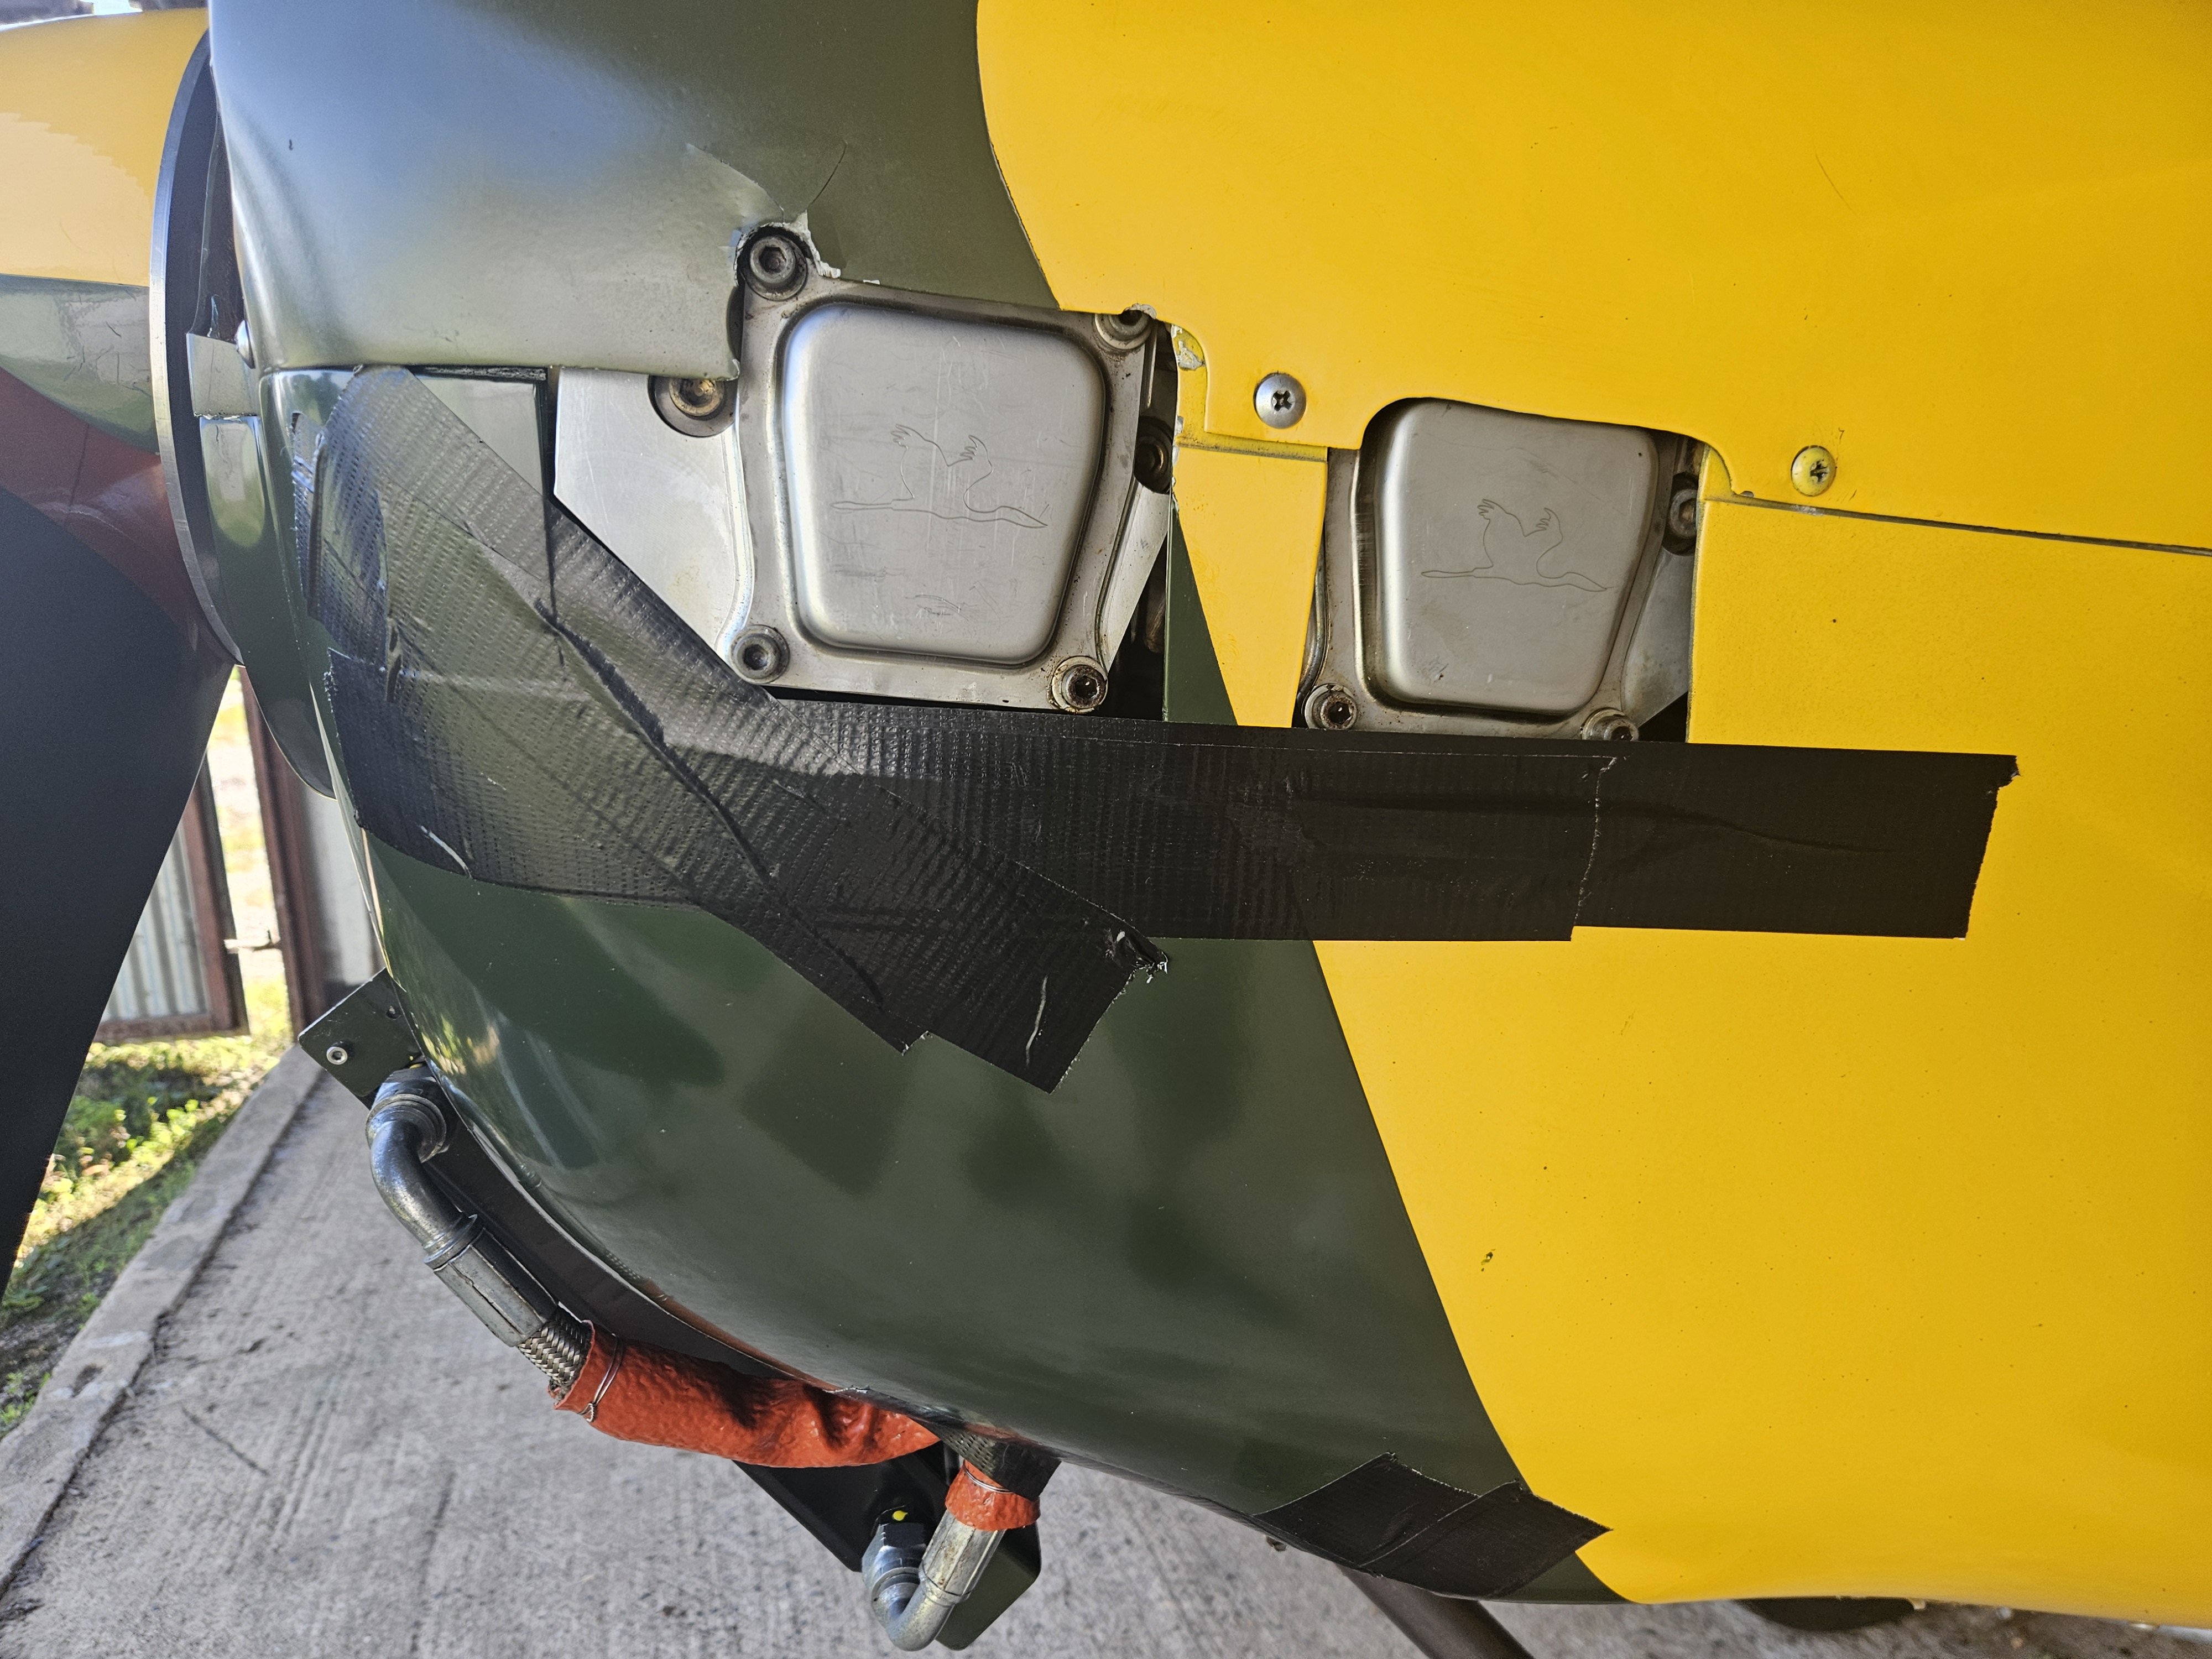
Id been thinking about the hot running head and thought the damage to the lower cowl meant we needed to repair and beef up some of the lower curves.
The original holes in the lower cowl were primarily around exhaust exits, a small hole where the exhaust silencer block touched the cowl, the oil radiator and feed pipes and some cut outs to accommodate the cylinder heads.
The accident crunched the oil radiator into the lower curves of the cowl and that needed beefing up and neatening
The net result was a super strong and great gloss finish but some holes were either enlarged or simply aren’t required anymore.
To test my theory out, without the need to do any ‘hard acts’ on the cowl , I planned to use tape to temporarily block off some of these holes and double the tape so that it would survive a short (30 min) test flight.
A short test flight, which ended up being 41 mins, proved very successful.
Even powered climbs were better than they were before.
Having left it for a few hours and thought about things .. one thing that came to mind on the cooling was the only major thing I changed on the engine following the ‘downing’
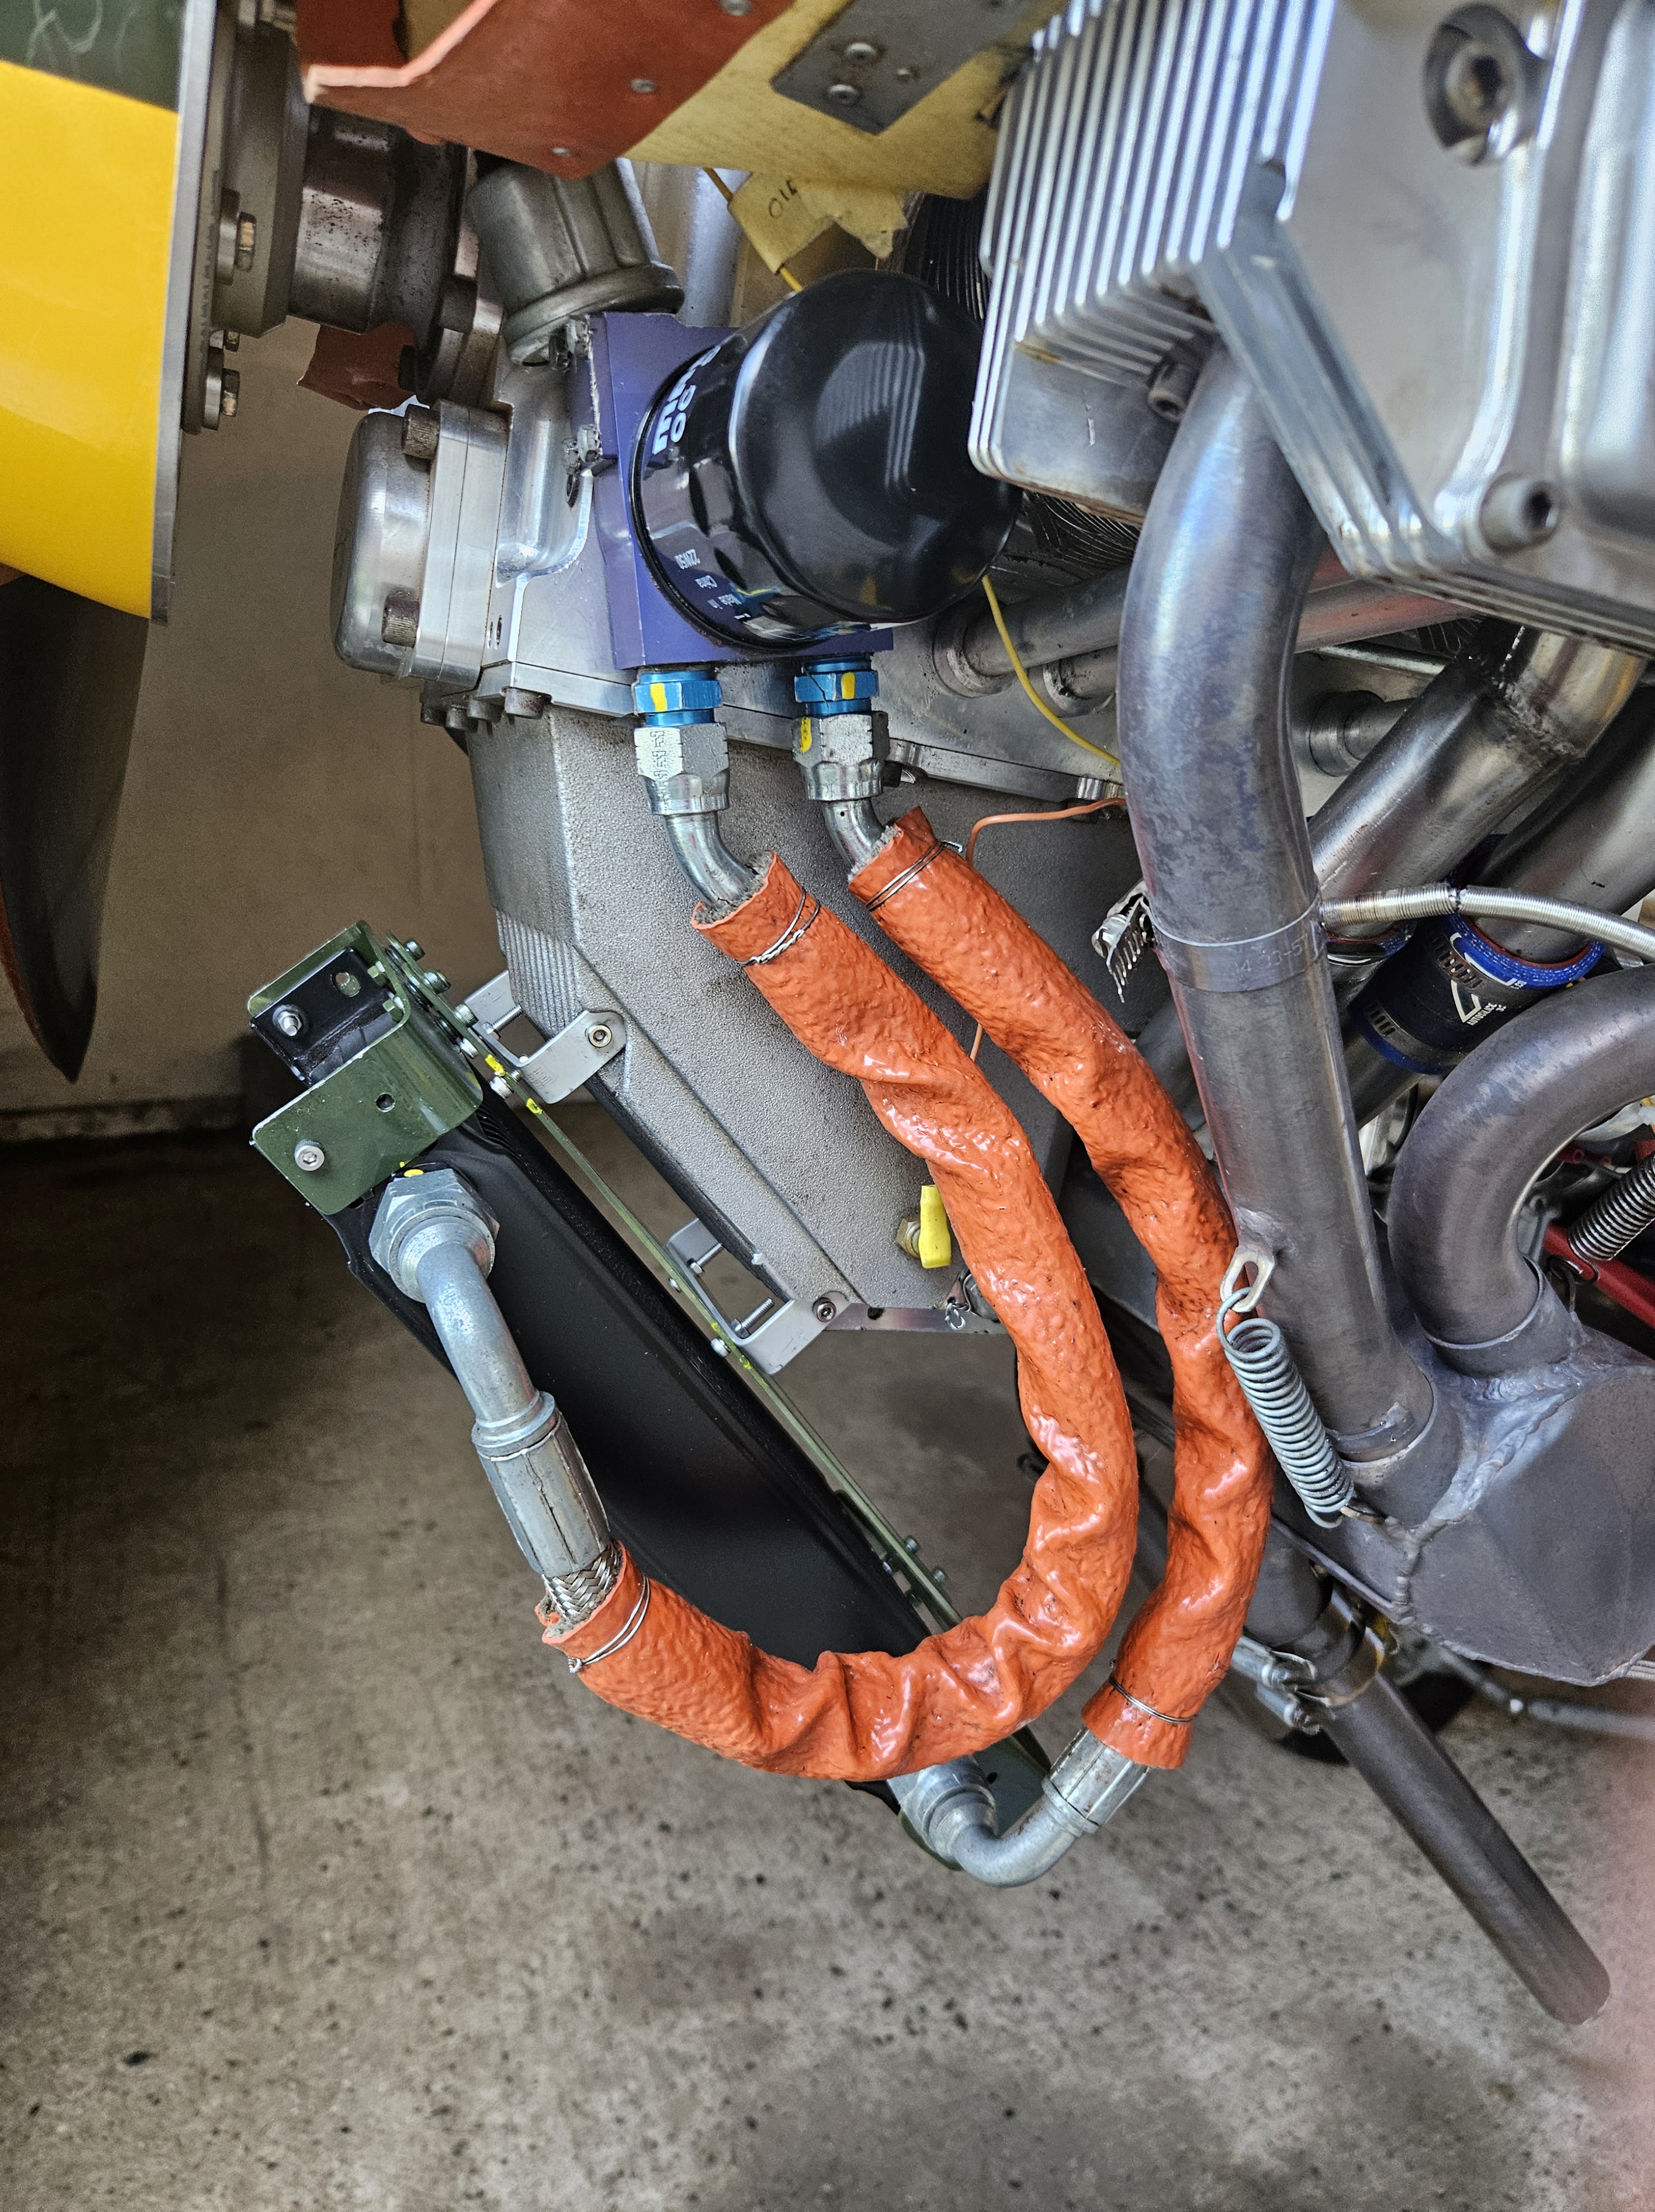
That was a brand new oil cooler matrix ..the original being the only part of the aircraft to take the brunt of the field landing !
This left the old matrix somewhat mashed …i removed it as it was leaking oil in the field on recovery.
What I didn’t do .. was take a photo’ before I removed the old unit and the pipes fitting could easily have interchanged
So, Plan A, is to switch the pipes out of the TOCA, the theory being .. if I had the pipes the wrong way the oil would have to be pushed ‘UP’ from the bottom of the oil matrix vs a gravity style ‘in the top’ method of circulation.
Pipes have been switched, so awaiting good wind direction and strength for a retest
Part II – investigation continues …
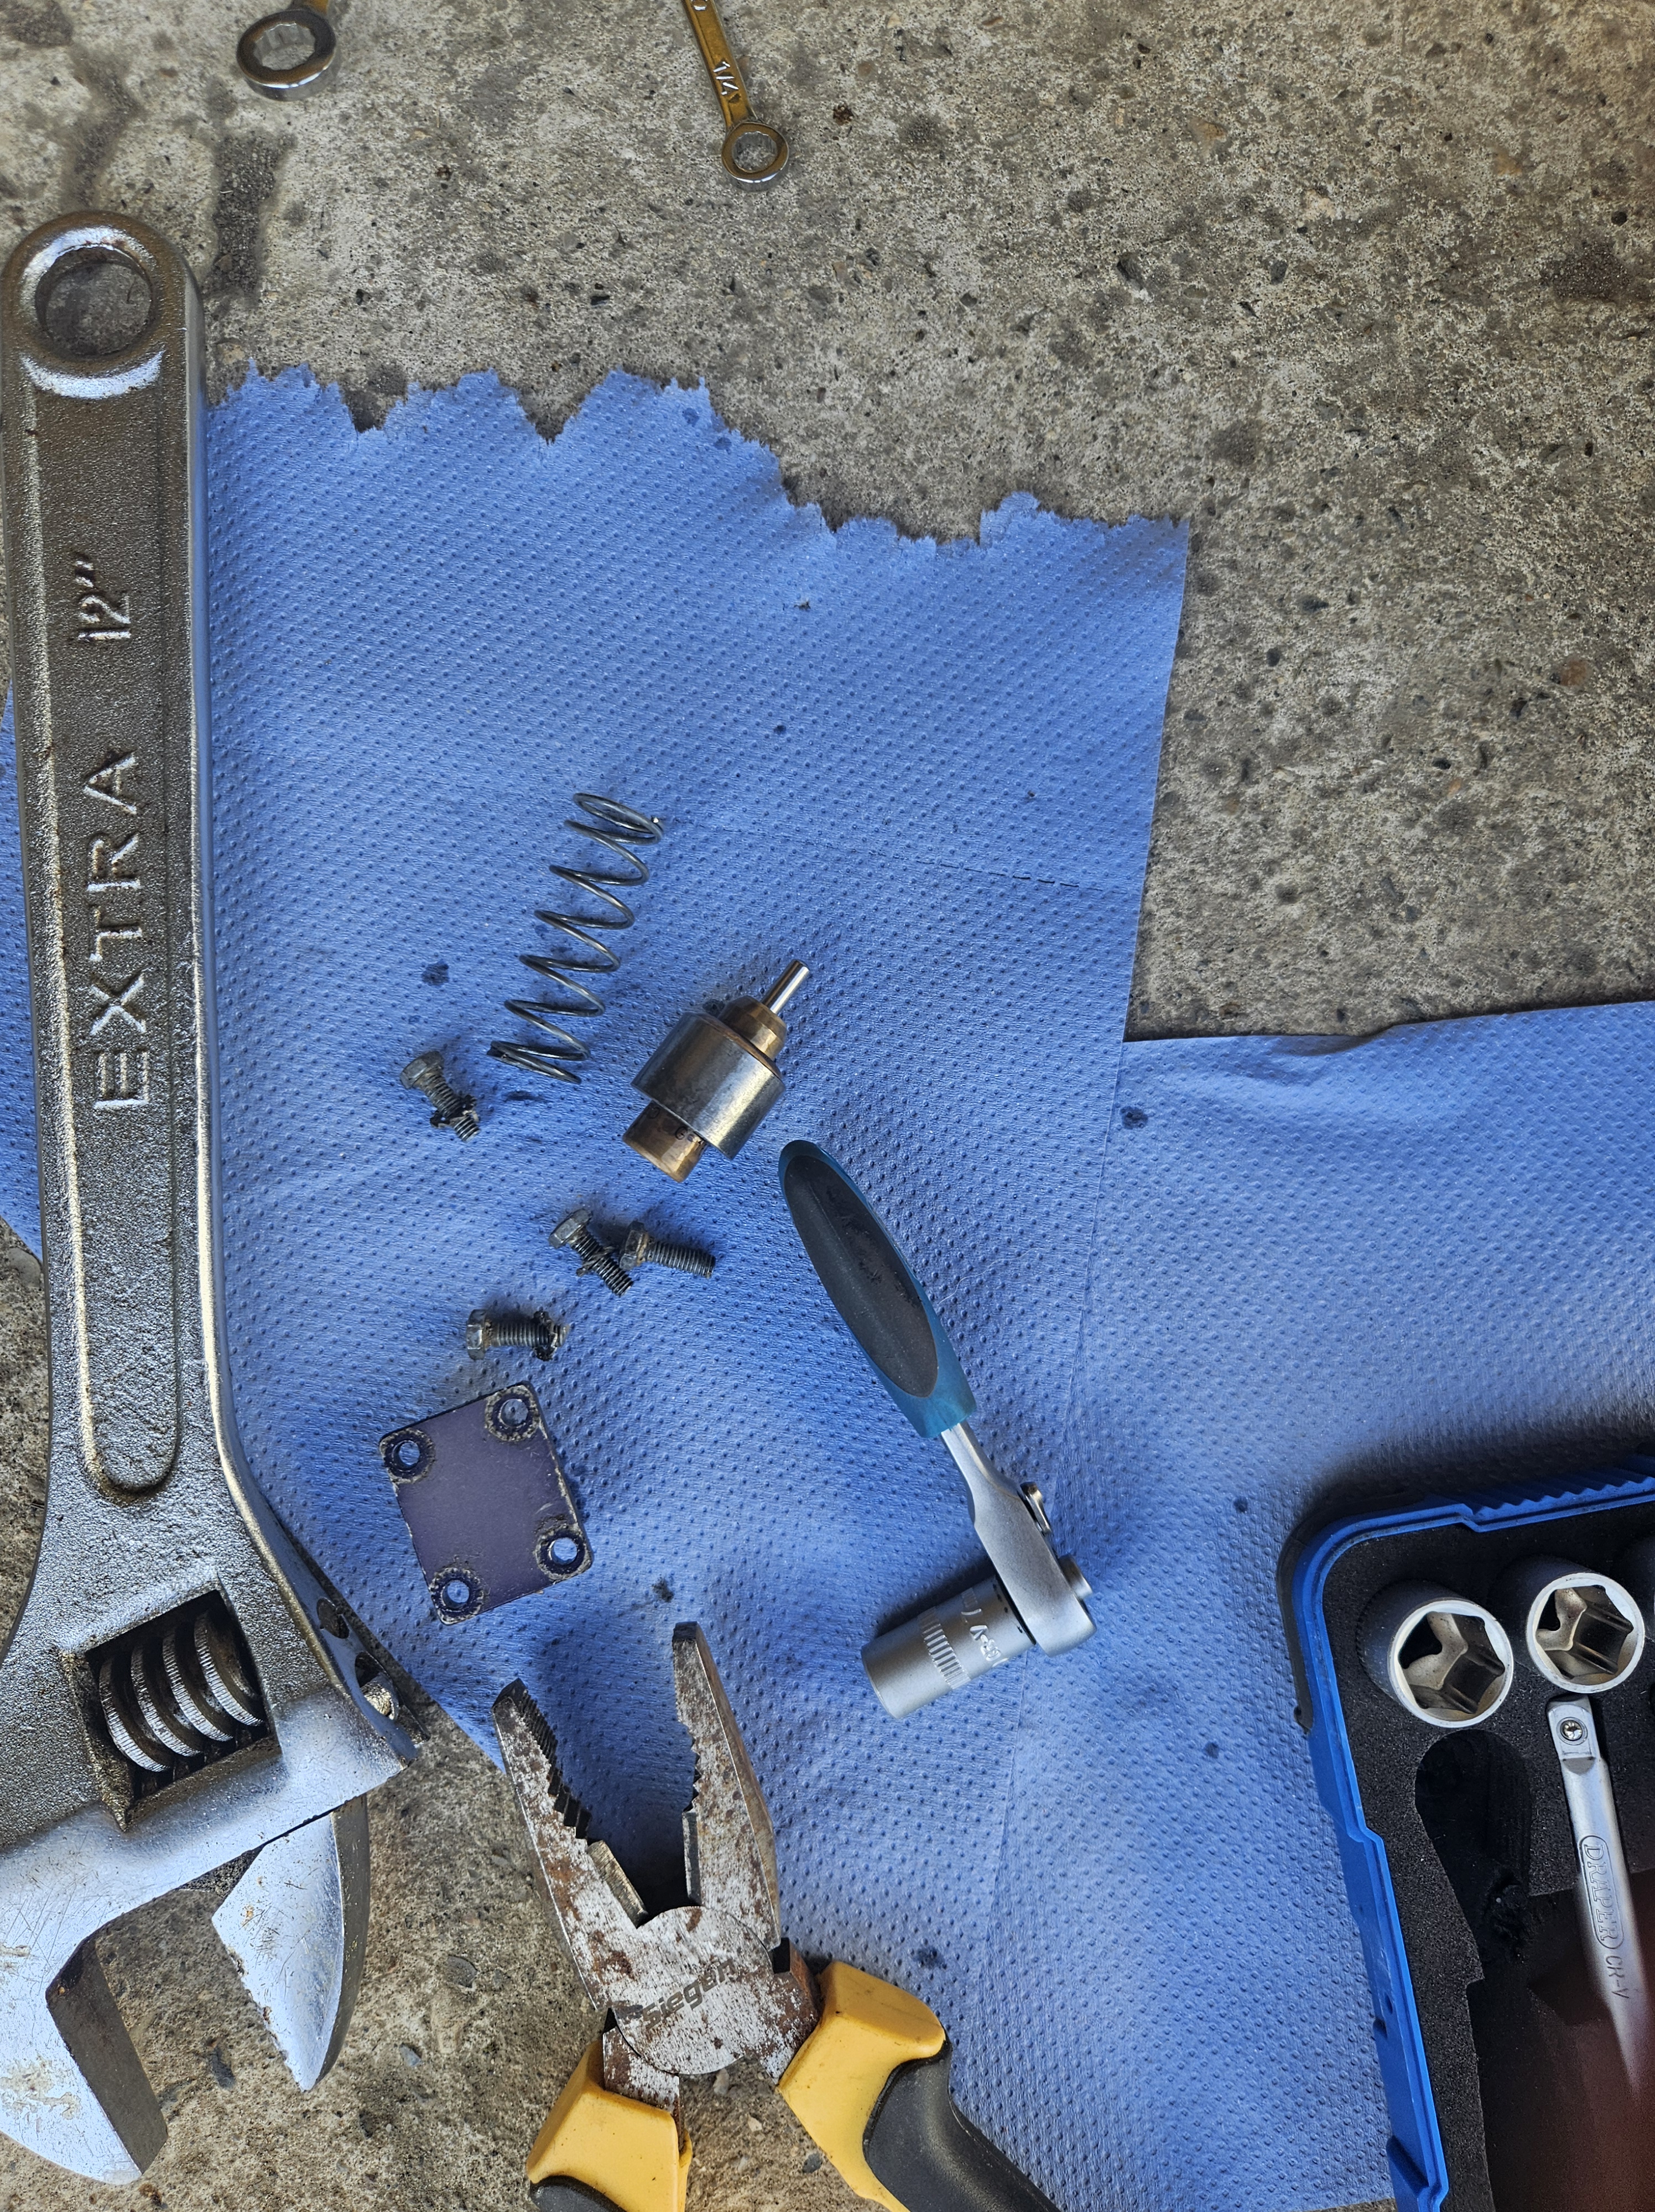
So, I thought if the TOCA was causing some sort of problem, ie the thermostat was perhaps causing an issue, I would remove it .. like you do with a car .. and the oul just flows .. uninhibited … right?
Anyway, removed it, its under a little square plate and easy to remove. Test flight number 4 (without the thermostat in place) and 3 minutes into the flight the oil temp started to climb past 80
Pulling around, throttling right back and brought her in on tickover.
On checking with the Jabiru guru Kevin H… it turns out if you remove the thermostat it CLOSES the feed .. completely!
So although this wasn’t what was required it PROVED what was wrong !
I suspect the thermostat valve is STUCK and needs freeing … then putting it back in for another check
final update – Yes, small valve was stuck after 12 months of inactivity .. boil it ..wiggle it up and down with pliers .. grease it and all back working fine 🙂
The day finally.arrived, where the paperwork just about exceeded the weight of the aircraft and, all being duly signed, Tom my inspector handed me the clearance paper.
This had already been pre signed by the Head chap at the LAA – major repairs and new builds seem to go through a slightly escalated route to the normal annual update.
The wind on Saturday would have been fine a while back .. 8 or 9 across ..but I didn’t want wind to be a factor at all post the 12 month + rebuild and today, Sunday, it as around 4 across.
Having checked the walk-around for the umpteenth time I had pre fuelled on Saturday, with 20L in the top (holds 36) and 20L in the main (holds 40), i finally pulled her out for start up.
I started up and warmed up and took off with no problems… scooting down the runway to climb out to the North and into the 500′ circuit. The aim was to keep the first few circuits close and ‘glideable’ in case anything was to happen.
A few minutes airborne and a couple of touch and goes, and it was time to come back into the circuit and land. It’s so easy to land this aircraft 😉 so ended up doing a couple.
Leaving it to cool, I removed the top cowling to check all was well in the engine department.
On the 2nd flight I noticed that the oil temp was rising a little on full power as was CHT no 4 …. this was only when pushing the engine a bit (3,200 rpm vs cruise or 2,700) so landed to check.
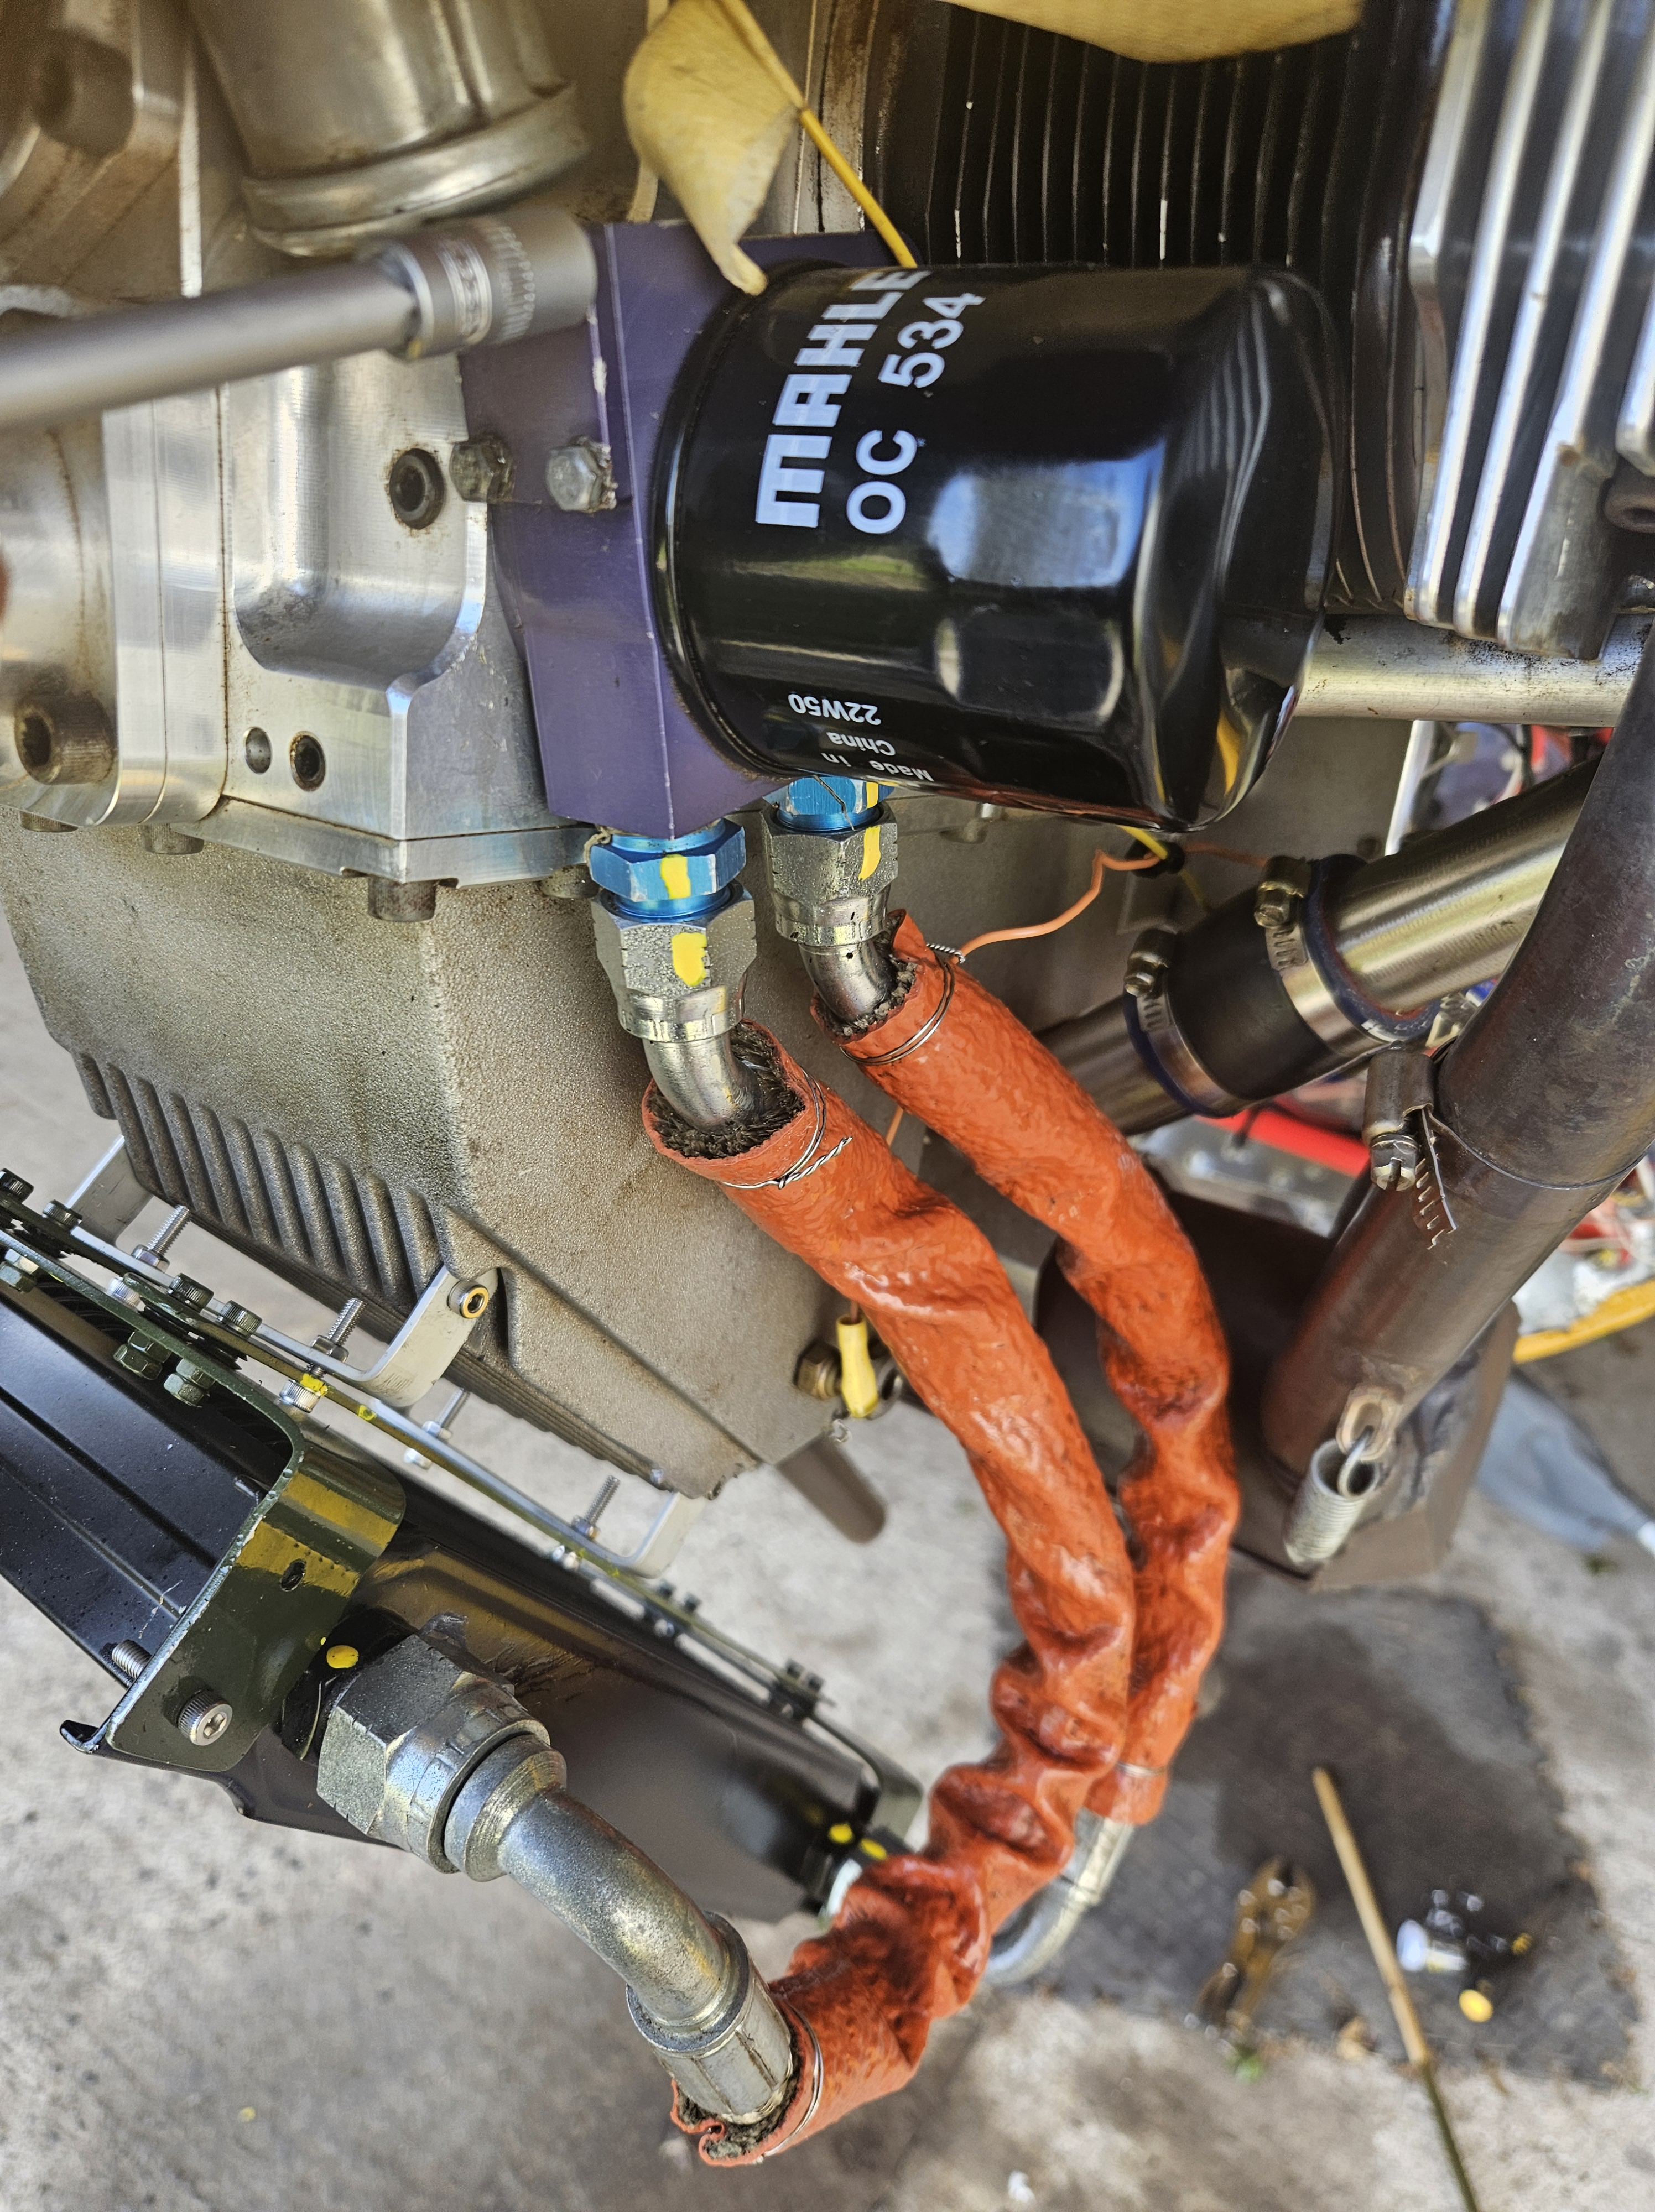
There was nothing obvious but, I wondered if perhaps the TOCA, the block that prevents cold oil being pushed around the engine (until its up to temp – of 50c, after which the valve opens and lets oil flow through the matrix), had a stuck valve ?
I decided to remind myself of what the TOCA did in terms of functioning, so checked my own blog !
It was simple to remove the thermostat and refit the blanking plate. I can run without this in the summer as the engine quickly gets up to running temp anyway.
The 3rd flight – video below, was a test without the thermostat, and climbed out with a bit more confidence and climbed up to 1,000′ in a slow circling left hand turn.
Passing through about 700 the oil temp started to rise to the high 80s (max is 90 to 100) and the CHT 4 started getting up to 180 vs the 160s of the other 3 Cylinder heads.
I landed back with tickover down to a close right hand base.. keeping the engine cool.. all the way down.
This time on landing i killed the mags quickly on parking and undid straps and jumped out to check the oil feed pipes into the cooler matrix .. both pretty cold !
I parked up and let the whole lot cool down whilst I thought what it might be.
The fuel guage in the Sherwood has been a bit like a Cessna .. for those who fly or flew Cessnas … you never trust them and always dip the tanks before flight (not easy on the high wing Cessnas)
The original electronic fuel guage I installed years ago failed before test flying as it simply refused to calibrate. calibration was achieved by means of the fuel entering a small hole in a ling tube arrangement that fed into the bottom of the tank. The resistance,I guess, then gave you a degree of ohms based calibration for the 6 or so LED lights.
A short while after fitting the second it became slightly optimistic and pessimistic , by that I mean, show it some fuel and it always said FULL .. fly for 30 mins and it seemed to think you were in air 😊
So, for all time, I’ve simply performed the hugely accurate ‘open the tank and look in’ technique .. which doesn’t need power ..doesn’t really need calibrating and has served the test of time ! Fadt forward to the recent rebuild and the LAAs insistence that a fuel guage be fitted. At first I was reluctant to try and retro fit the large alloy backplate and see through tube that TLAC fitted so some later models but, forced with the LAA directive and there being no real obvious alternative, I have fitted it this evening.
It turned out to be easier than I thought, there being 2 threaded holes in the tank, one at the top and one at the bottom. These were fitted with the tapered brass bit rings that allowed the clear tube to be warmed and slipped over and suitable clamps applied.
A hole was drilled in the dashboard and the tube fed through. I’d opted to not use the large alloy arm that TLAC supplied as my (long ago fitted) panel didn’t lend itself to have this retro fitted.
Nevertheless, the tube fitted neatly on the right hand side of the P2 panel- so I should be able to see the top 6” or so even with a passenger run situ.
Having drained the tank to fit the brass fittings, I then put a quantifiable amount in, 20L from my new Jerry can.
This gave a very satisfactory measure at pretty much top of the dashboard level. I’d expected lower, so lifted the tail but, after bobbing a little, it settled pretty much at top level again.
So it looks like I won’t get to measure full to top but I will know exactly when 20L left and, once I’ve drained a bit, will set the 10L mark as well.
This should provide e visual reference when I open the tap and dump from the new upper tank too.
All the above said, I have hatched a plan to devise and submit a MOD for a good old fashioned cork float … the sheer visuality of a wire suspended cork slowly going down or bobbing up has that tactile visuality that appeals !
Mike, at Priory is an expert on all things ‘original’ and has given some great advice …
Ah to only have to worry about regular maintenance and oil changes and not major rebuilds and the like !
Looking forward to the days I can be flying and then just taking a little time out to check plugs and change oil and clean filters .. the simple pleasures in aviating life ❤️
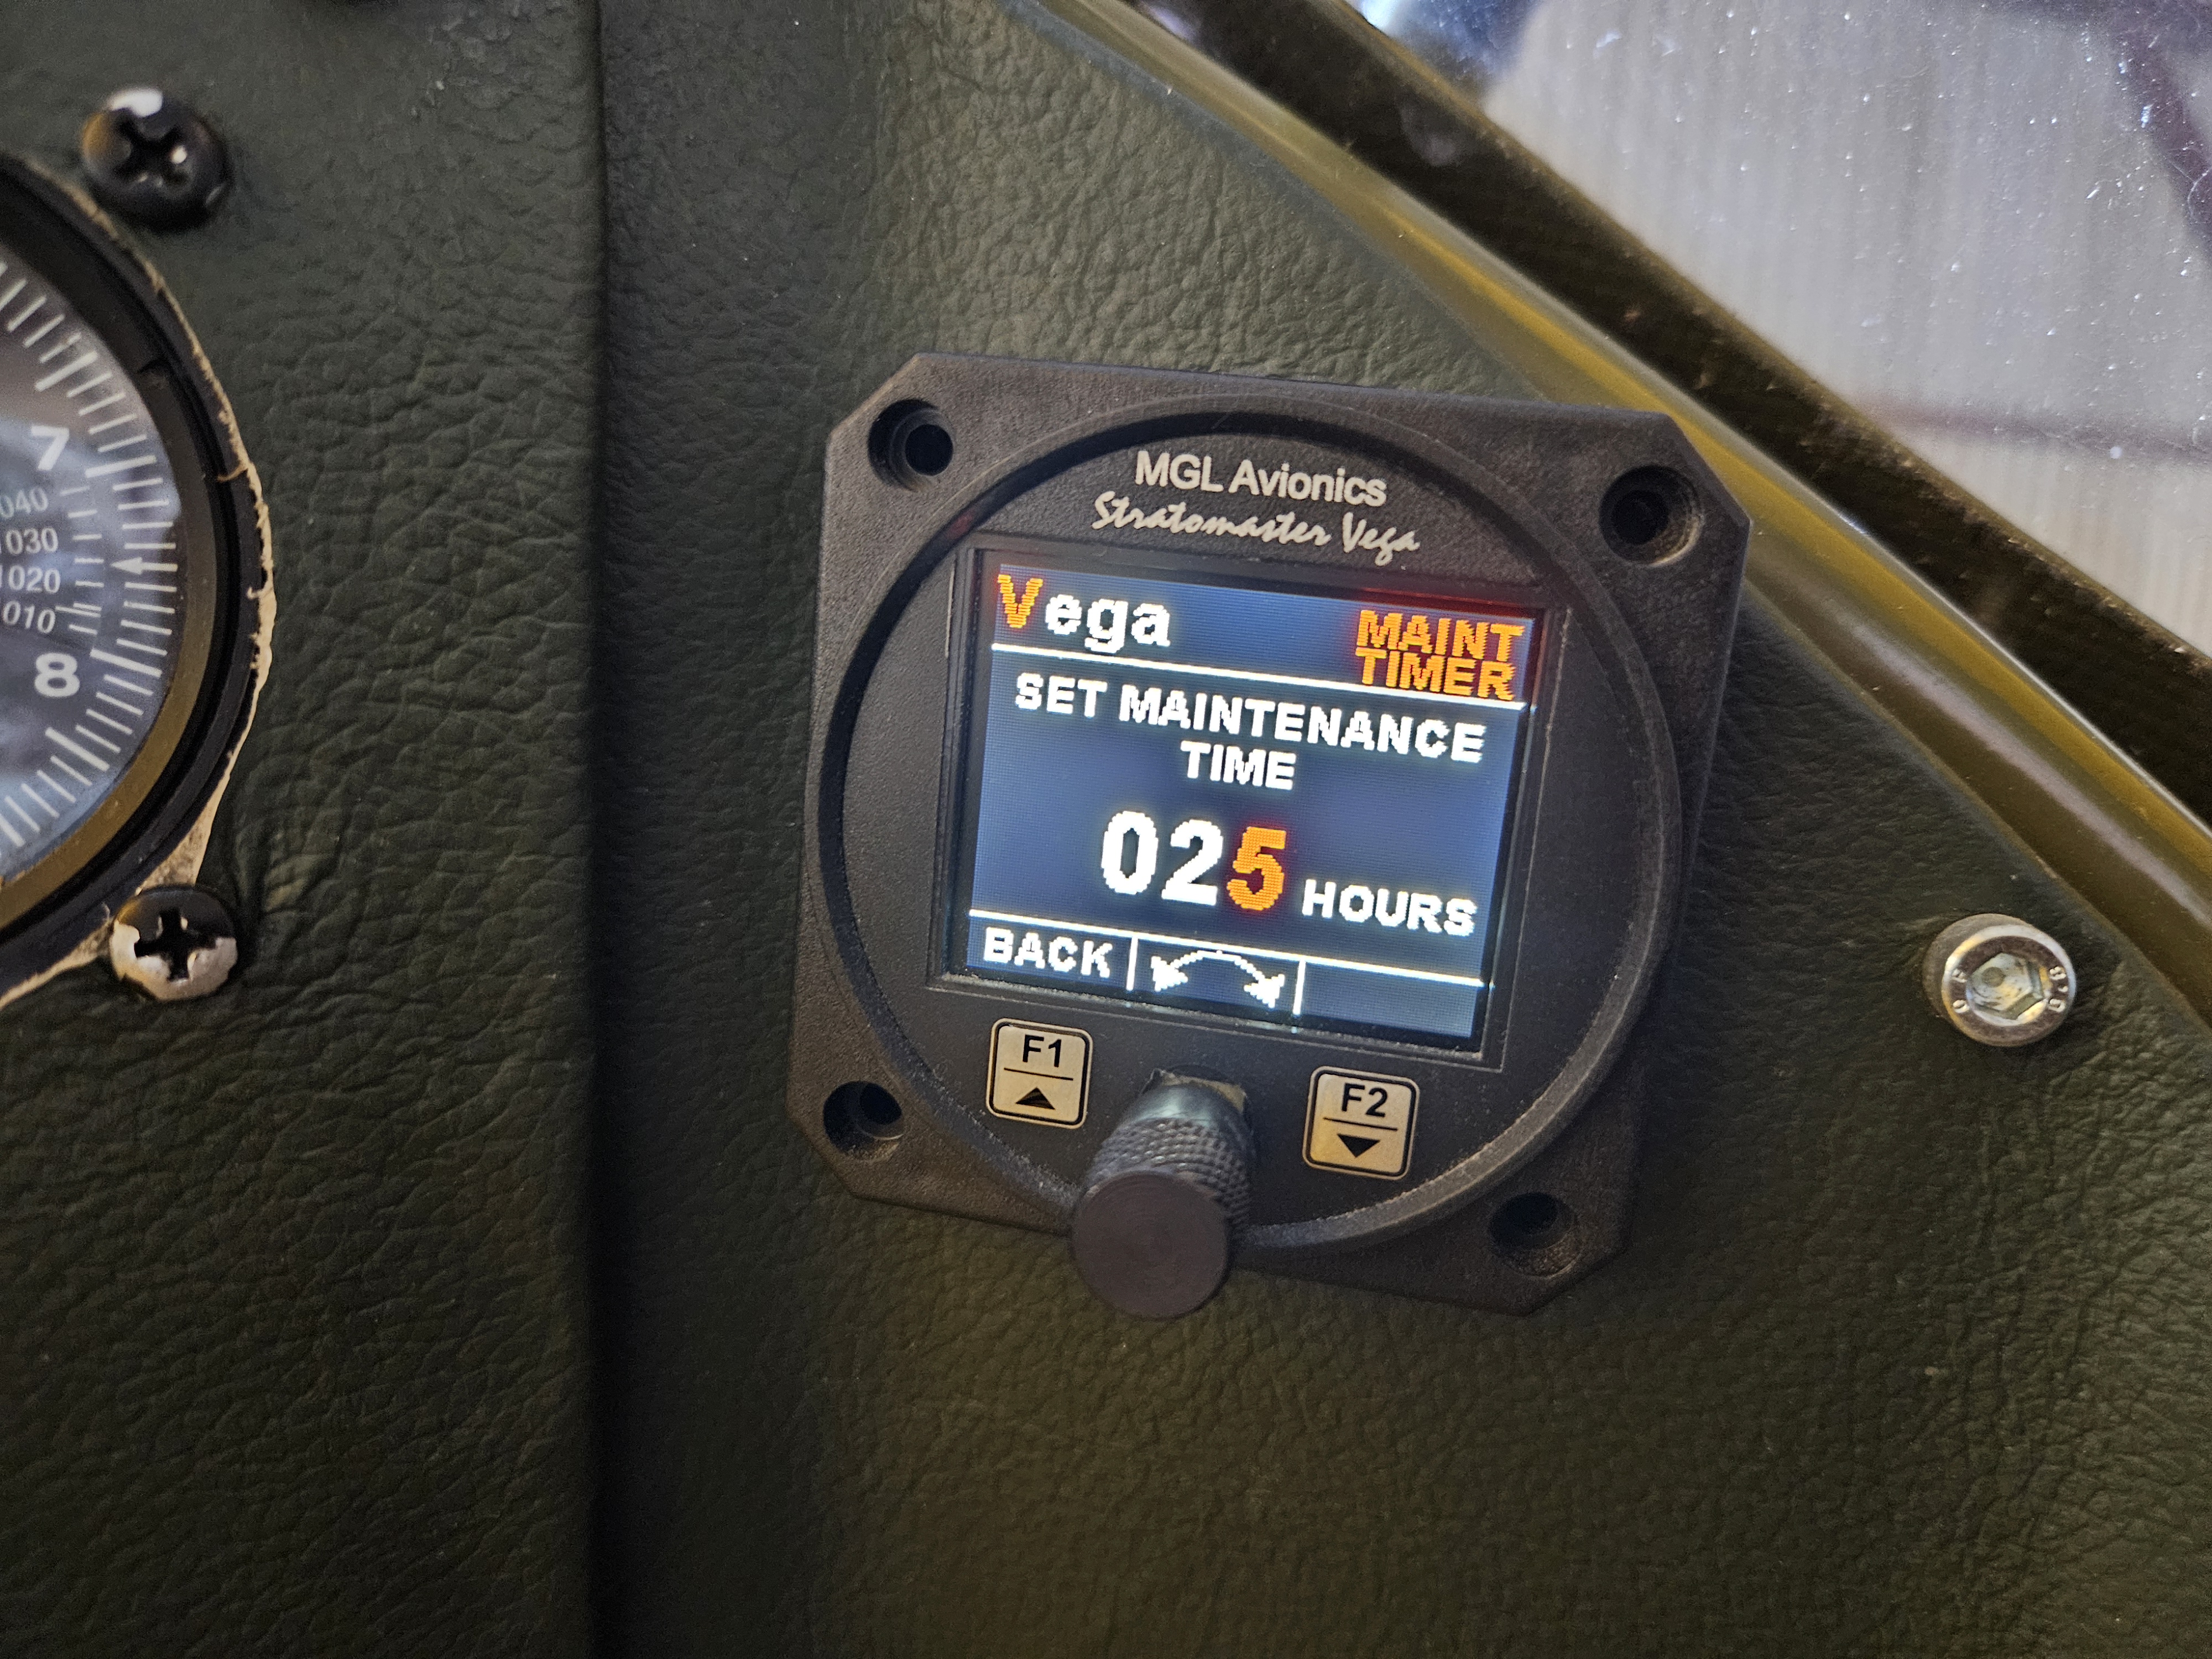
Ive got 2 maintenance timers. One in the rear P1 cockpit on the old ‘green screen’ MGL multiple instrument which also does the hobbs full timer count ..but i also have one on the relatively new Colour MGL that is in the front cockpit and gives a super clear display of revs. It also is way easier to see than instruments in the rear cockpit due to natural line of sight.
I generally have set maintenence and pil change schedules to a fixed 25 hours .. the manual says you can go 50 and 100 which you innately do on 25 x schedules but it’s so easy to work on why wouldn’t you chekx more frequently
That gap … when the inspection is done… the updates post the inspection have been done and it’s been rechecked .. and you are now awaiting formal LAA release for test flying ..
The last time this happened was just after the build .. all intervening sign offs have only required the inspector and then off you go .. this one, following a more significant update and work, is getting an oversight from the Chief inspector.
I remember the ‘gap’ awaiting the first release for testing… an odd mixture of frustration (because I wanted to just get her tested after the 4 year build) and anxiety (because a sign off would mean i would HAVE to get on and put all those nuts, boots, wood, metal and fabric into the air for the first time).
You then get what my good friend Andy Brown talks about…Imposter Syndrome .. im not a qualified engineer, ive never done anything like this before, were all those late late nights leaving me too tired to check and re check everything, what would friends and family think when this all turned out to be a long 4 year unmitigated disaster and waste of time and money !
This time, the wait is more aligned with the frustrating trait .. the weather is always a factor and we seem to be in a spell of warm and relatively calm weather… so each morning and each evening feels like ‘lost’ opportunity.
The garden hasn’t had so much attention and tidying up home garage and base hangar after all the bits and pieces ive needed during the rebuild is a diversionary task that inevitably leaves you looking skyward and checking winds !
Ive mapped our the first 4 or 5 flight schedules to get a sequence in my mind and test things quickly and efficiently.
Im not going to fuel the new top tank initially (it’s had its leak test on the ground) but can be eliminated from the initial flight and so cut down the list of ‘variables’ to contend with on that first return to the air.
The initial flight can then focus on new main tank, new upper starboard wing, repaired upper port, new trim tab and general handling. The planned duration ot this one is simply ONE circuit.
That’s going to be about 3-5 minutes but will allow a quick cool down ground check before running the 2nd and 3rd where I introduce the other tank for powered leak checks.
Post the leak checks i can get both tanks covered over in Oratex.
In the meantime .. it’s time to ‘fettle’ .. thay word all pilots use when the work is never ending .. always something to do..
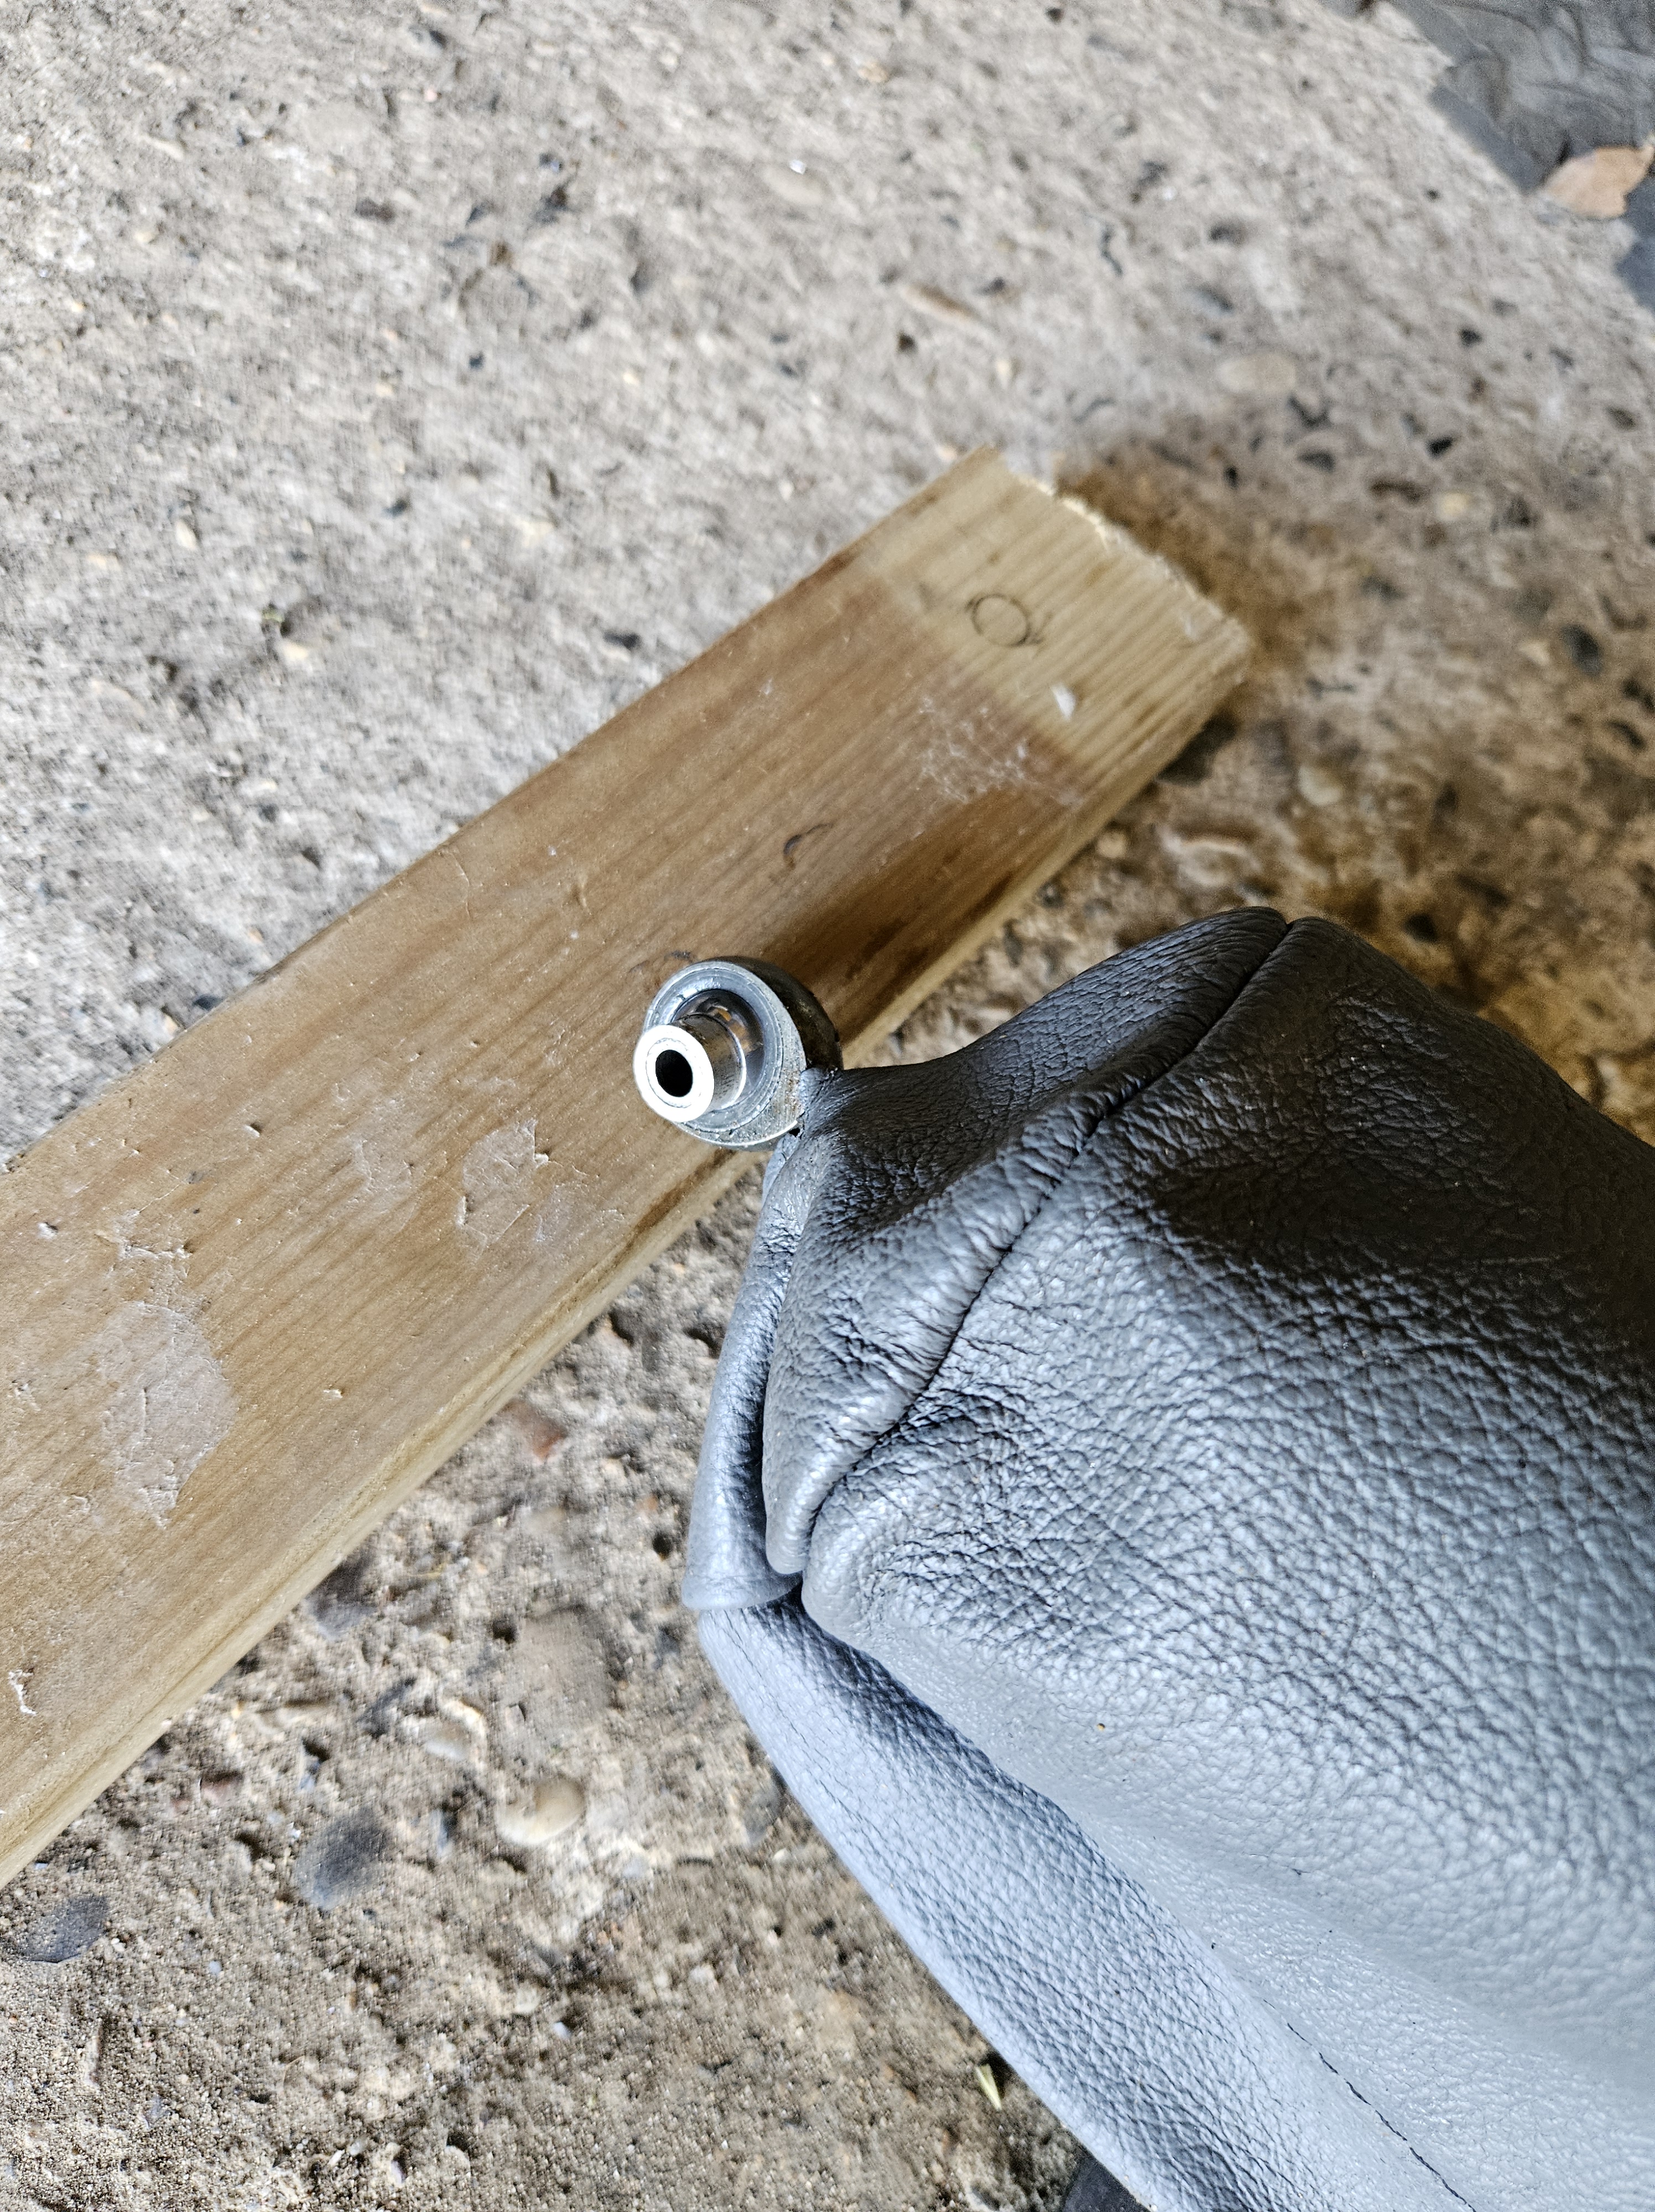
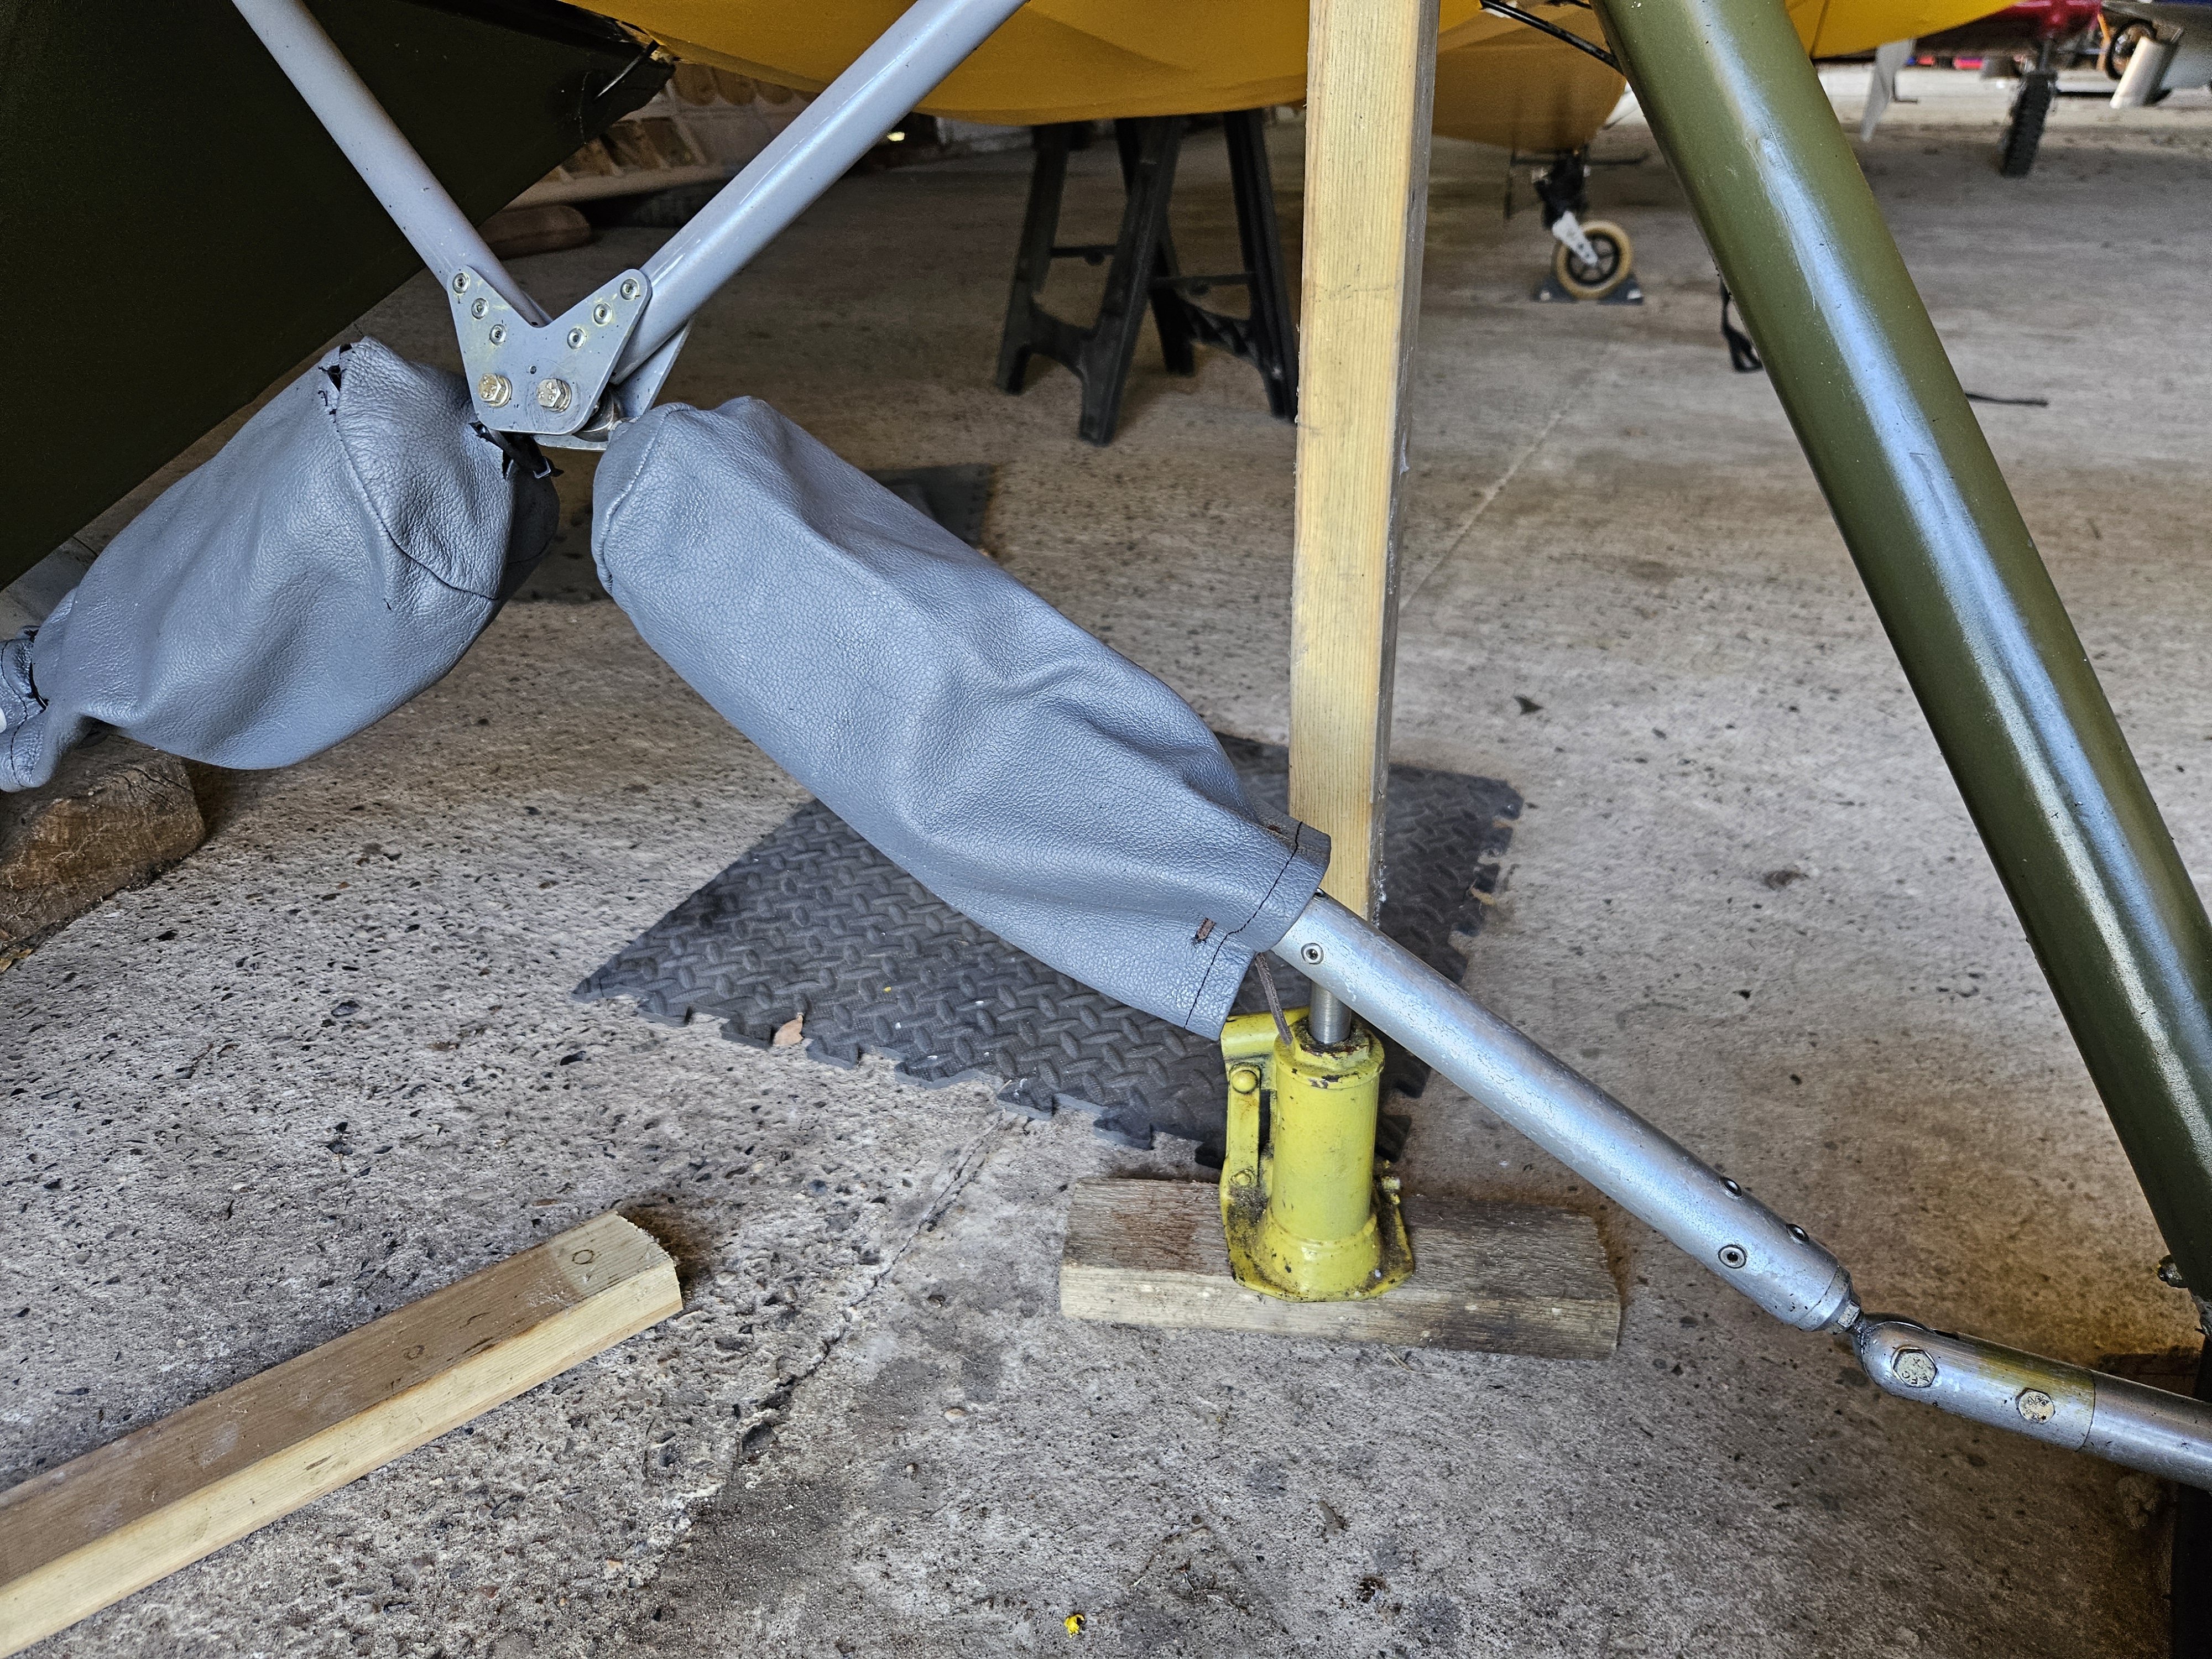
In this case it’s get the leather boot over one of the legs that has been left open for some time. I’d left if off to check any ingress of smoke oil but all is fine. To slip the boot on you need to jack the aircraft up and undo the centre bolt on the leg mount.. not an easy task (first tjme) but ive done it many times and jacking at the top of the leg works just fine .. ot also let’s you check brakes and free running of the wheel.
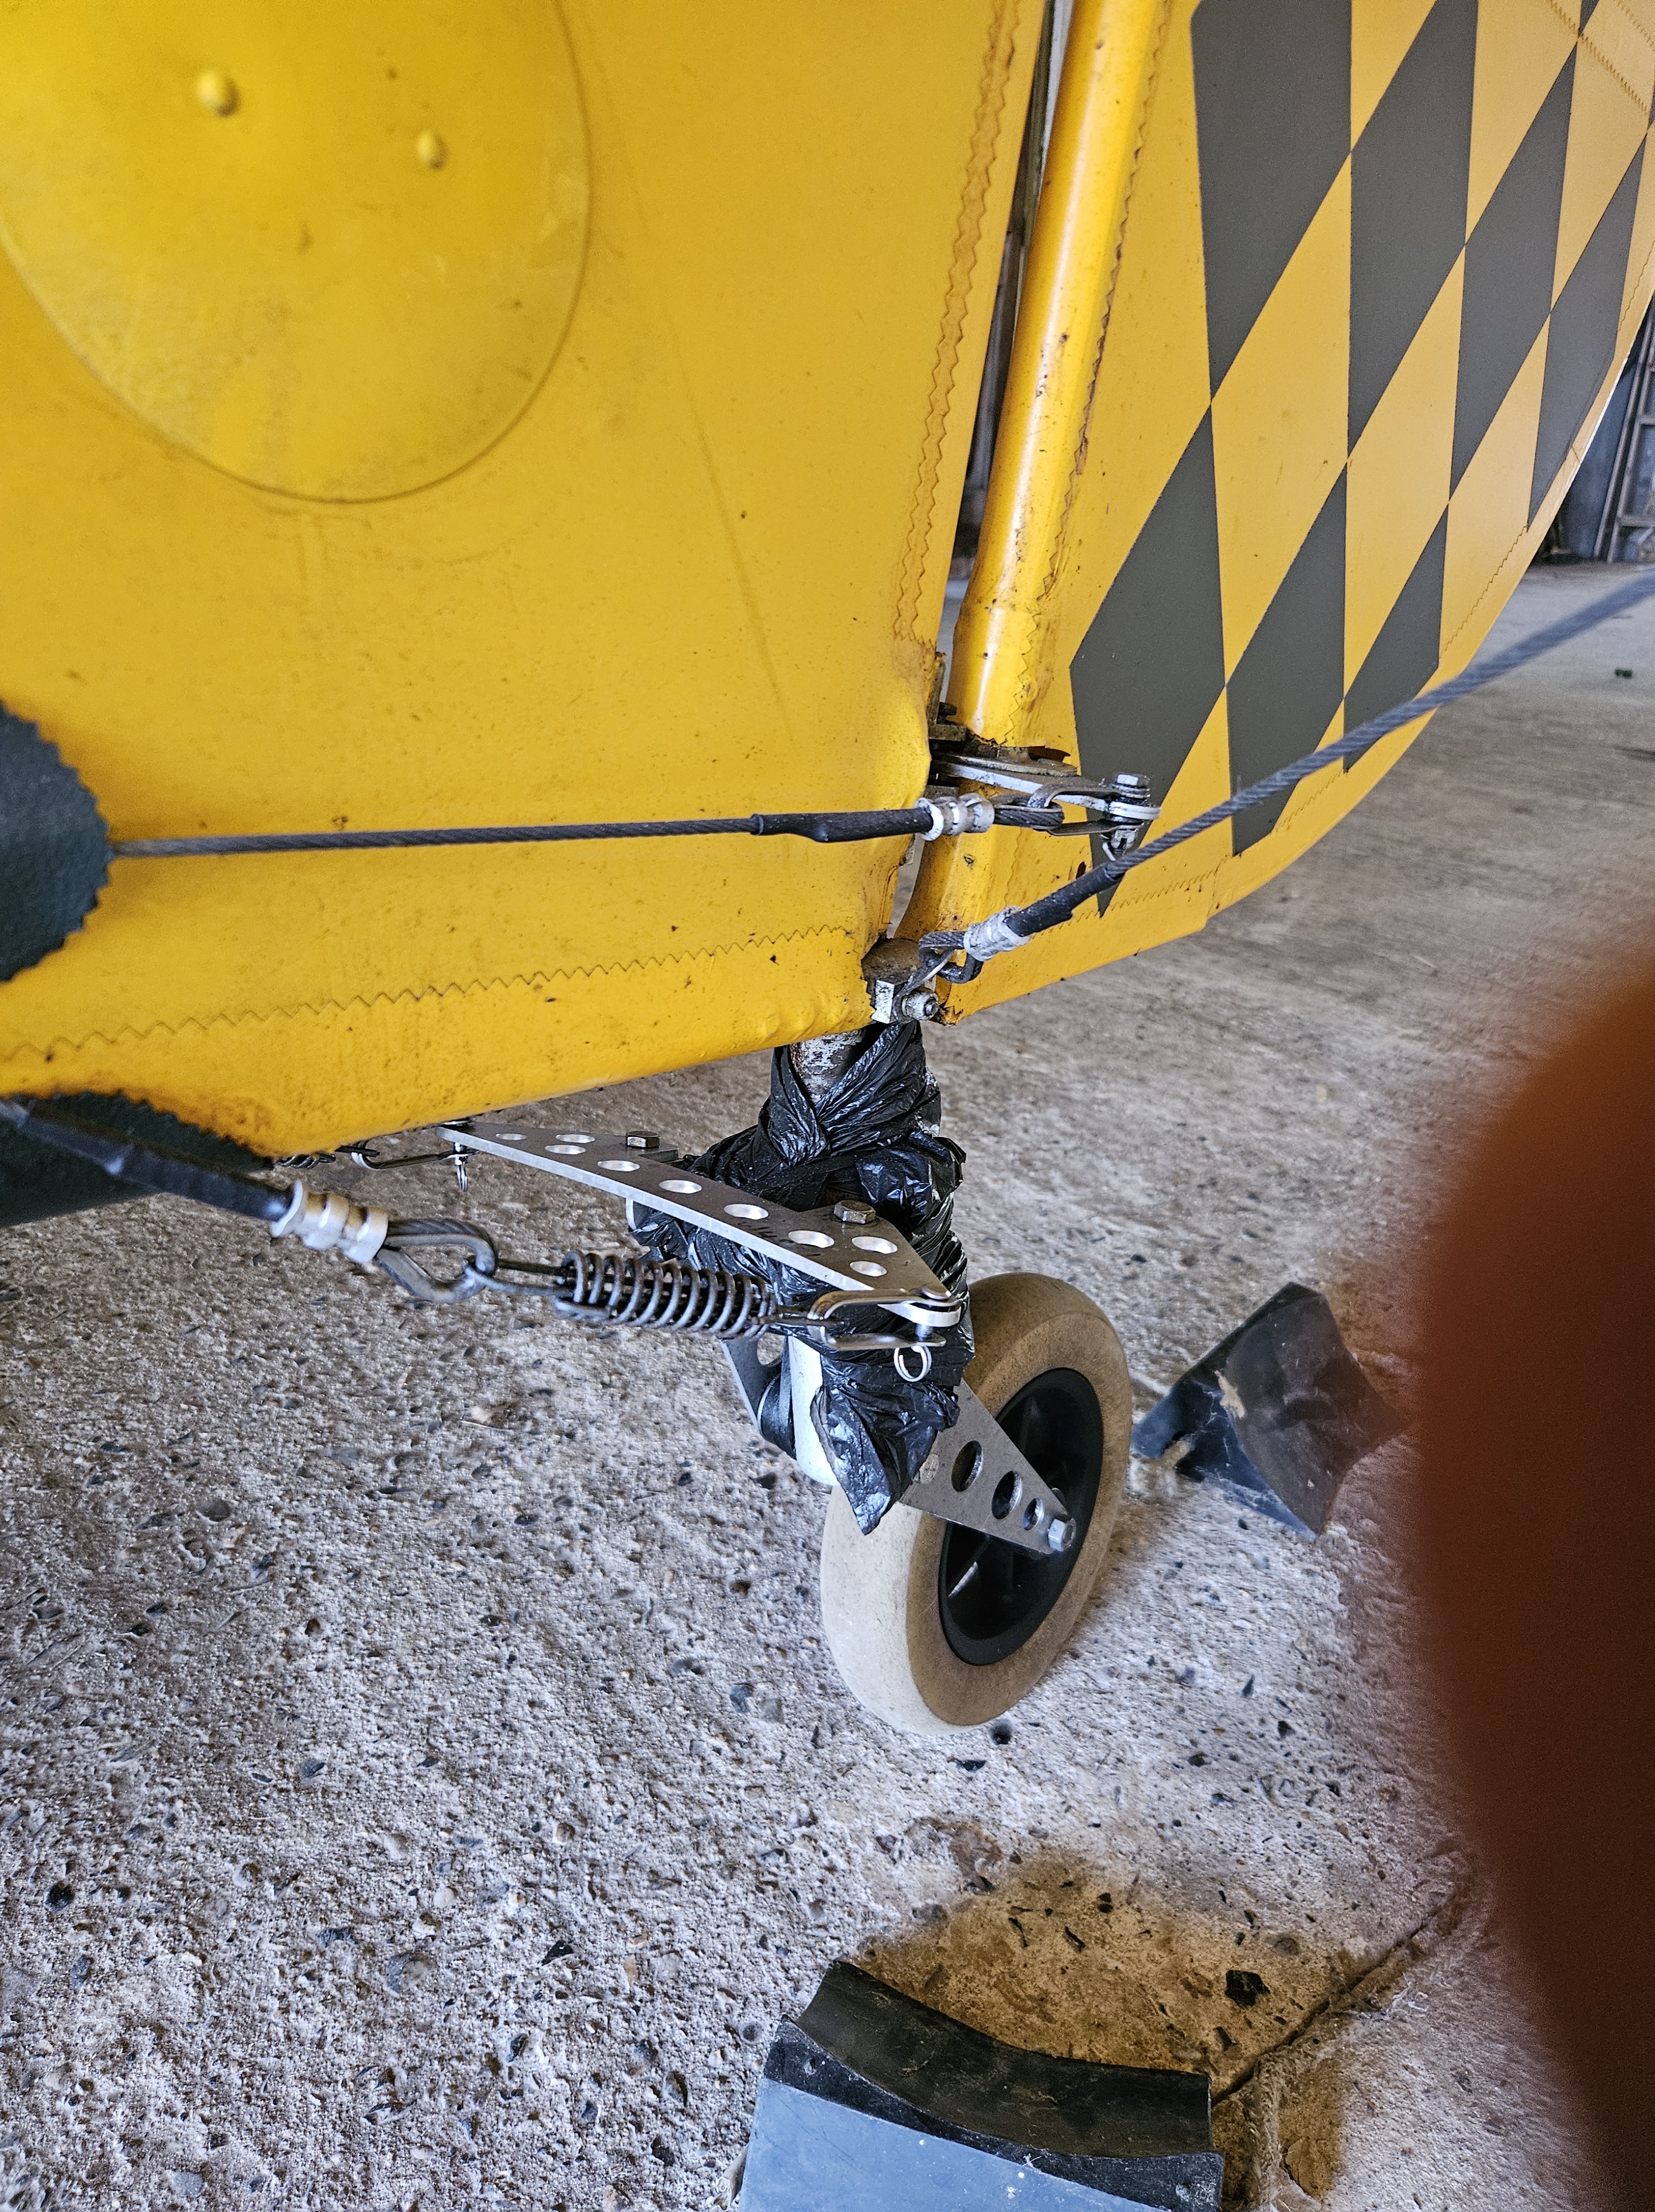
Another ‘fettle’ is the tailwheel. During the recovery we had put a strop on the top arm of the tailwheel and bent it slightly as we jiggled the aircraft back onto its main gear. This was a pretty cheap item to replace and took all of 10 minutes to do but id decided to not reconnect the steering cables. This makes it way easier to get in and out of the hangar and also pirouette on the ground runs on a fairly narrow turning area.
Its a quick job just to remove the pin spring lock and connect up again .. shame as I used to love the control the Stampe SV4 had with its pop out tail steering. This is where the rudder movement provides a ‘slaved’ degree of follow …but then the cables (usually spliced into the main rudder feeds) reach their limit and the wheel won’t turn any more… in some cases the tail mechanism allows the movement to ‘snap out’ usually against a ball bearing and it goes full castoring until it clicks in again .. really neat idea !
I haven’t got that ! And James (Milne) assures me that I will eventually learnt the skills of blipping the throttle and using rudder to coax an aircraftto turn sharper circles!
I know my problem with this ‘prop threatening’ manoeuvre… it’s that i instinctively hall back on the stick on the ground when taxying.. so planting the tail firmly in position
When you blip the throttle .. with full up .. it just loads the tail even more!
Ive got to be braver and use neutral and even forward stick with power to unload the tail whilst also applying a load of rudder … a evening test session beckons !
Whilst awaiting paperwork it’s good to get the engine settled in !
Technically it’s nothing to do with the engine .. it’s me !
Any lay off .. for whatever reason .. just adds a ‘tweak’ to your sensitivities ..
This is, in my view, healthy. Having that edge that says I need to check, double check triple check isn’t a bad thing.
So, it is all this that brings you to ground run the engine for a 3rd time … this will be followed by a 4th, 5th , 6th
Each start, each glance across the dash, each note of readings, each steady increase in throttle (up to.1,800 and she’s pulling on the brakes) back down to 8-900 tick over.
Being told by Bob and Trevor – both local experts, that she sounded sweet and clean and no rattles and smooth ..all increases your comfort and understanding that all is indeed well.
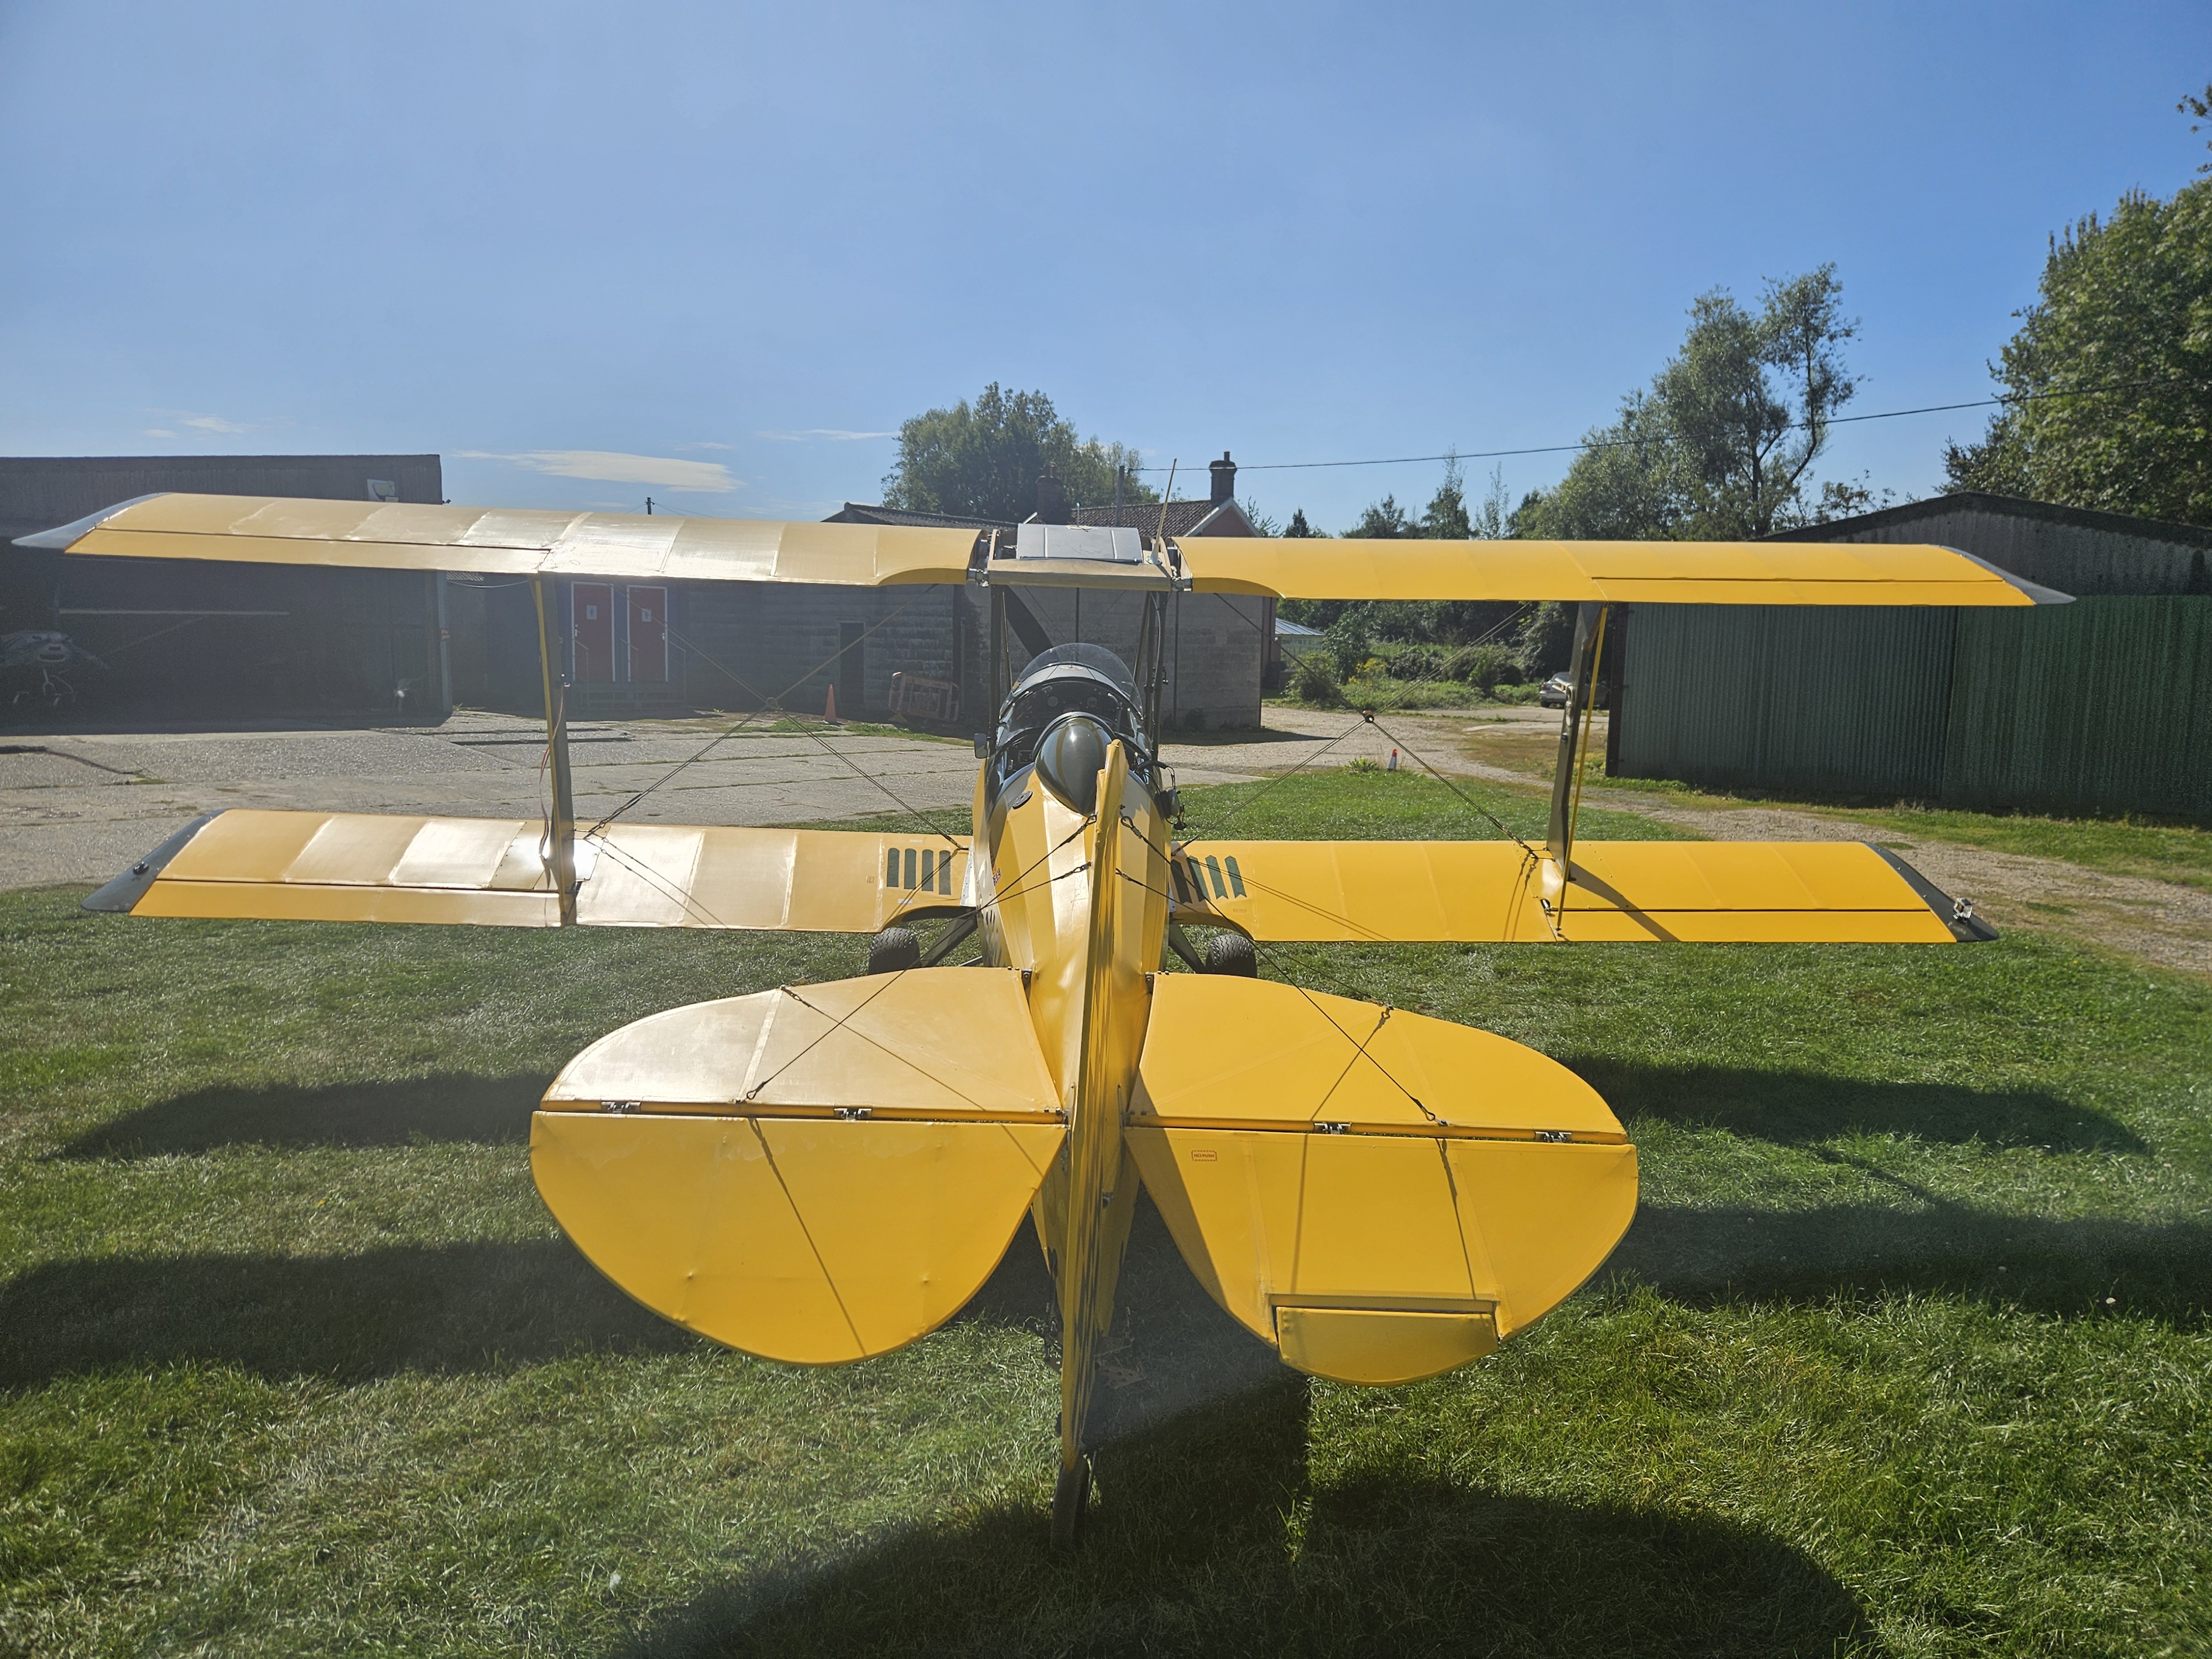
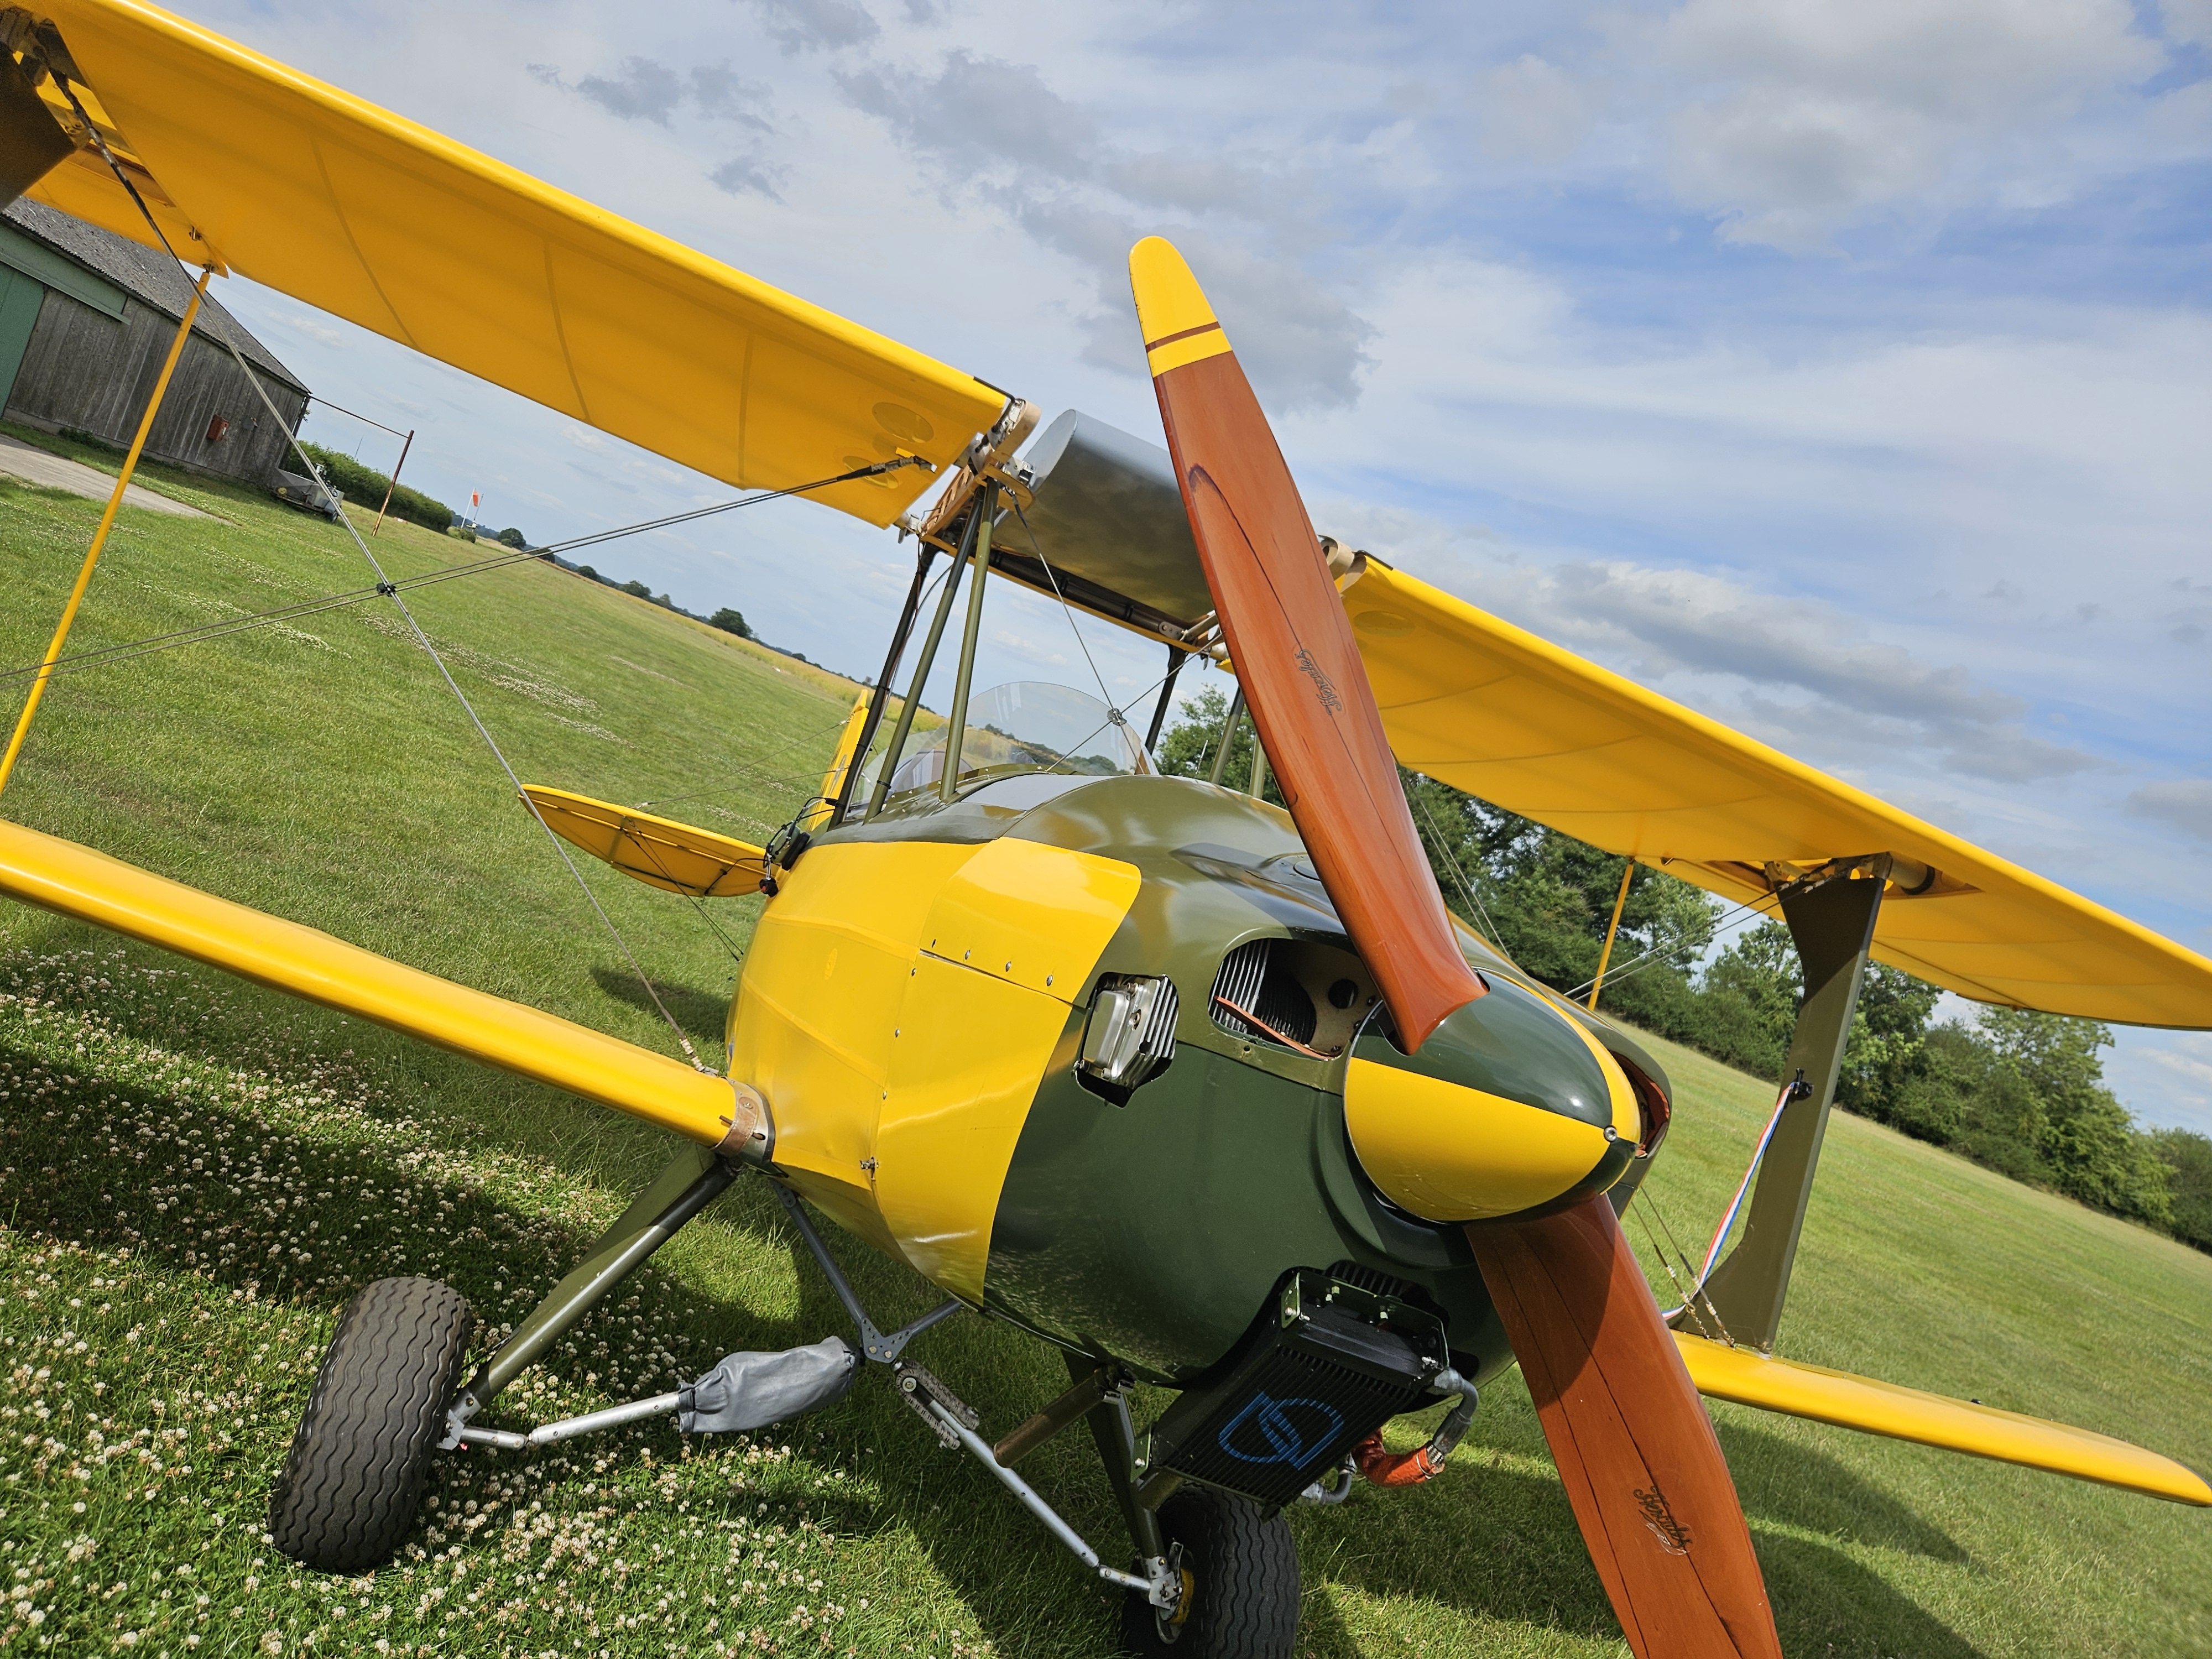
Ive always liked this colour scheme.
The upper deck olive green has the effect of making the nose depth look shallower and more streamlined.
The engine run was fine. Start first turn, choke full movement- post the adjustment last time.
Still just 1 EGT misreading ..but 3 are and 4 CHT all reading well within limits.. even in this hot day (28 degrees)
As I get nearer to test flight authorisation there are always some bits to complete and get ready.
The inspection panels have been off for some time so needed a tidy and clean and then refit.
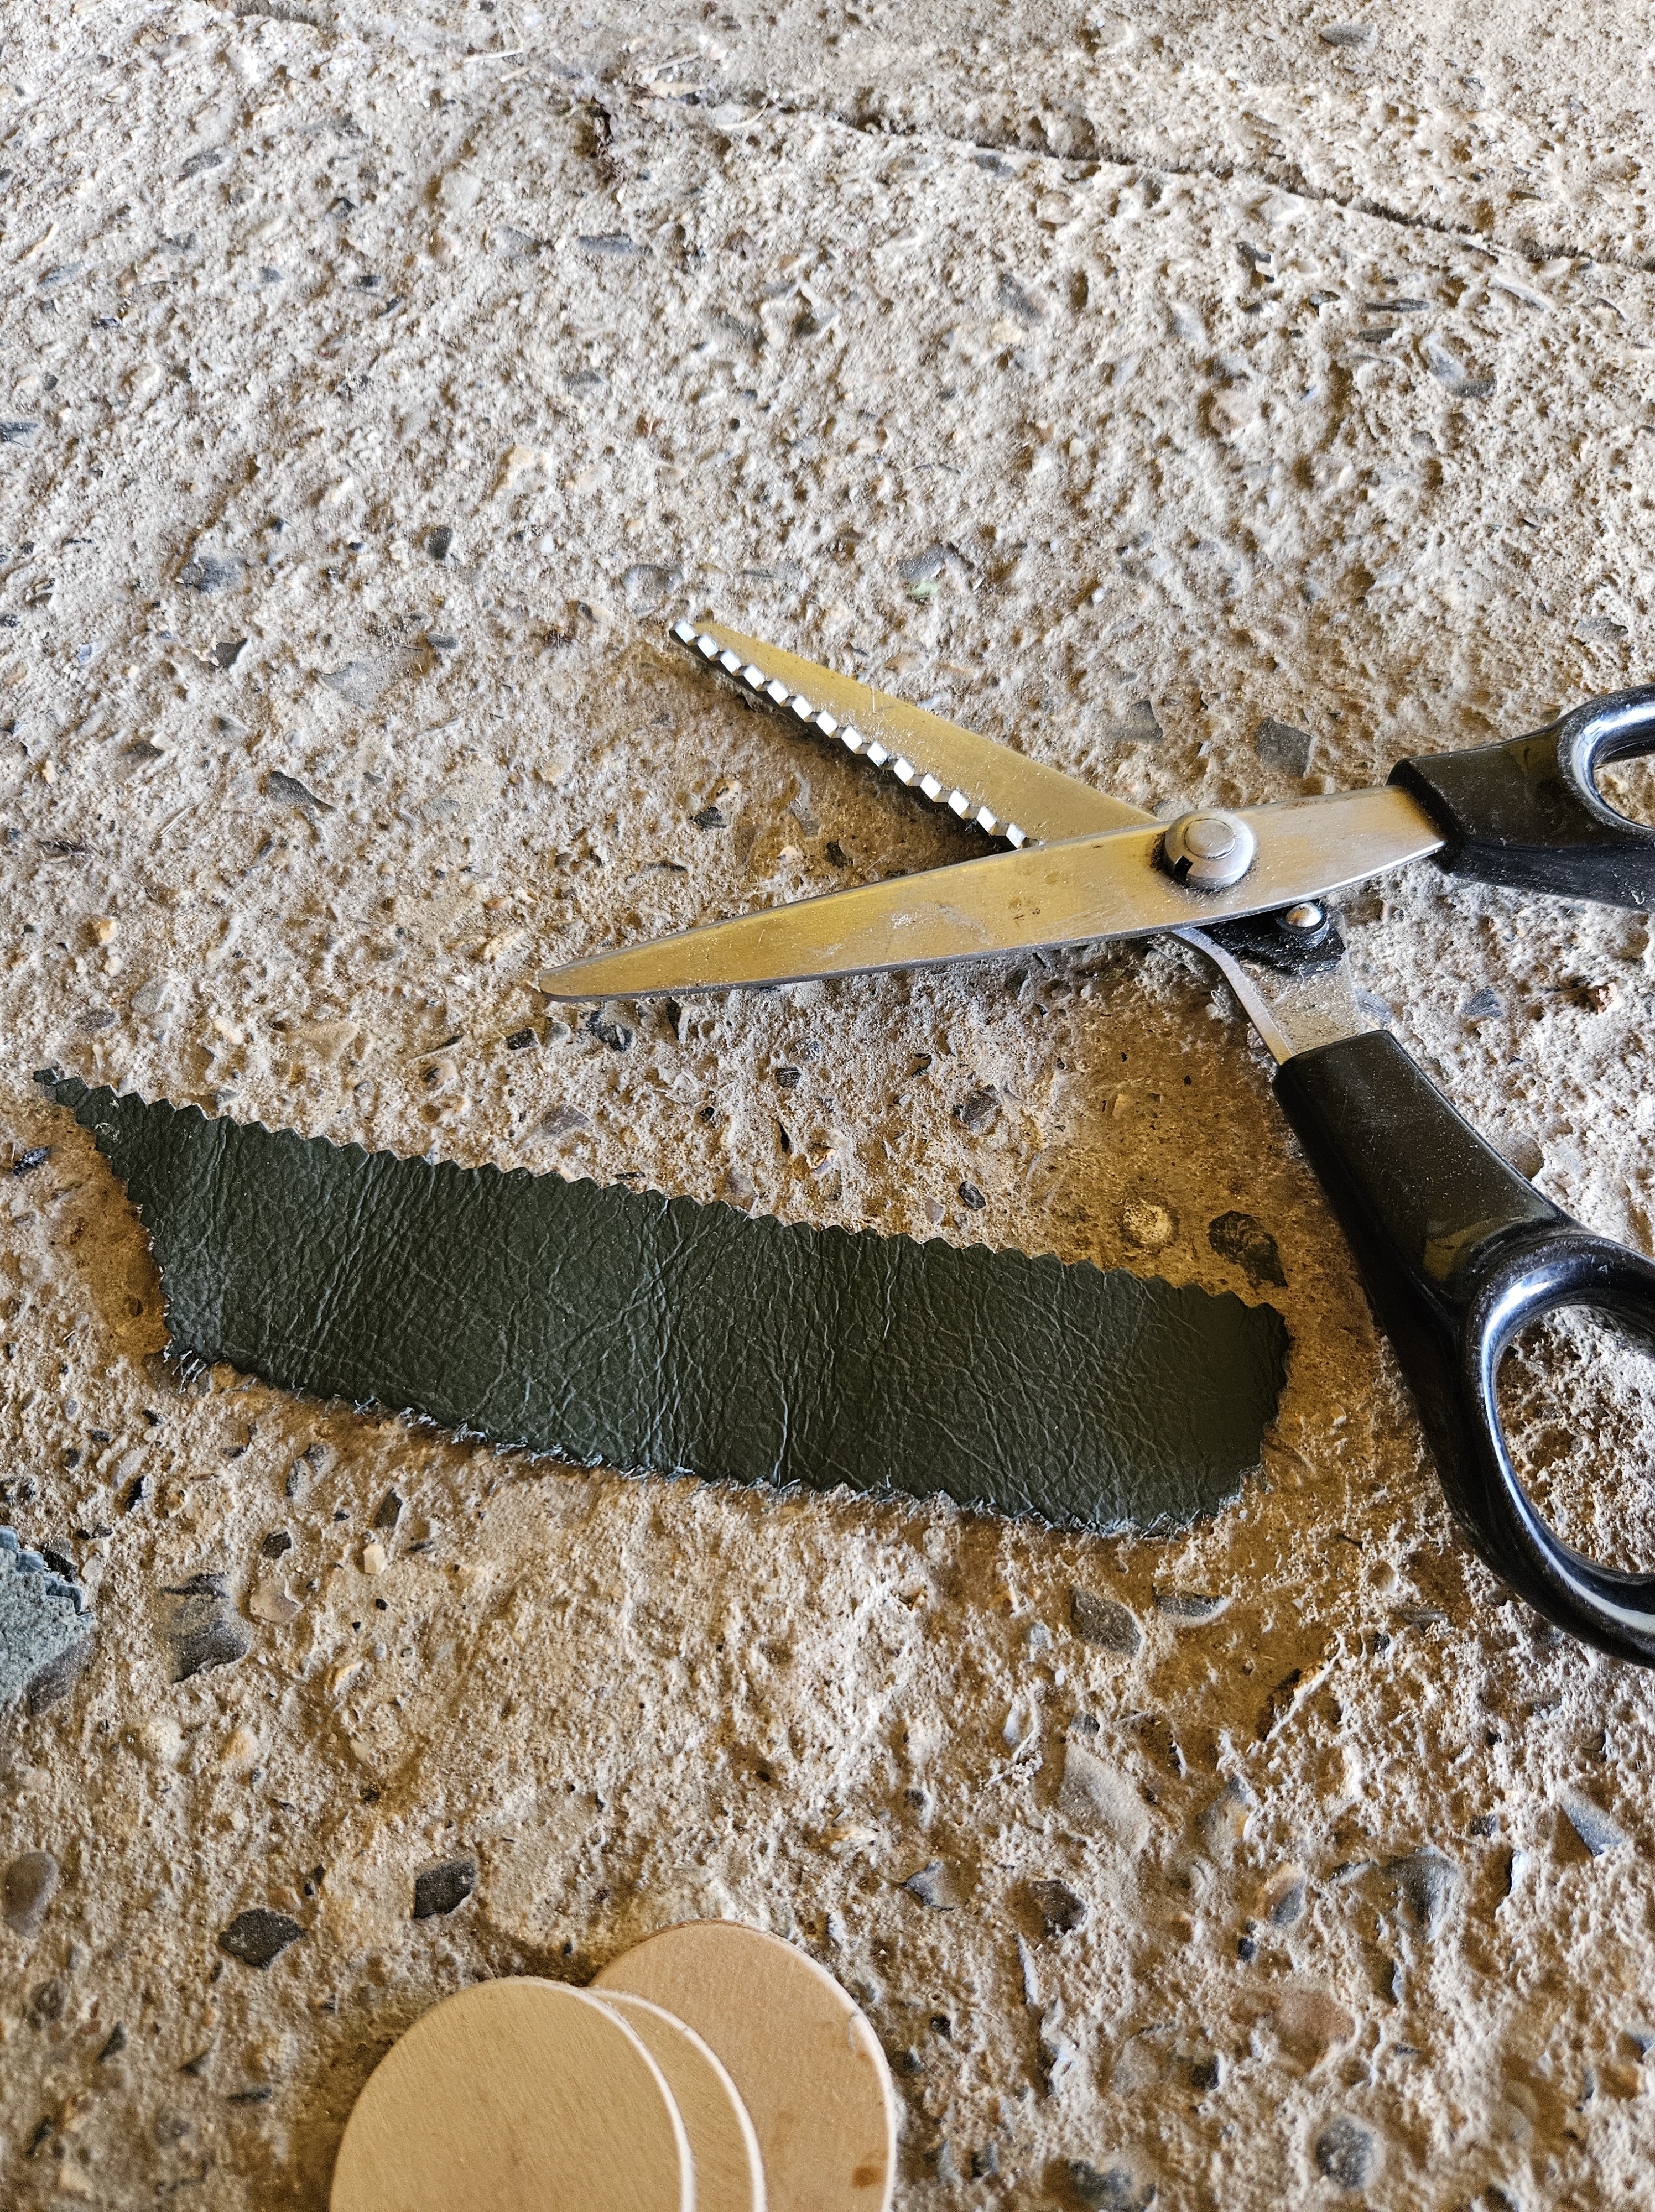
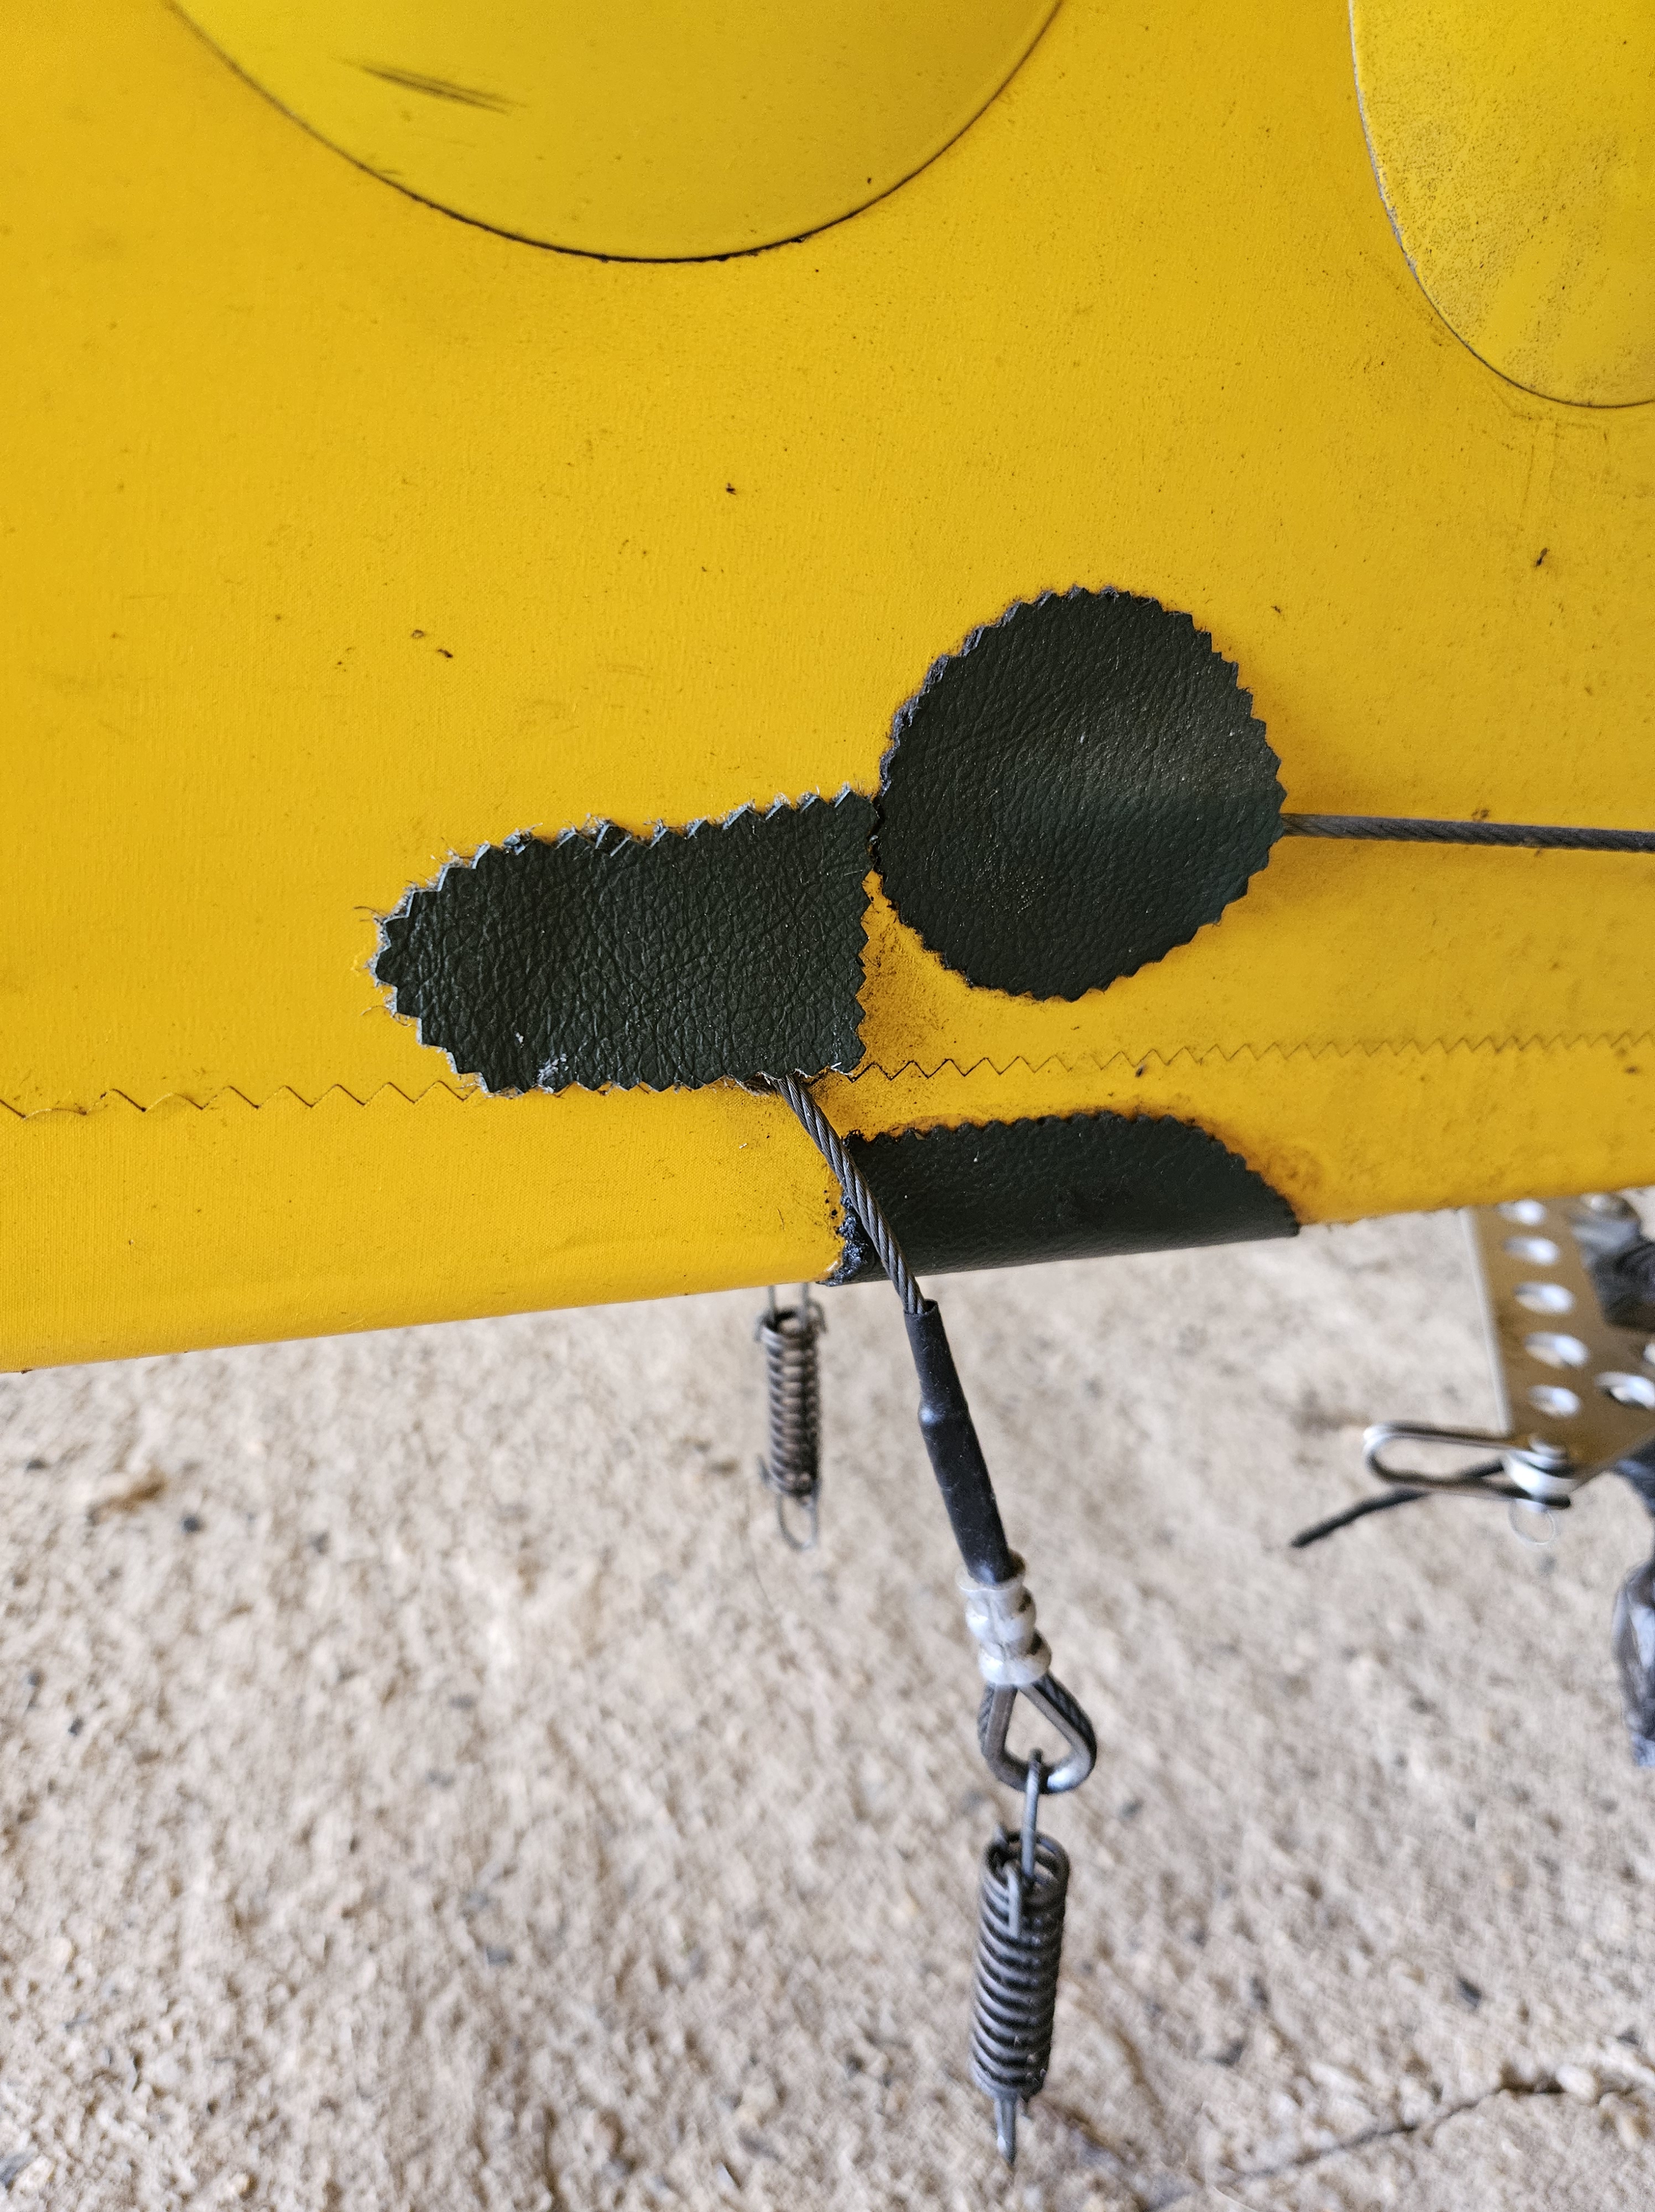
Then, there were the leather fairleads that needed to be repaired and replaced. These are glued on top of the Oratex using contact adhesive and linked around the edges to make them look less obstructive
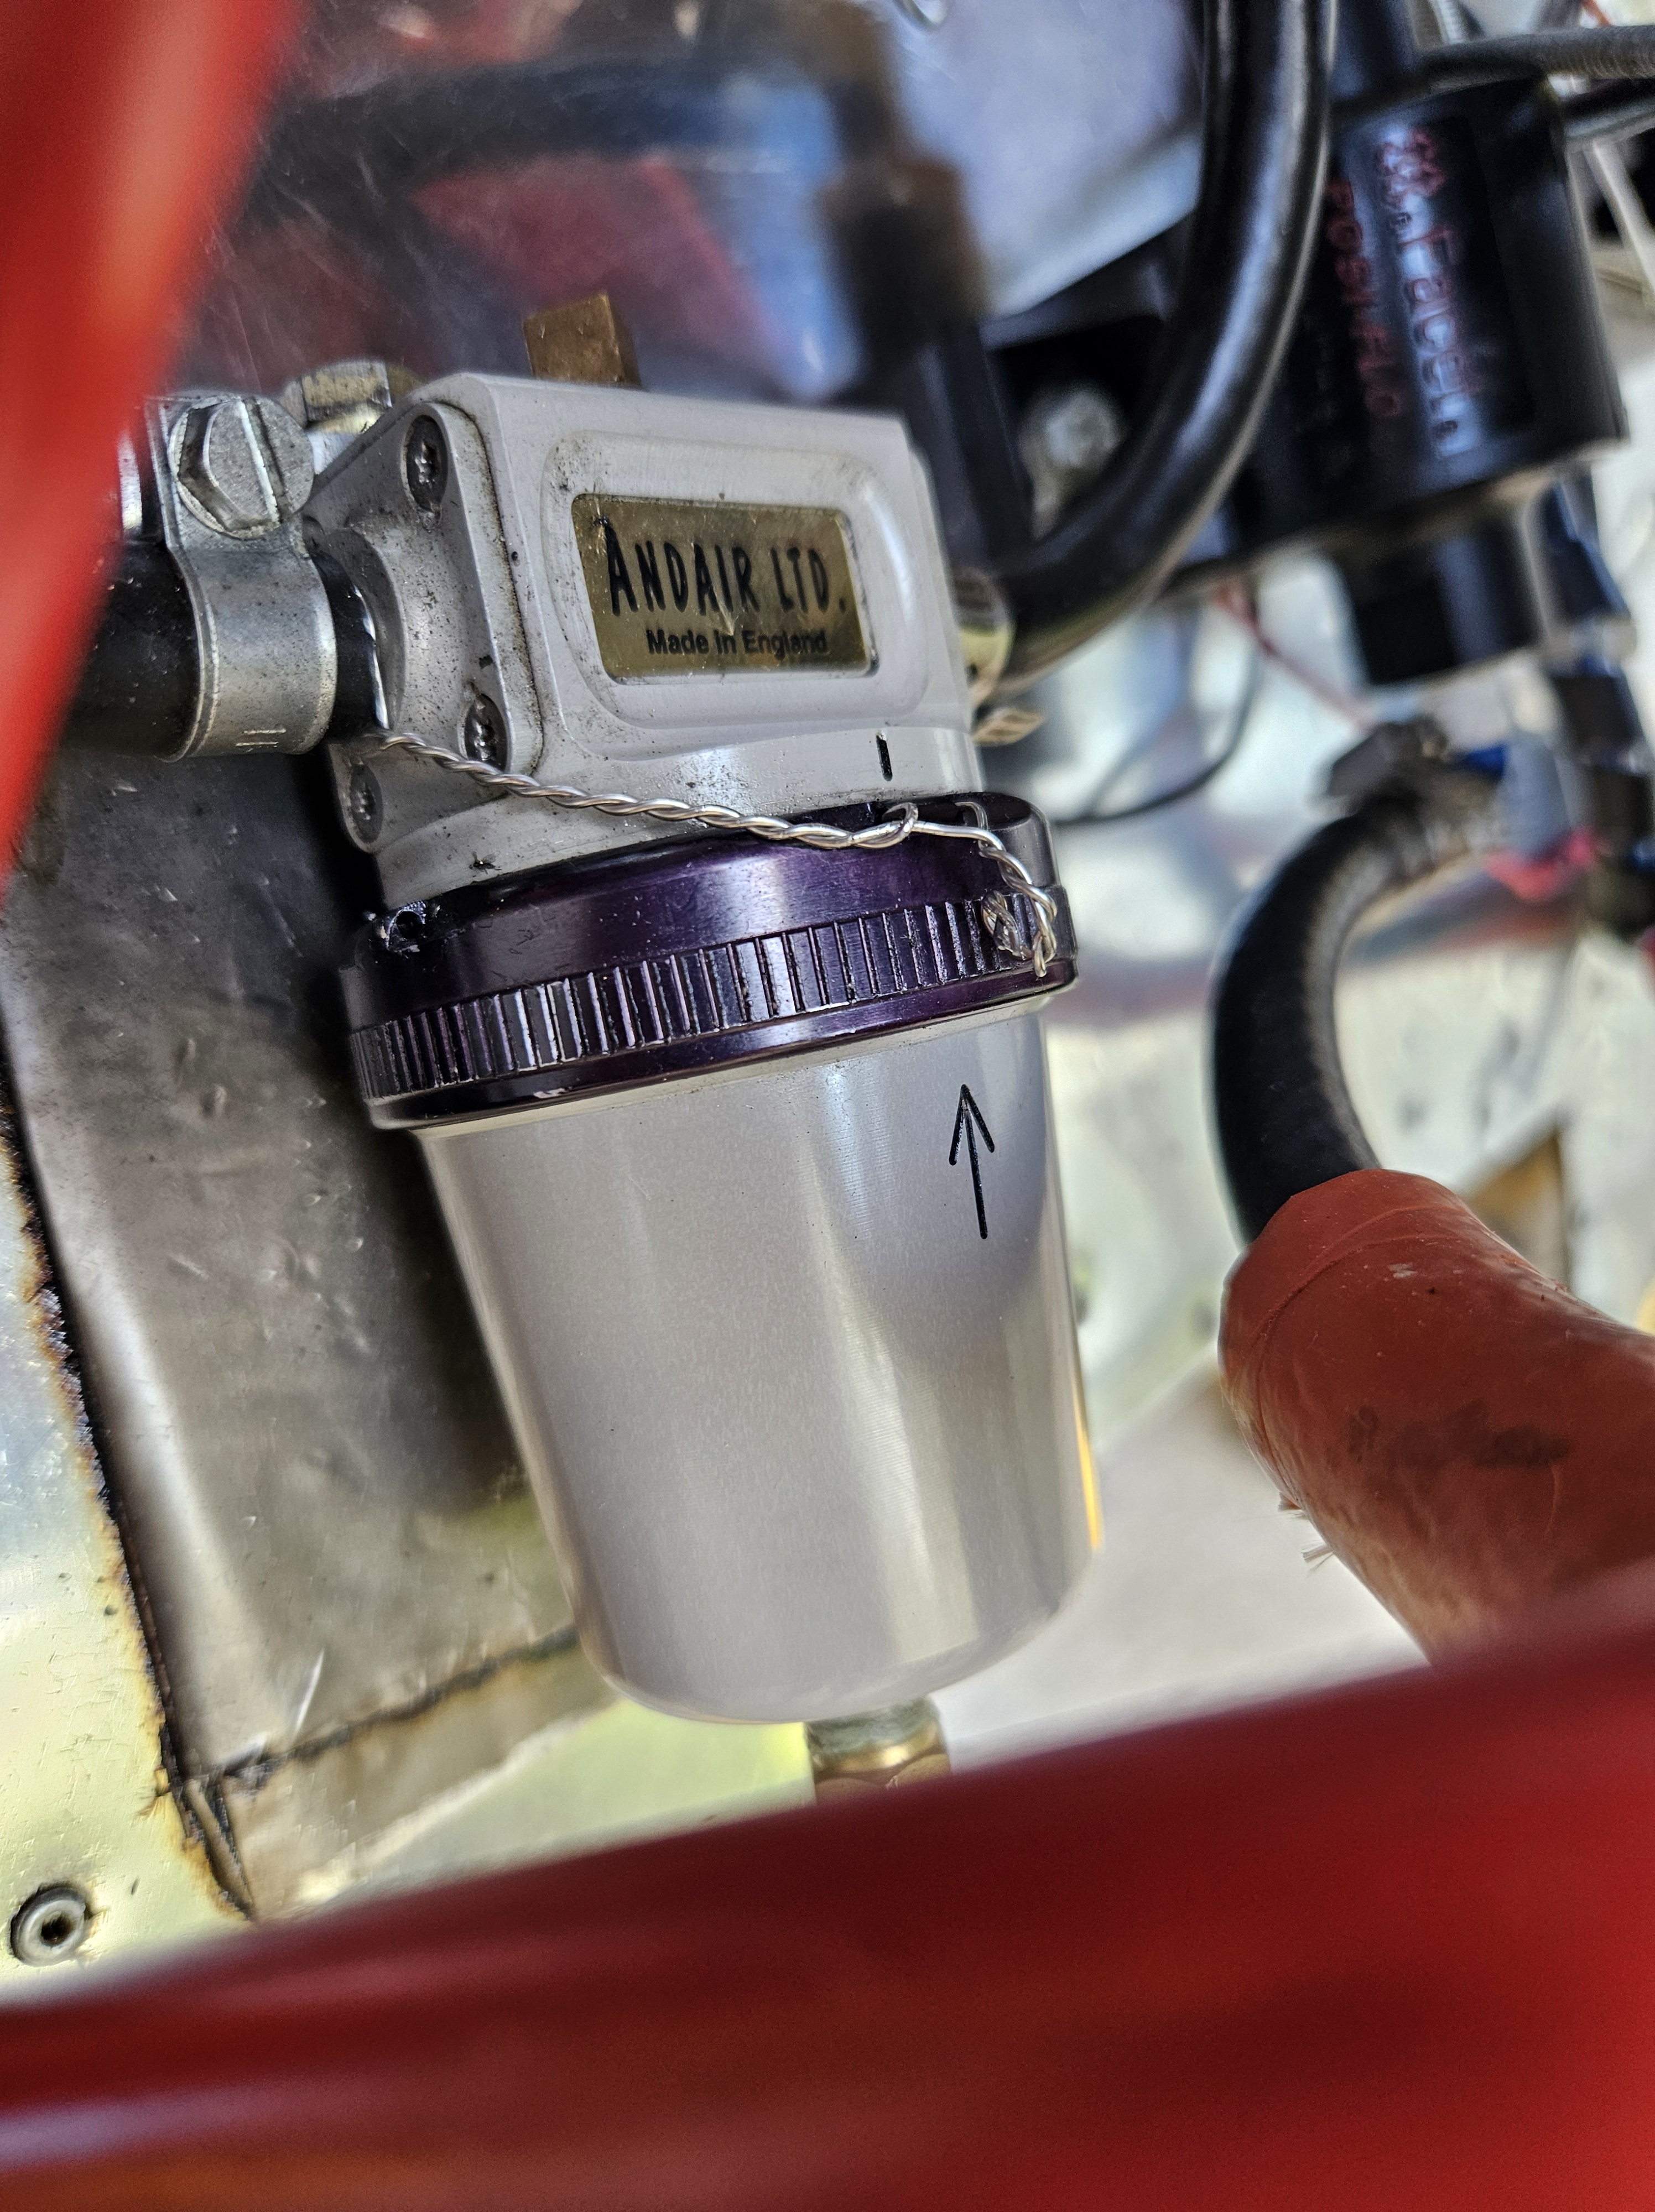
One thing I’d missed on the pre inspection was the fuel bowl wire locking. I’d seen the wire locking in position but failed to see id snipped in 12 months ago when I undid the bowl to inspect for impurities. Having found it clean as a whistle .. amd it should be as there is a pre strainer up stream at the bottom of the tank, id forgotten to re wire.
Cutting away the 2 sections i added new, twisted and looped through the bowl to secure
At last..ive reached the point where I can engage with the local inspector.
Tom (Woodhouse) covers a number roof aircraft at Priory Farm and so I thought it would be nice to ask him to look.
What a really nice, genuine guy.. nothing was too much trouble to look at and talk through.
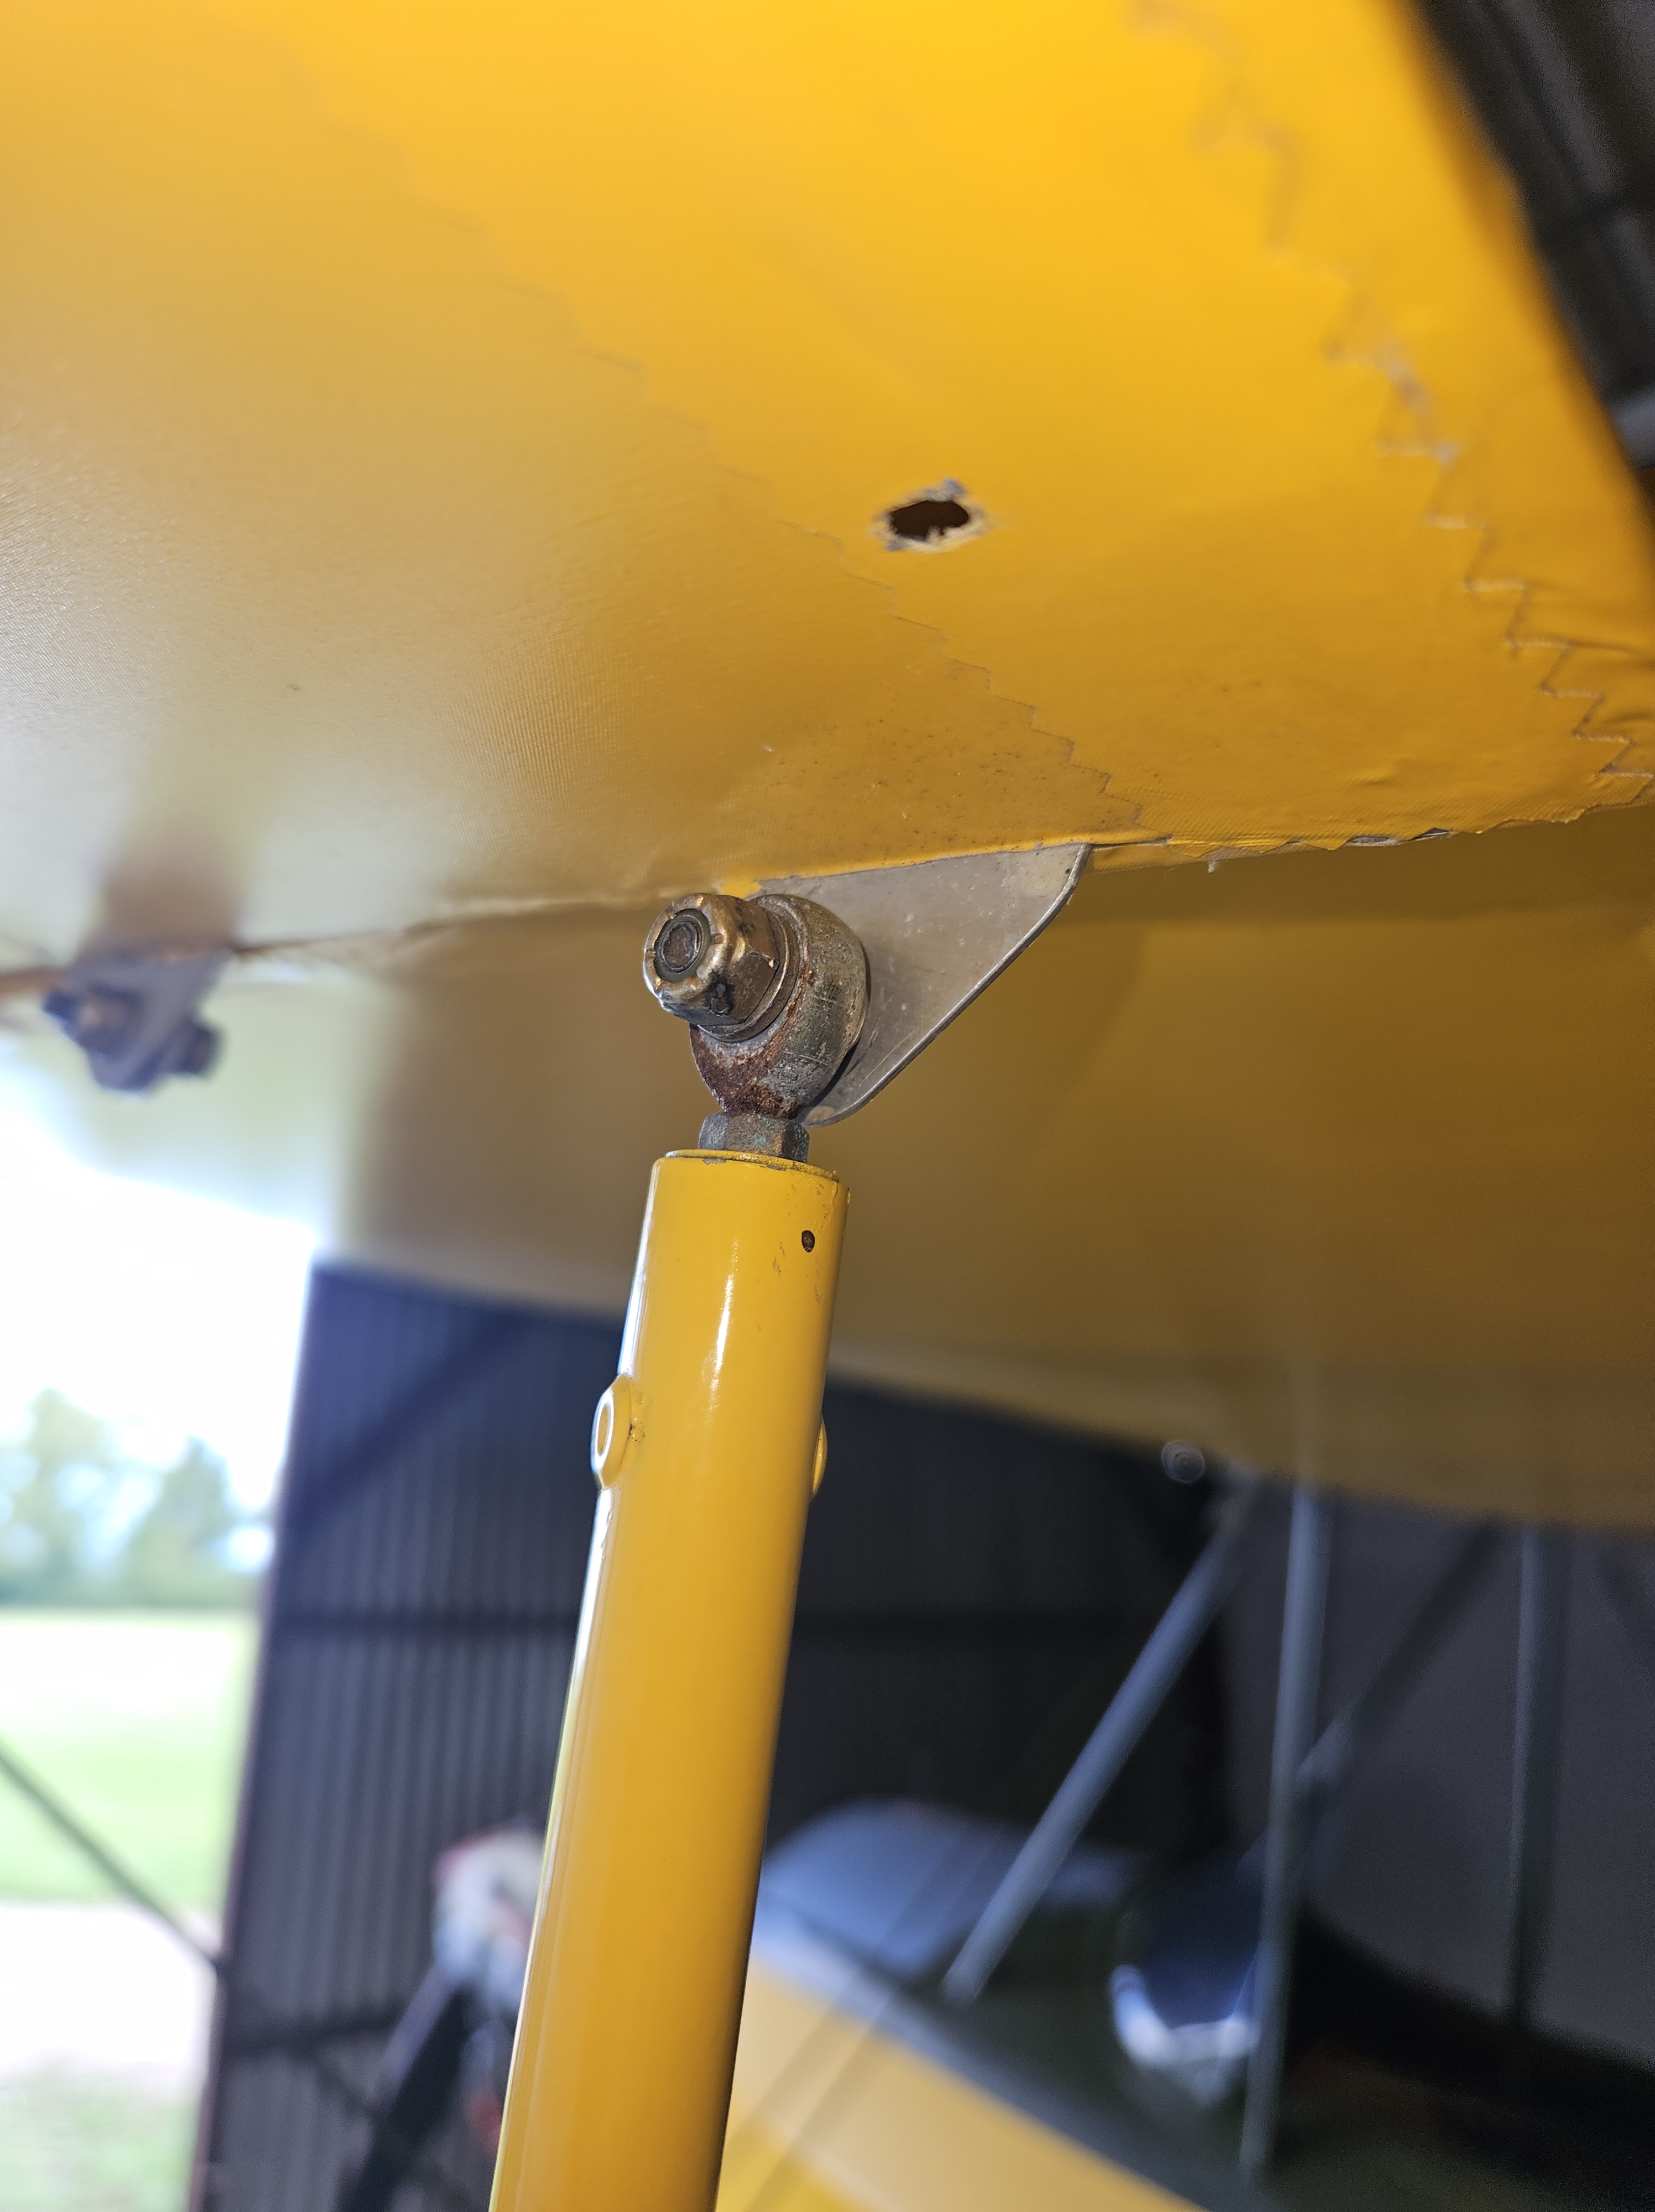
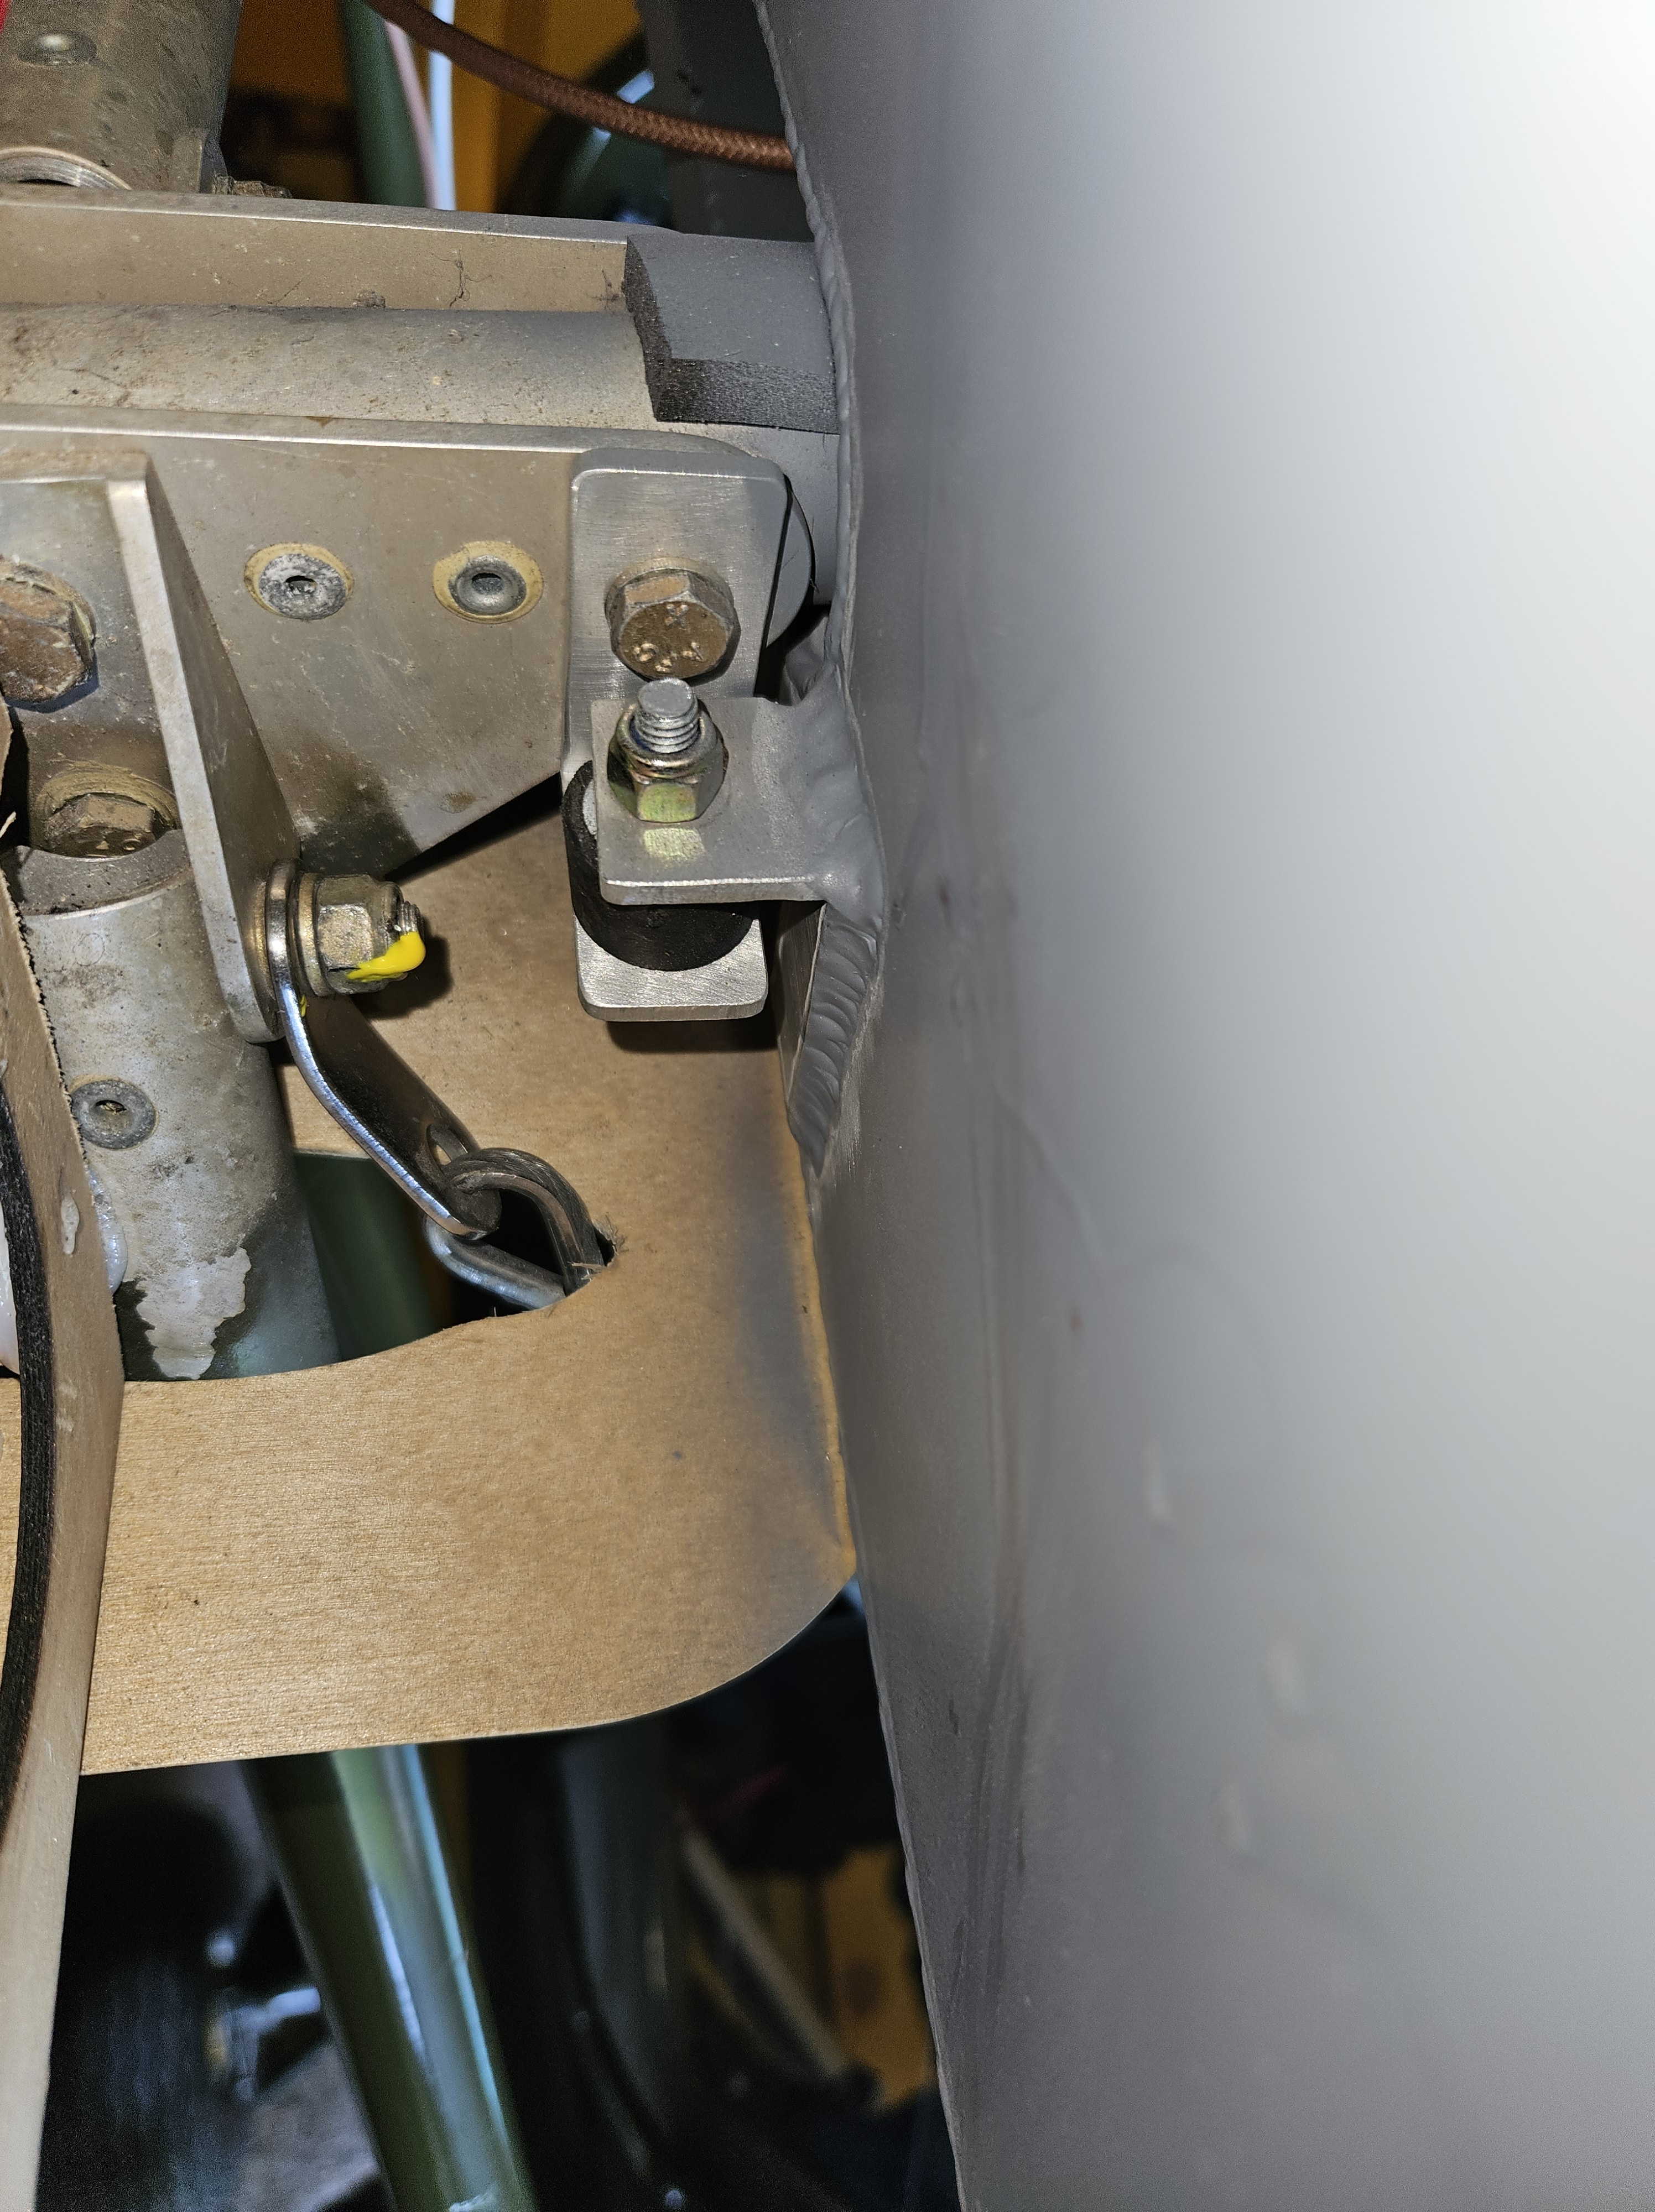
Tom found a few bolts out of safety ..where little or no thread was showing through the nut-bolt combination..
On checking back through the original build manual I realised I had been a little over zealous with use of washers! I’d managed to put washers under the bolt head as well as under the nut .. removing all these put all the bolts into safety !
The image above shows it flush … post washer removal..2 threads showing
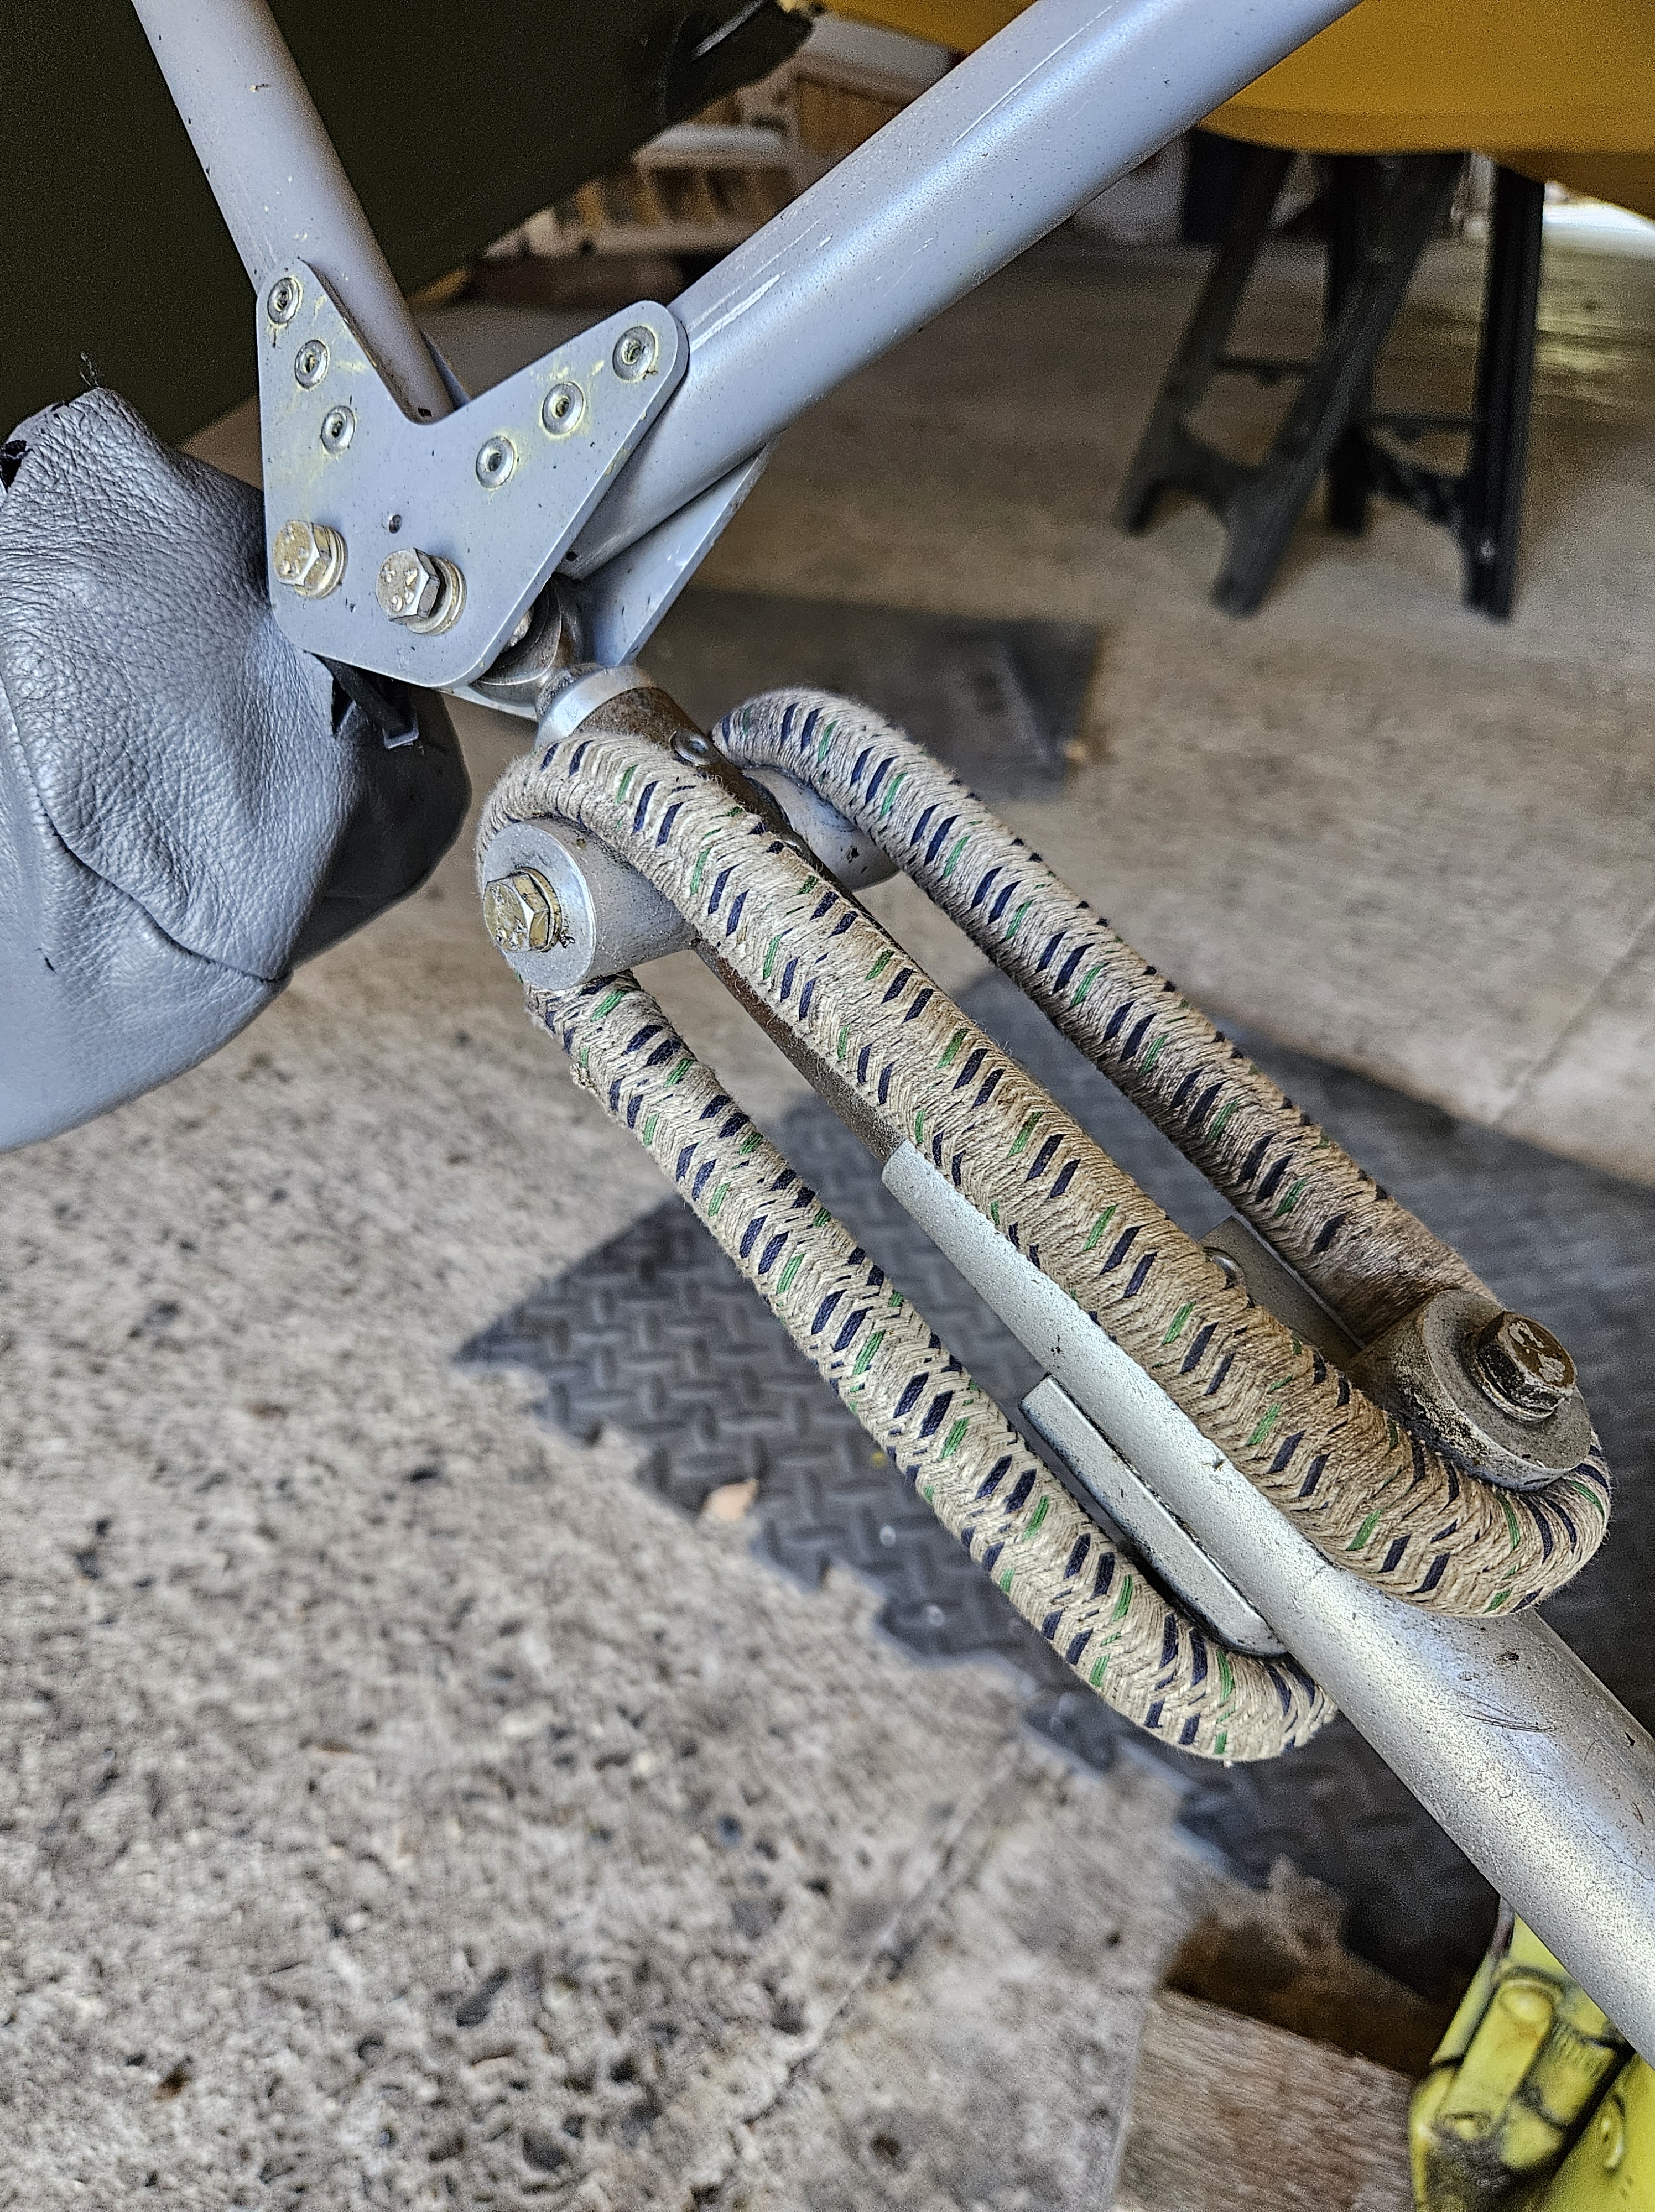
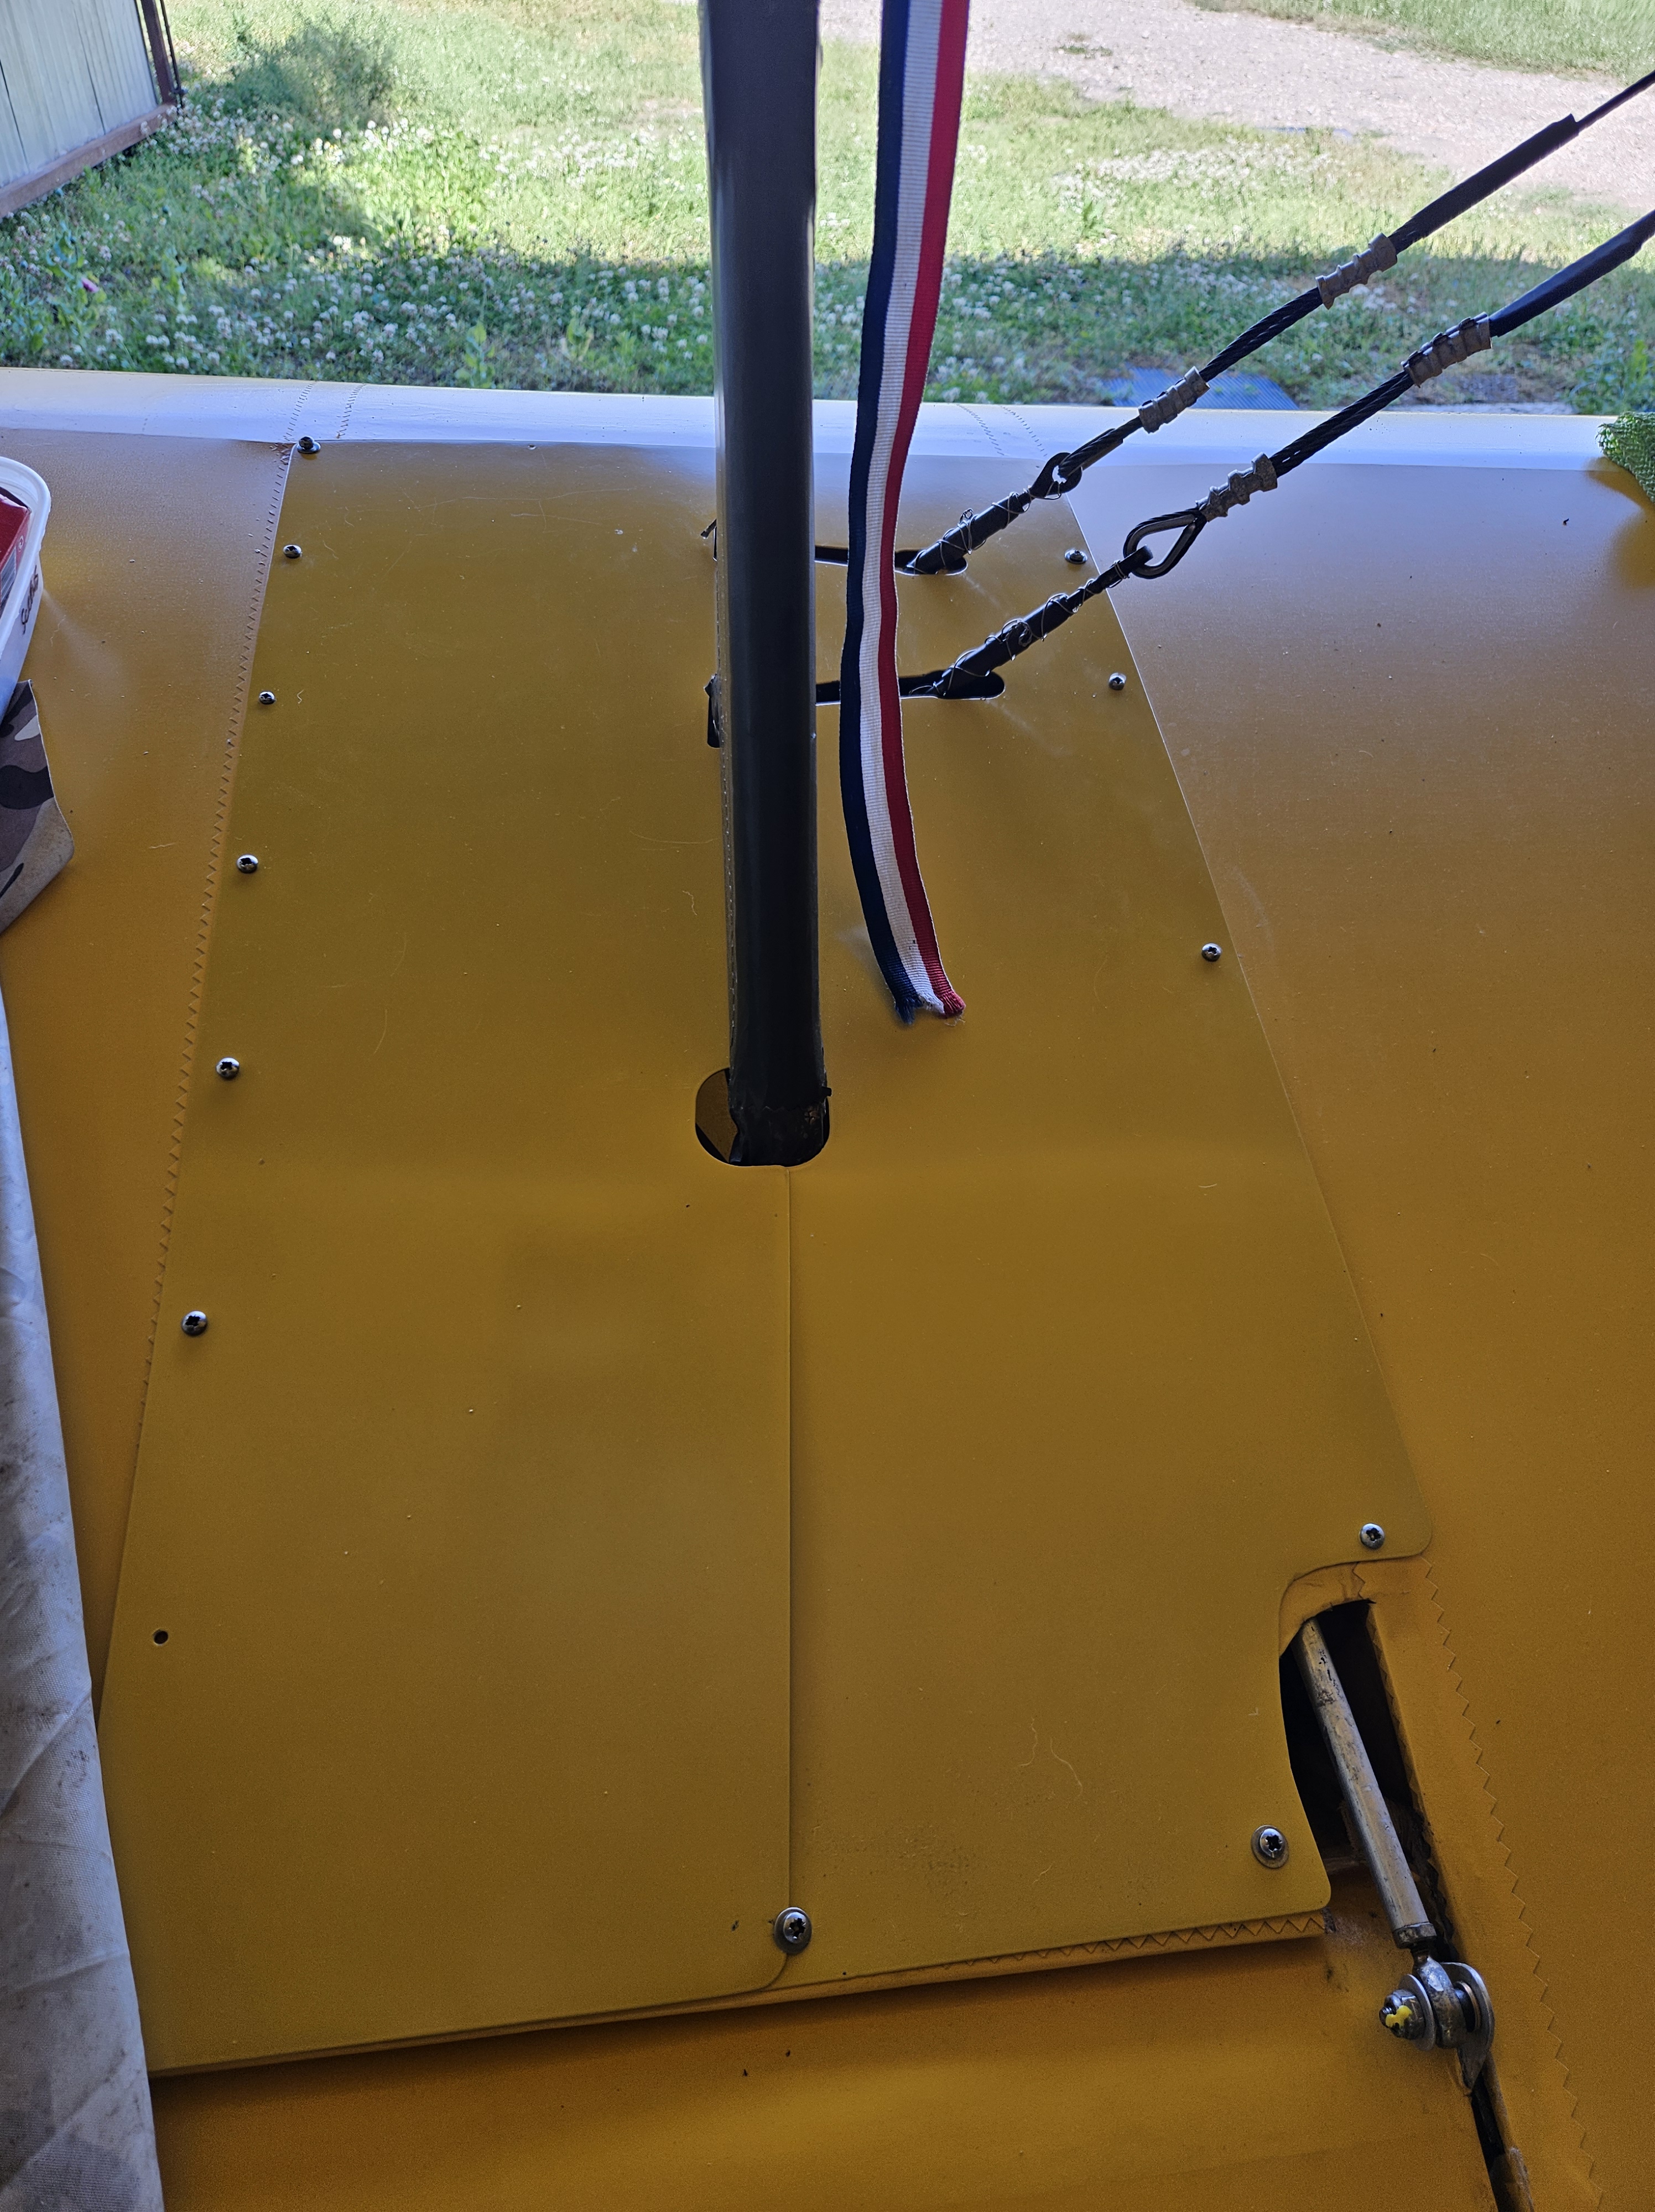
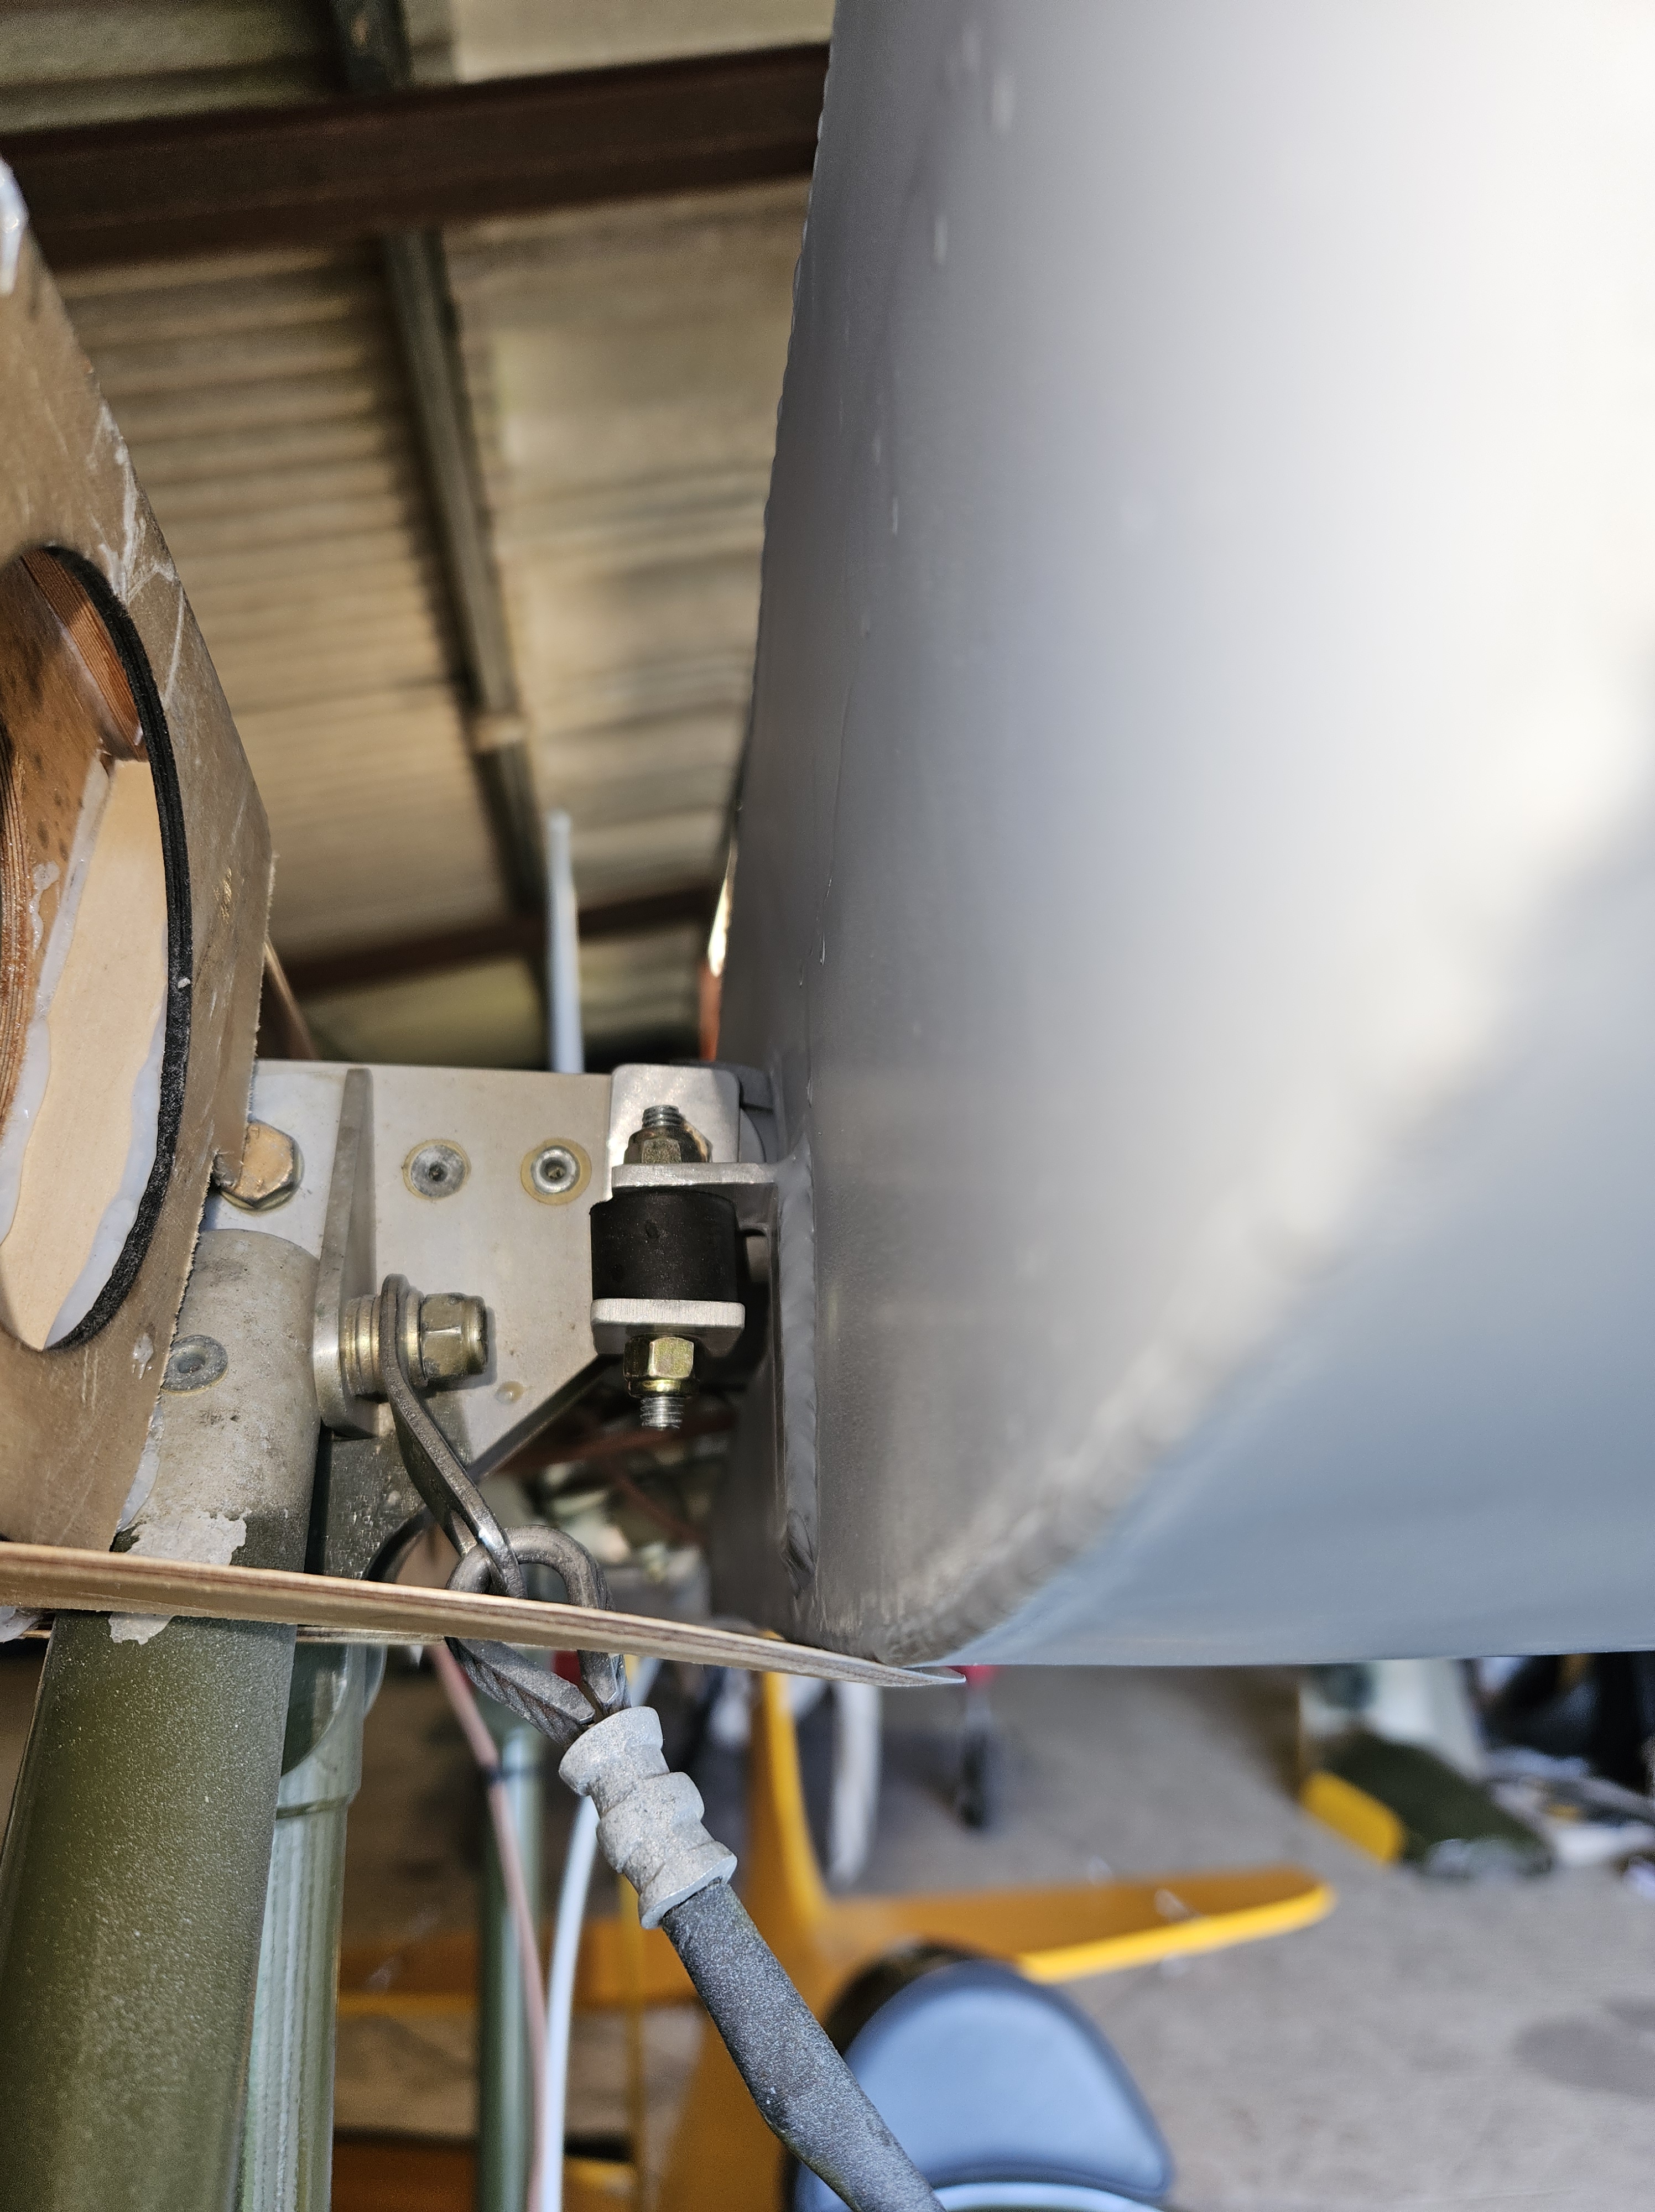
The same was found on 1 cross bracing wire in the front cabane. This had been covered for the last 5 years so clearly not visible.
Quite why I used so many washers is a mystery… washers in these positions (on bracing wires) are great for ‘finer’ adjustment .. where you have a fixed length of bracing cable .. removing washers has the effect of tightening the cable (quite significantly per washer) and adding slackens
3 washers! I think that was excessive !
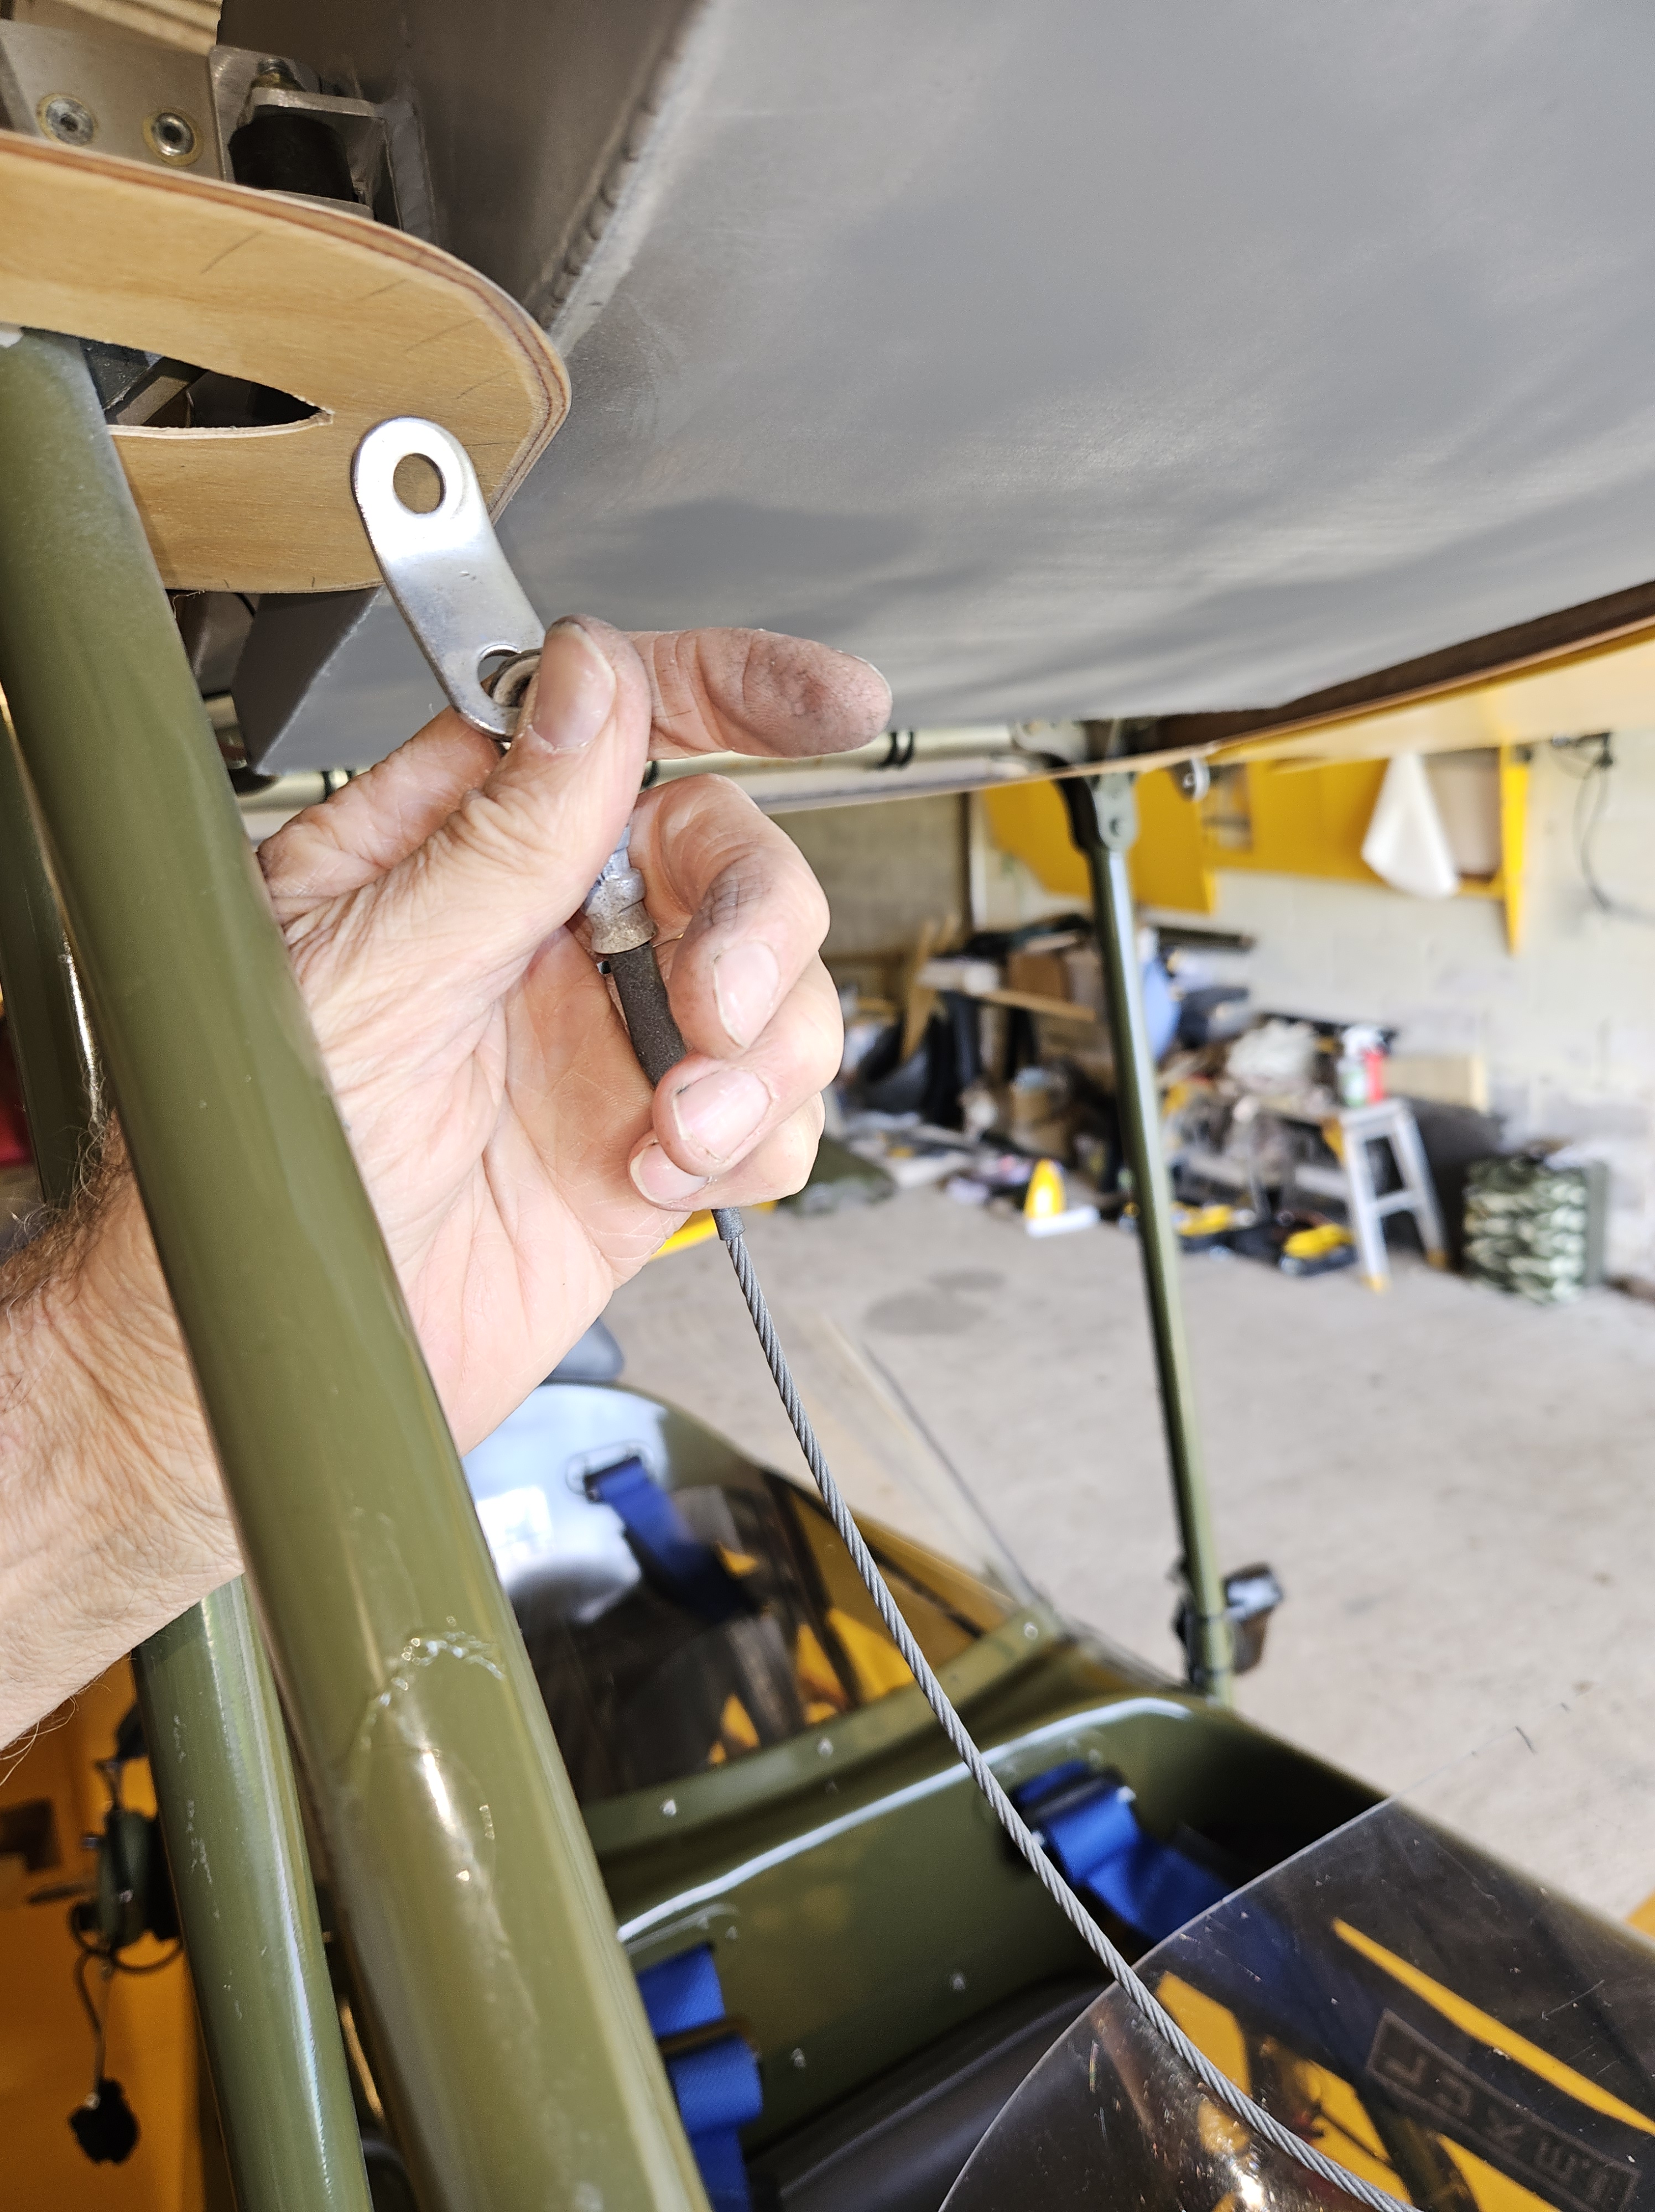
Remove tang … tricky but it cam out relatively easily
Back to single washer, cable nice and taught and colour marked