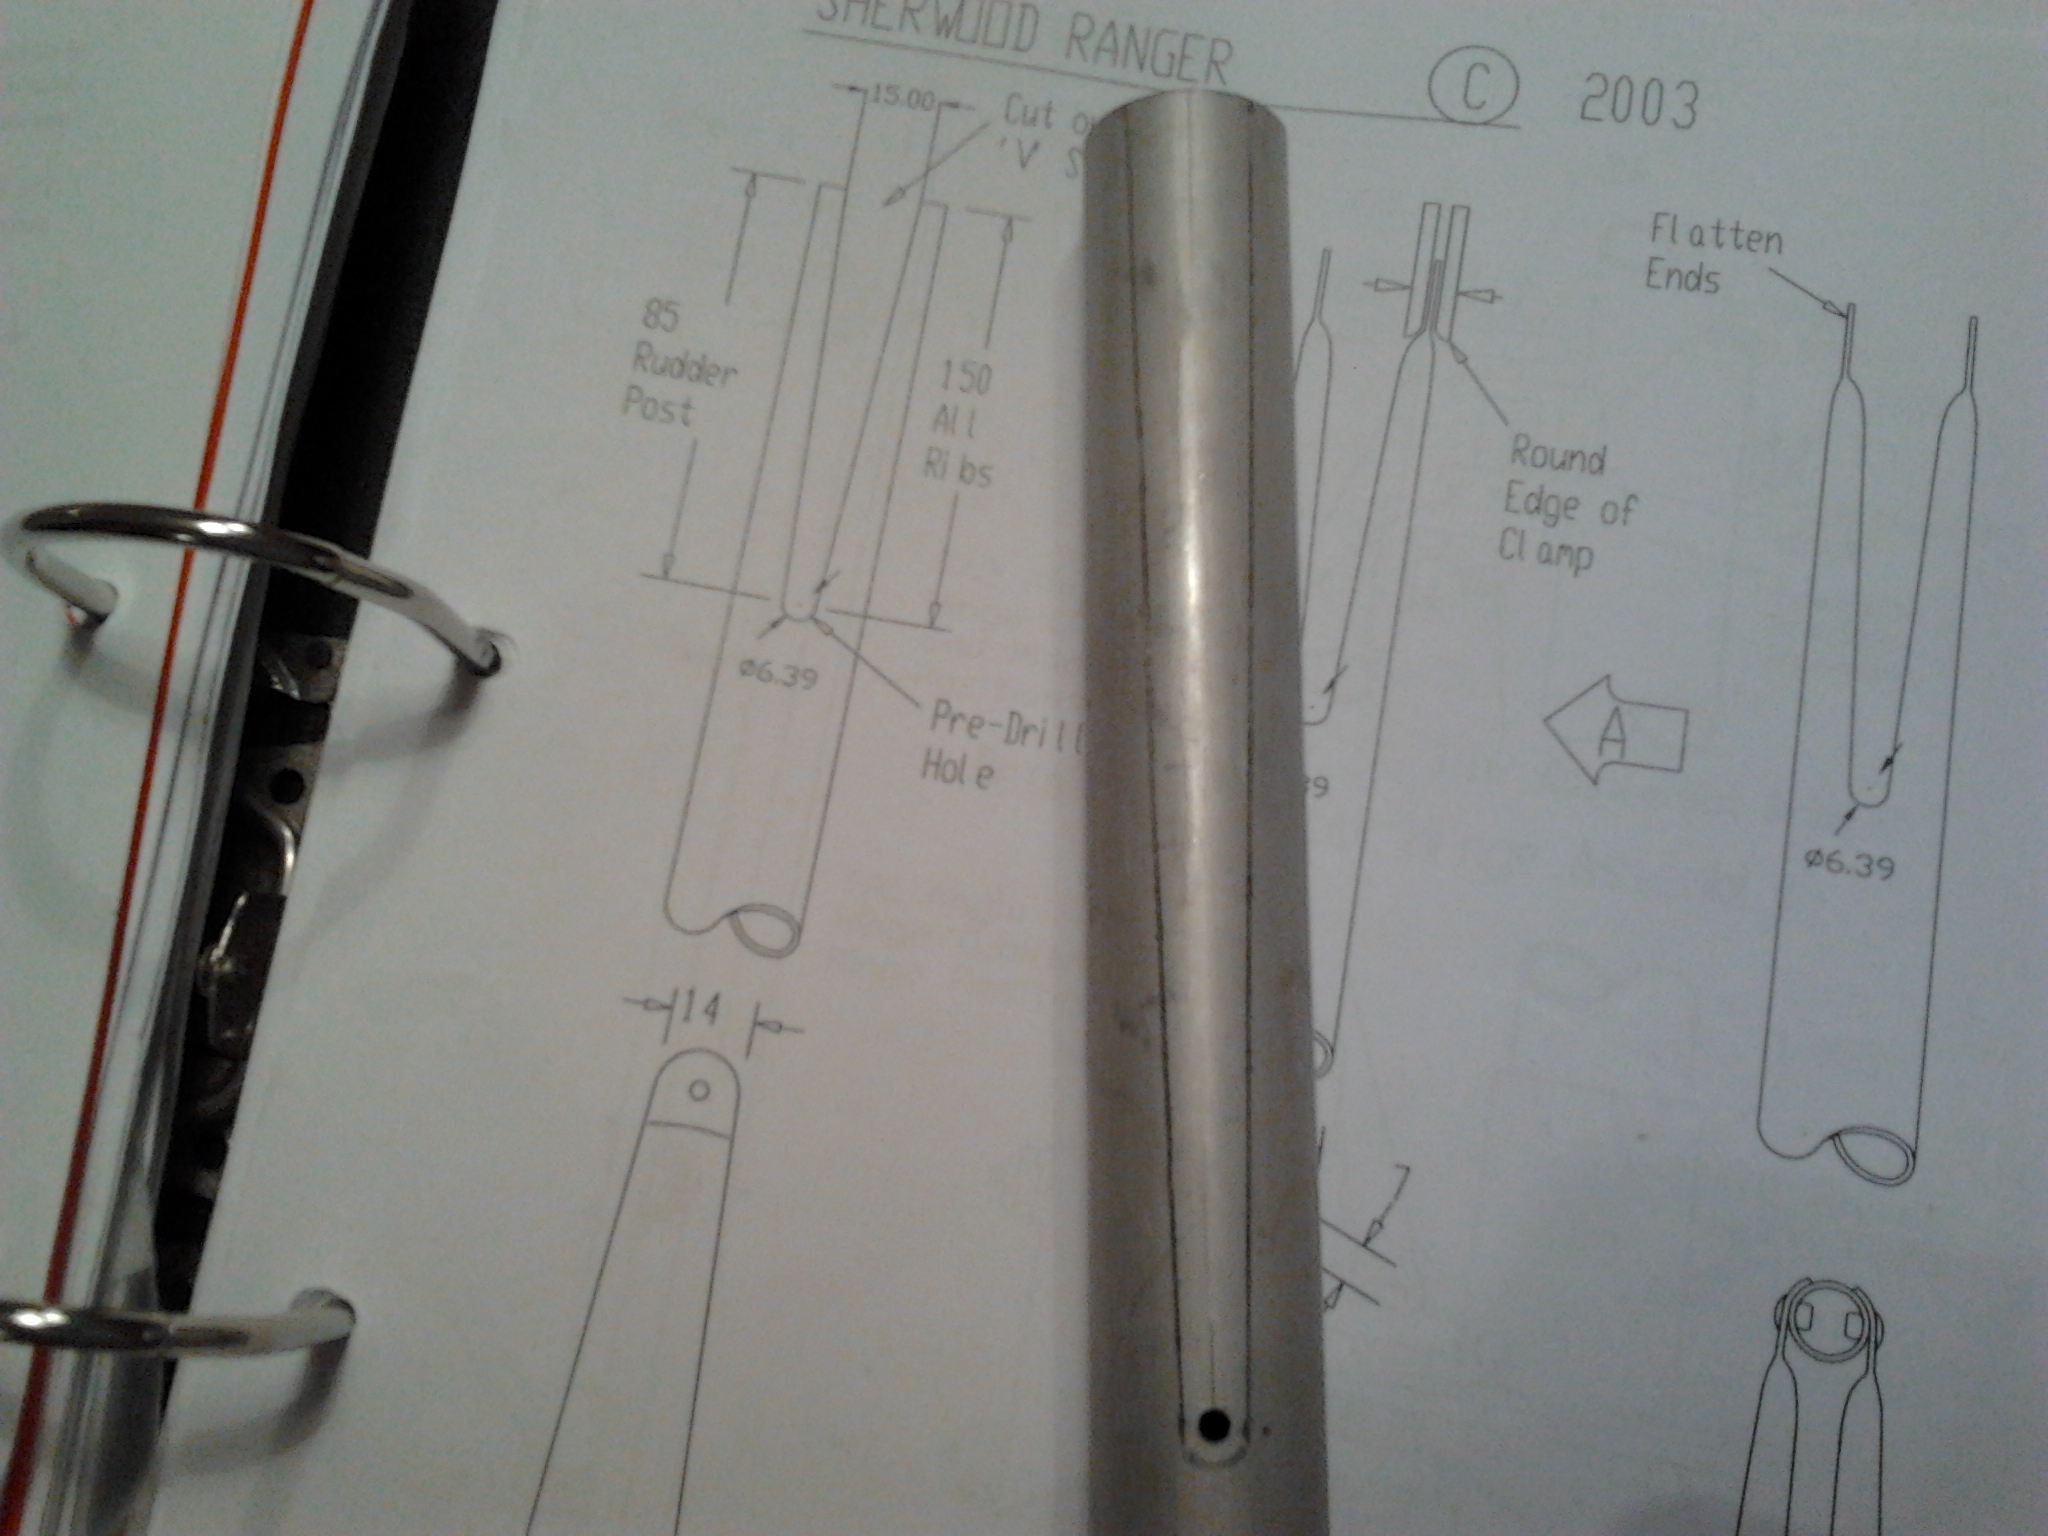
Starboard elevator prep an finish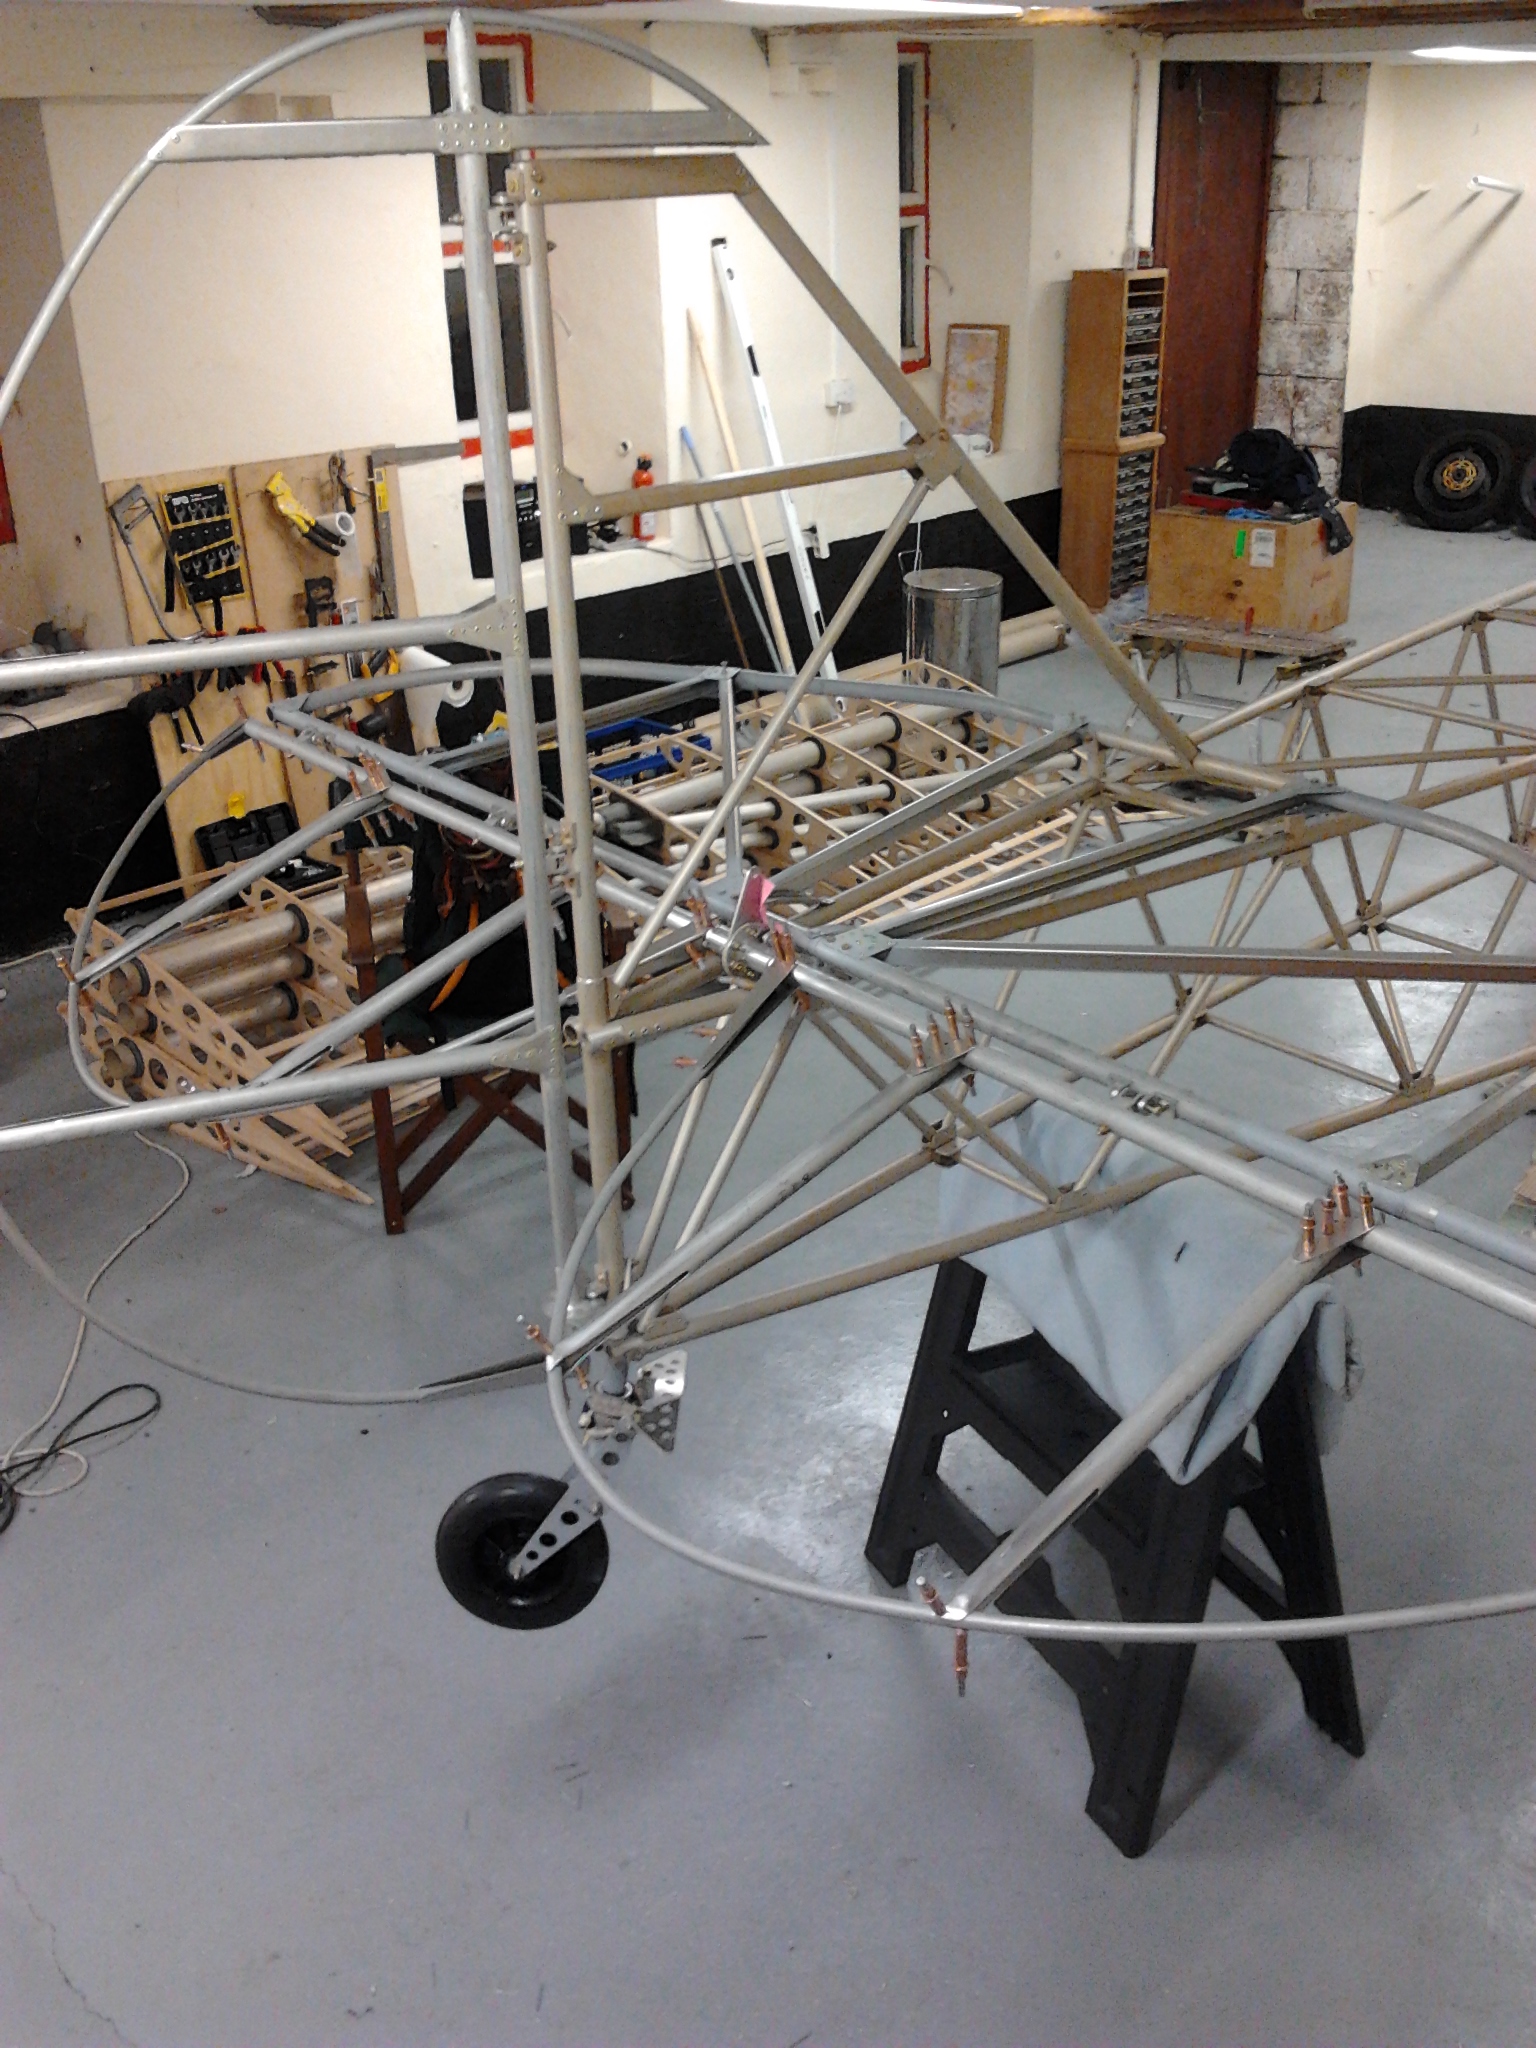
Rib is cut with centre V to allow taper to trailing edge then rounded.
A mile of runway can take you anywhere

Starboard elevator prep an finish
Rib is cut with centre V to allow taper to trailing edge then rounded.

Having prepared the ribs and set the elevator spar in place the trailing edge cap is profiled to fit around elevator spar then fitted to secure inboard edge.
The trailing edge is fed though the outer edge hole and pulled in to fit rib lenghts.
The inboard rib is plated and drilled and cleco’d then the trailing edge is pulled in again to aign the outer rib.

Once fully setup and aligned with clecos you need to dismantle to remove the large amount of burr that has built up from all the drilling. This is also the time to get thinned waxoyl into the leading and trailing edge and also get all those hidden joints etch primed.
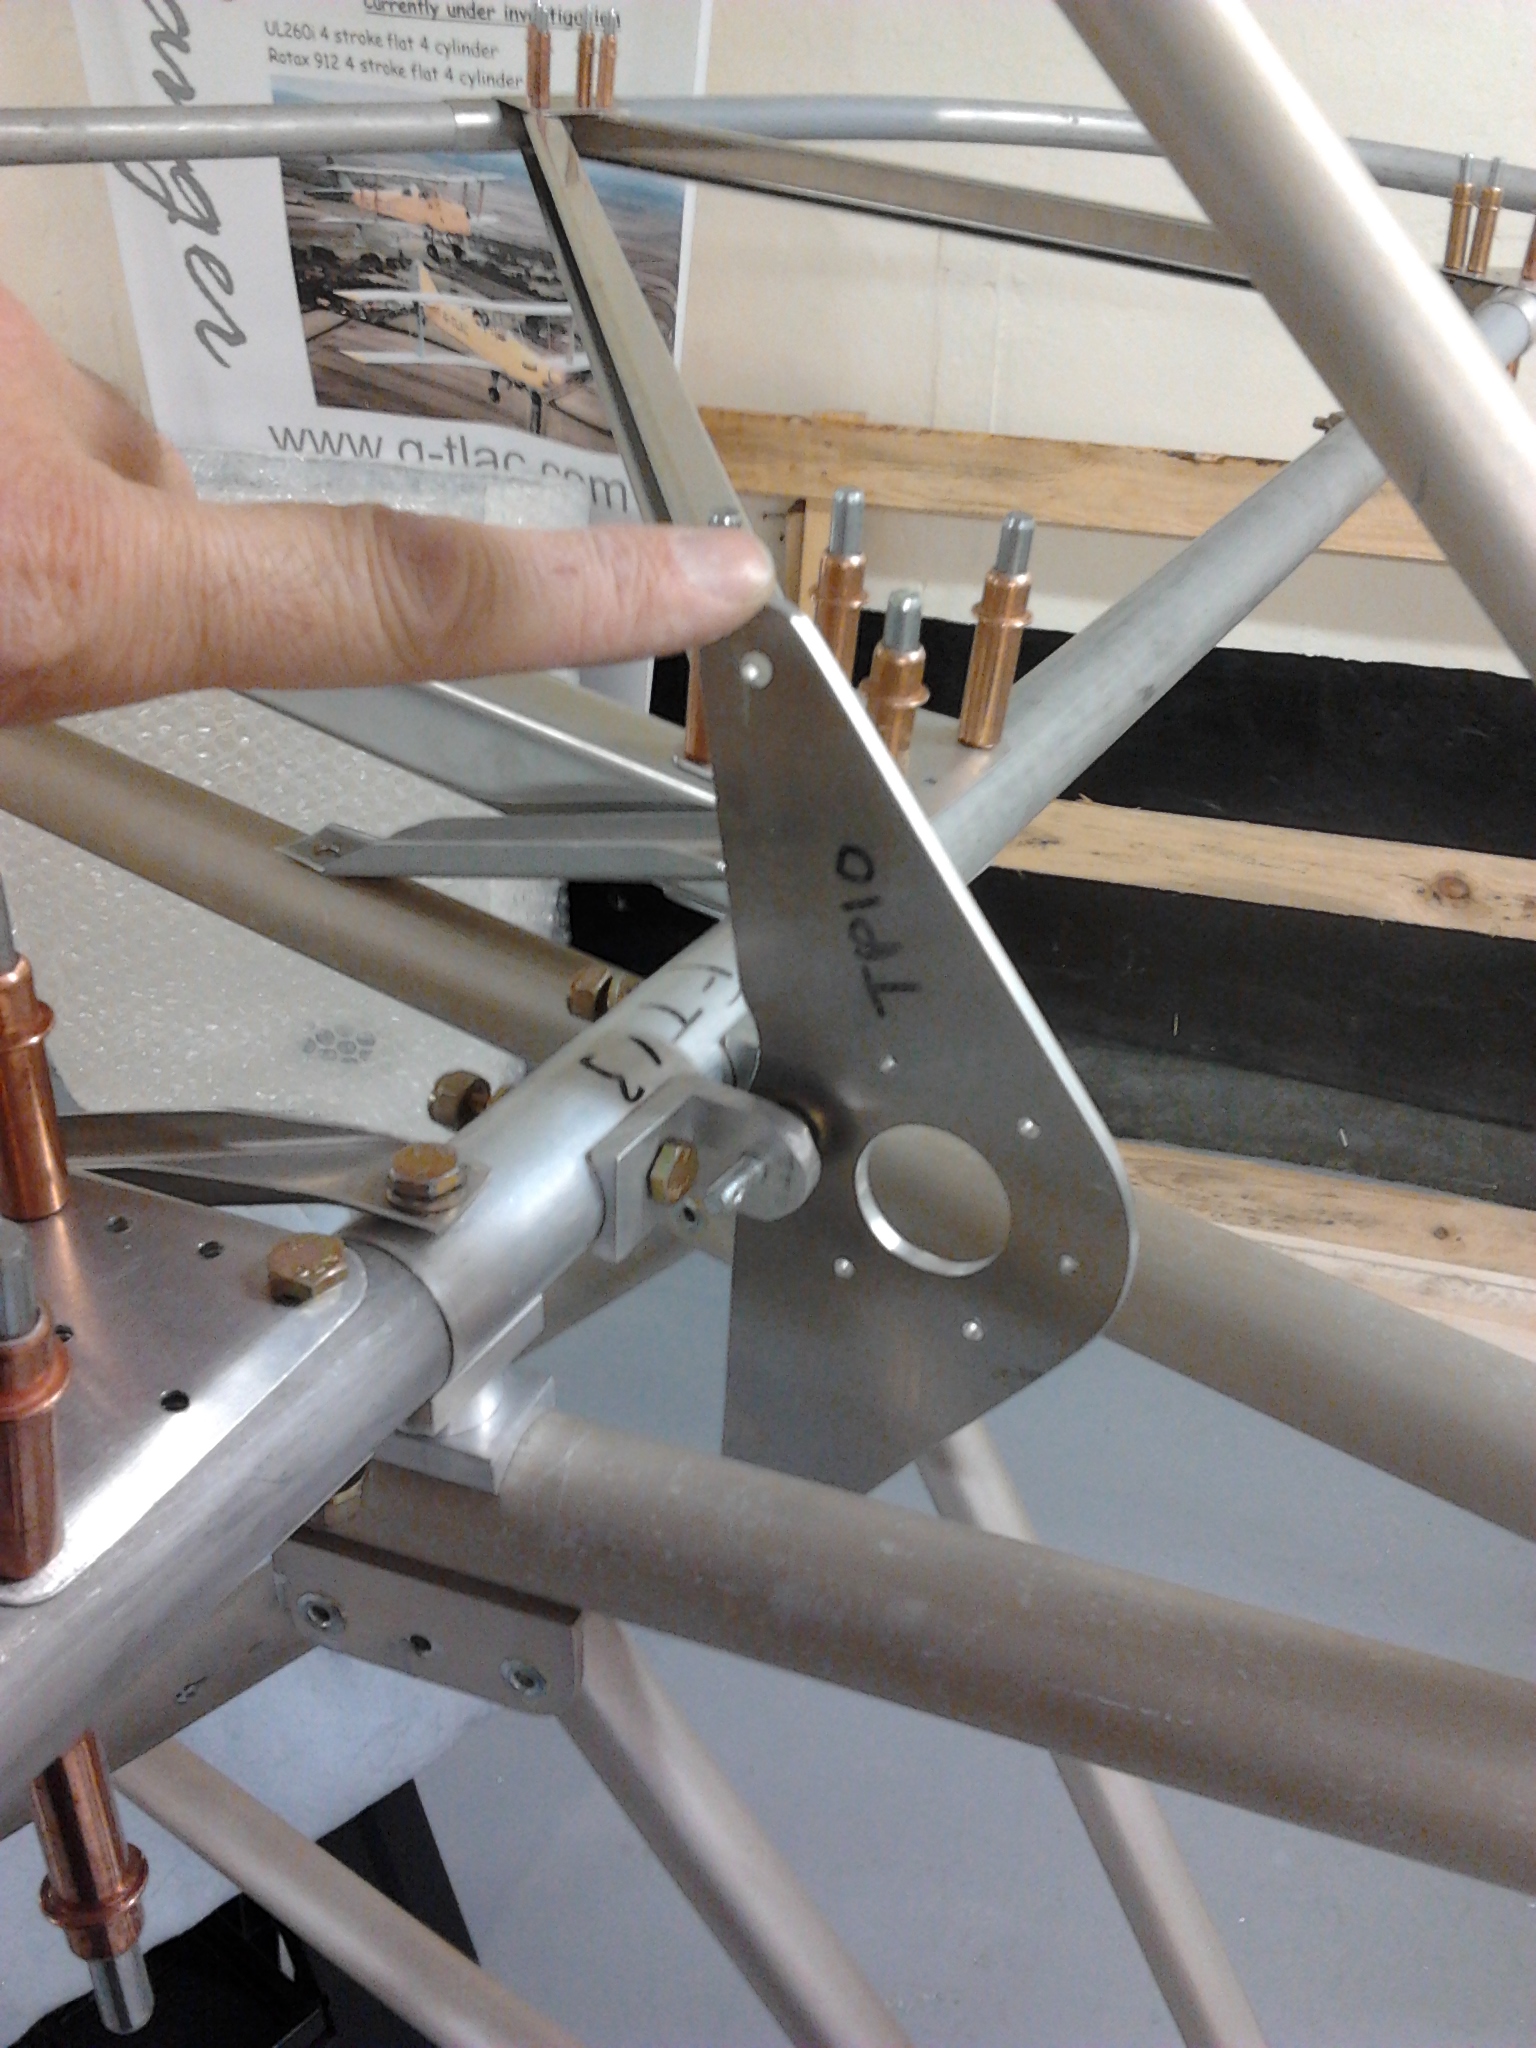
Note all existing bracket plates were marked with letters to help reassembly .. Ie A , B , C etc
Also, took the option to drill out both innner mounting holes to 4.8mm so that they have two bolts in place of one bolt, one rivet.
Finished port tailplane with no clecos and all riveted, de burred and treated with waxoyl and etch primed
Had fun and games the other night when the lights failed in the barn ! I was midway through putting the elevator horn together so managed to complete the process with a torch clenched between my teeth.
With the ‘back end’ coming together .. its time to start looking at oher areas …. The next logical part is the cockpit area … this will mean sequencing the two joysticks and their connecting rod mechanism, the rudder pedals (front and rear) footrests and then seat rails. The Throttle levers also go in around now so it going to b a busy and productive few weeks !
Pictures to follow a I get thee stages underway …..

Probably the last of the ‘heavy’ metalwork ! … Mark out the ribs for cutting
then test fit the elevator horn to make sure it looks like it will line up correctly. This needs to be removed and the flange holes drilled out before bolting the two flanges in place. The stubs of the elevator leading edge will fit into these

On the way back from our short winter break we popped back via the idyllic French village of Yvoire on the French side of Lac Leman … totally stunning at 16:00 Saturday afternoon and not a breath of wind (or fog !) … Jersey been BKN or OVC at 000 forever !

Now – floats on a Sherwood and …….

Off skiing at New Year so printed off the Jabiru 2200 engine manual which the factory have usefully put on the web. Time to get into what lies ahead !

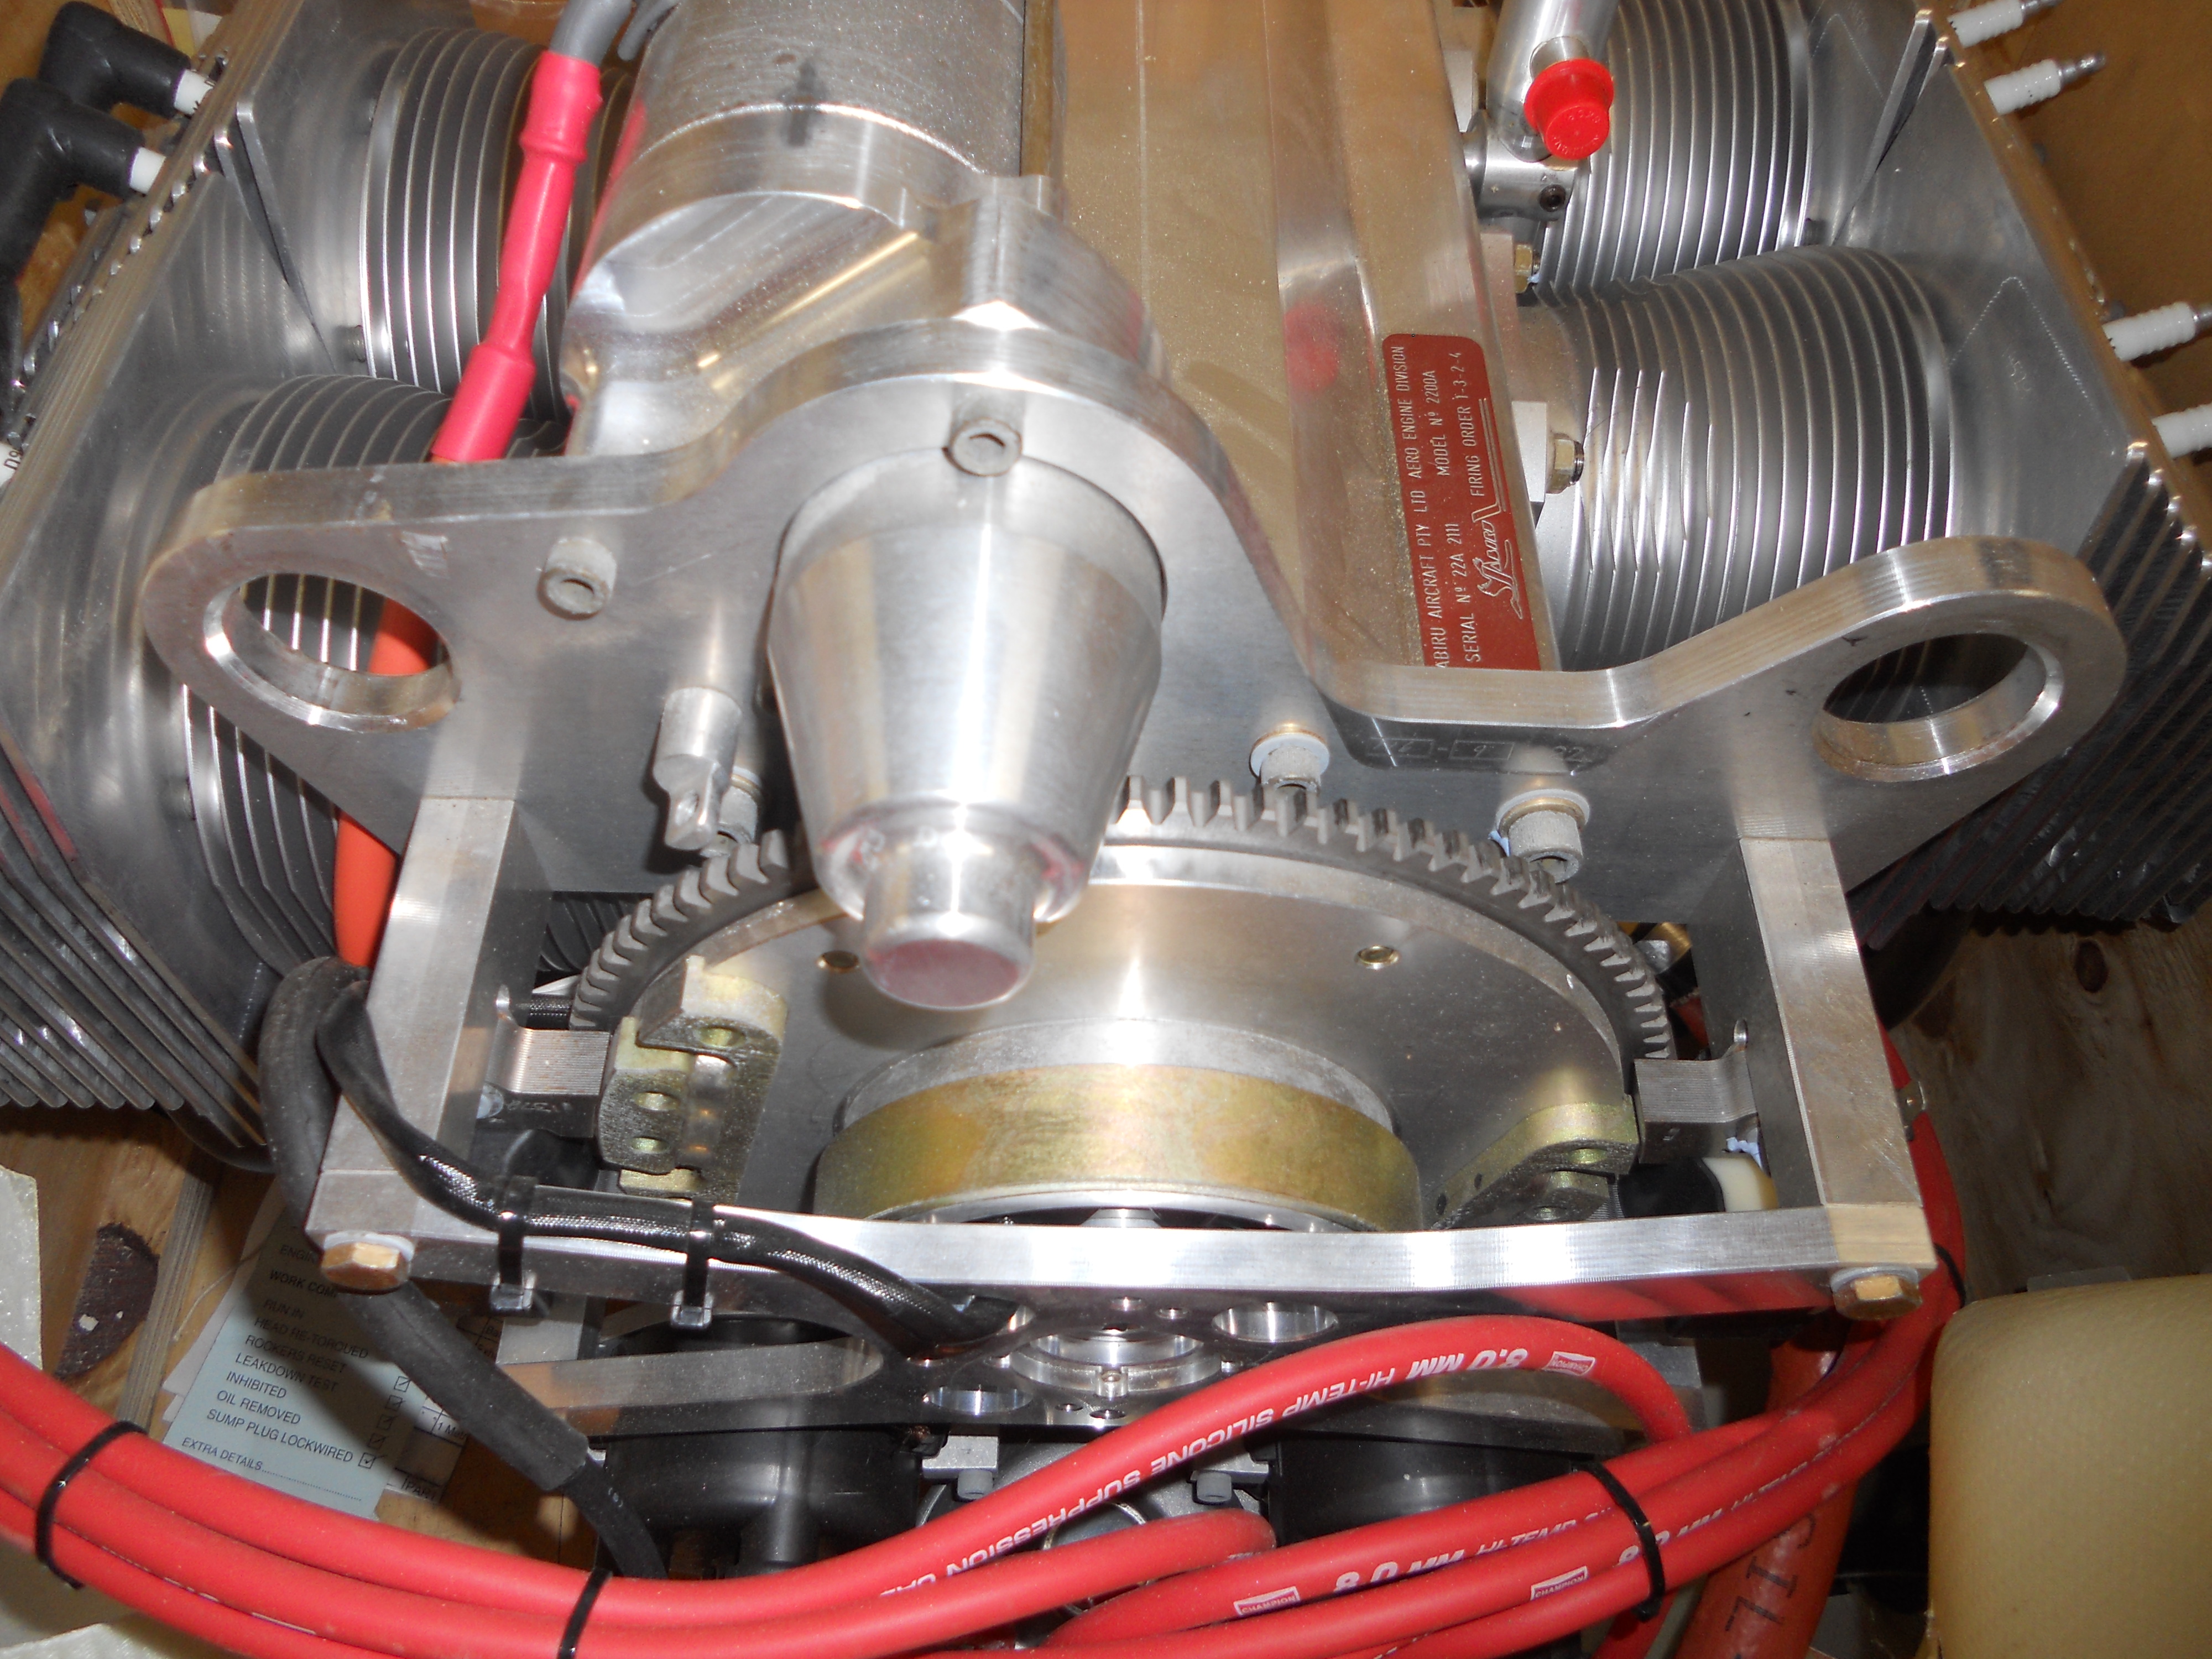
Got a brand new unused 3 year old Jabiru 2200. Converted before it left the UK to run on Avgas … nice to have a built in starter – compared to hand swinging the Gypsy Major on the Stampe ! Nice to have learned how to do it though and really makes you appreciate key/push button starters. I remember it was always a finger and arm counting job after starting ! and especially challenging on hot starts … anyone who can hand start a hot Gypsy Major 5 minutes after landing in Dinard and still keep a safe technique on the 20th swing !
Still need to source a prop – but have looked at the Hercules wood, and why would you pick anything else ! Just need to decide colour pin stripe to match ‘plane colour

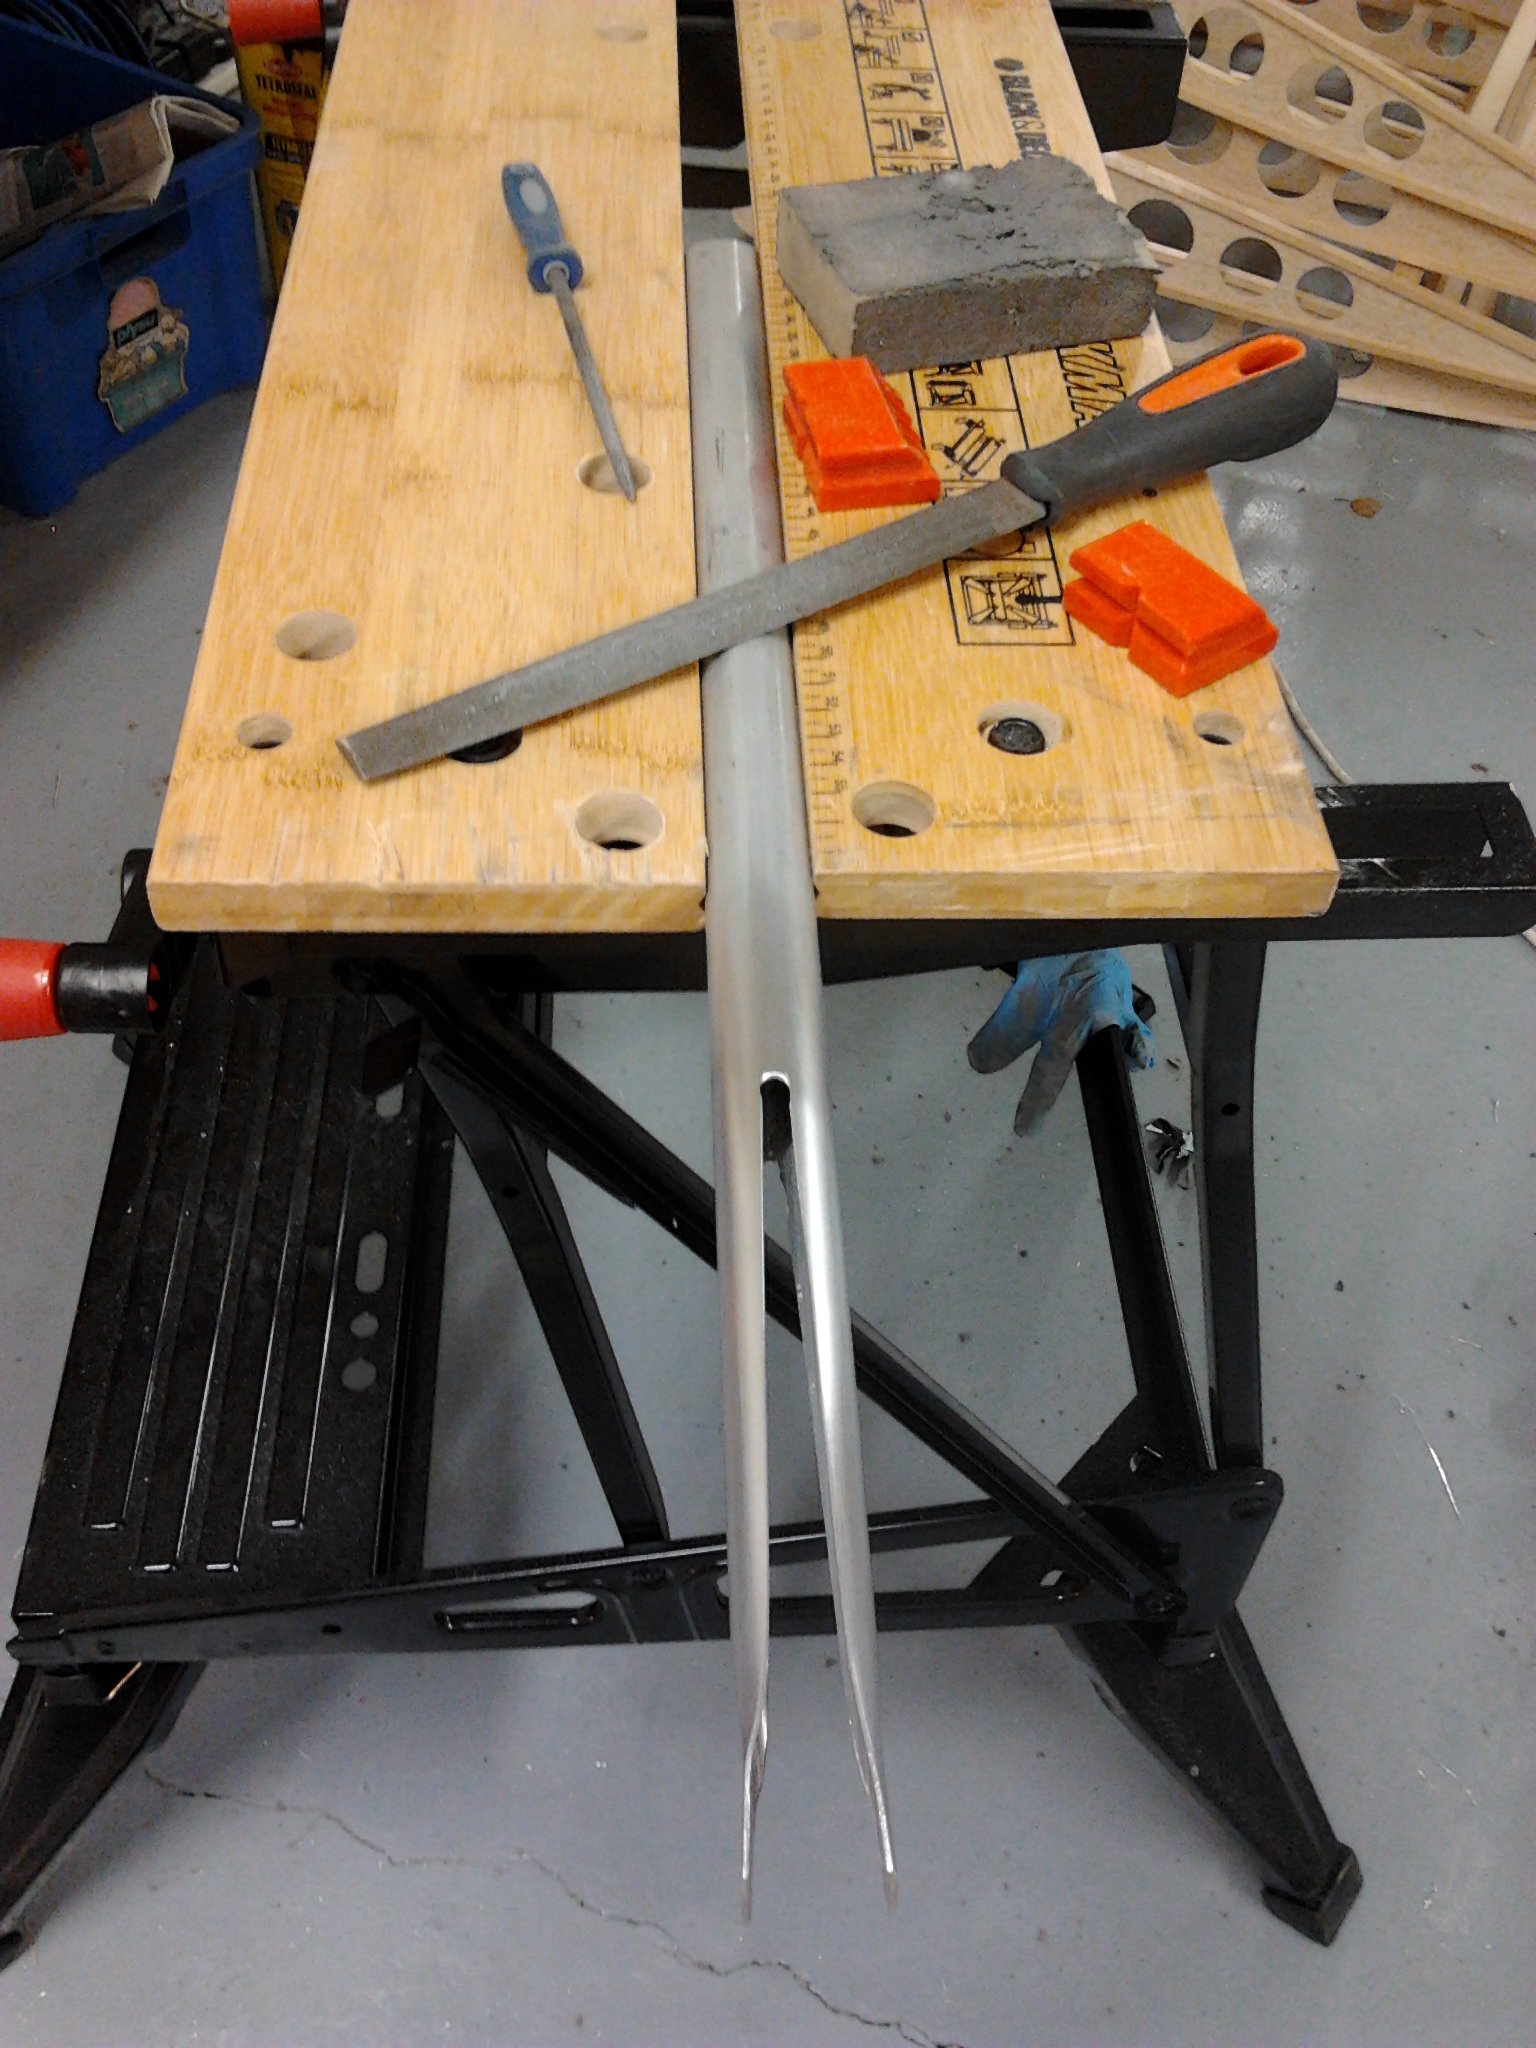
The 3 tailplane ribs are supplied slightly oversized and so require trimming back and shaping so that you get a neat joint with the rear of the Leading edge or the front of the Trailing edge. This is slightly trickier when the centre rib, which angles at around 45′ comes in to make a neat joint in the gusset sandwich.
Taking small amounts off with a file and constantly checking and re-checking helps.

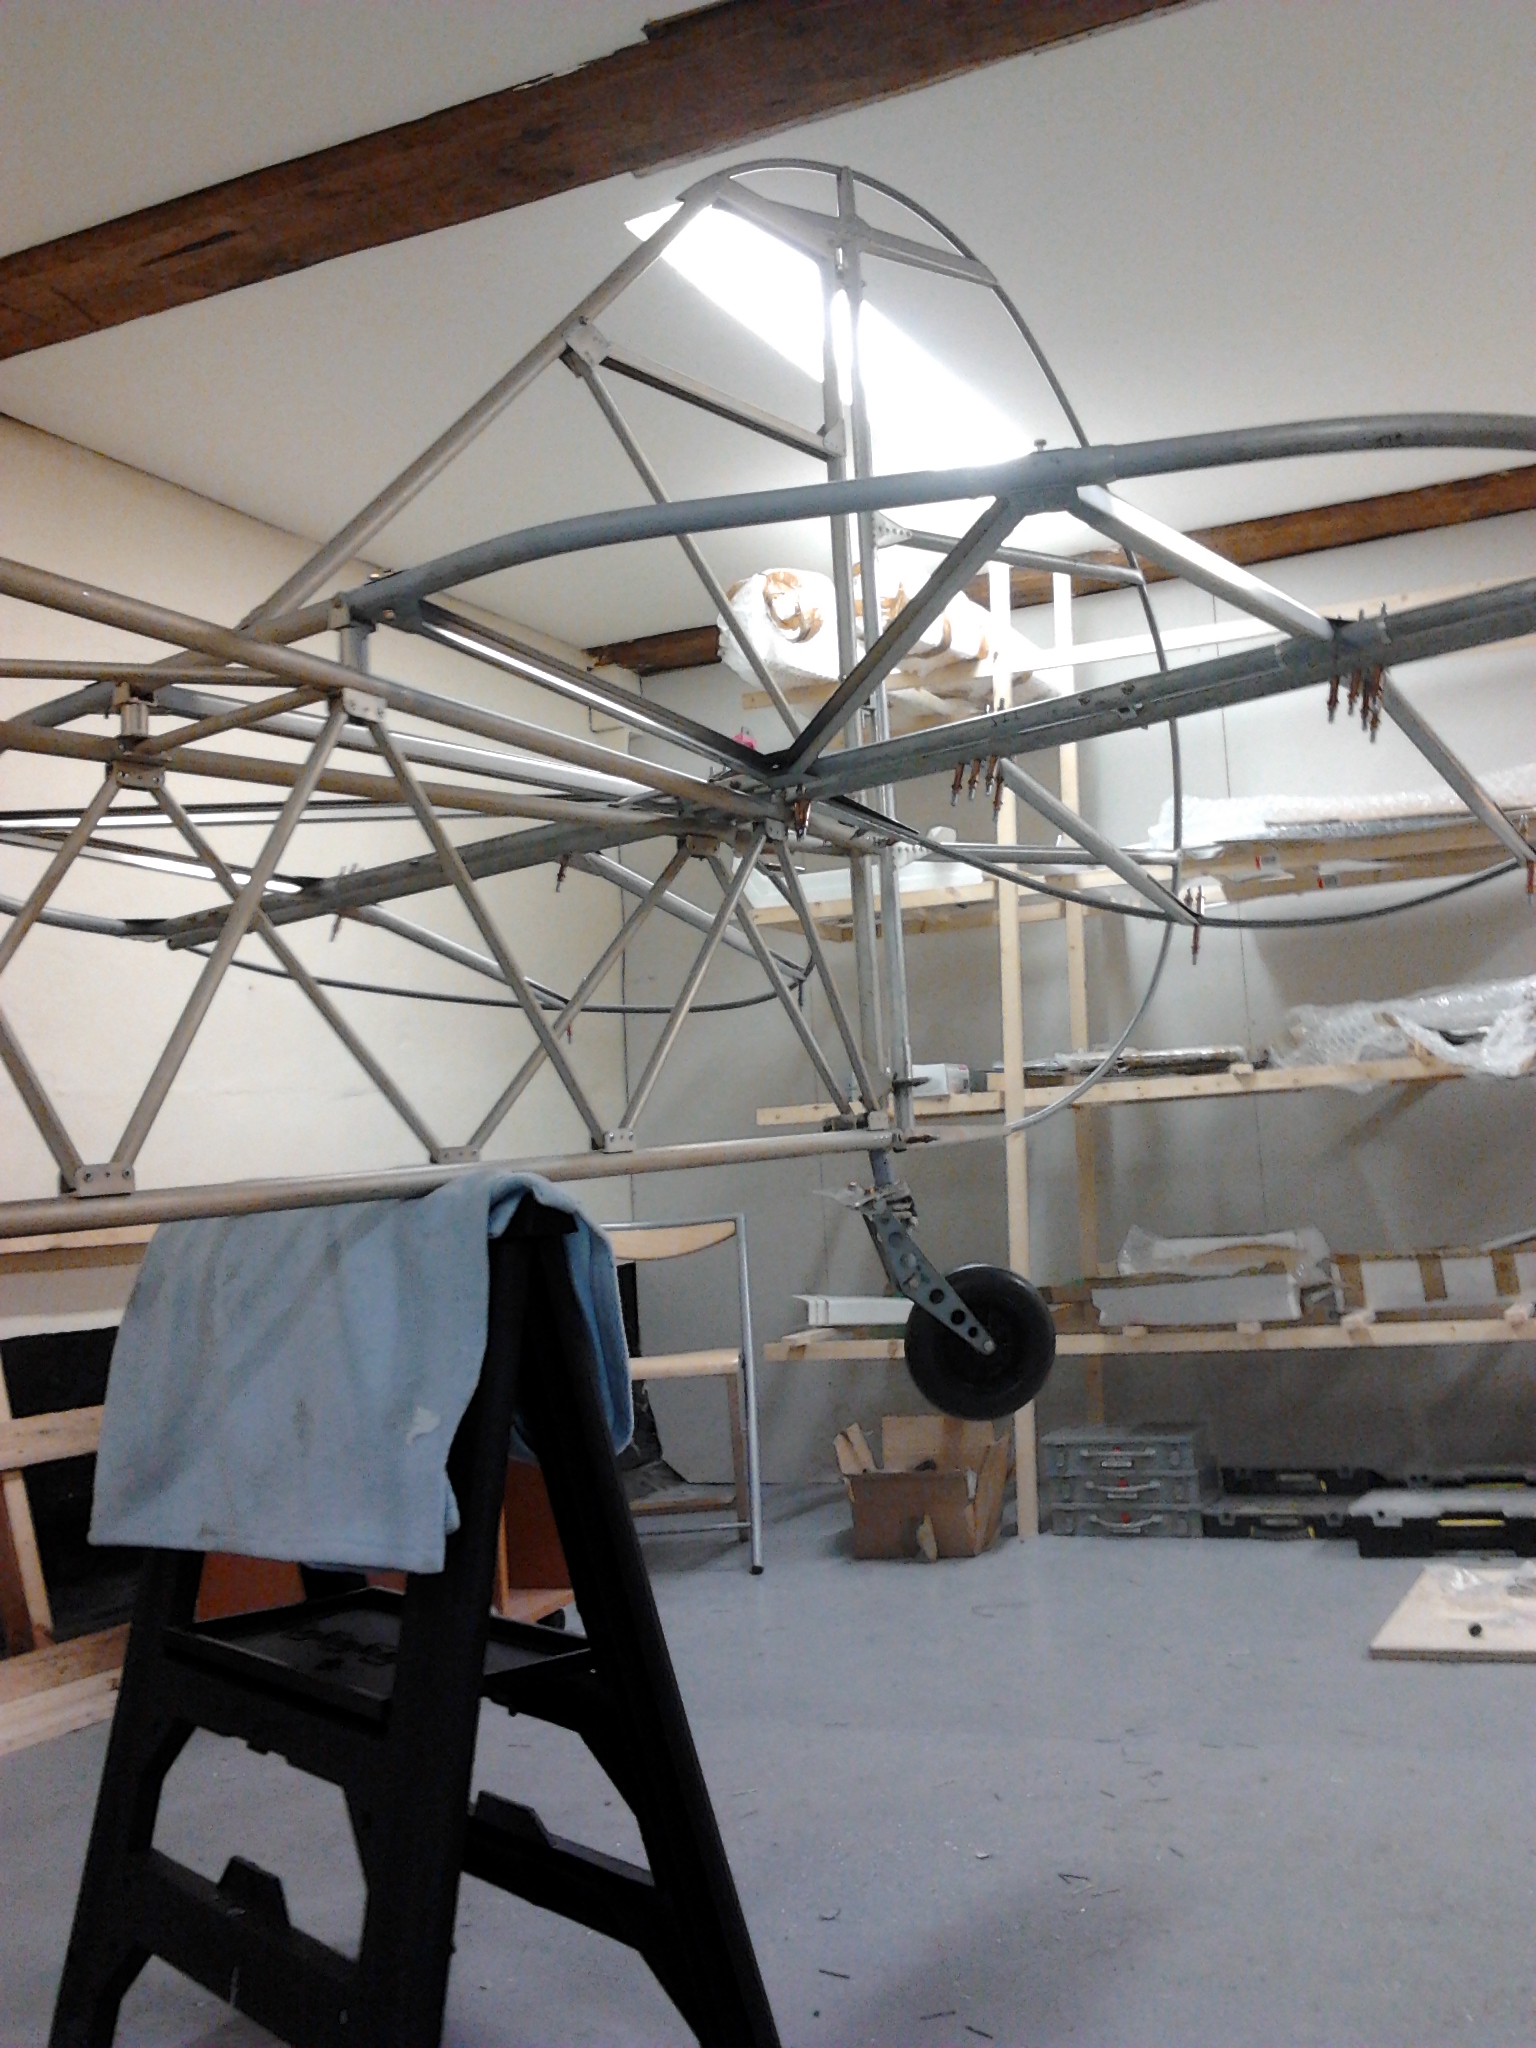
This part is quite satisfying as each part you add makes this look more and more like an aeroplane and again, withe the Sherwood, stronger as each componant is fixed into place.

All this is a temporary fix at the moment as the plan notes you have to remember to remove all this for covering. First I have to remove it for two reasons,
1) I managed to drill one of the underside gusset holes directly into a cleco and broke the drill bit (part of which is now inside the tailplane leading edge … a simple dismantle and hold it upright will remove the part !
2) I need to treat the internal tubing against rust – so will be thinning down my waxoyl to run this through.

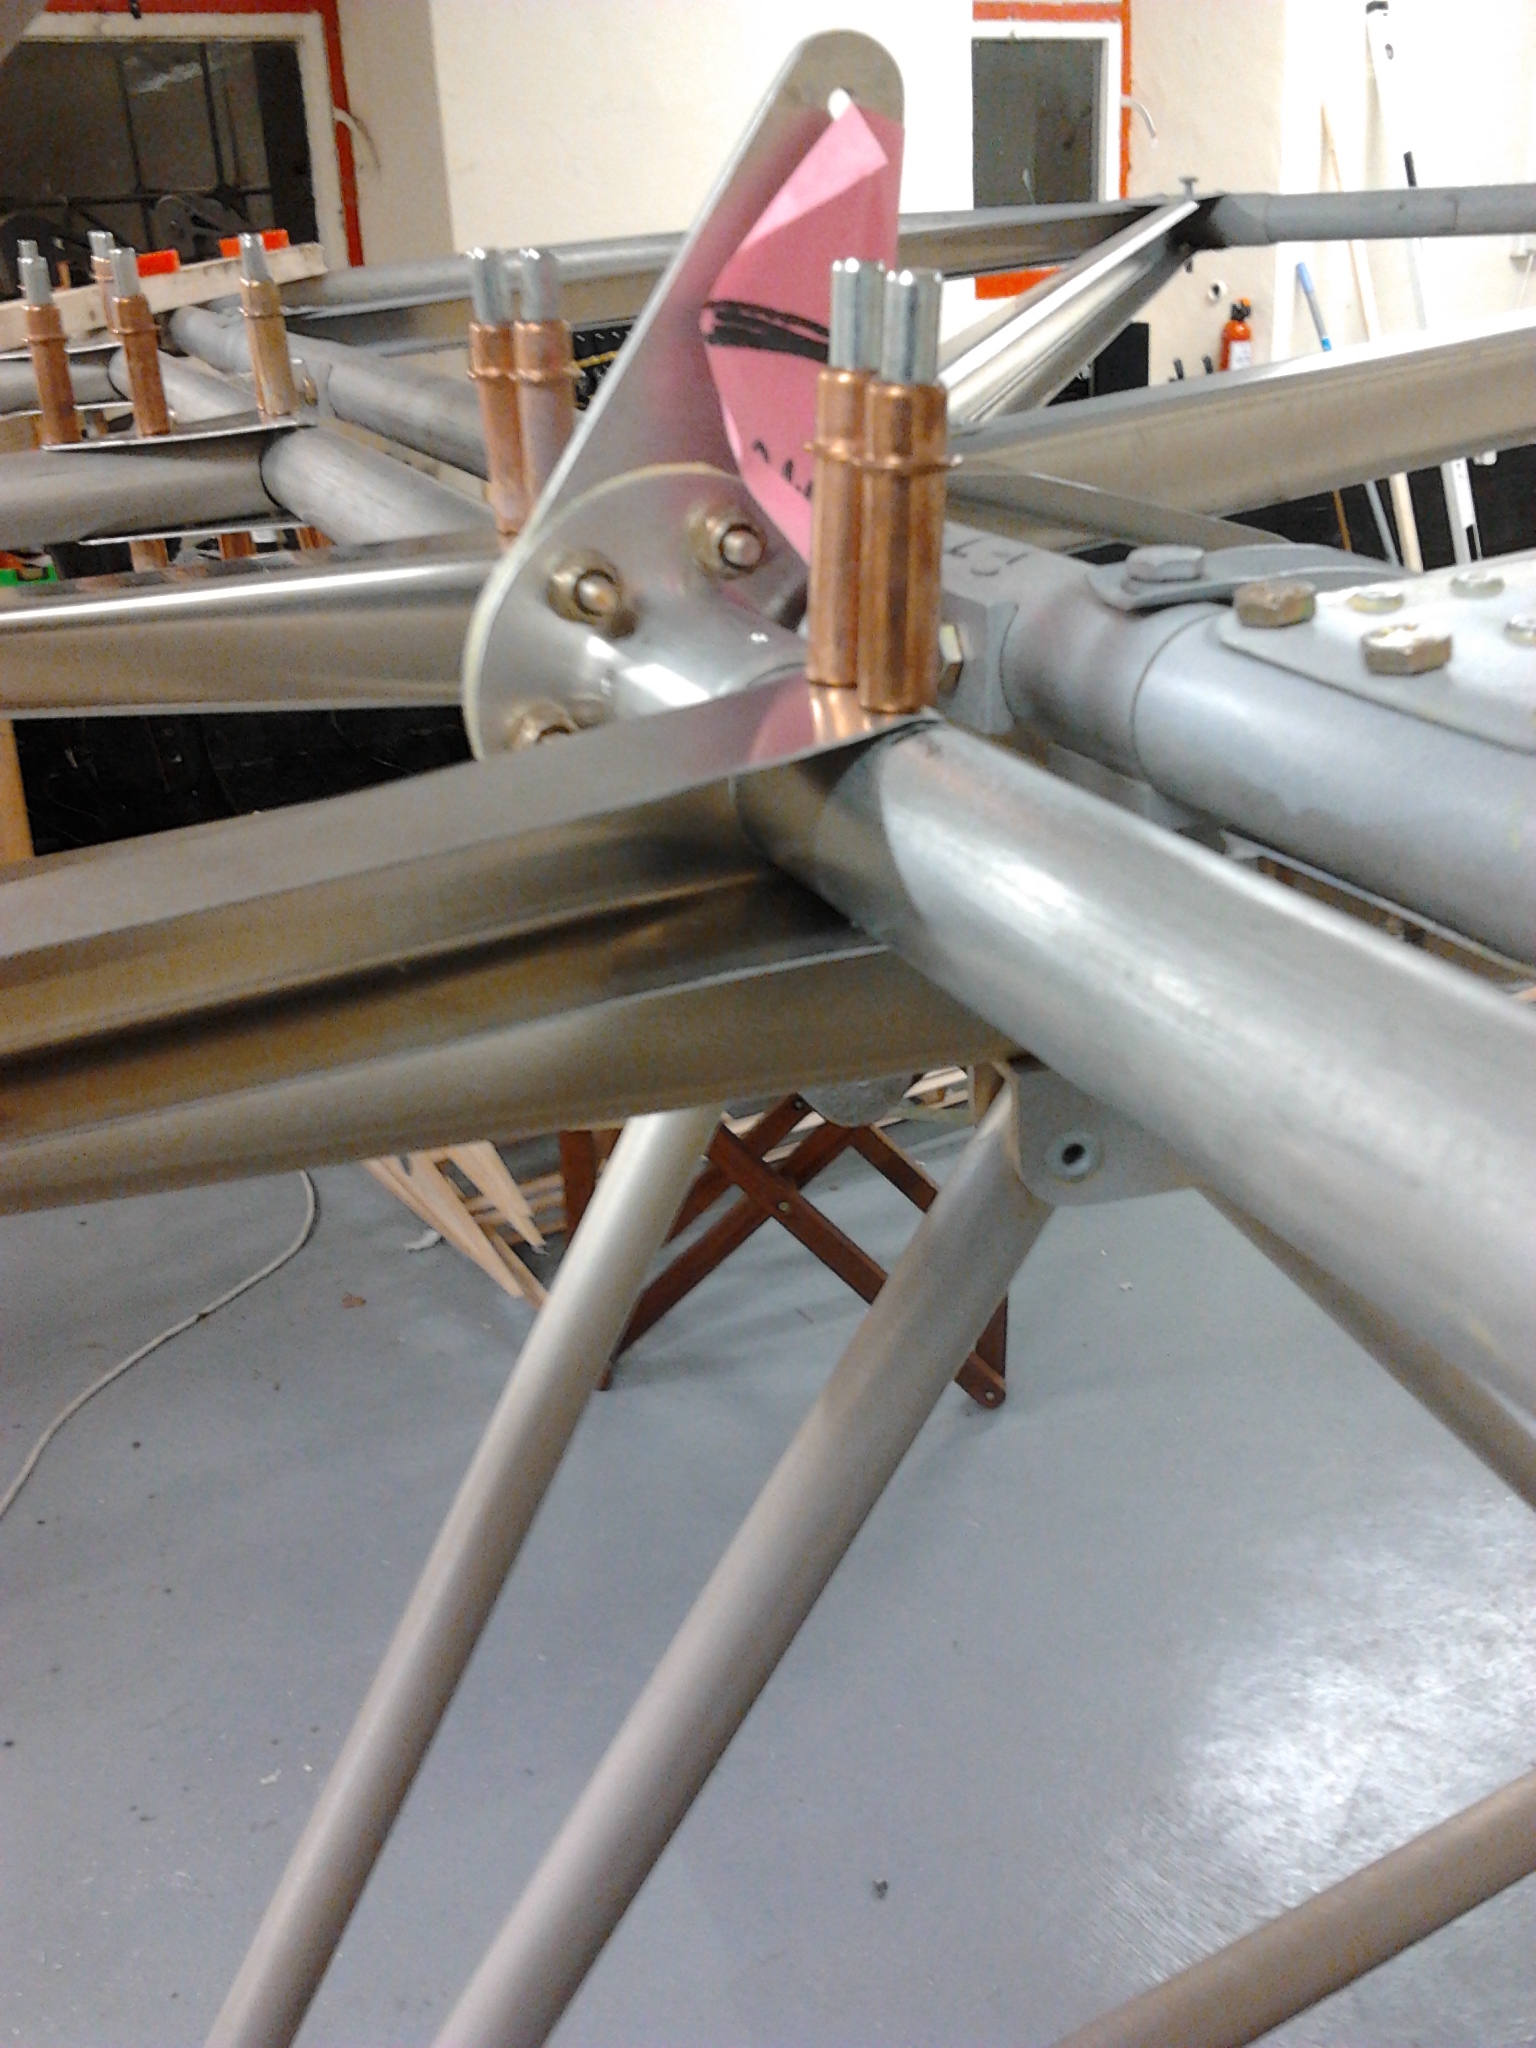
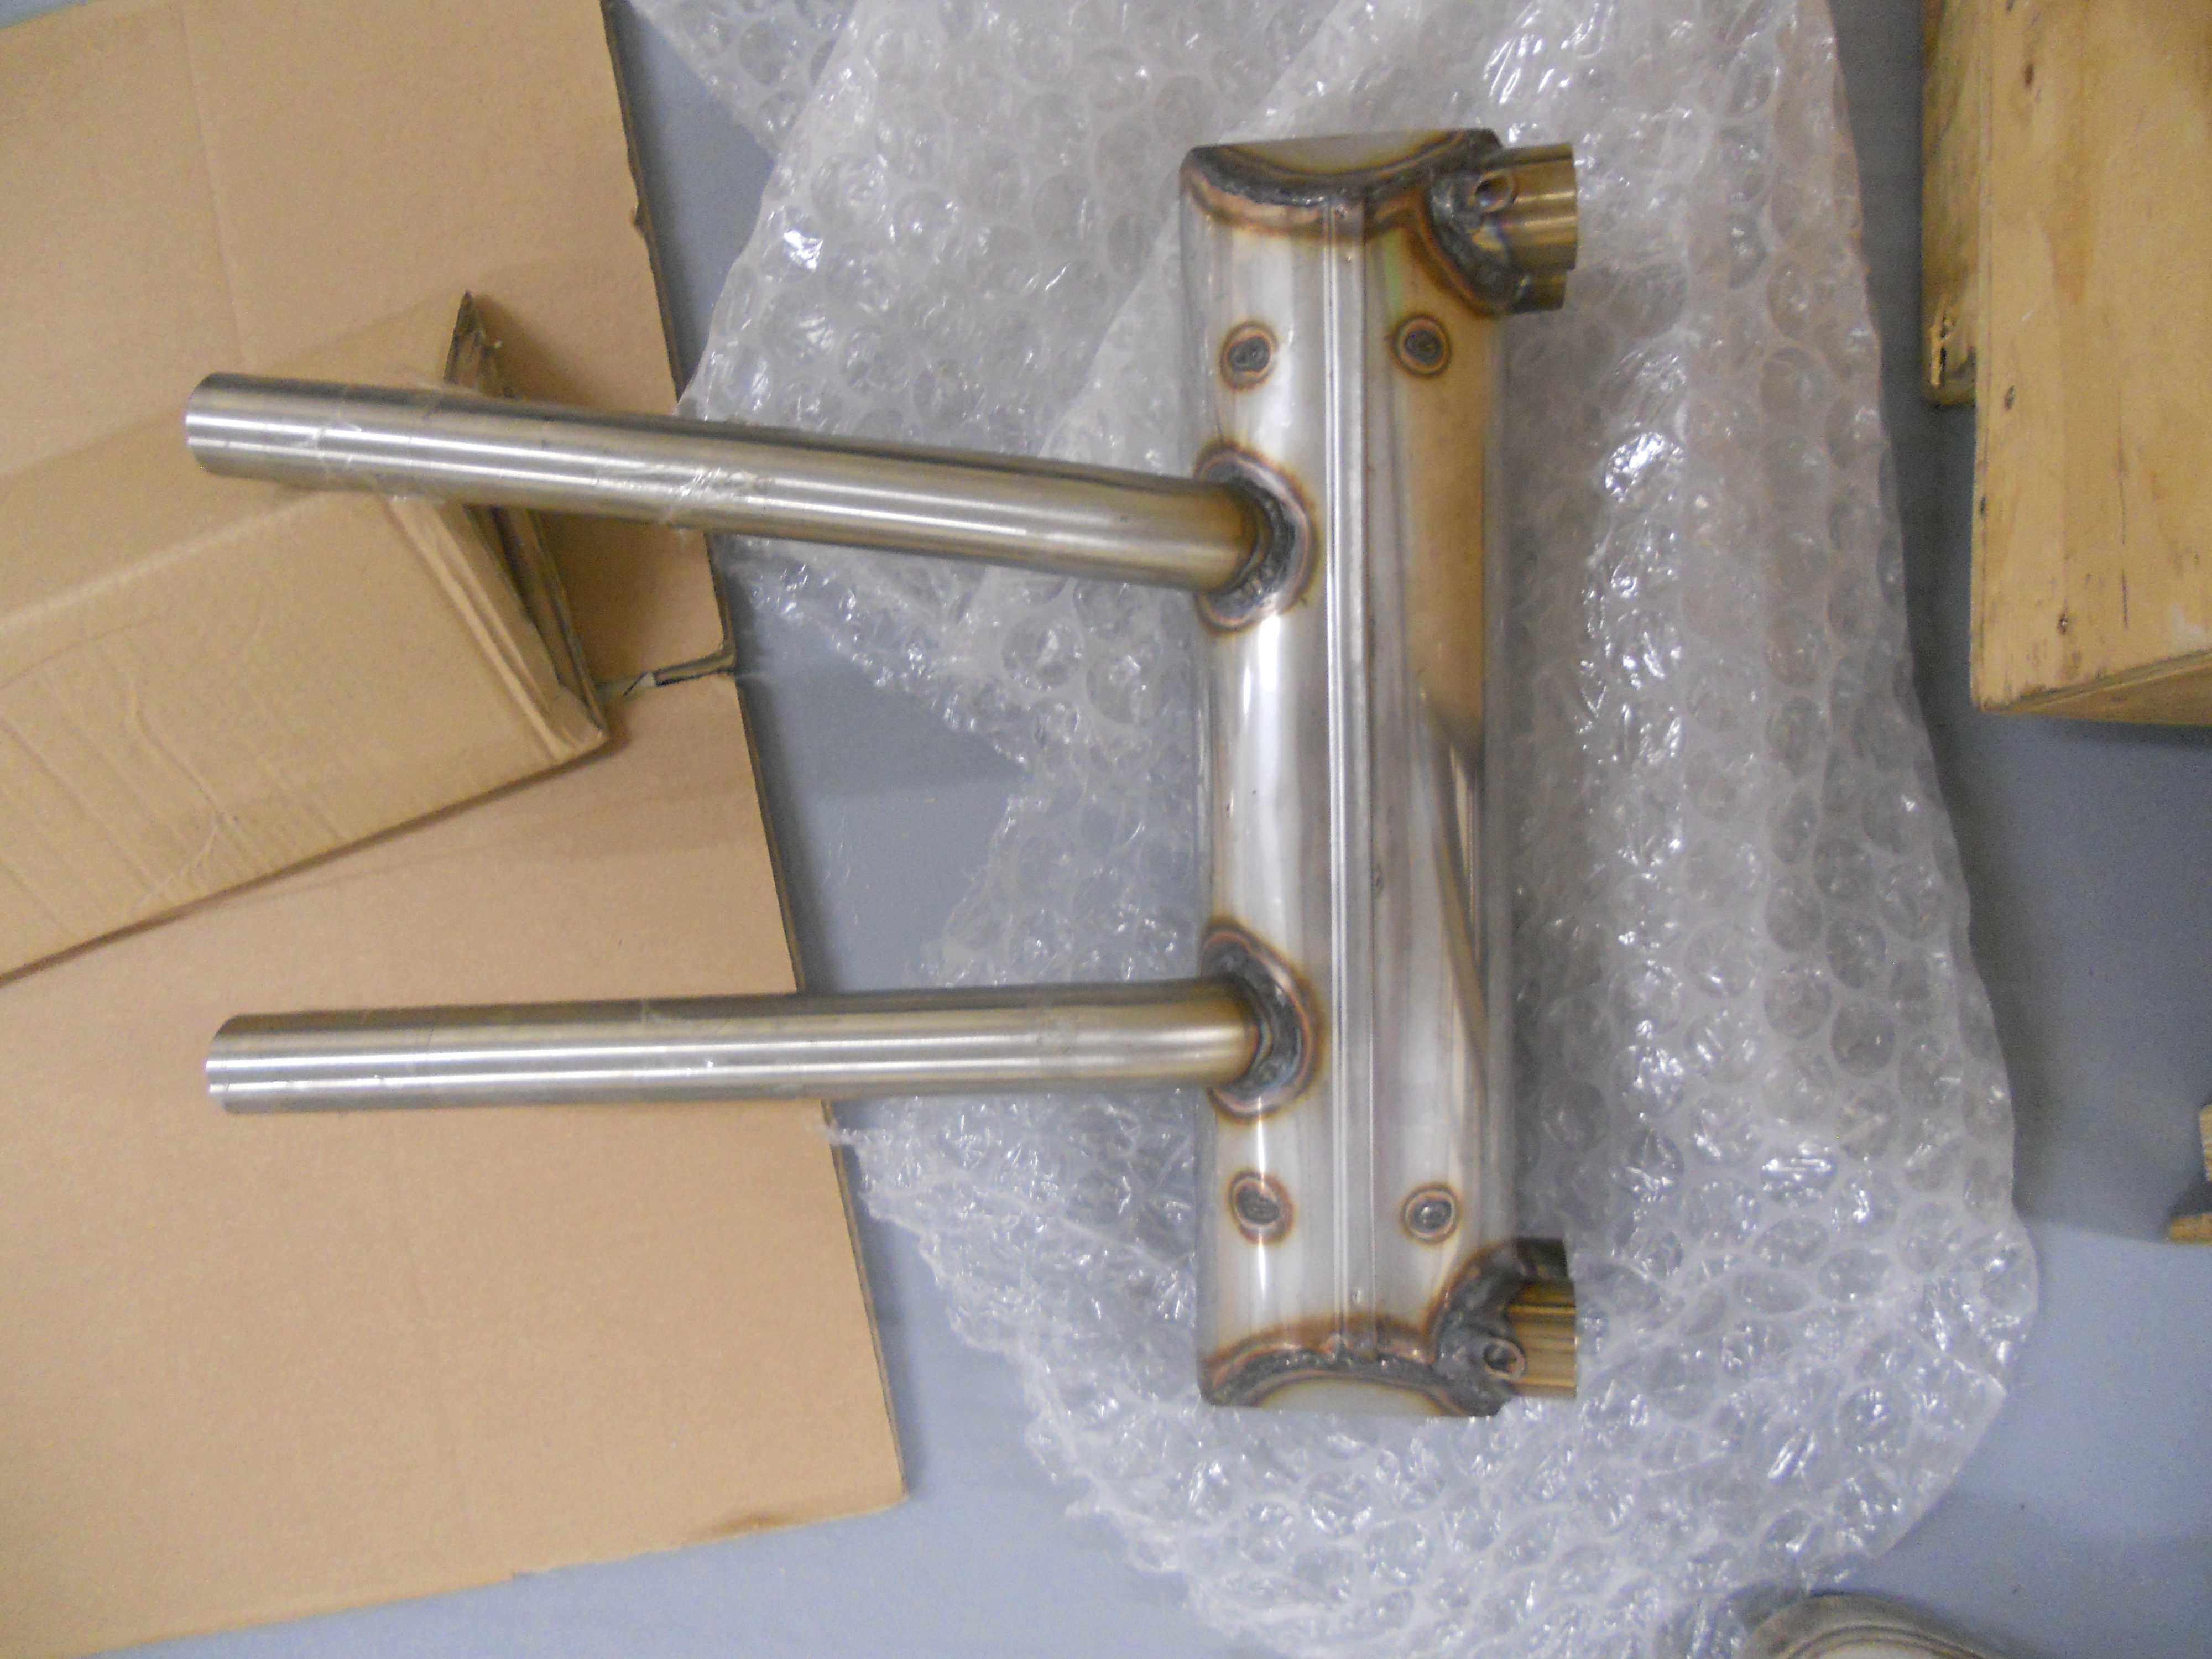
Leading edge requires trimming once it is pushed fully onto the mounting shafts. Each plate / gusset requires cleaning down so that you dont leave any sharp edges.
Then start to fix in place with a few holes cleco’d to get a basic layout
Note the sandwich gussets require shaping so they follow the line of the Leading or Training edge

