Pre side covering …

Prep work as I hope to cover the Port side this week … Wasn’t hey with the original beech ties so new fresh whipping chord and doubled up to be nice and secure …

image   image

Also, as the 50+ wind whipped up outside the hangers I brought up all the aileron bolts and hinge joints to the correct setting with my ‘Rigging – De rigging’ checklist !


O ring part two

Part duly arrived but having looked into the myriad of online Jabiru 2200 manuals I have now found the full servicing manual … The one that details taking pistons out and the like !

There is a very short section, like two sentences, on sump removal but it does note … ” .. On early engines you ‘may’ have two hidden bolts that secure the sump”

On review it seems that some bright designer thought it would be good in addition to the ring of Allen bolts securing the sump (easily accessible from the underside) they would add 2 bolts in from the rear of the engine mounting plate. This then has an additional minuting plate OVER that the has the two distributors fitted to it … So the only way you can tell is to dismantle the entire setup !

I have an awful feeling mine just might be that model but have no way of finding out …

Have now drained the engine oil which is clear as a bell and will now remove the filter to inspect for any signs of contamination. Have emaile Jabiru but not heard back yet on possibility of missing vs badly fitted part and have now asked for opinion on effect of this potentially lost in the sump somewhere …

All pretty depressing when I should be half way through engine ground running and taxi tests.

Radio check !

Another first for Jersey … Just soldered the last BNC connection on to the aeroplane ariel and connected the headset up for the first time …
ME – “Jersey tower this is Golf Sierra Whiskey Alpha Bravo – radio check”

TWR – “Standby One”

ME – “Standing by – ‘AB”

TWR – “We don’t seem to have a flight plan for you AB”

ME – “ha ha Haven’t finished building it yet .. Soon”

TWR – Laughing … “Readability 5 AB !! “

Oil cooler

One thing we did spot on initial testing was very slight seepage from the oil cooler pipes. I put these together with Aeroquip parts and braided cable with jubilee clips tying it all in. Nothing wrong with any of the equipment but probably me being timid about cranking down a chunky jubilee on the nice looking but not too strong alloy Aeroquip fittings.

Found a local guy at the harbour who puts together hoses for all sorts of things … Martin … What a brilliant bloke .. So helpful and diligent

I took my whole setup off the ‘plane in about 10 minutes … Went down to him to discuss and I now have a fantastic pair of braided professionally swaged pipes with the benefit of 45’ fittings for the cooler matrix to allow it to mount flush in its housing.

martin also pressure tested the fittings by filling each tube with oil, blocking the end off and then pumping up to around 500 psi !!  Amazing stuff and the swaging machine looked like something off Thunderbirds !! beats my hand held nico press

Turnbuckle tie up time

Having rigged and de rigged so any times it’s now time to lock down !

Graham kindly loaned me some engineering ‘bibles’ which are timeless in the information they hold .. If only you could instantly absorb all this stuff !

They are laid out so easily with sections on every build or repair that you may ever come across.

The section on how to wire a turnbuckle is really helpful and sounds like it will make a really neat solution

Jabiru O Ring

Having had three successful but short engine runs it was disappointing to see that the small smear of oil I noticed just near the base of the oil filler hadn’t disappeared after I had thoroughly cleaned all around it.
This means it can’t just down to a careless dribble whilst topping up ;(

Contacted Jabiru in Australia as, although this is around 6 years old it’s brand new out of the box ! A chap called Michael got back to me and suggested undoing the grub screw that holds the dipstick / fill tube in place and checking it was seated ok …

Oh dear ….

Tube duly removed and yes I can just see the O ring indent about 2mm down from the nicely machined face on the lower sump …. The inlet pipes are just above this so it’s tricky to see too closely but my nail could fit nicely into the machine groove ….. Which of course it SHOULDN’T ! … A rubber O ring should prevent that ! But it’s missing !

That leaves me with the challenge of

A) it’s missing and was never put in … Not good practice .. But better for me … 95p from SkyCraft or

B) it WAS put in but was pushed inside by the tube when fitted ! … So it’s in the sump somewhere

I have mixed feelings ….

I suddenly feel a little more like an engineer as I have looked into a problem and found the actual issue but angry that this is slowing the critical engine testing now ….

Graham from CIAS has a couple of scopes that we will try to see if we can see anything … Have asked SkyCraft if they stock sump gaskets and looking how easy it is to drop the sump … Looks like all the exhaust and inlet manifolds off and then a rectangle of Allen bolts …. May be safer in the long run


Next tests

We then moved into a period of F7-8-9 gales in Jersey which didn’t make me feel inclined to pull the ‘plane out for further engine running

next steps will be to repeat and fine tune the engine monitor .. Check for any leaks as she picks up temperature and rev range

Then, with the aid of a couple of wing walkers, check the brakes and general handling in terms of steering and taxiing …

Once I have about an hour of ground run on the engine … I can start to plan a few evenings covering the sides and getting the reg on … The radio clipped in and a test call to the tower to make sure my ground plane all connected up nicely.

The TRIG transponder and radio need to be ordered soon as well as Jersey don’t really approve on non transponder due to the nature of commercial traffic. Les, the SATCO, has been brilliant but I don’t want to push my boundaries !

April could definitely bring a spring to the air … In more than one sense !!

29th Feb – Second engine run

The second engine run .. Of about 5 mins was a much more controlled and pleasant affair !!

explored a bit more of the range .. Very small movement invoked the most amazing amount of thrust … Boy this hung is going to go ….

I ran her up to about 60% .. Once I had some warmth in ….

image   image

I could then hear the zing of the prop as the sound echoed around of the hangar walls .. She sounded just like a REAL aeroplane … Just absolutely purred …. Back to slow running which was clearly ‘hunting’ .. That is the choke not closing properly .. Part now ordered from Sky Craft to peg this properly

I could then see that the multi engine monitor unit I had indicated that a warning in the Port CHT .. No reading so looks like maybe a bad connection … RPM was varying between -300 and plus +800 … This was located to my incorrect initial setting of the RPM defaults … Spotted I had left the default of 6 pulses per revolution when the Jab only has two nuts that pass the tacho ! Now reset will check on next run

29th Feb – First engine run

The day arrived ! having had an aborted (flat battery) attempt at turning the Jab 2200 over the Monday brought a nice fully charged battery, a tank with some nice fresh Avgas in and a bunch of eager bodies around to help.

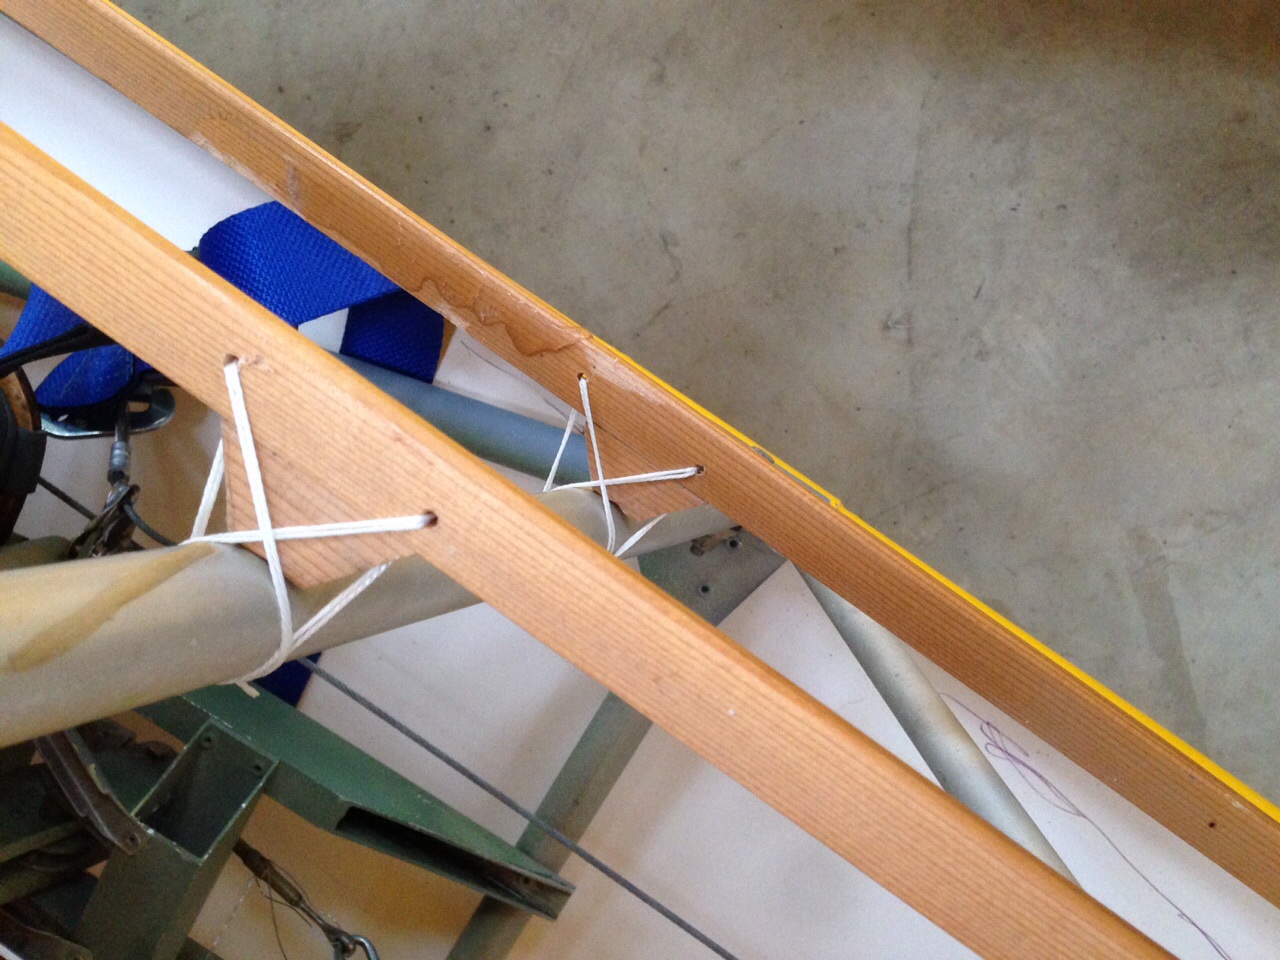
SWAB was duly pulled out and the wings opened … Must get those retainers fitted to the top so it can be a single man job again .. Since the chunky spring retainers went in you can’t do it single handed .. But boy are they secure

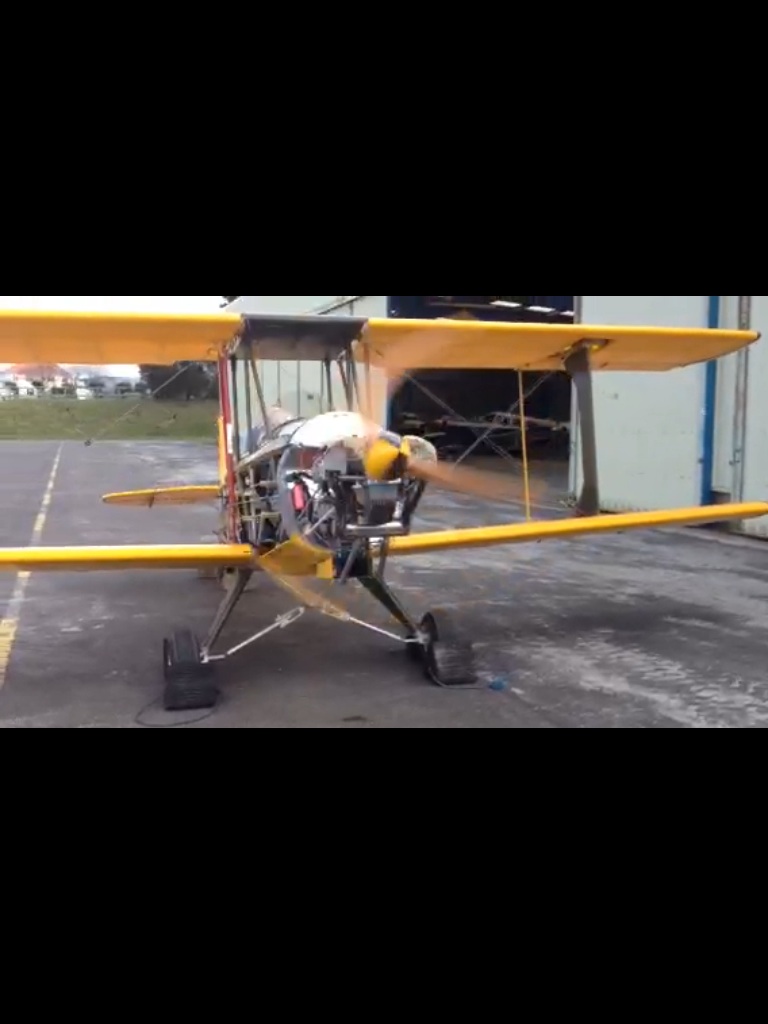
Chris Winch and I tied two large concrete blocks to the lower tail end and two large chicks were put in the wheels. Extinguisher and hose were put ready and then I climbed in .. Only he third time I have sat in .. Superstitious or something ?!

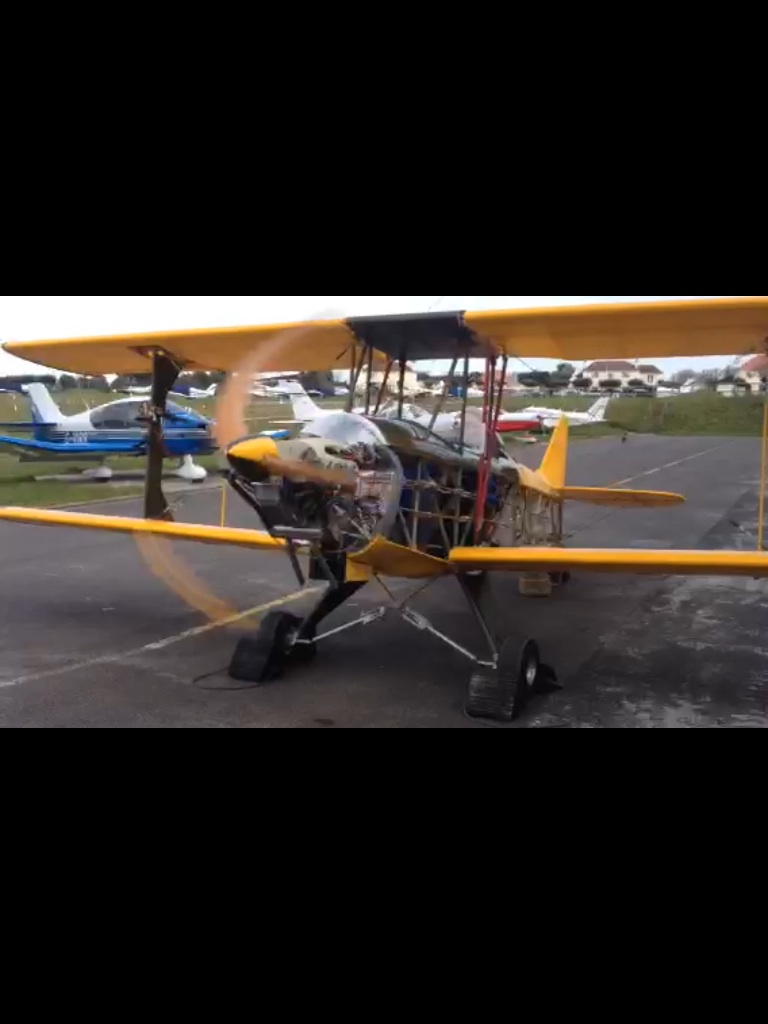
Brakes on, throttle set all the way back and a small notch open, fuel on, choke on, carb heat on, mags on … CLEAR PROP and press the button …..

Two turns then absolutely burst into life …. So much life though … Realised it was a lot more than tick over so my right hand, which had been resting over the mags, pushed both down and it stopped immediately …

Turns out the Jab throttle seems to operate the ‘other’ way … I haven’t seen anything in the manual but had assumed (yes I know that means an ass out of you and me !) it opened up to full throttle against the (return) spring …. It doesn’t … So tick over was actually FULL throttle. It ran for about 4 seconds before I hit stop

havung investigated with the collective engineers we decided I should push full forward on the throttle and pull back a noth .. Second start .. Perfect .. Ticked over .. A bit rich .. Found the choke cable was catching on the carb flange …

Blog at WordPress.com.

Up ↑