
Pre planning the 100 hour engine check …
Its done just under 95 hours … at very varied power use .. which the manufacturers recommend .. ie don’t drone around at the same RPM hour after hour as the pistons glaze the bores …
(Update .. just cross checked my log book and engine run hours with my Hobbs entry and Hobbs is 99.25 … so time to stop and do this…. New bolts arrived 26th Jan 2021)
This has been a great workhorse .. hauling lots of small, medium and Large ! People around .. and also purring around at 5,000’ on very low RPM .. then nice fast turns with smoke and eager passengers who like to see the world on its edge ..keeling around on a wingtip ..
I’ve religiously changed the oil every 25 hours …after the first 25 .. you can go to 50 hours between changes but it’s so cheap AND a really easy way to make sure nothing is going awry over time …
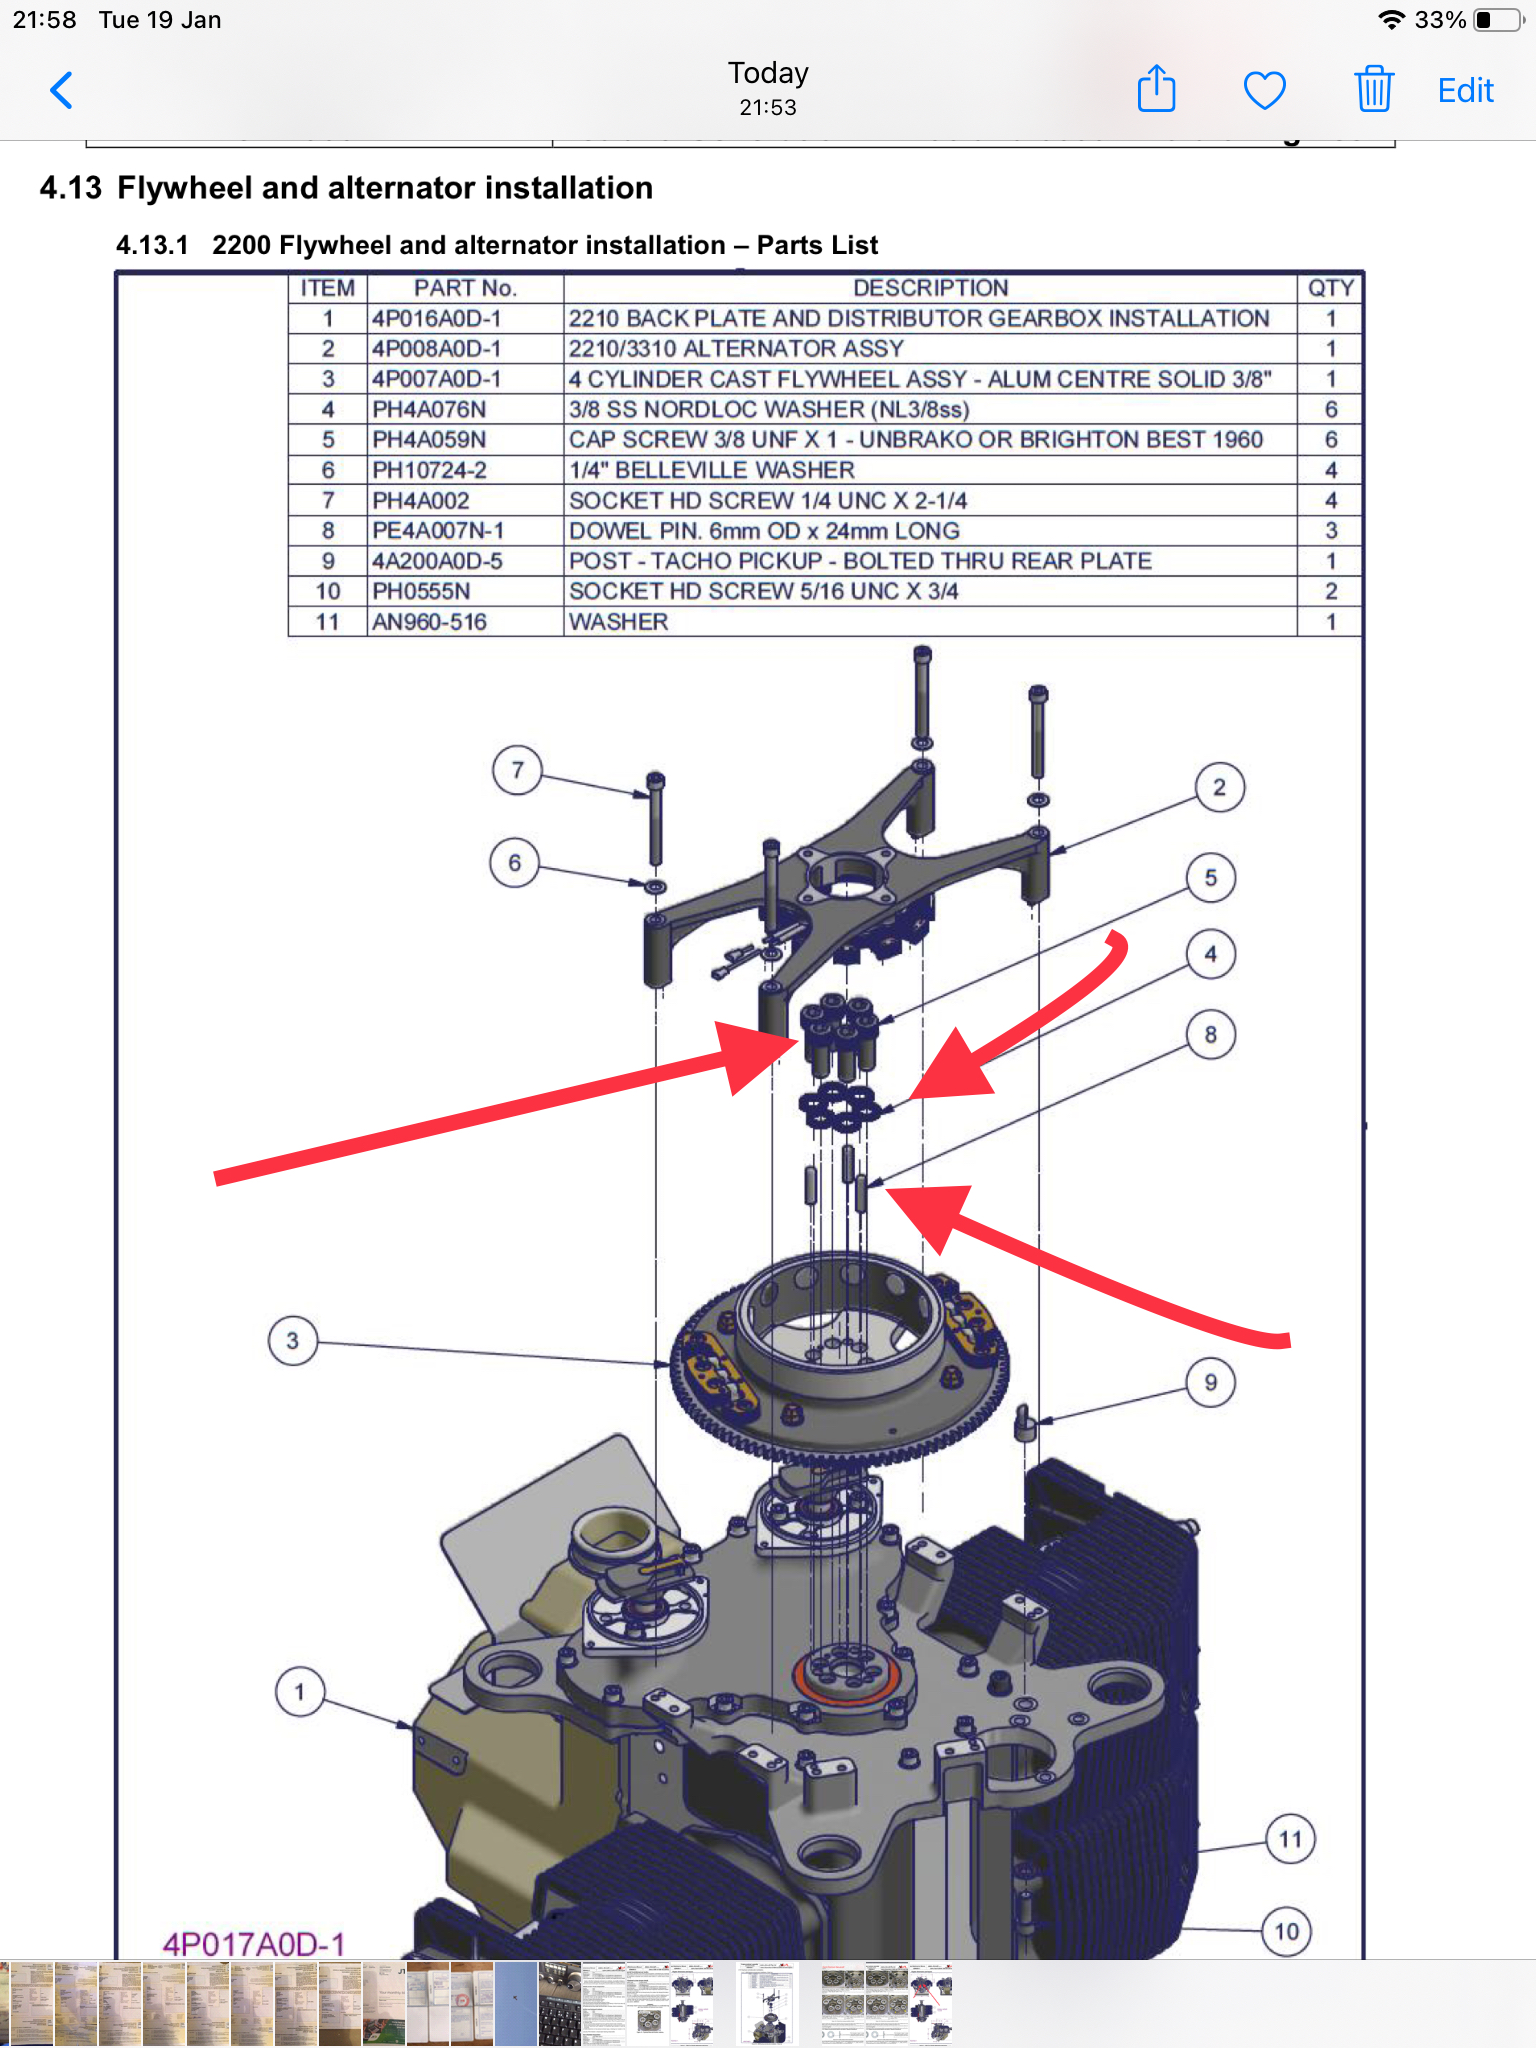
Anyway … it’s 99 hours now .. so time to plan a usual oil and plug change but also … there is a service bulletin that states you should check and change the 5 bolts that hold the flywheel in place.
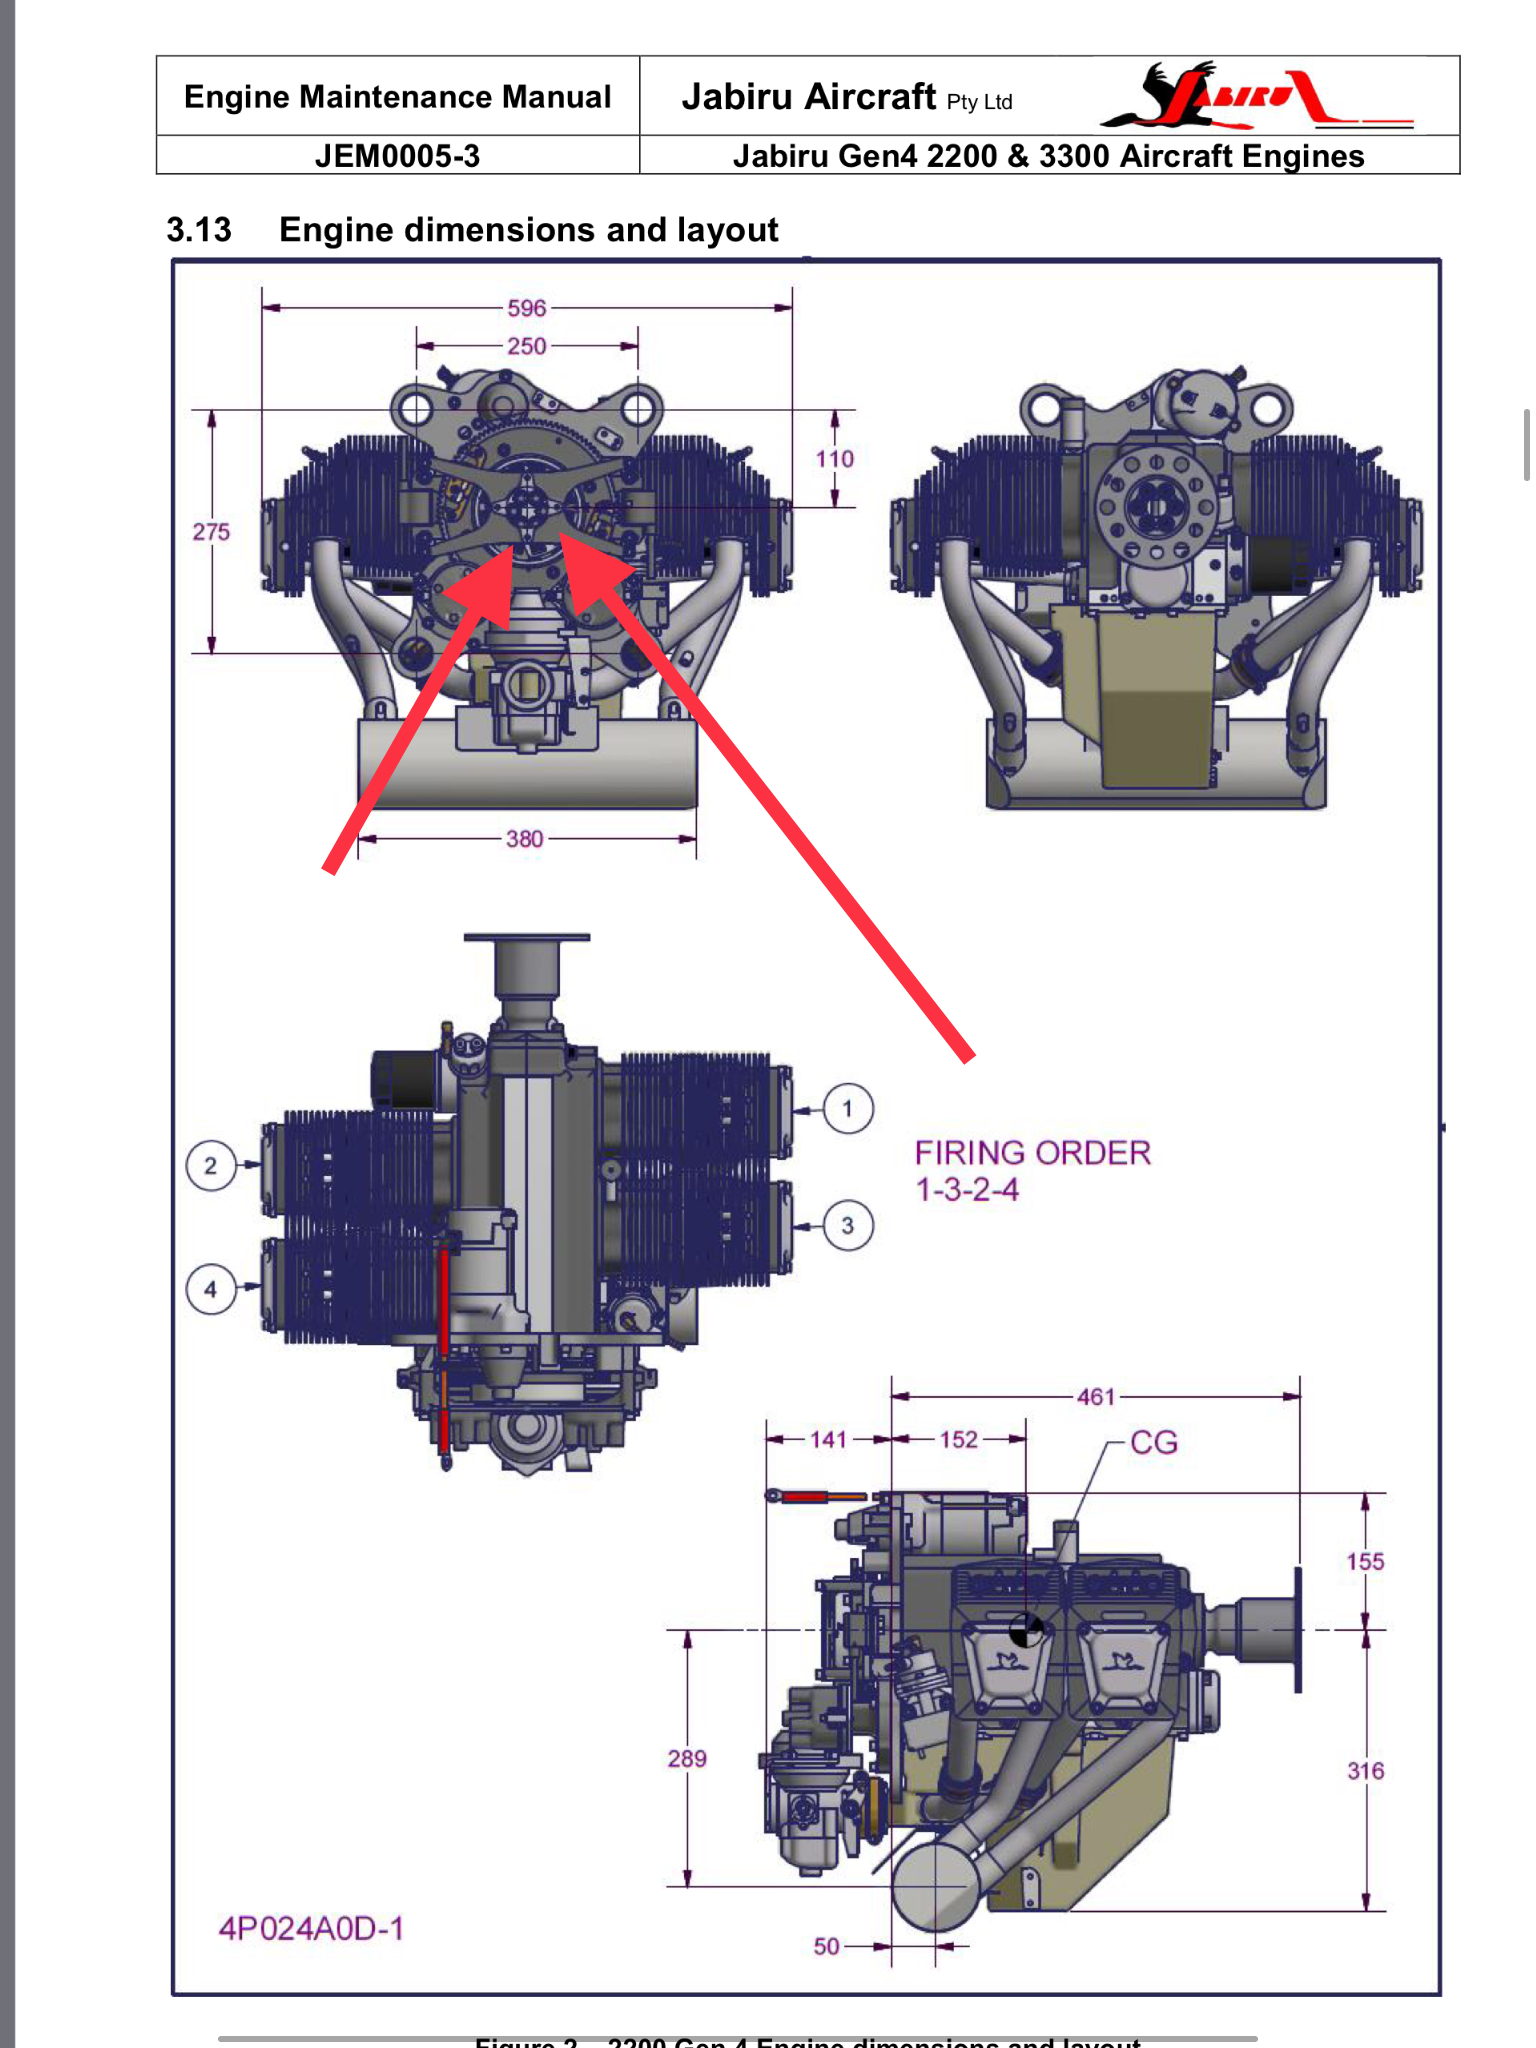
The great session I had at Skycraft last year showed how closely clustered these bolts are … they bolt directly into the rear face of the drive shaft.
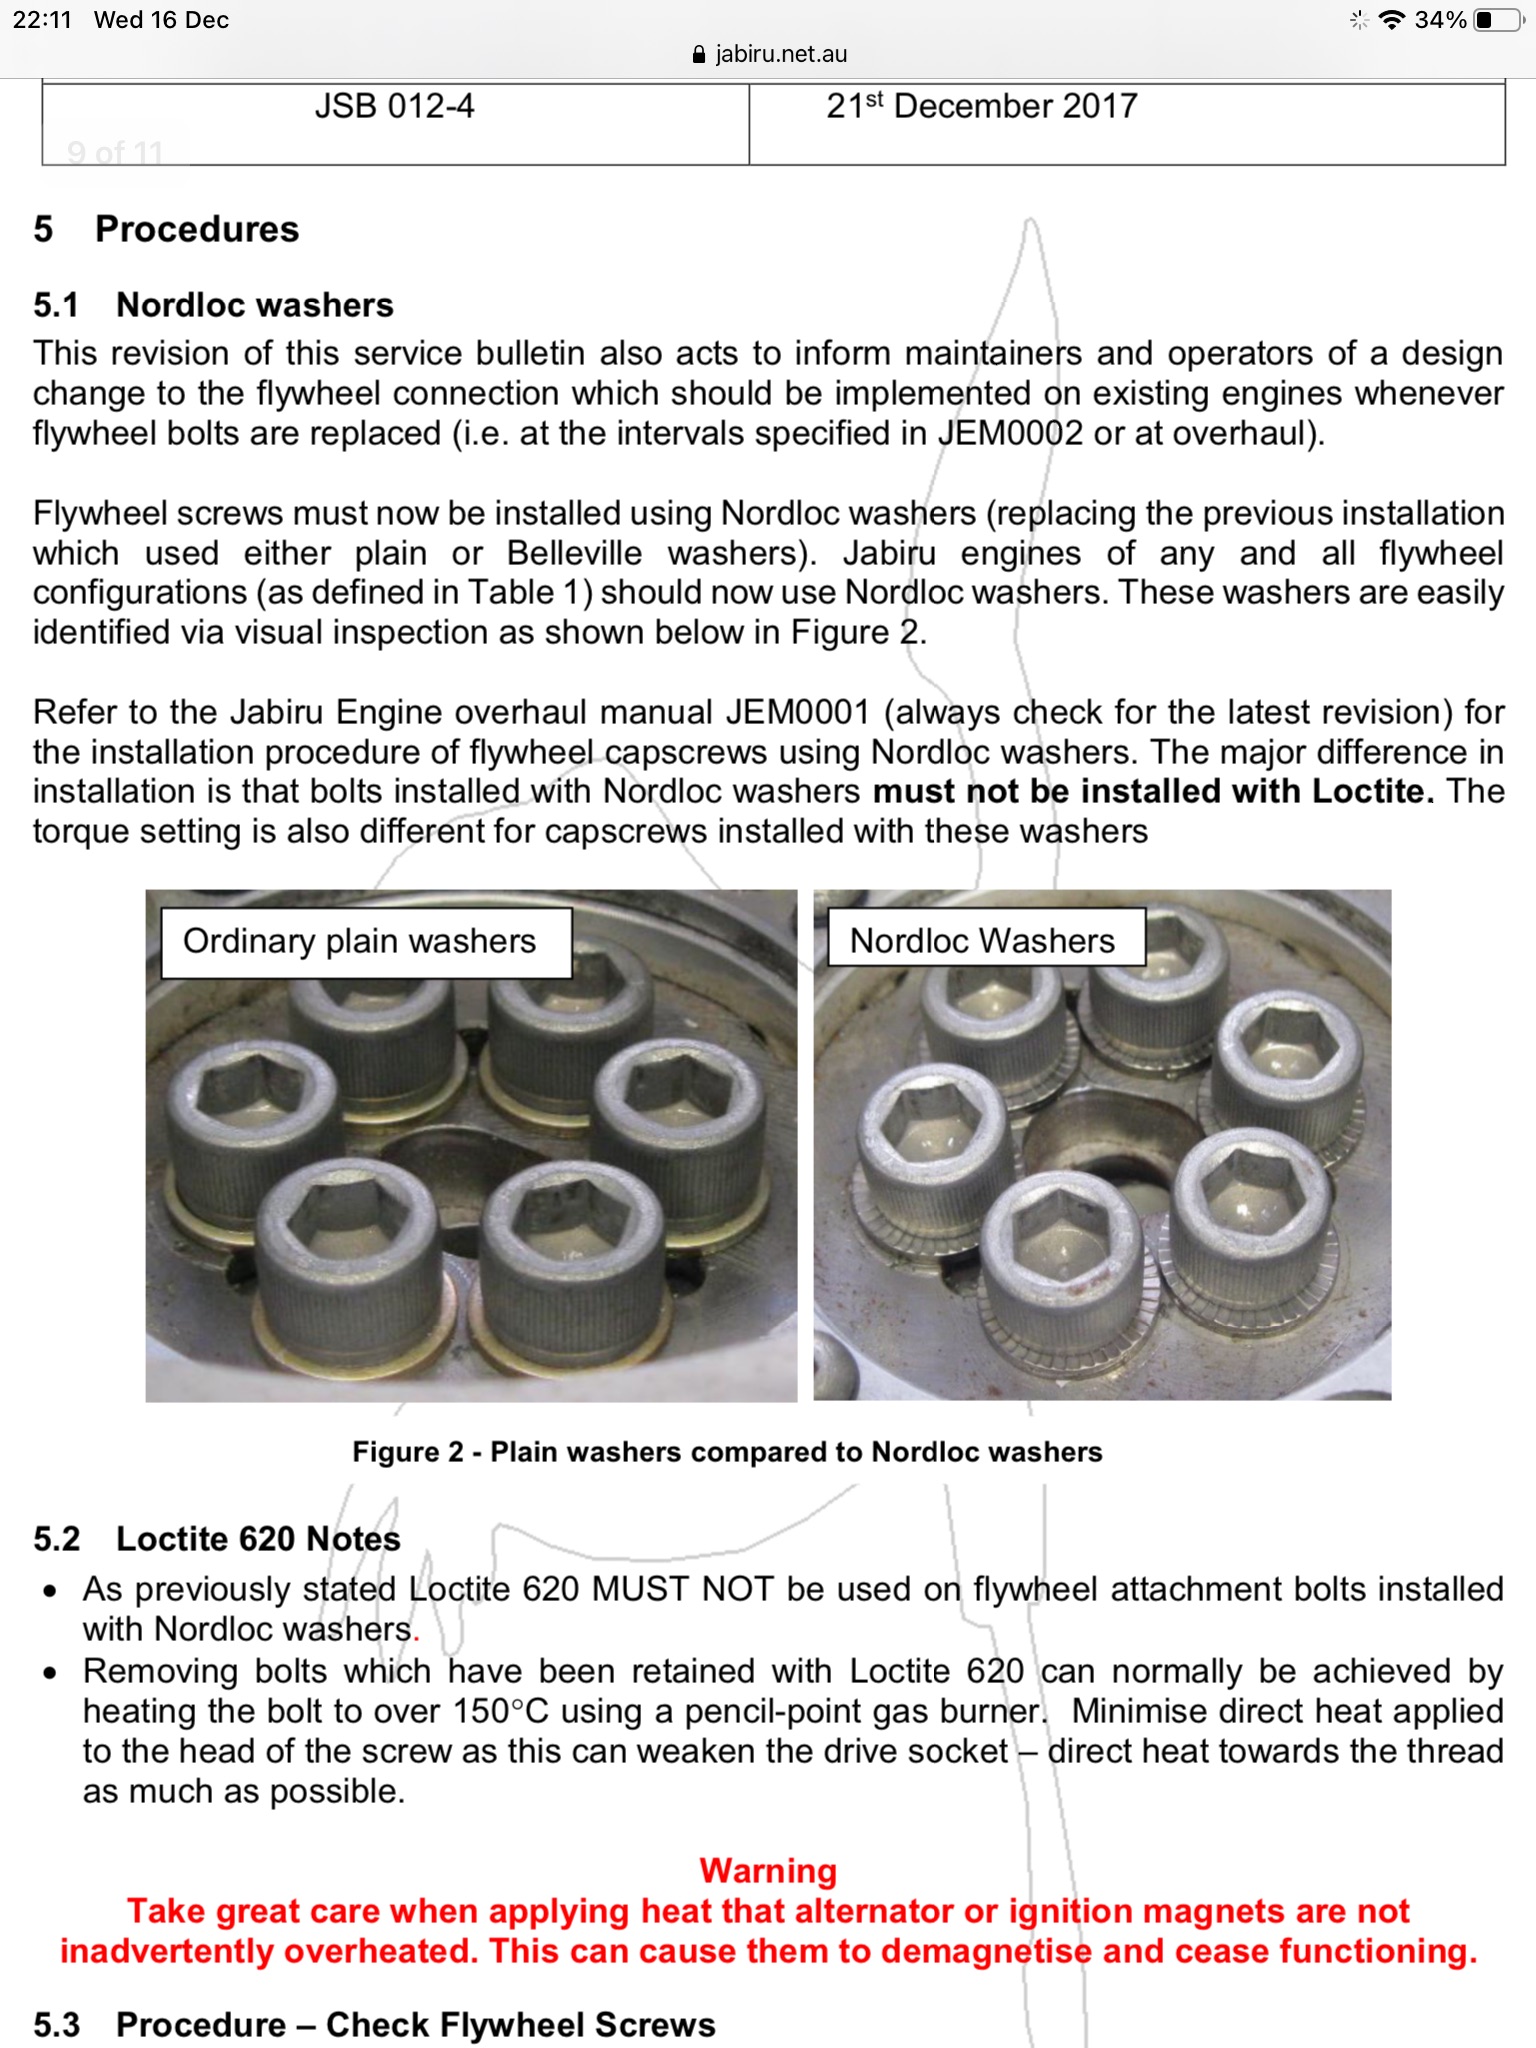
They need initial checking to see if any have worked loose before they are all replaced with improved design and improved Nordloc washers.
In the early days, Jabiru had problems with these earlier bolts sometimes failing. A bolt failing on a flywheel as you might imagine pretty quickly adds strain to those remaining and your flywheel starts to think about other trajectories !
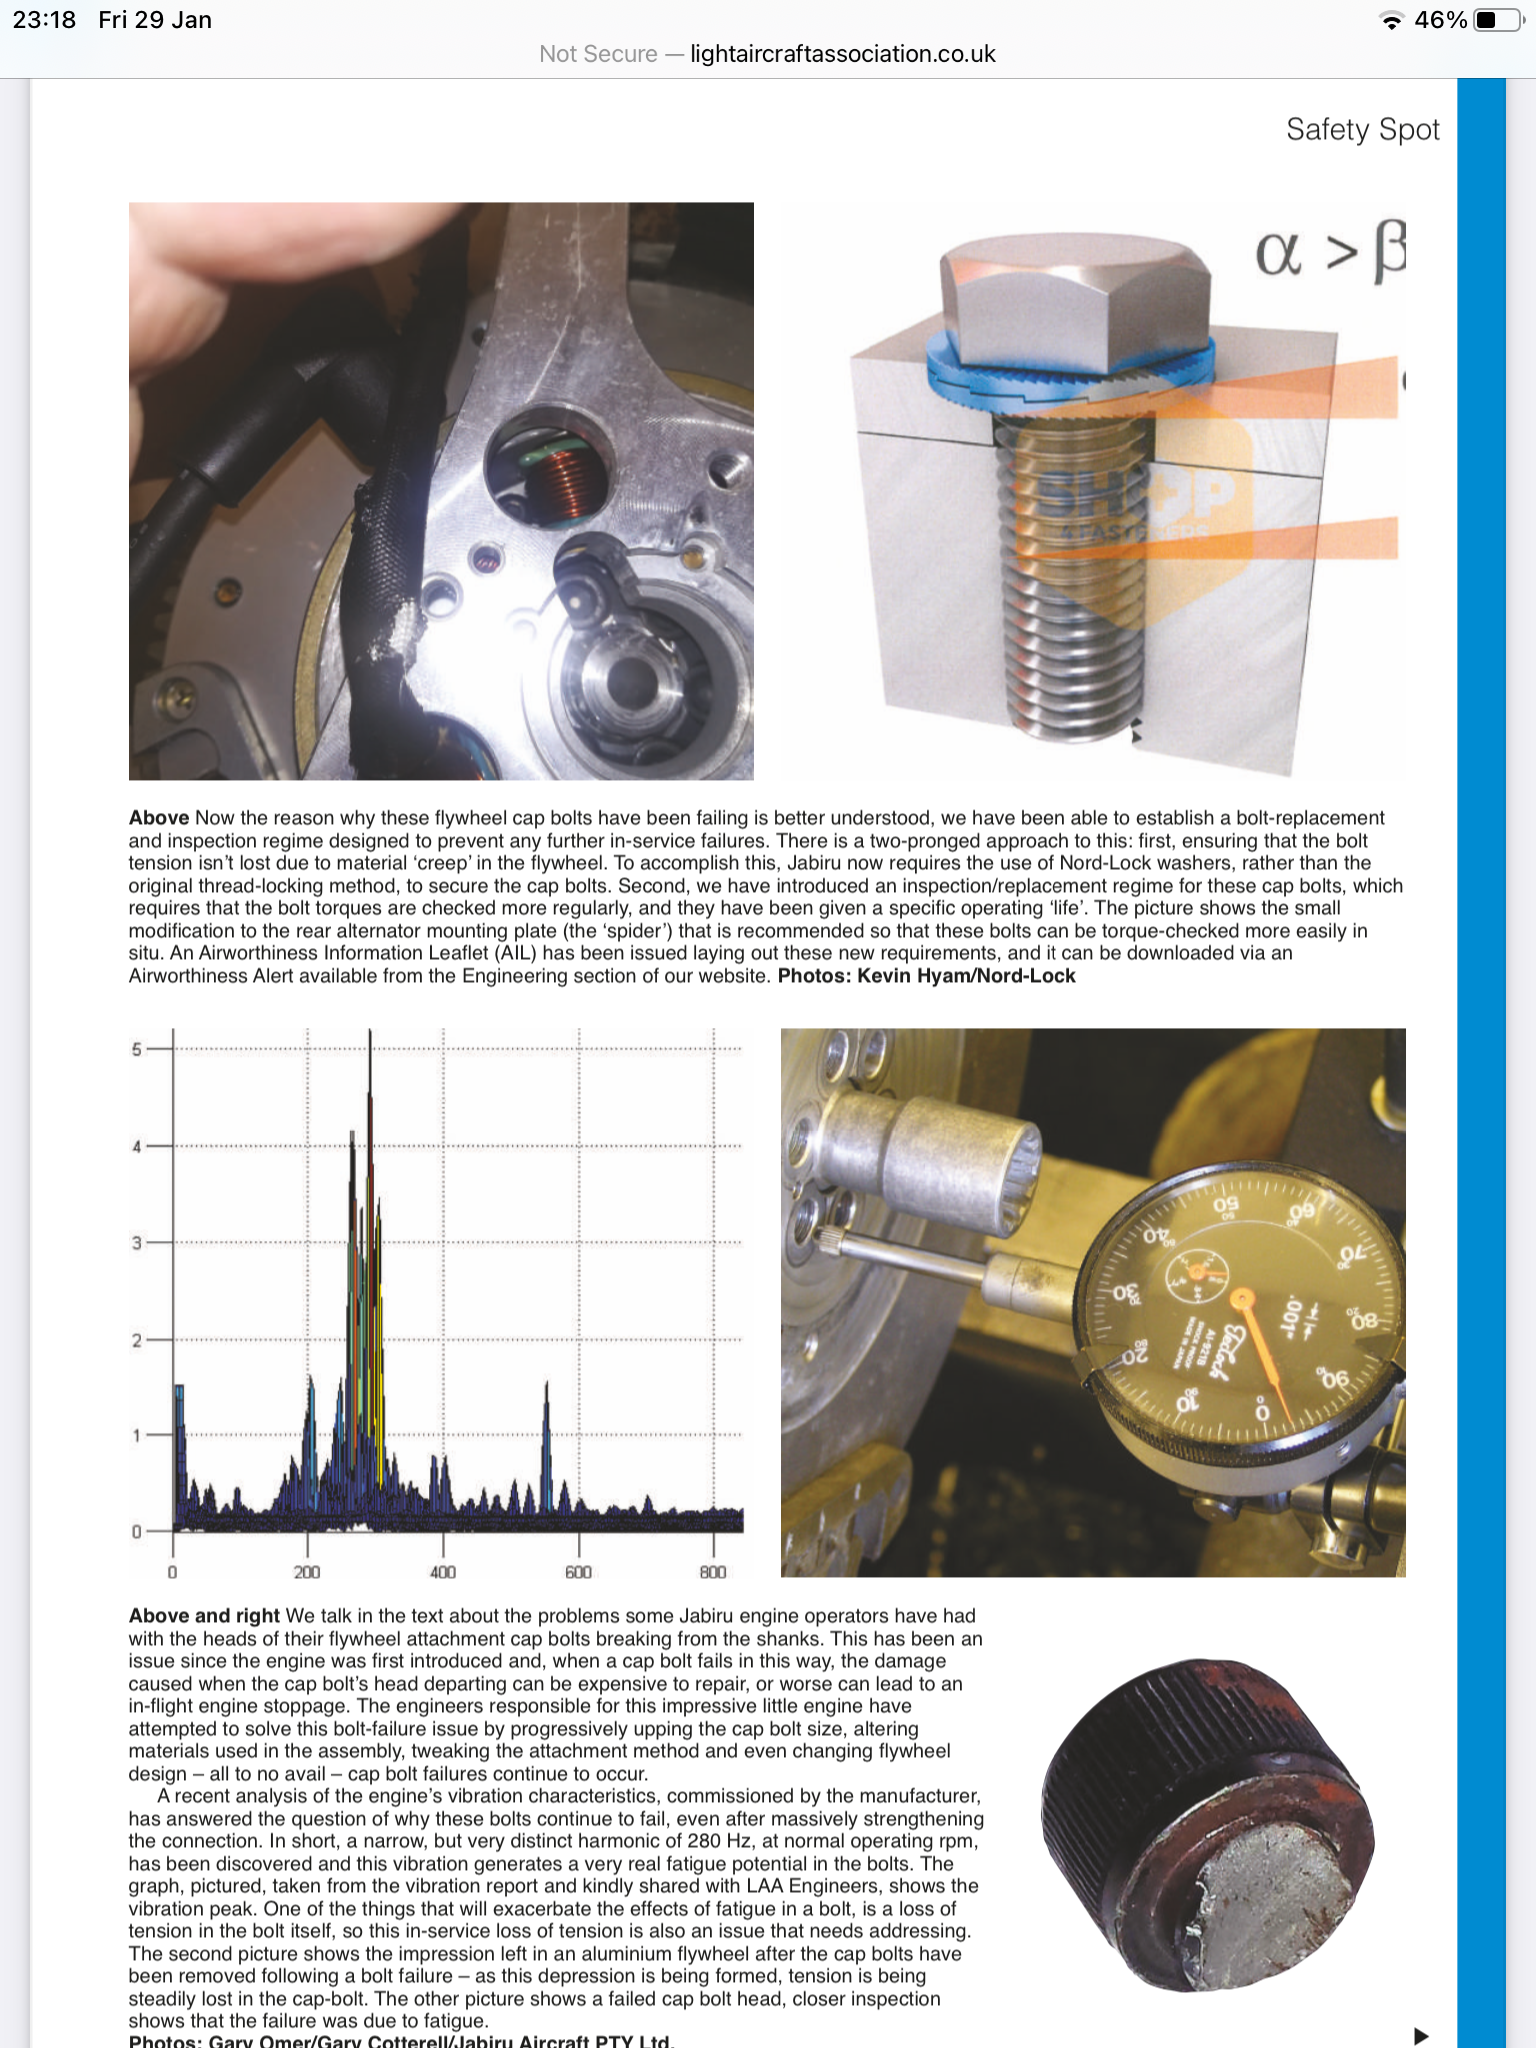
Not sure who it was … but years of clever research was published recently … and the LAA published in their regular magazine … Bizarrely.. it turns out that the recommended cruise RPM of around 2,700 RPM sets up harmonics in the assembly that is detrimental to these bolts !
THIS replacement is purely precautionary … but wise …
update 23 Jan 2021
Had a look at the back end of the engine today .. to see what the back of the ‘spider’ looked like .. turns out I can’t see the bolts .. but see a splined end .. so guess it’s a spider off and then release the splines mount ..
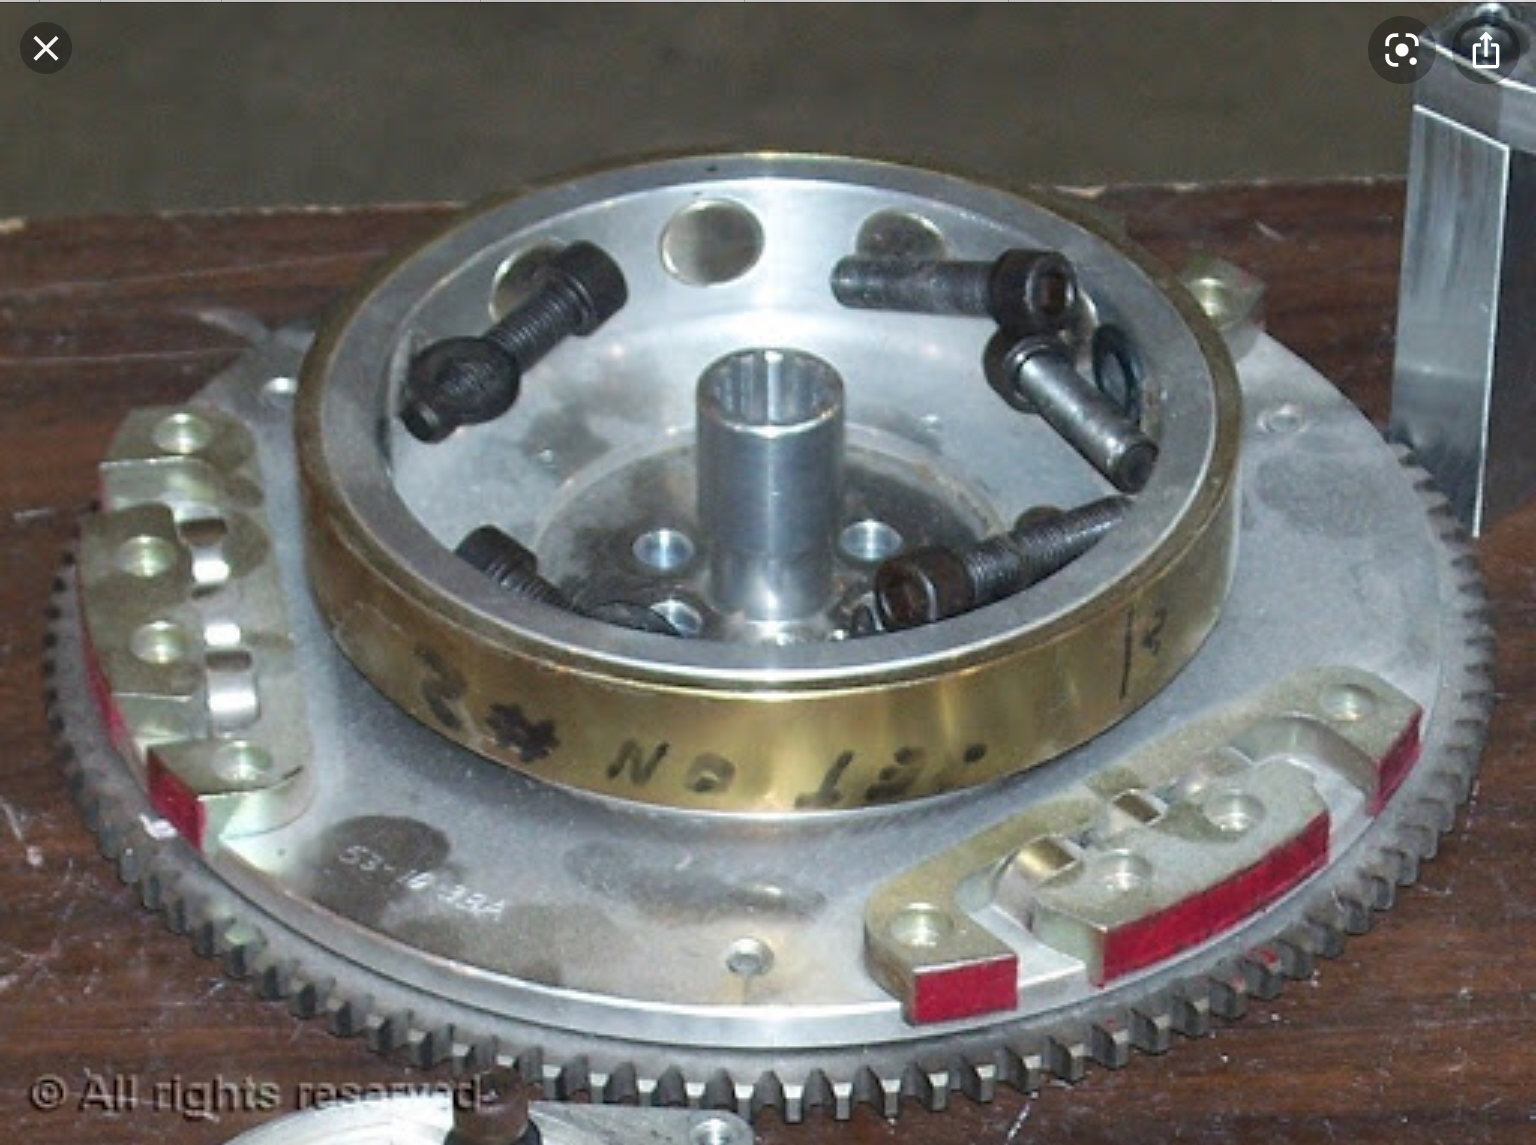
I asked Dave Almey from Skycraft what the spine end was for … apparently it’s so that you can add a drive shaft to drive a vacuum .. if you use vacuum instruments … learn all the time) .. thanks v much for quick response Dave
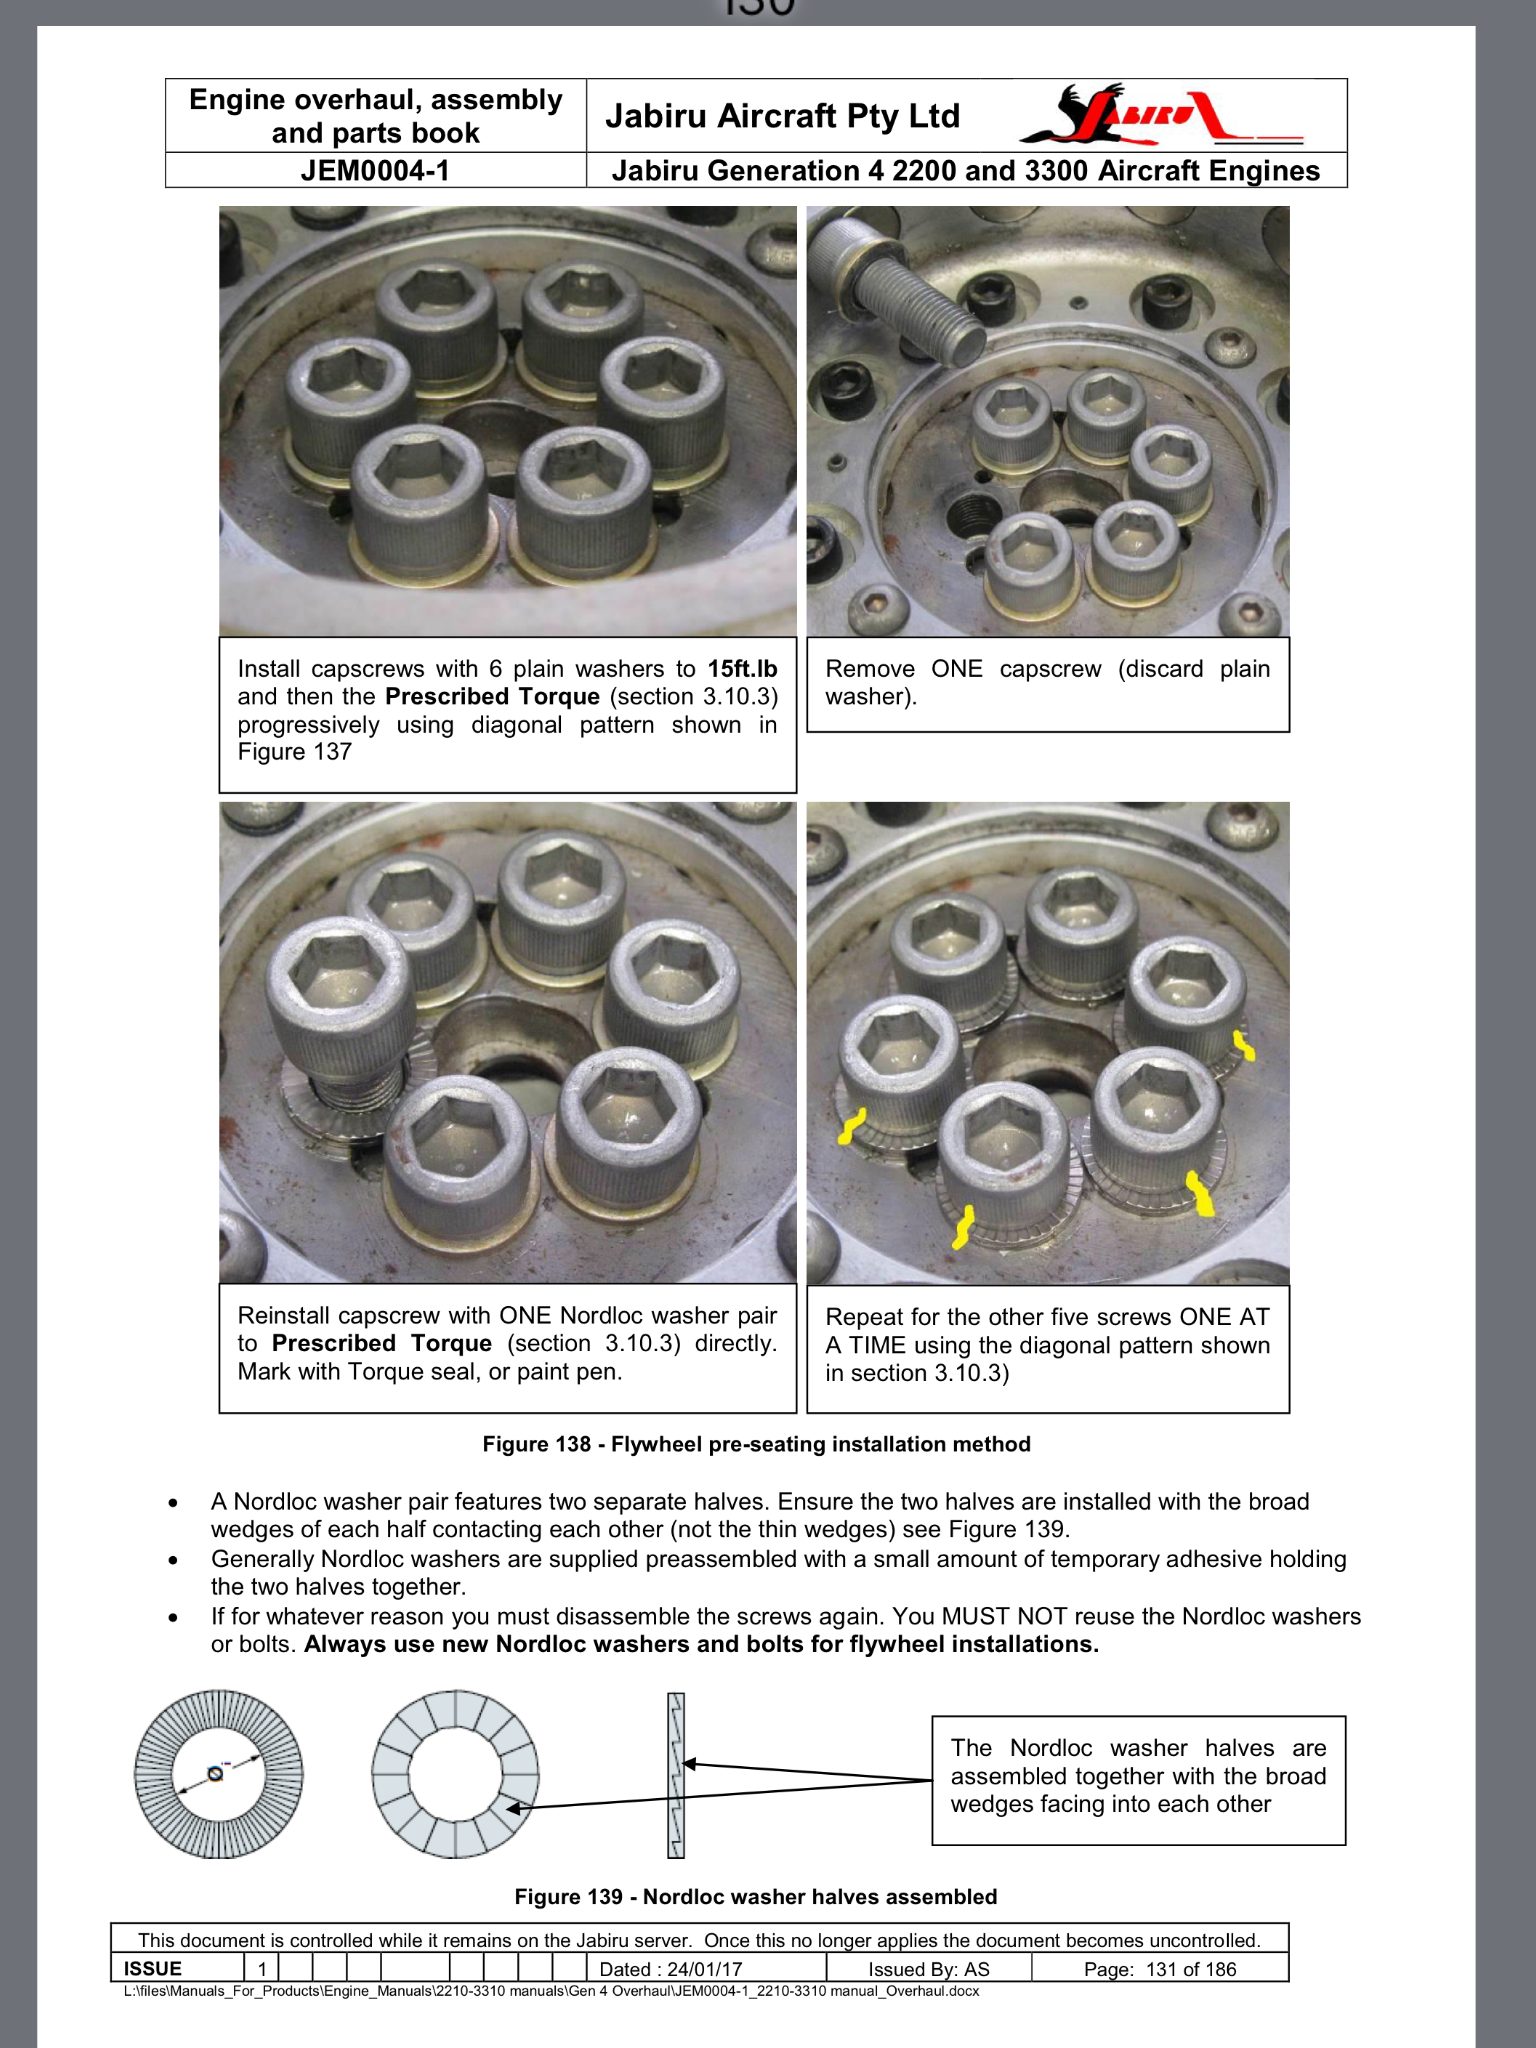
This excerpt from the LAA magazine mentions the detail around removing previous bolts … that were secured with Loctite … and recommends pre heating to break that Loctite … vs … with Nordloc washers NOT to use Loctite PLUS differing torque settings
Will be interesting to see how you can “apply heat to the thread and not the head of the bolt” when zero thread is actually visible … it ALL being in the body of the drive shaft 😊
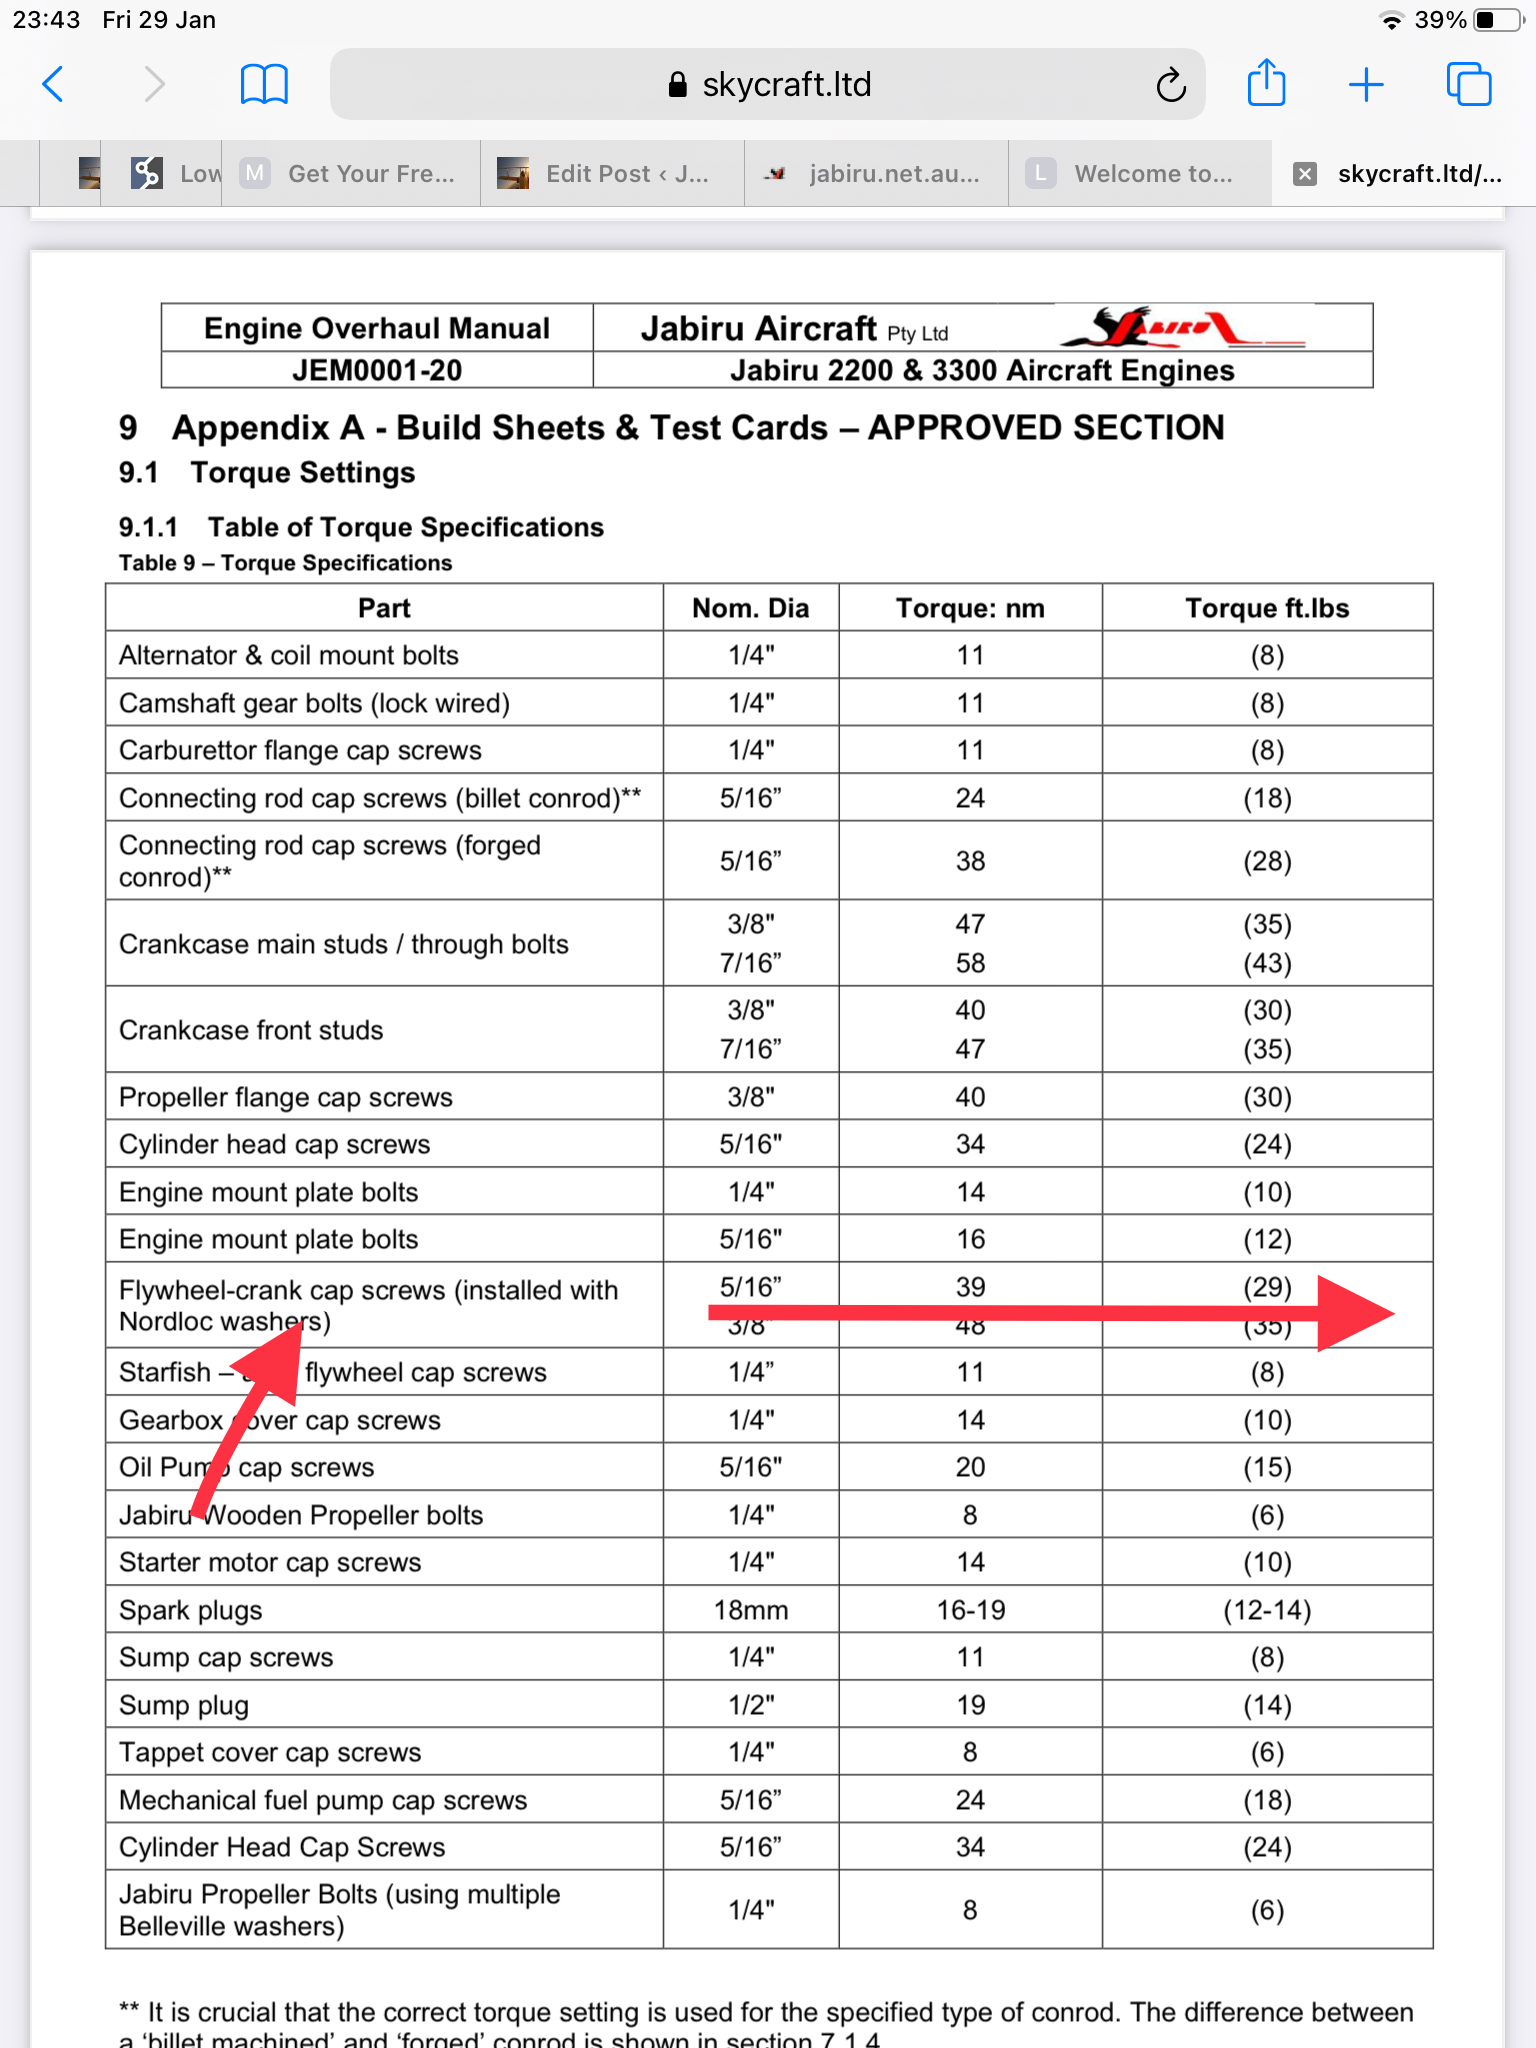
At last … after searching and sub referencing different Jabiru docs I have located the different torque settings associated with Nordloc washer on the cap screws … bolts .. for the flywheel …. 39nm

Leave a comment