
Flew the other evening and after some more fun, but weak attempts, at stall turns.. evidenced by the go pro footage review … I have reached the 50 hours of engine run.
Landed back and drained the hot oil into an old baking tray I found in the back of the hanger .. it was large and flat enough that I could get a good look at the oil and see that no foreign objects were in and also that, after all this time it had finally started to blacken … my previous early changes at around 5 and 10 hours showed it almost clear. So I have been working the engine .. which Jabiru recommend .. they say not to ‘nurse’ it and also not to leave it at a set RPM for long periods .. no chance of that 😉
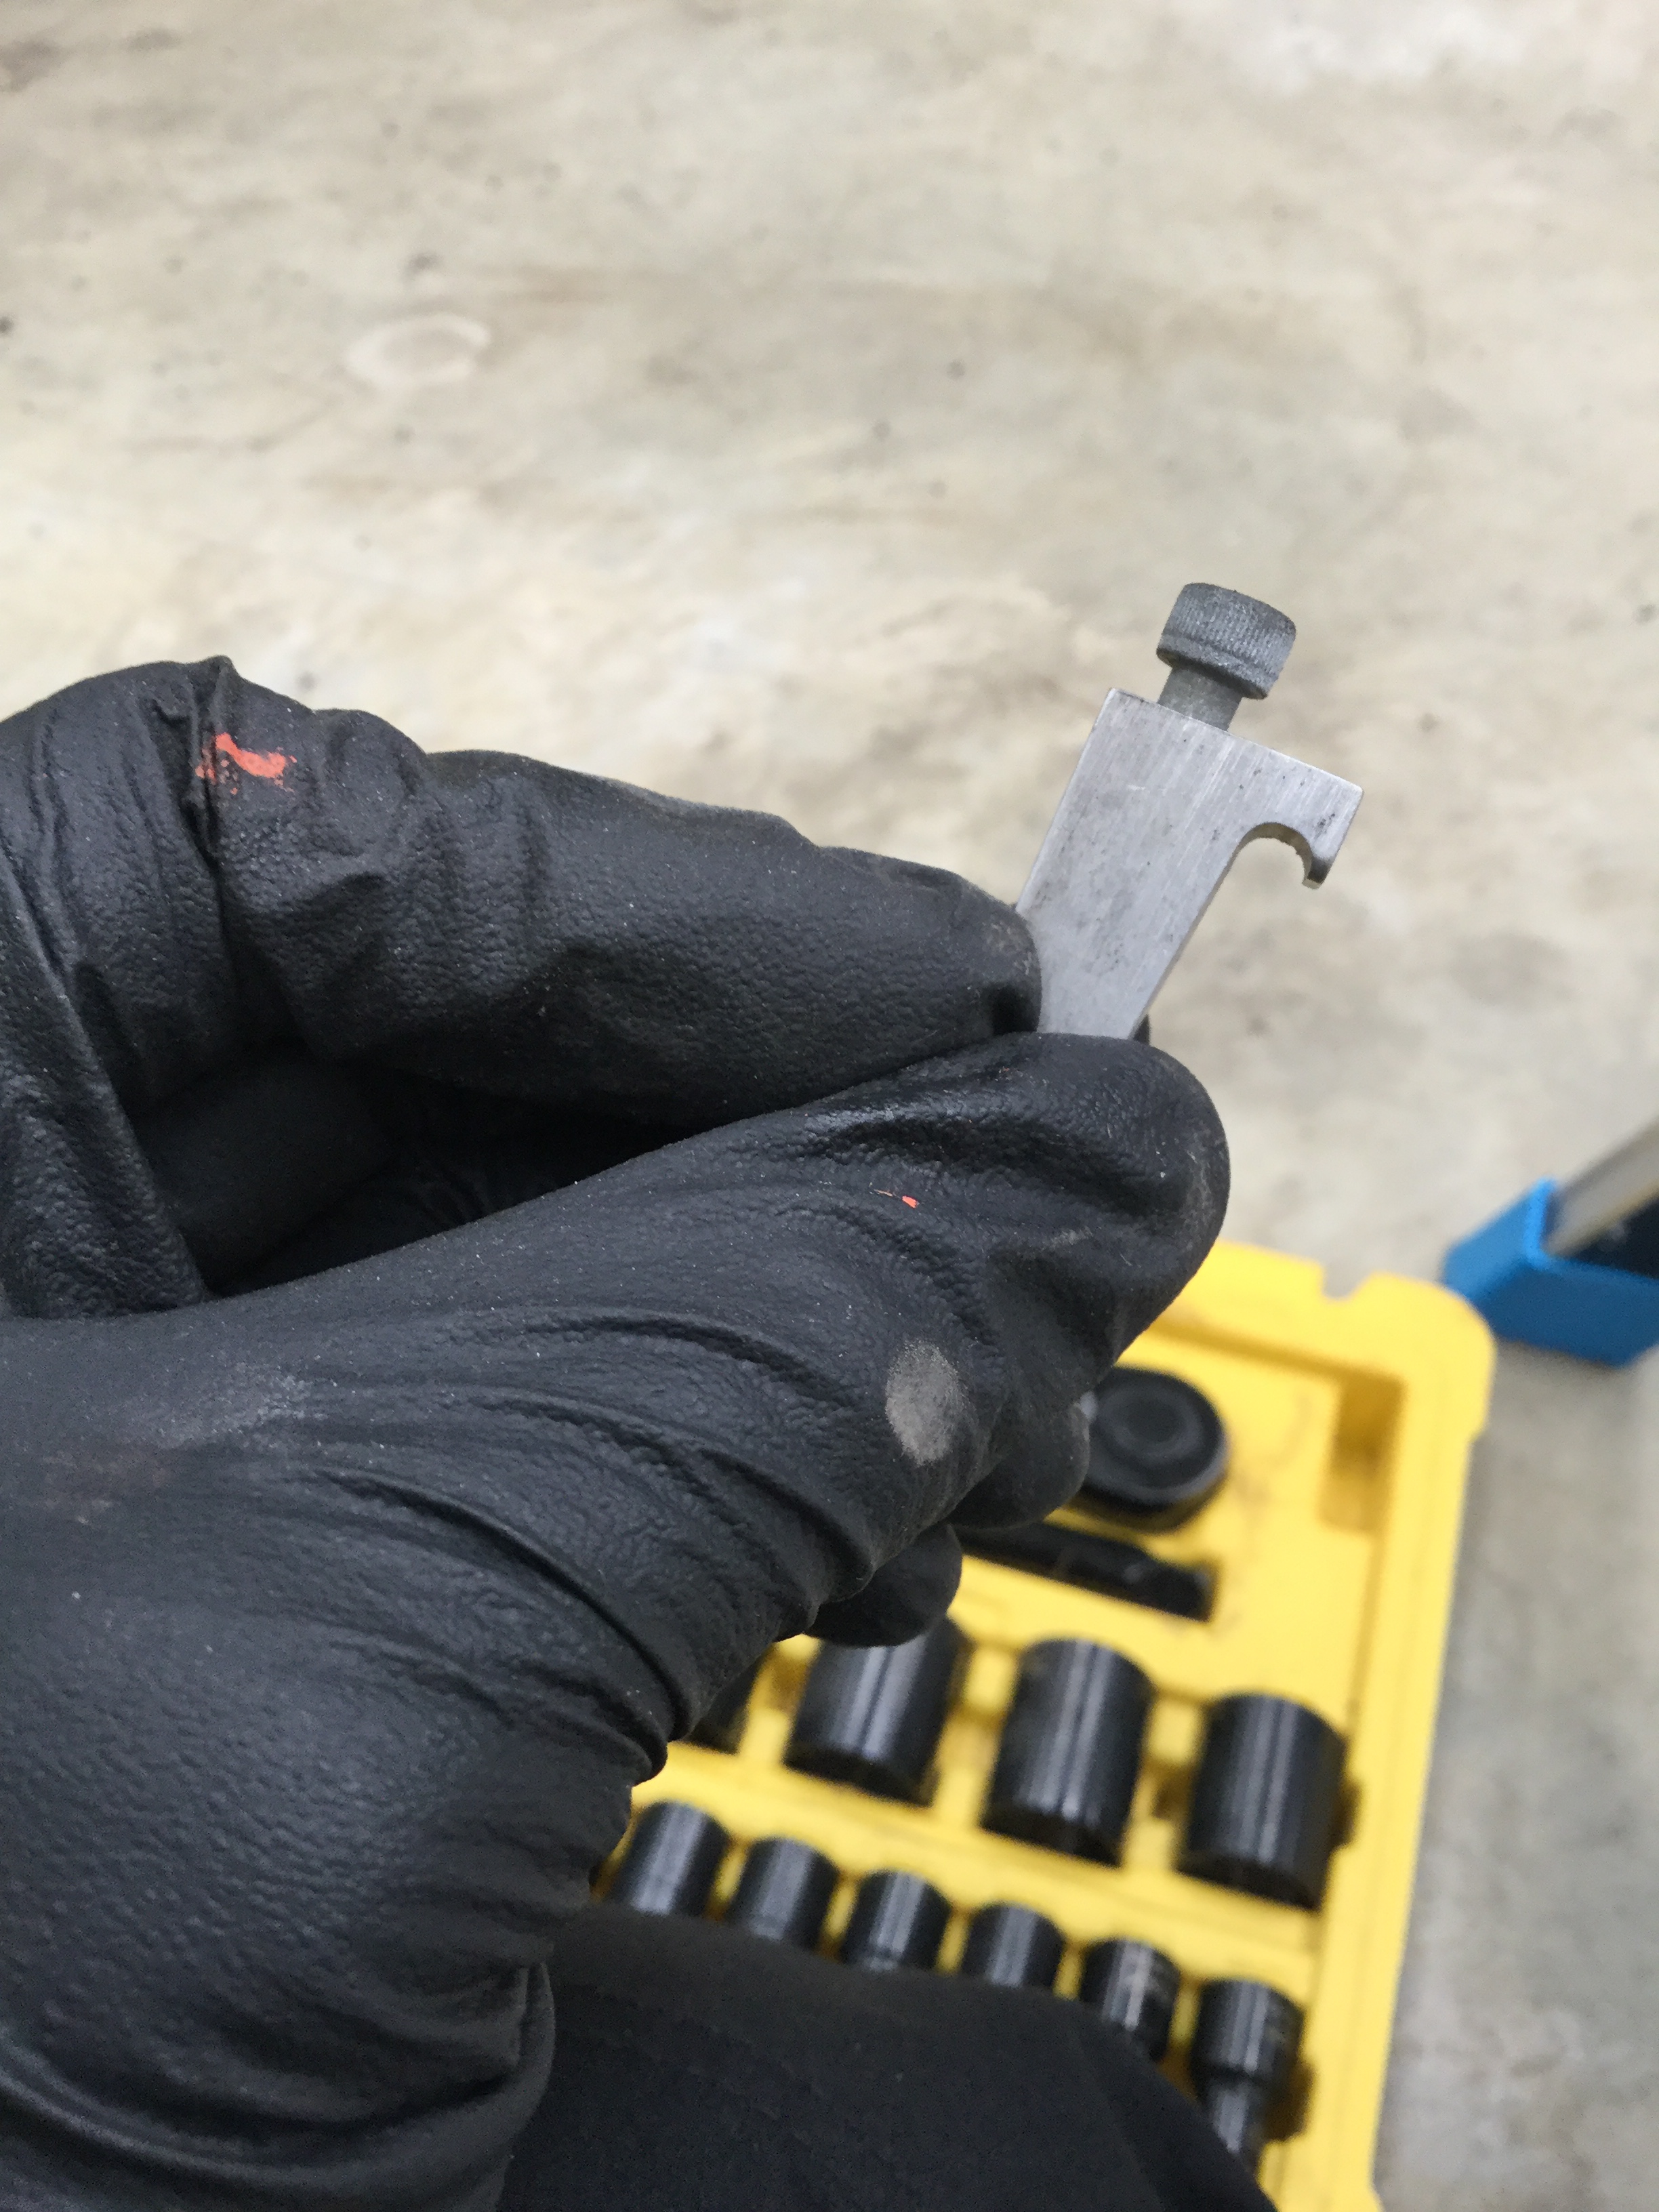
Oil drained and eventually managed to get the old filter off .. thanks Graham for the loan of the thinner metal filter grabber vs my bike chain one .. which simply won’t get between the filter and the cylinder head fins which protrude just too much downwards to allow space.
Next will be the distributor caps, rotor arms and all 8 spark plugs. I checked the plugs around 4 hours ago and they all had the good healthy brownish tinge to them showing they were burning well.
I also plan to
– Remove all wing inspection panels
– This will let me check the aileron belcranks, clean and grease them
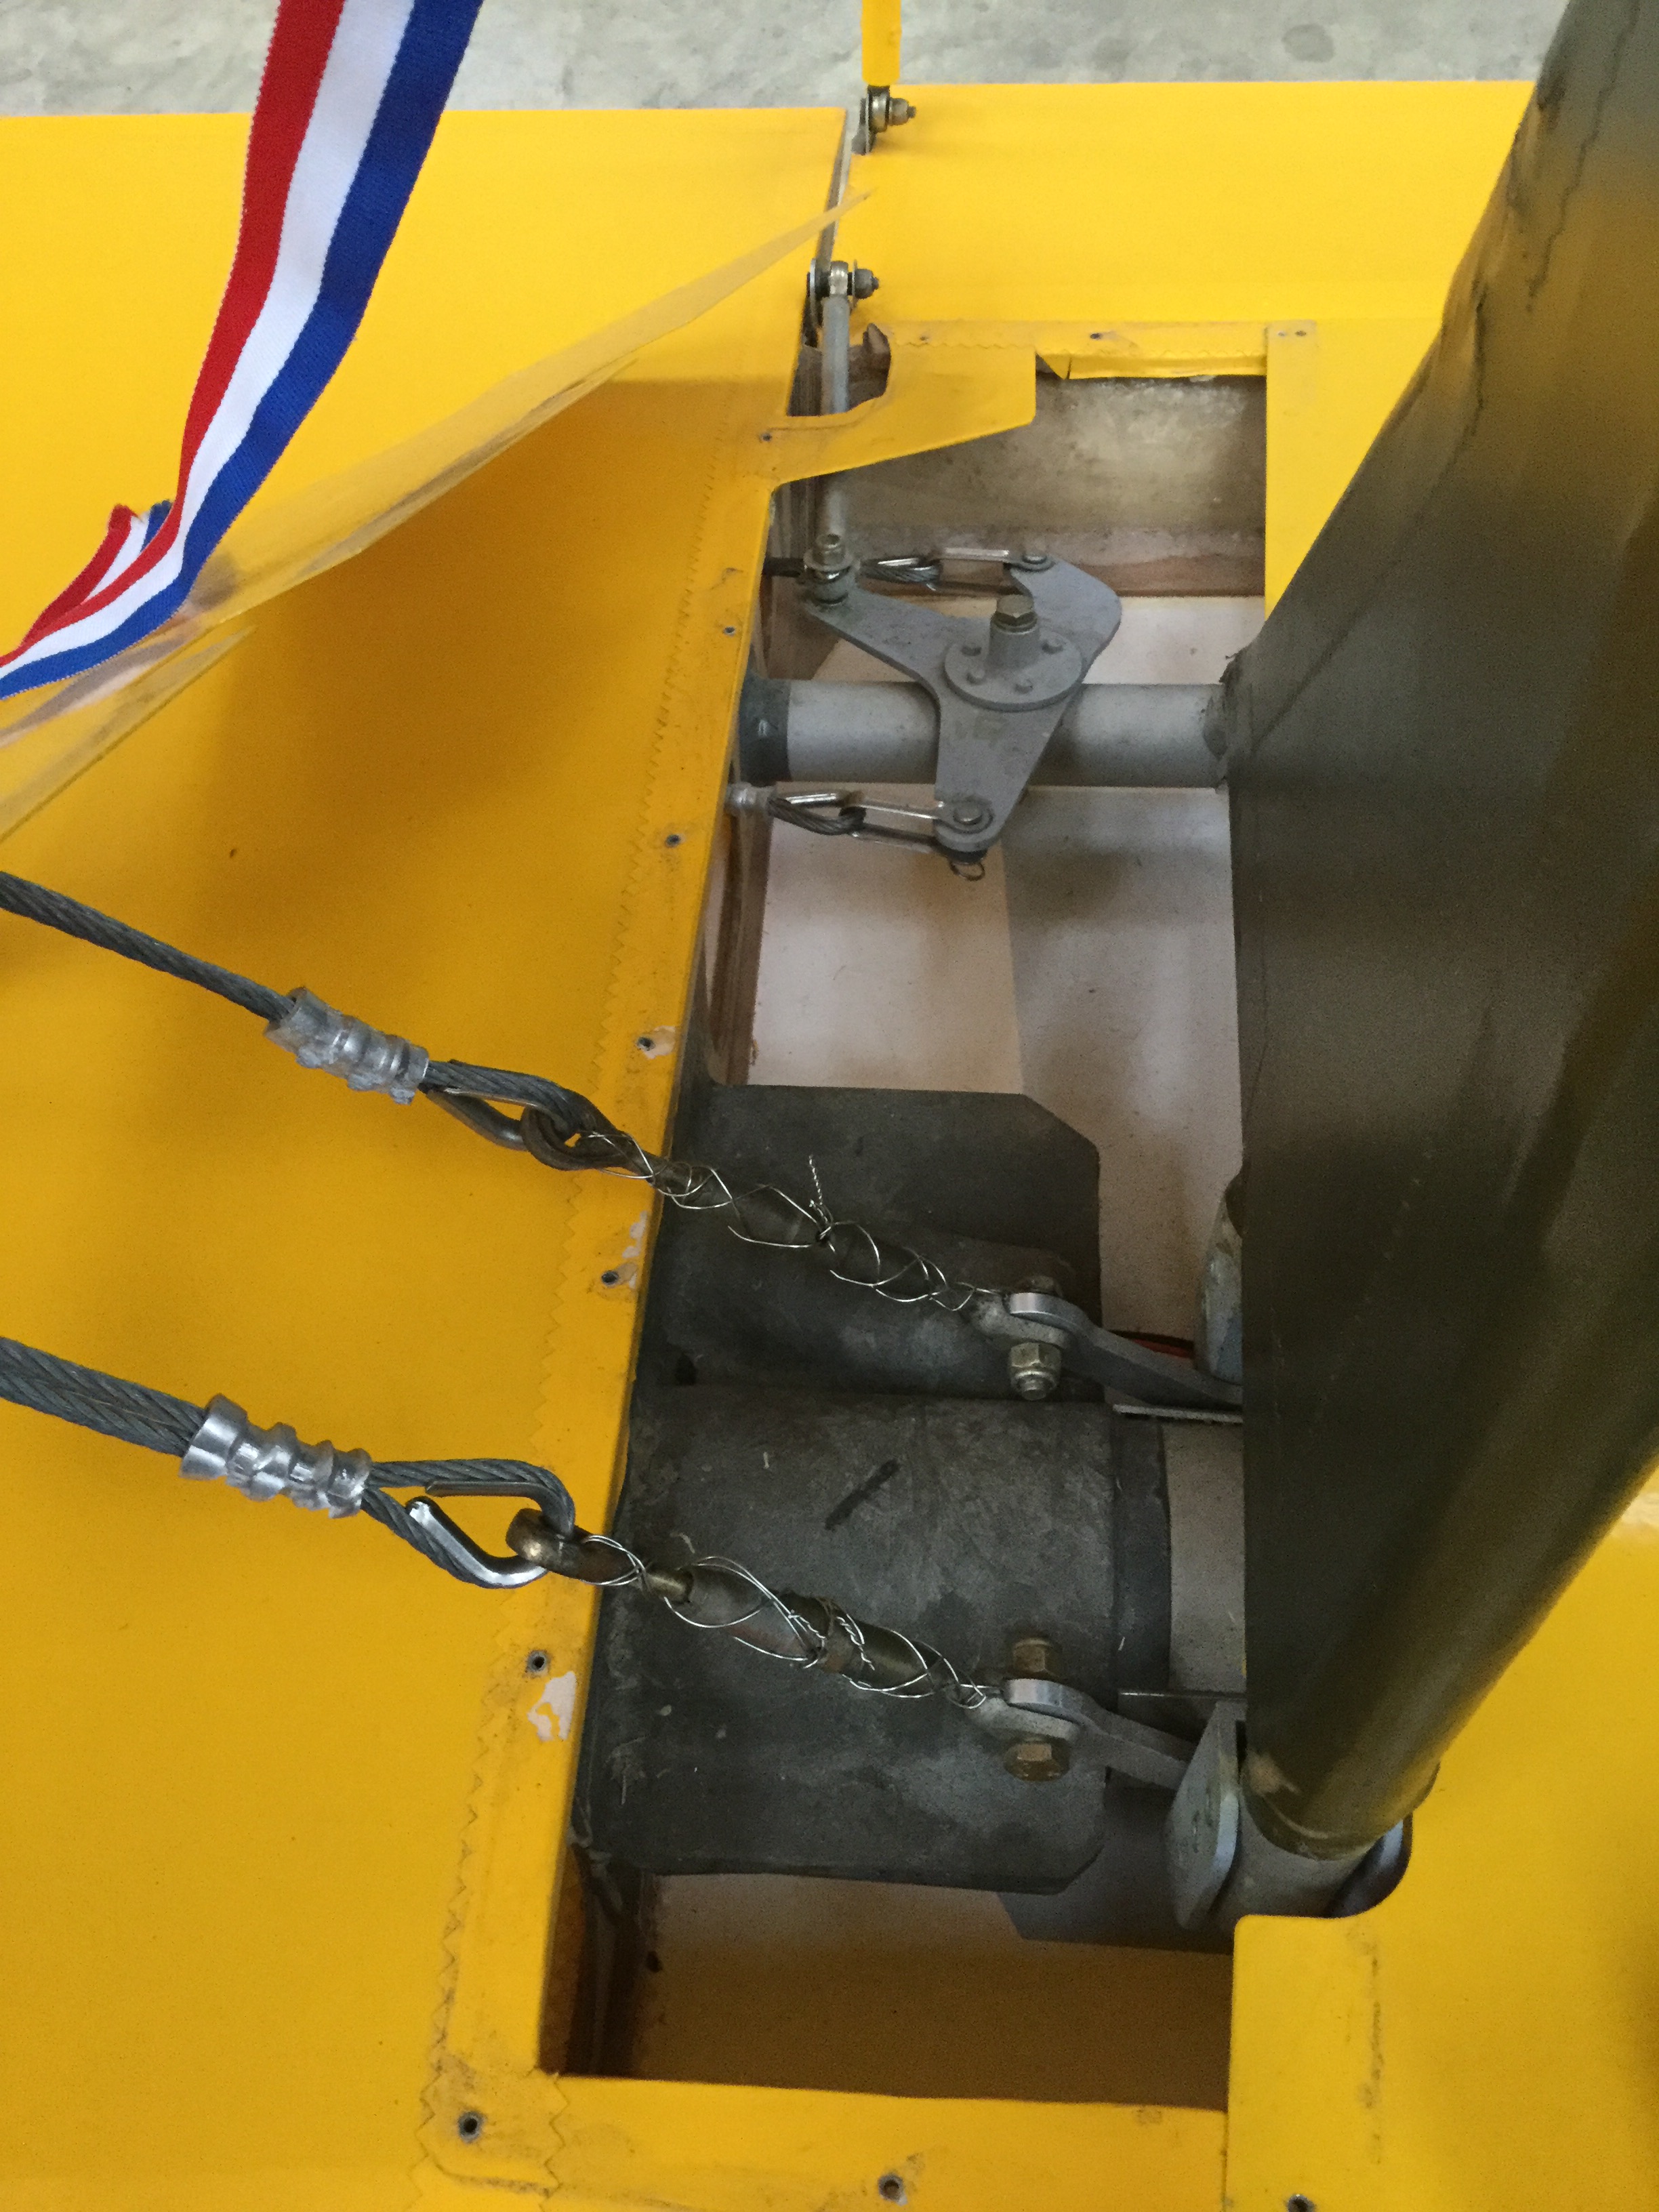
– I added numerous clip in access discs during the covering (small alloy disc – around 5” dia) .. will pop these out so that I can see all the turnbuckles and wire securing etc
– I grease the wing bolt/pegs regularly but have made a new one up as one of the alloy arms has bent over time with my man handling
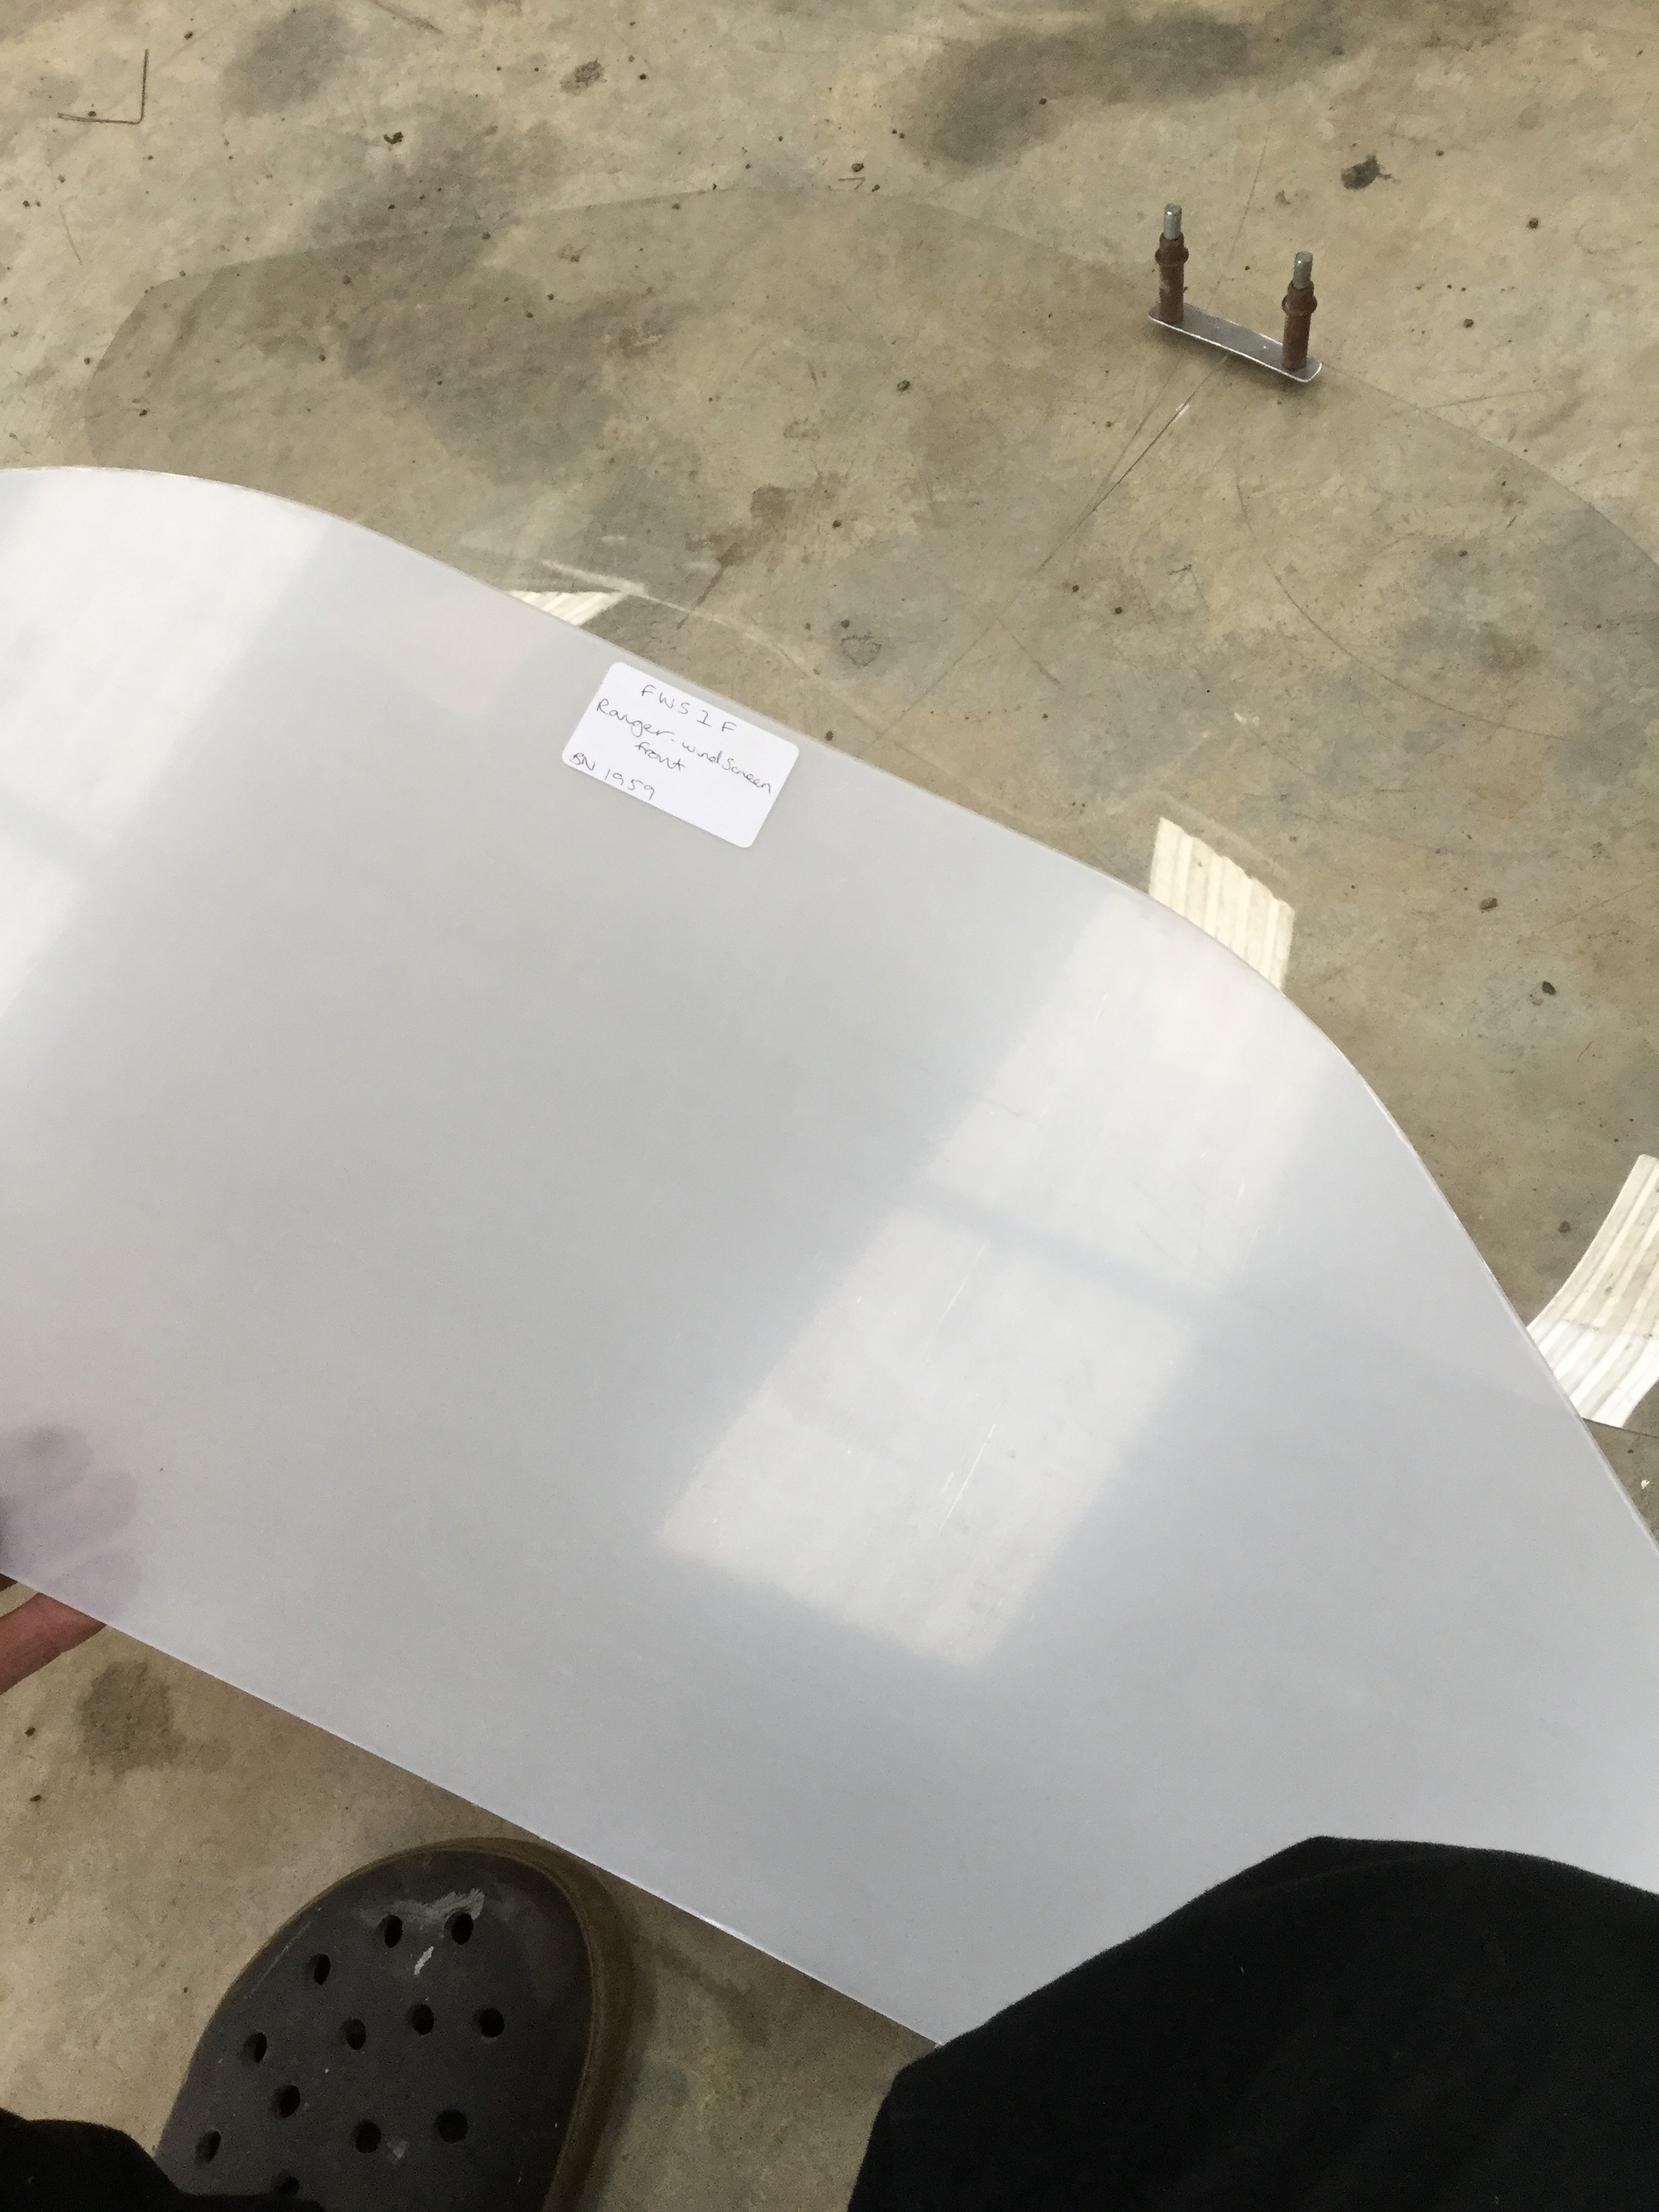
– I have a new screen to put in P2 up front following the lady exiting problem ..
– I also aim to put a hoist under the engine and lift the weight off the undercarriage to I can remove the wheels and clean and re grease the brakes .. these got quite mucky last time .. partly as one was over tightened and rubbing but partly cos that’s how they work !
– Good clean up of the tailwheel which, of course, picks up all and sundry and then re grease.
– I’m also planning to get her trestles up and re check the wing alignment ,. Not because I think anything has moved but because it’s a relatively quick and easy check to ensure all is well.
– I have a landing wire to make up as one was just on the edge of its turnbuckle adjustment and so is minutely slack compared to all the others
– P1 panel has a quick removable centre section that holds all the primary (doesn’t have many !) instruments .. I hadn’t left this just clecod in as it takes about 3 seconds to gain full access to the rear of the panel. Now things have settled I can rivnut where the clecos are and then have proper stainless Allen bolts securing .. still will only take about a minute or so to gain access but will look neater
– Then a general hoover out .. amazing how much dust and grubs find their way into the bottom of the inside
– Following a problem with the Fuel filler cap – most prob user error, I’m going to put a retaining chain so that it stays close when filling .. the temptation to put it down somewhere else is too great
– The new (Big Tundra style) tyres are wearing really well .. miles better than the first ones which I guess had age hardened over the 4 hot and cold years build in the barn .. will give these a good check over but very pleased with how they are behaving on the hard runway
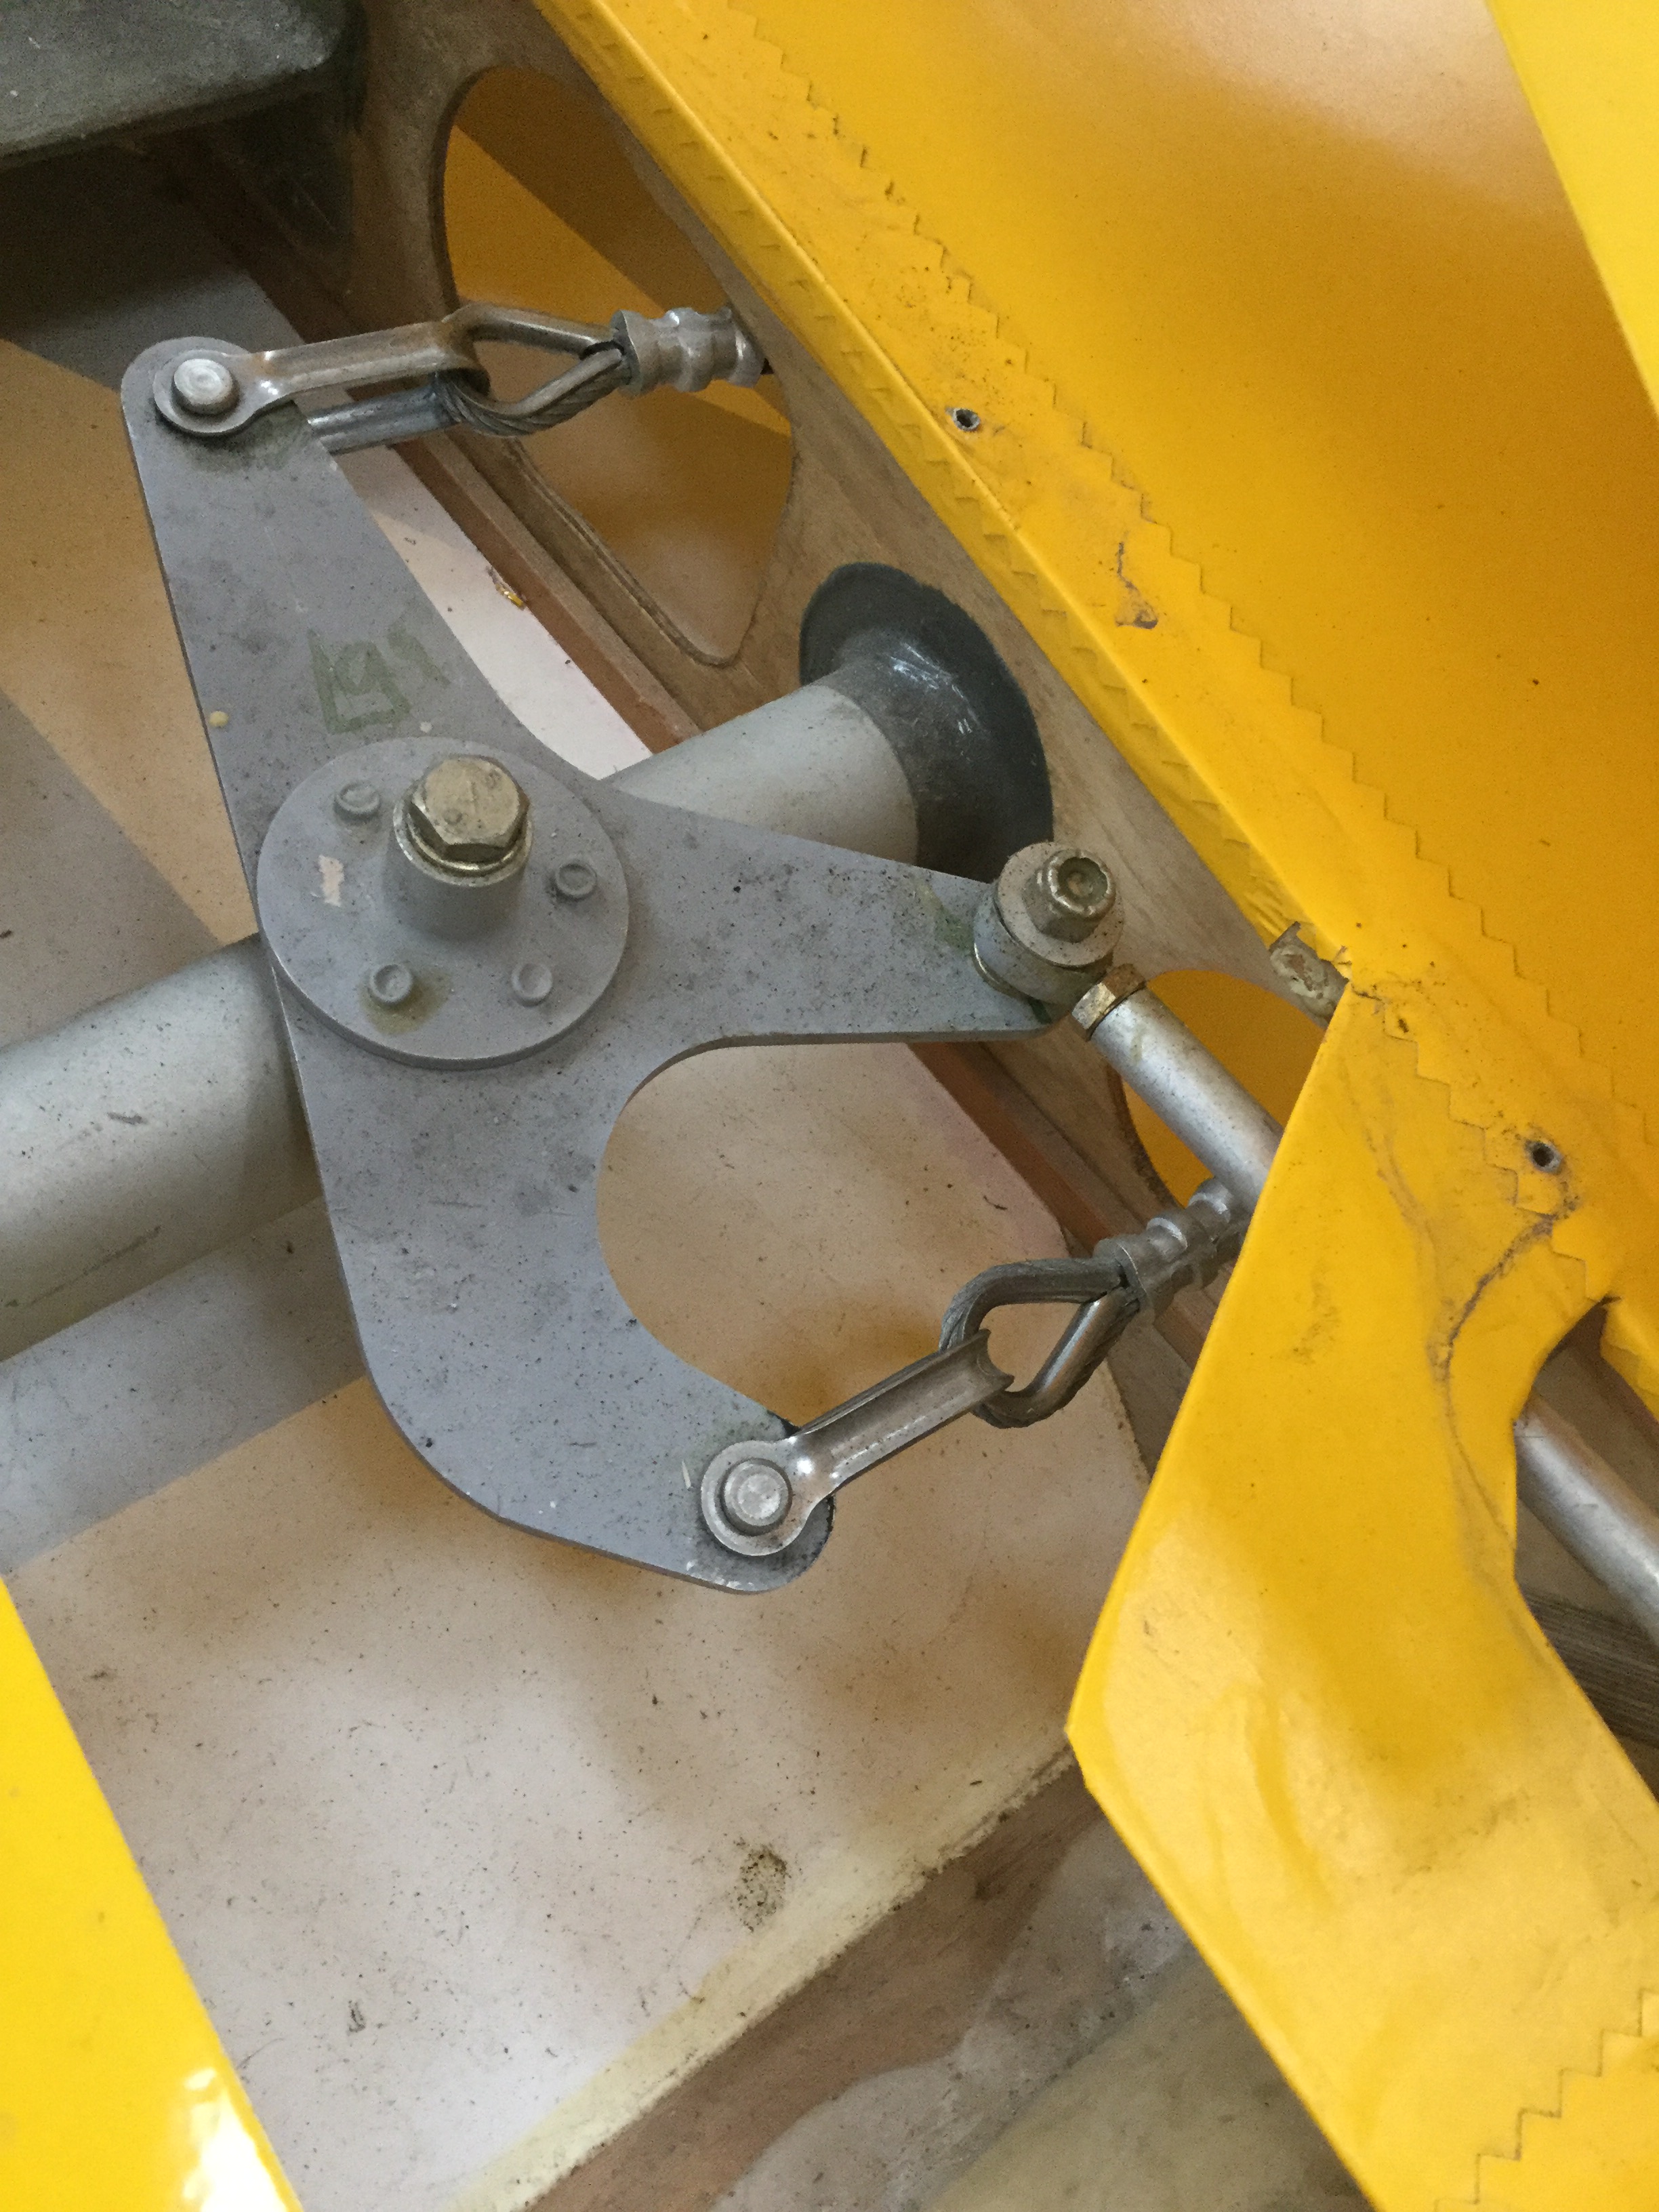
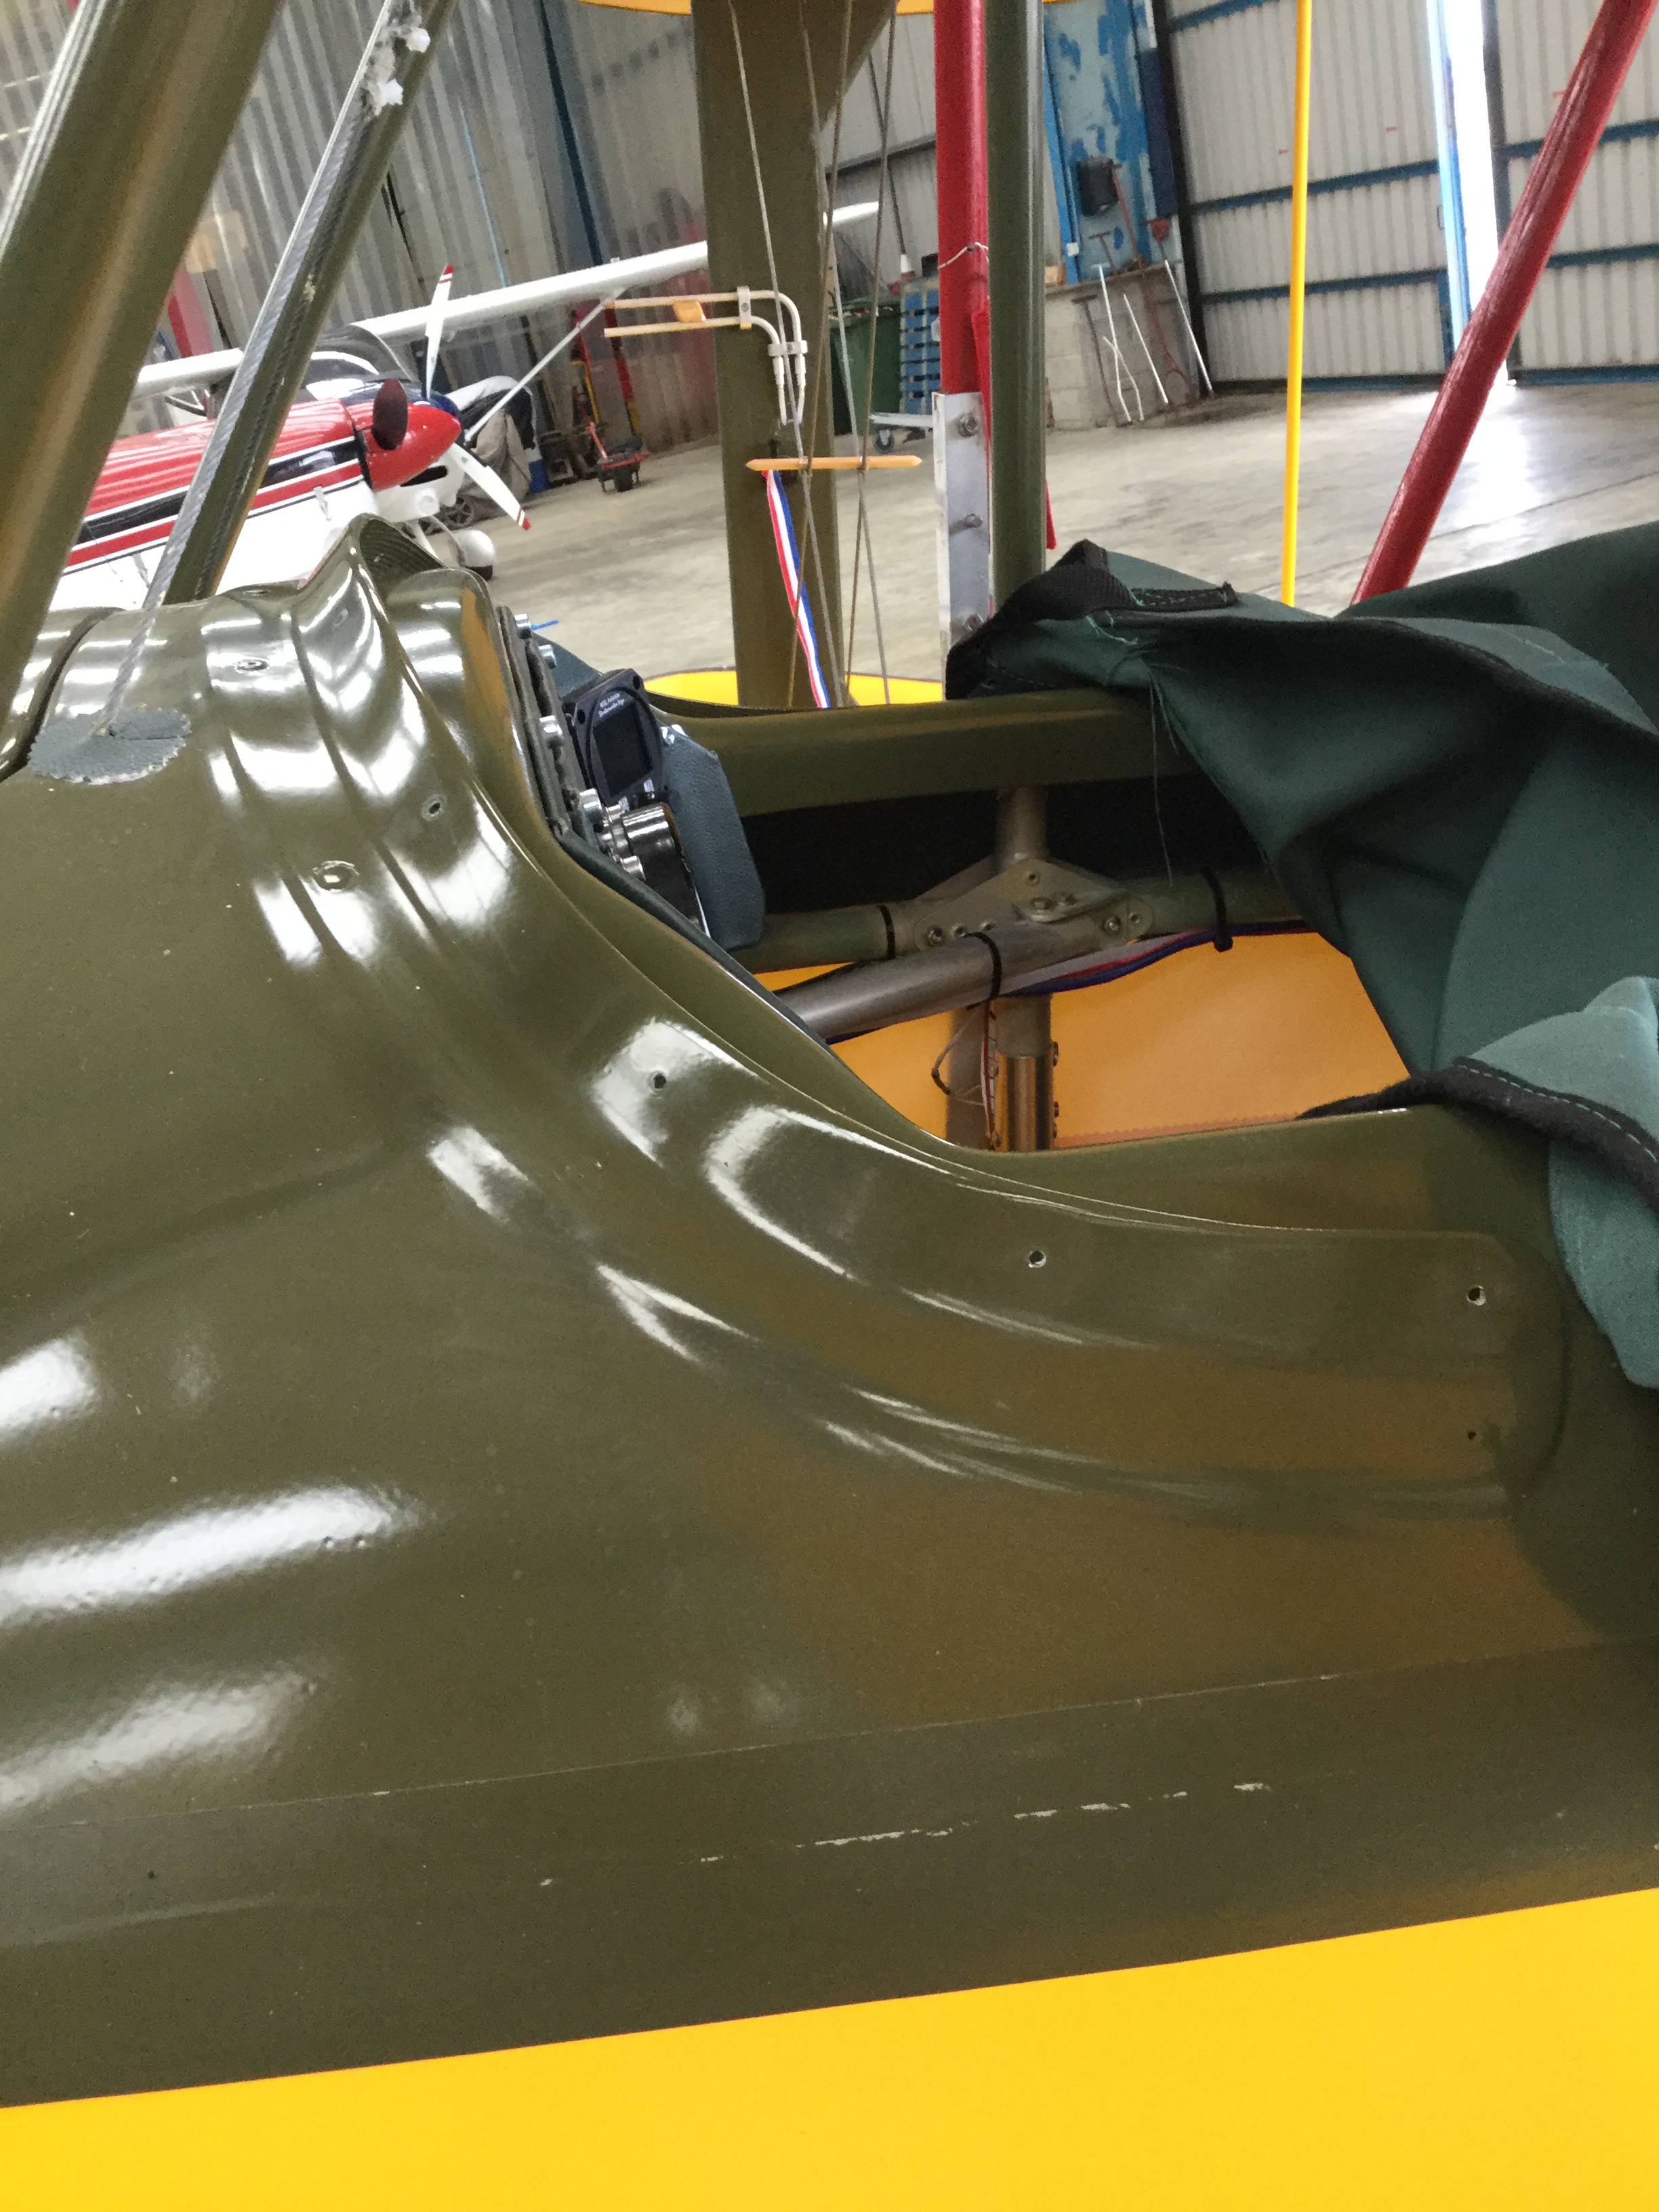
Aileron bellcranks .. cleaned and checked for tightness and then freshly greased .. also hoovered our grubs and dust that had collected over the previous 9 months
You can see how grubby it gets under the plates .. so good chance to clean it all up

Top bolts checked as well .. and checked turnbuckle security
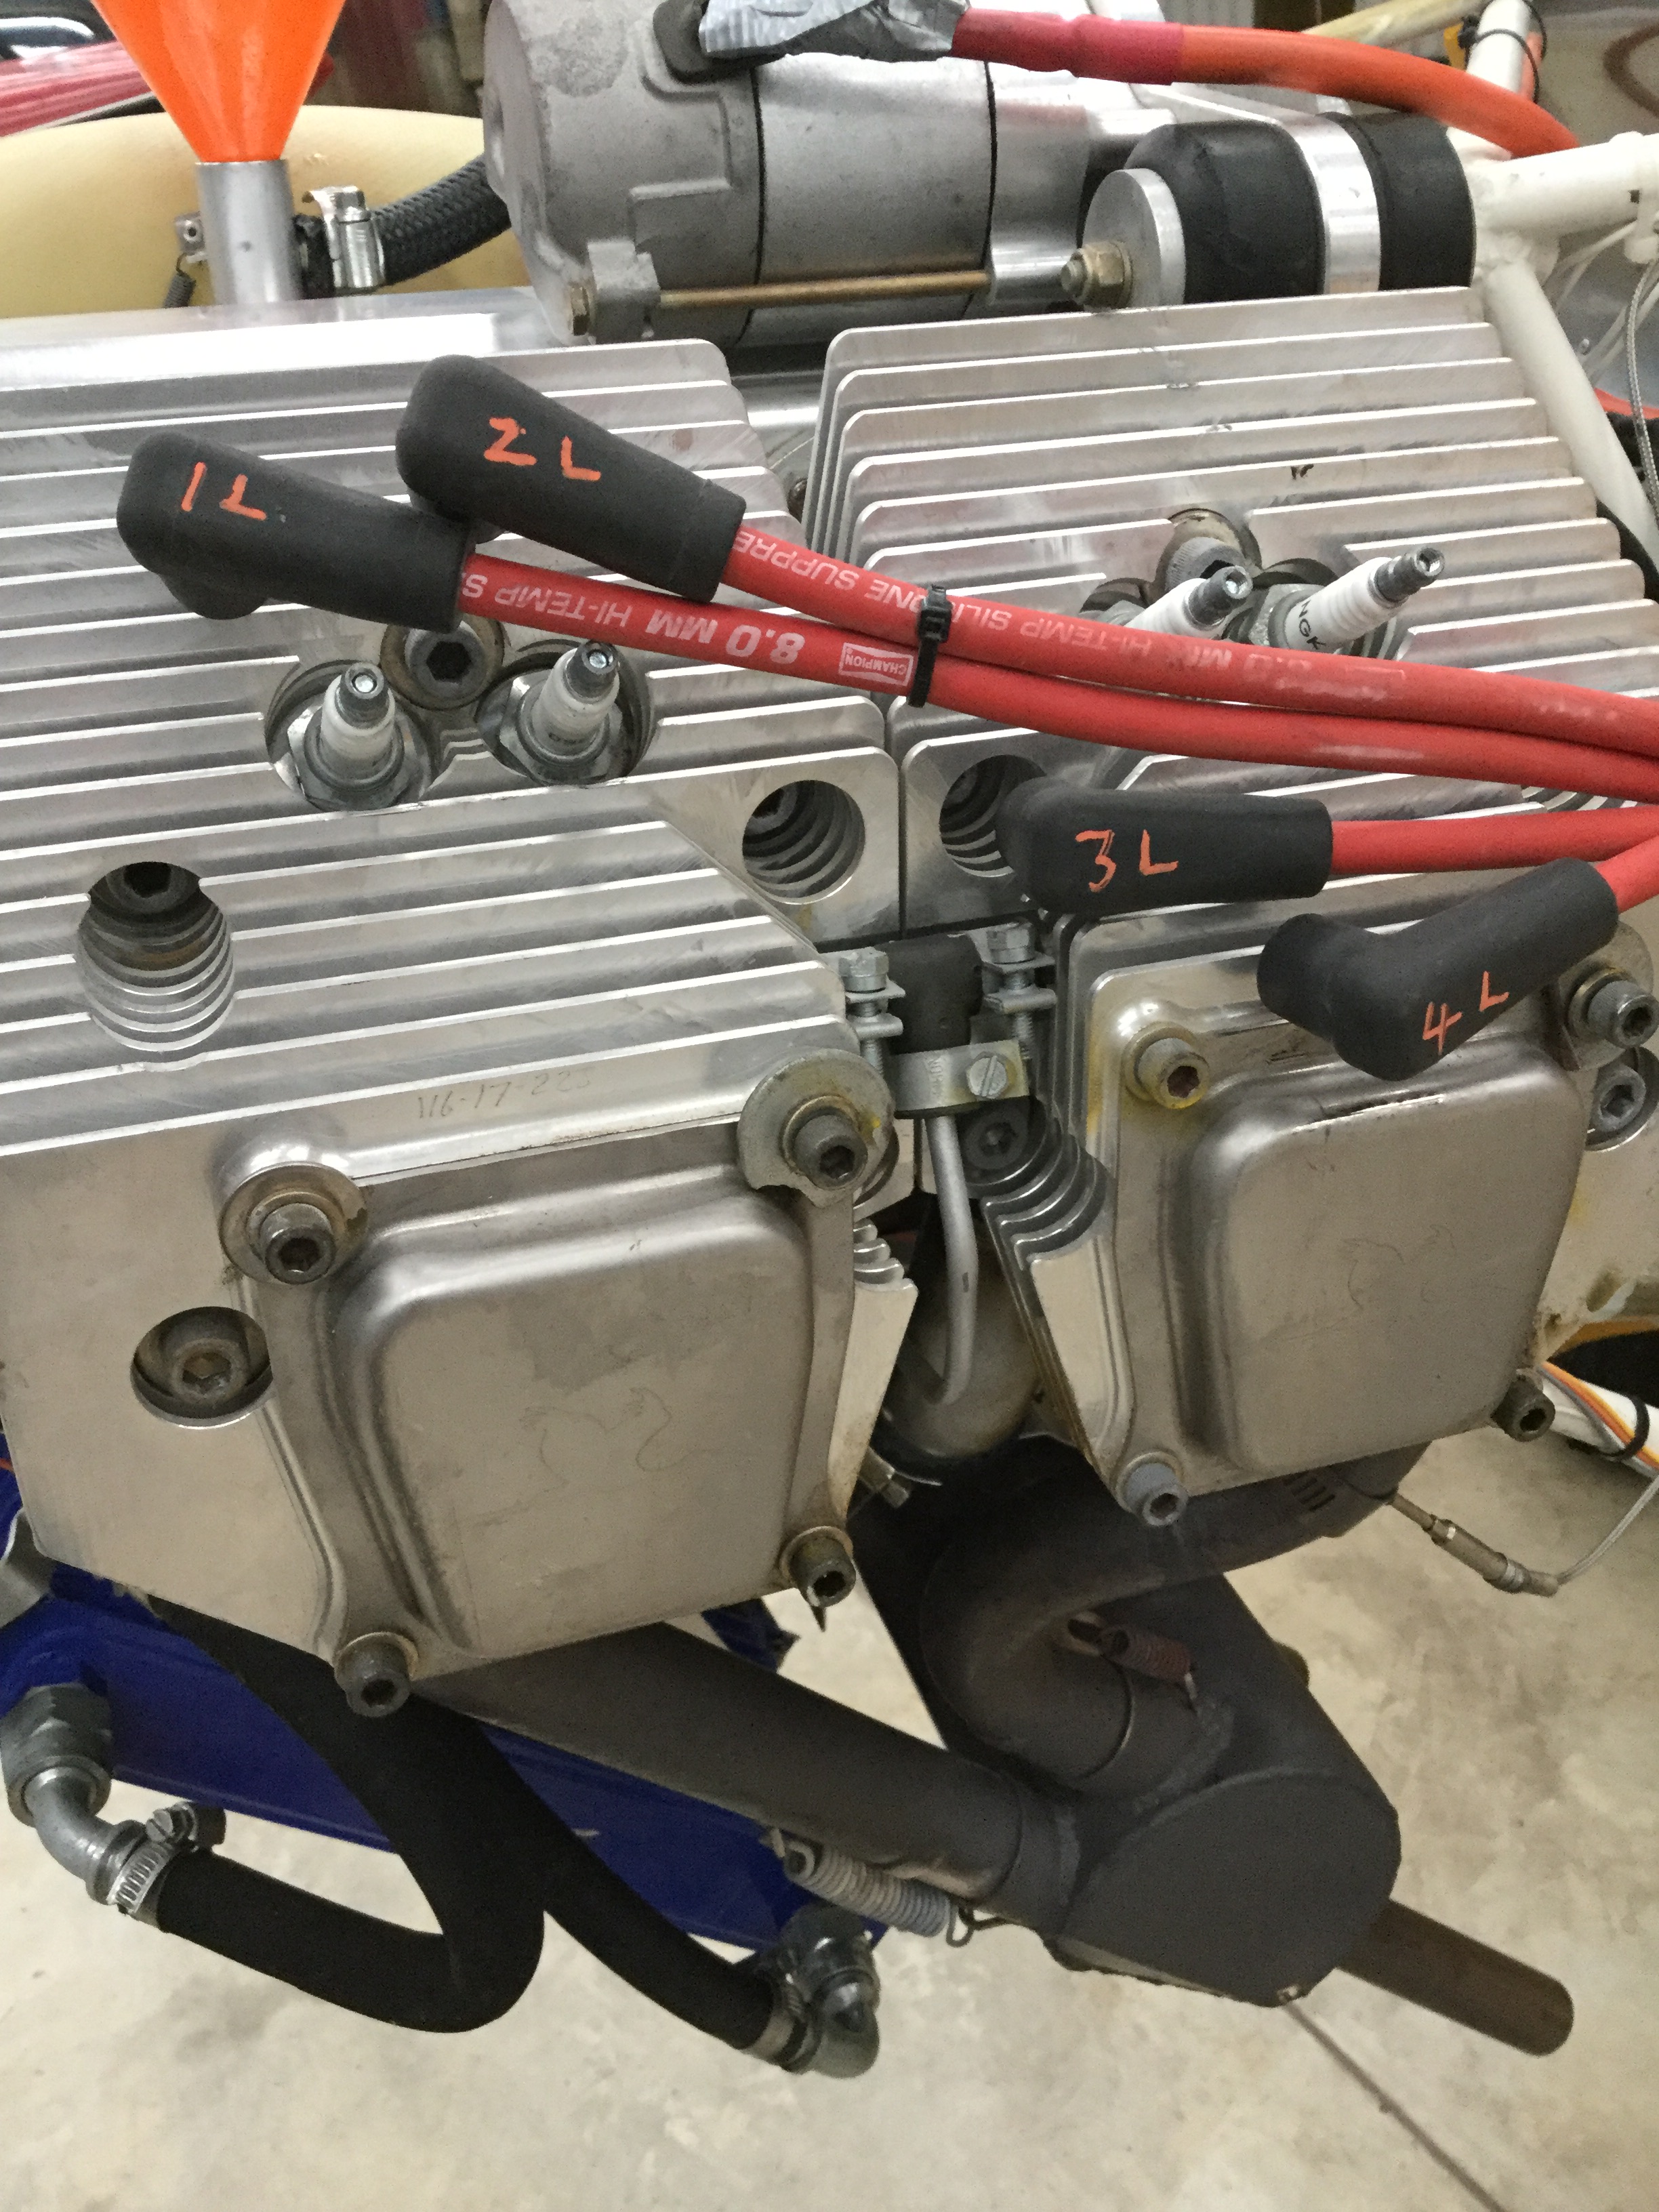
Pre label both ends of the cables at plug and distributor cap … yes, I know .. Port and Starboard .. but good old ‘L’ and ‘R’ never hurt anyone 😊
Reminds me of the old David Gunson after dinner speech recording … “I get in the plane and pull on my leather gloves with an L and R on the back … I don’t need this information .. it just prevents me asking stupid questions later “ 😊

Natty little cheek saddle brackets hold each side of the distributor cap down

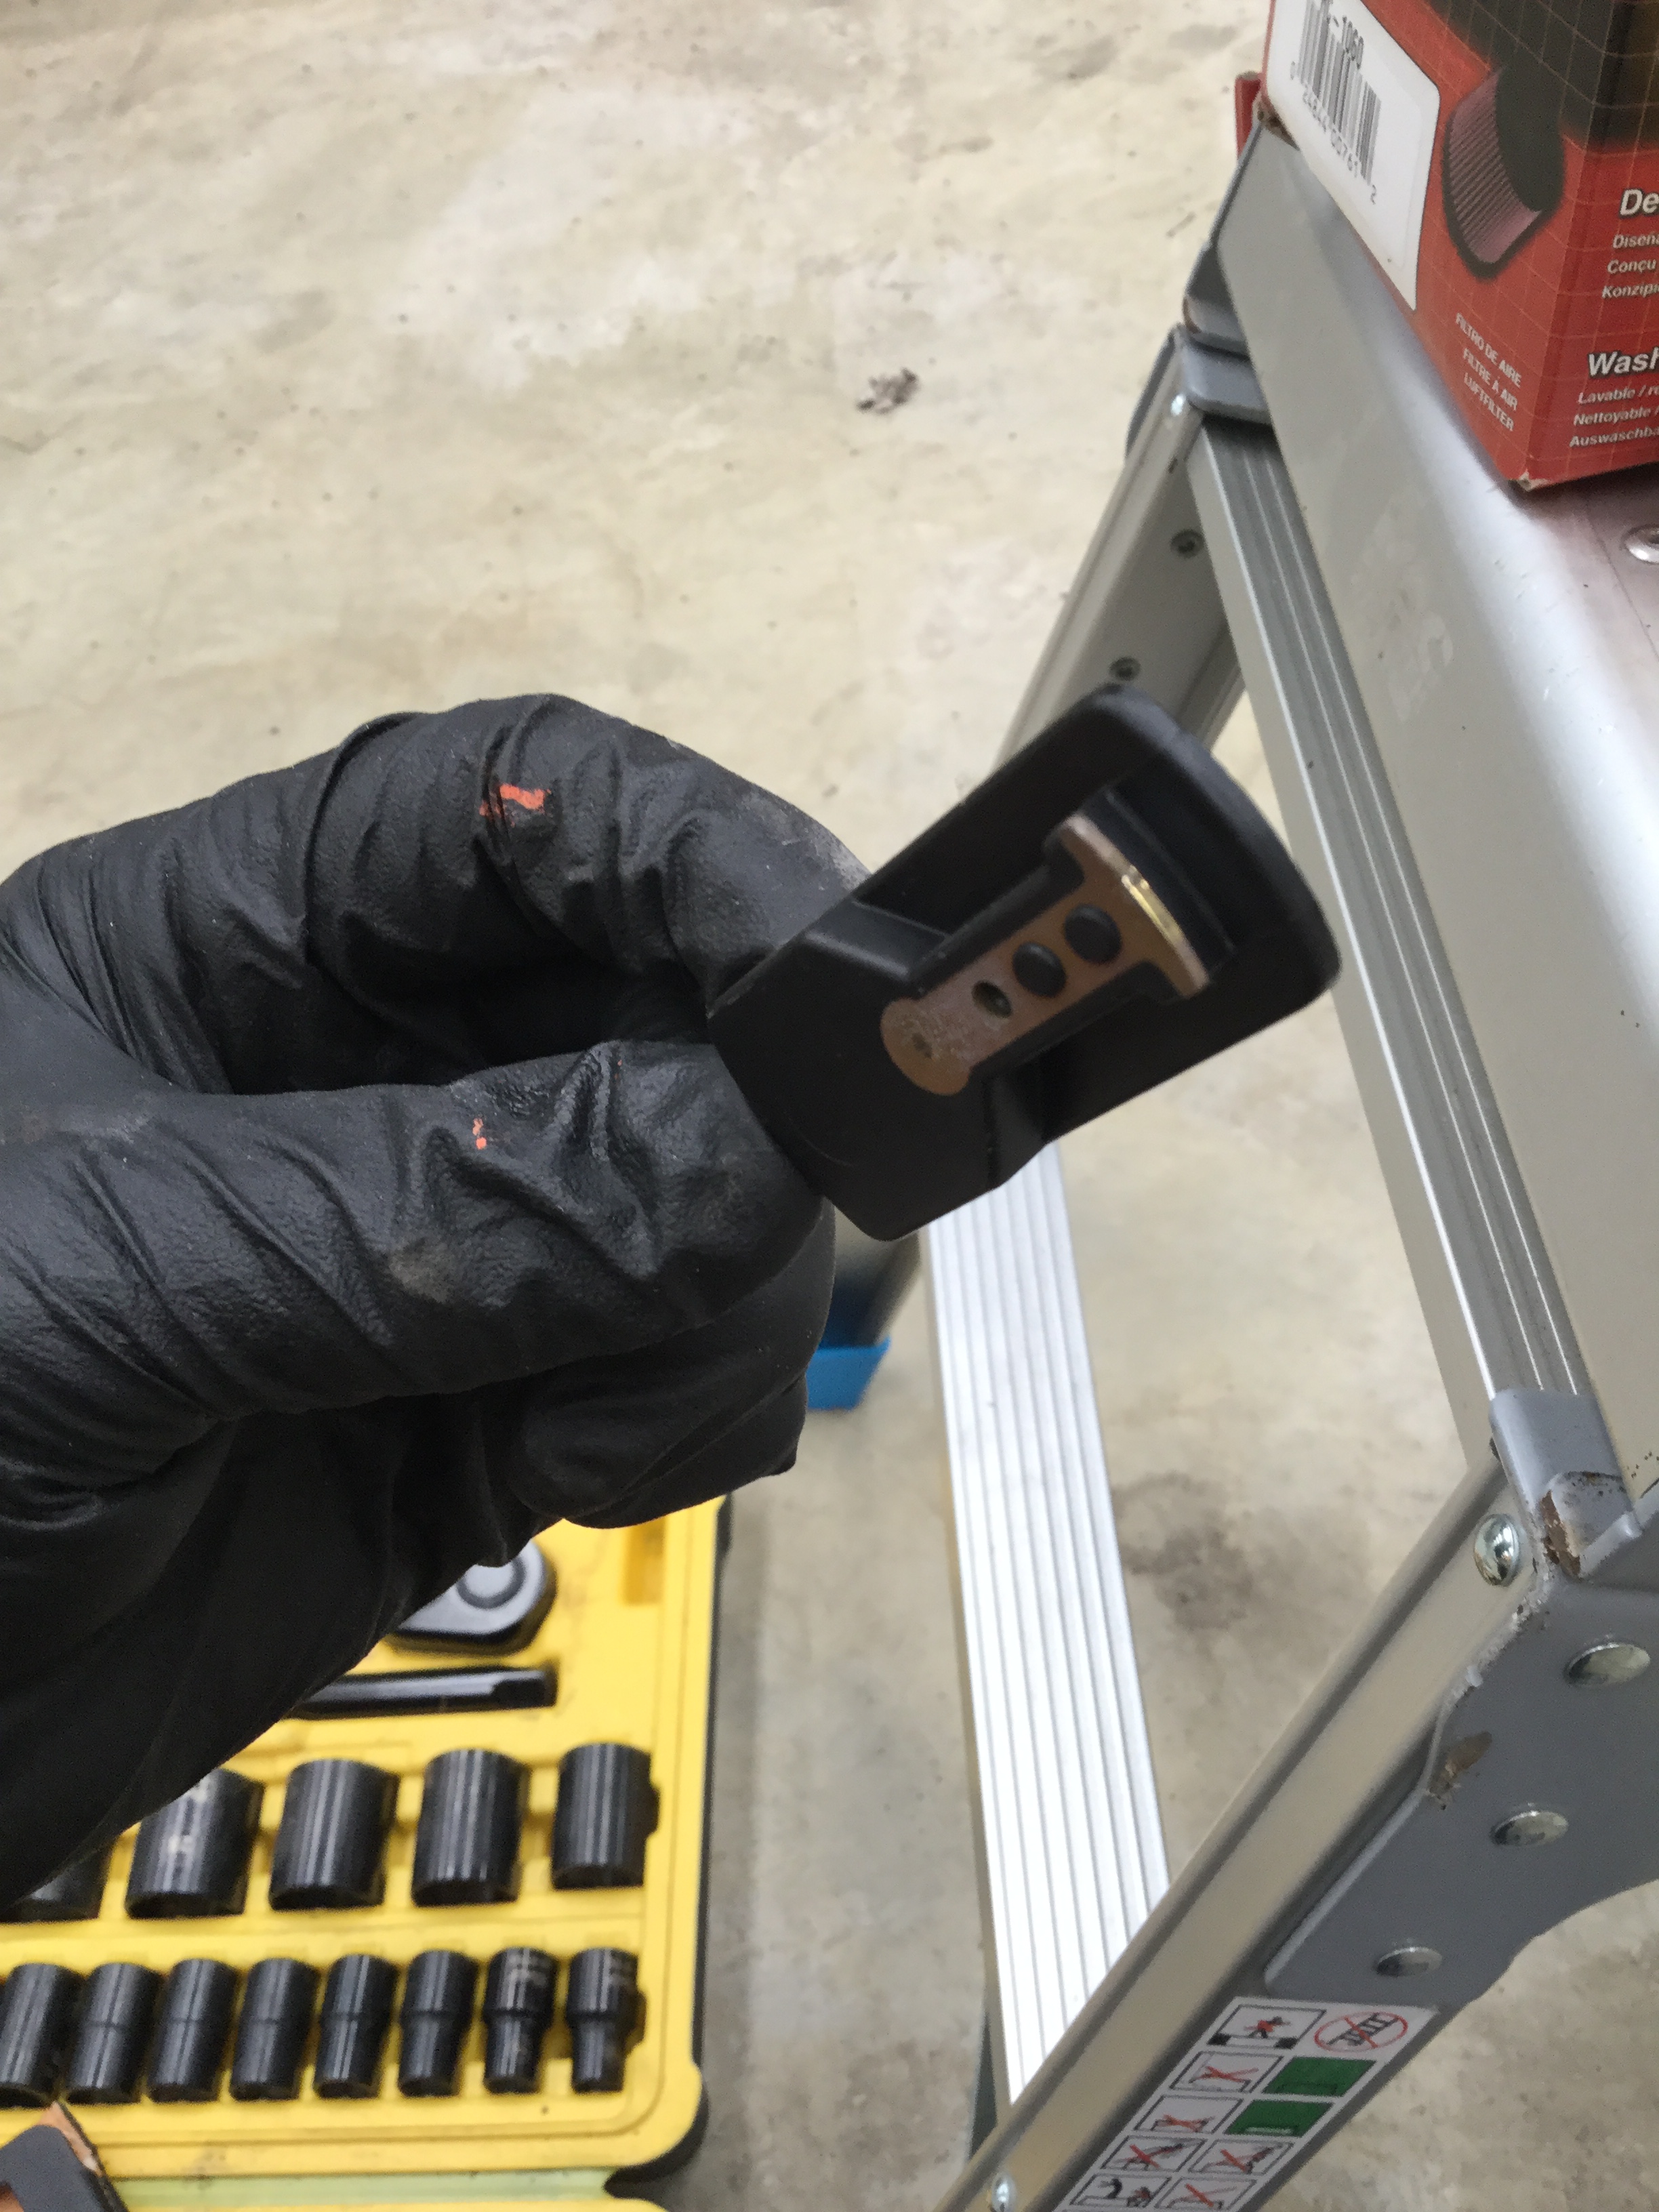
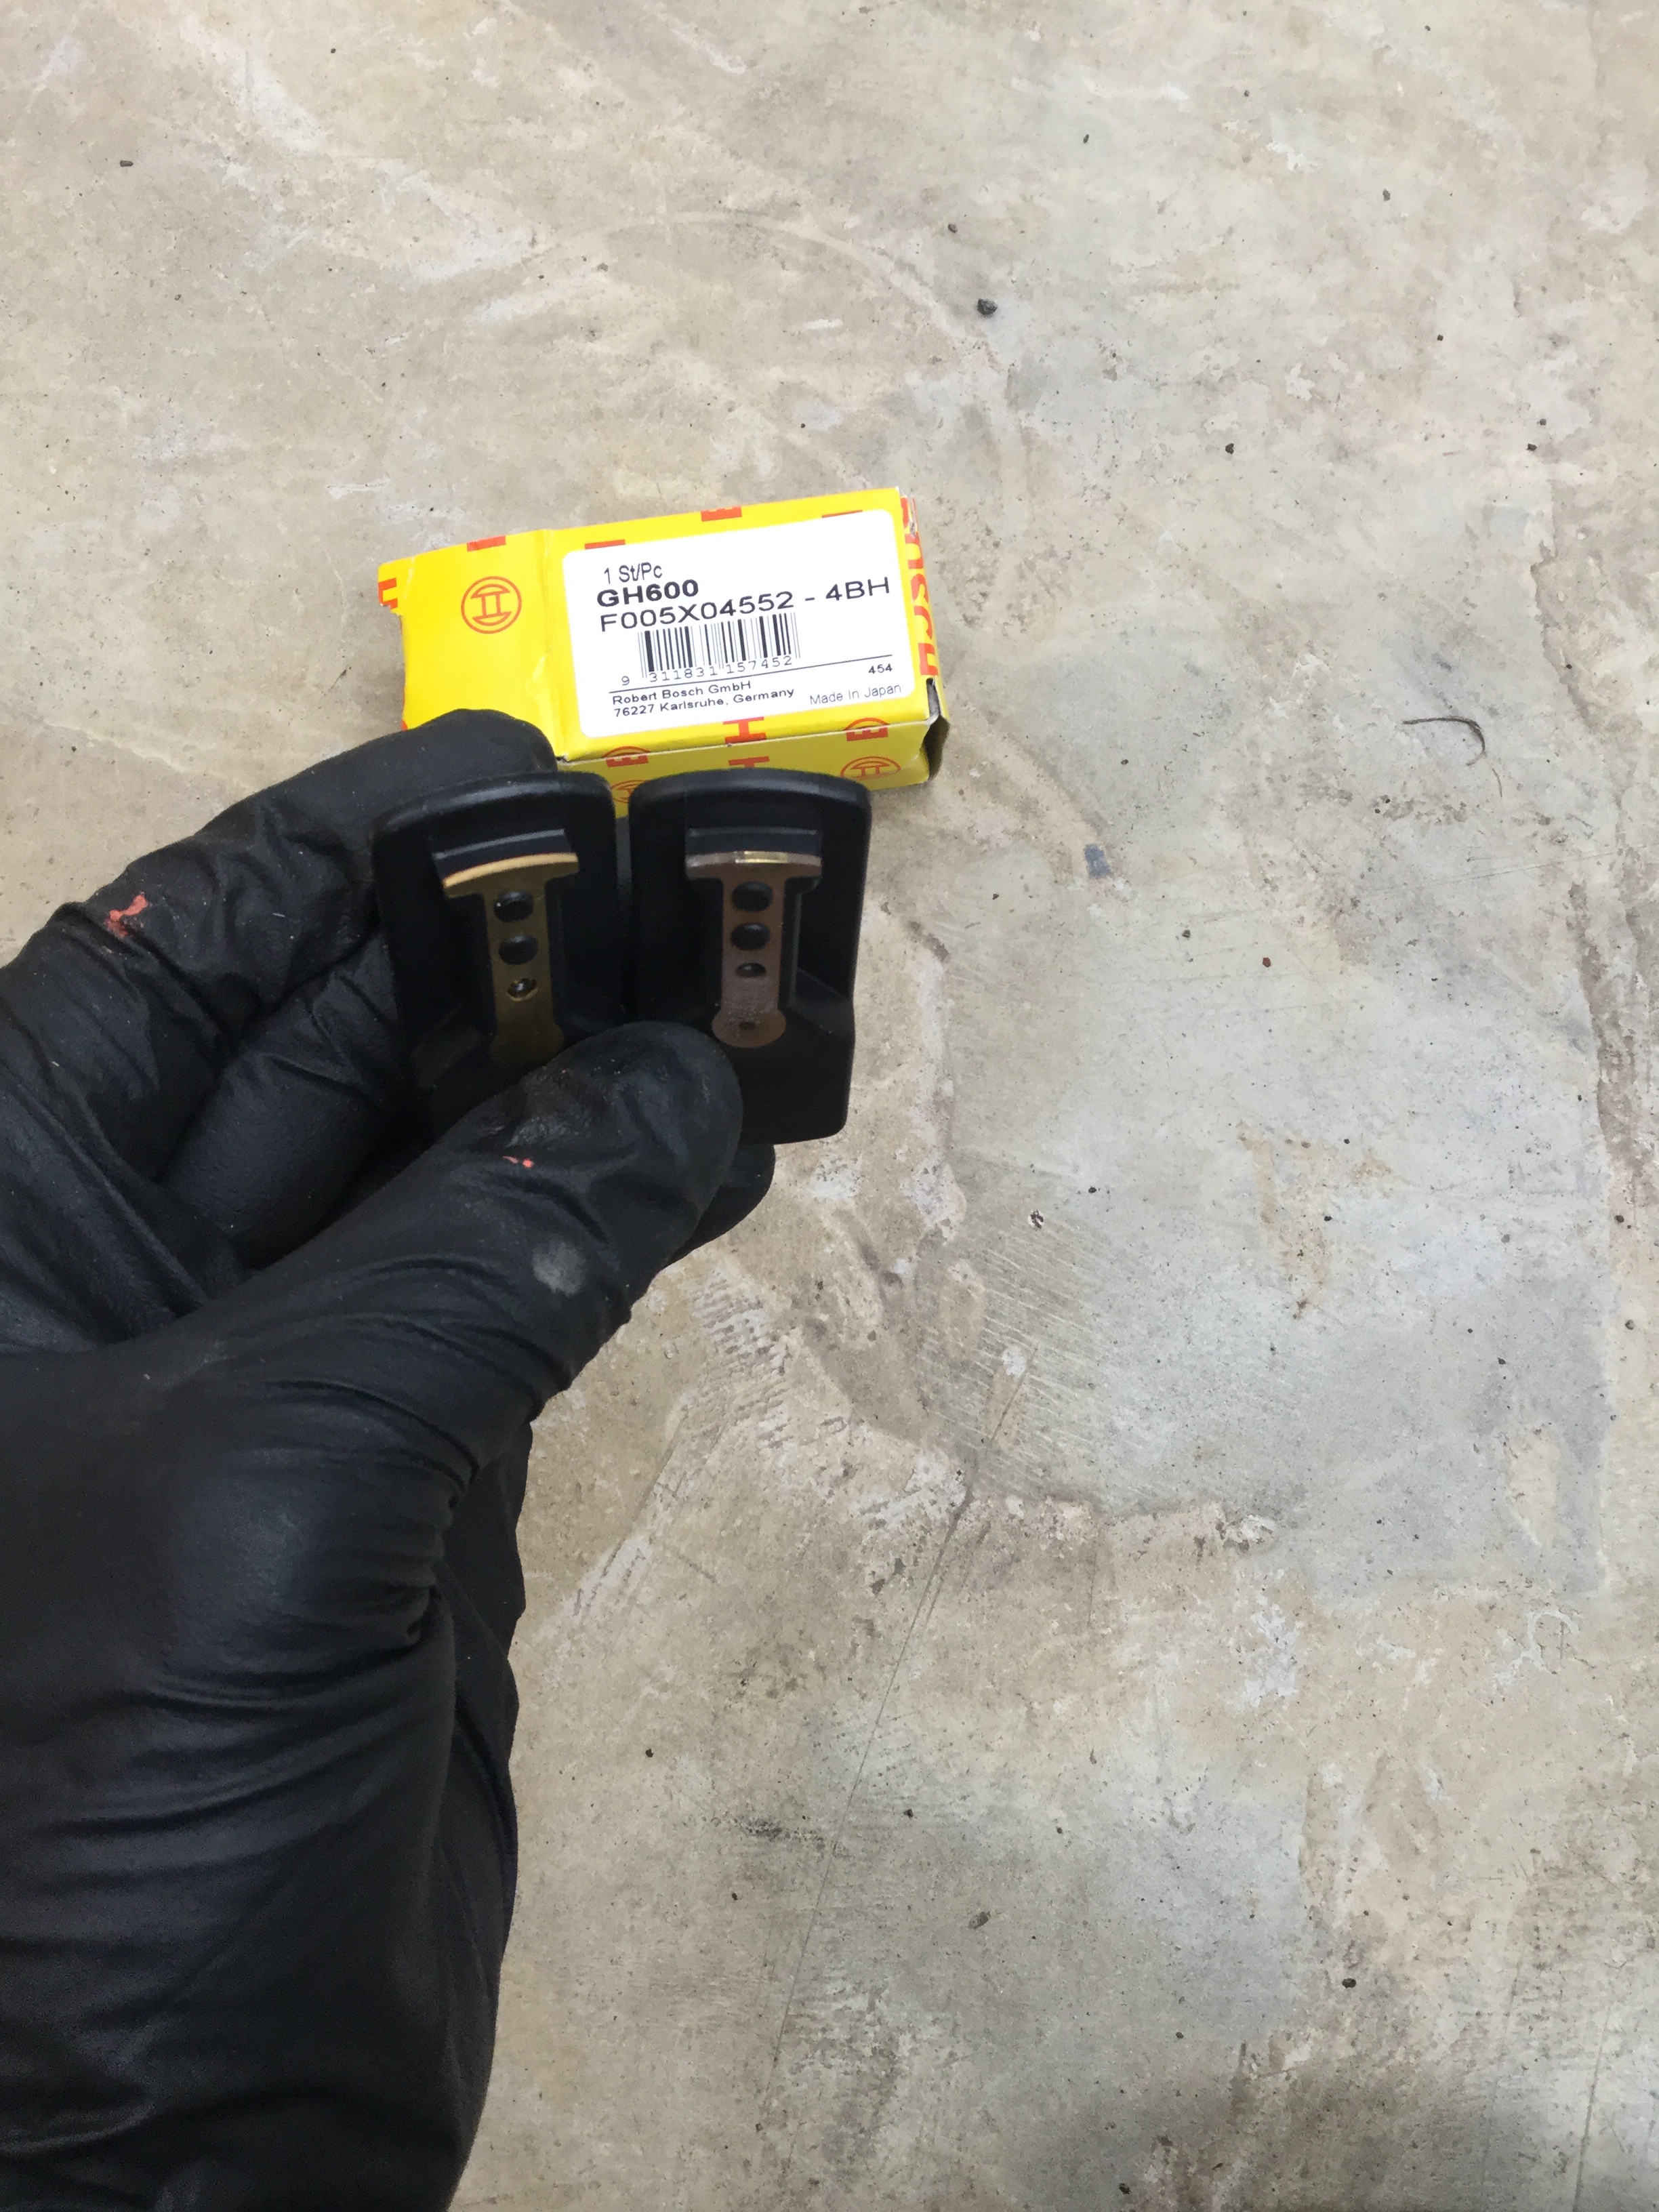
Old and new rotor arms … classic pitting but oh so small compared to my old MGB Roadster
Cap pints were immaculate .. but change anyway 😉

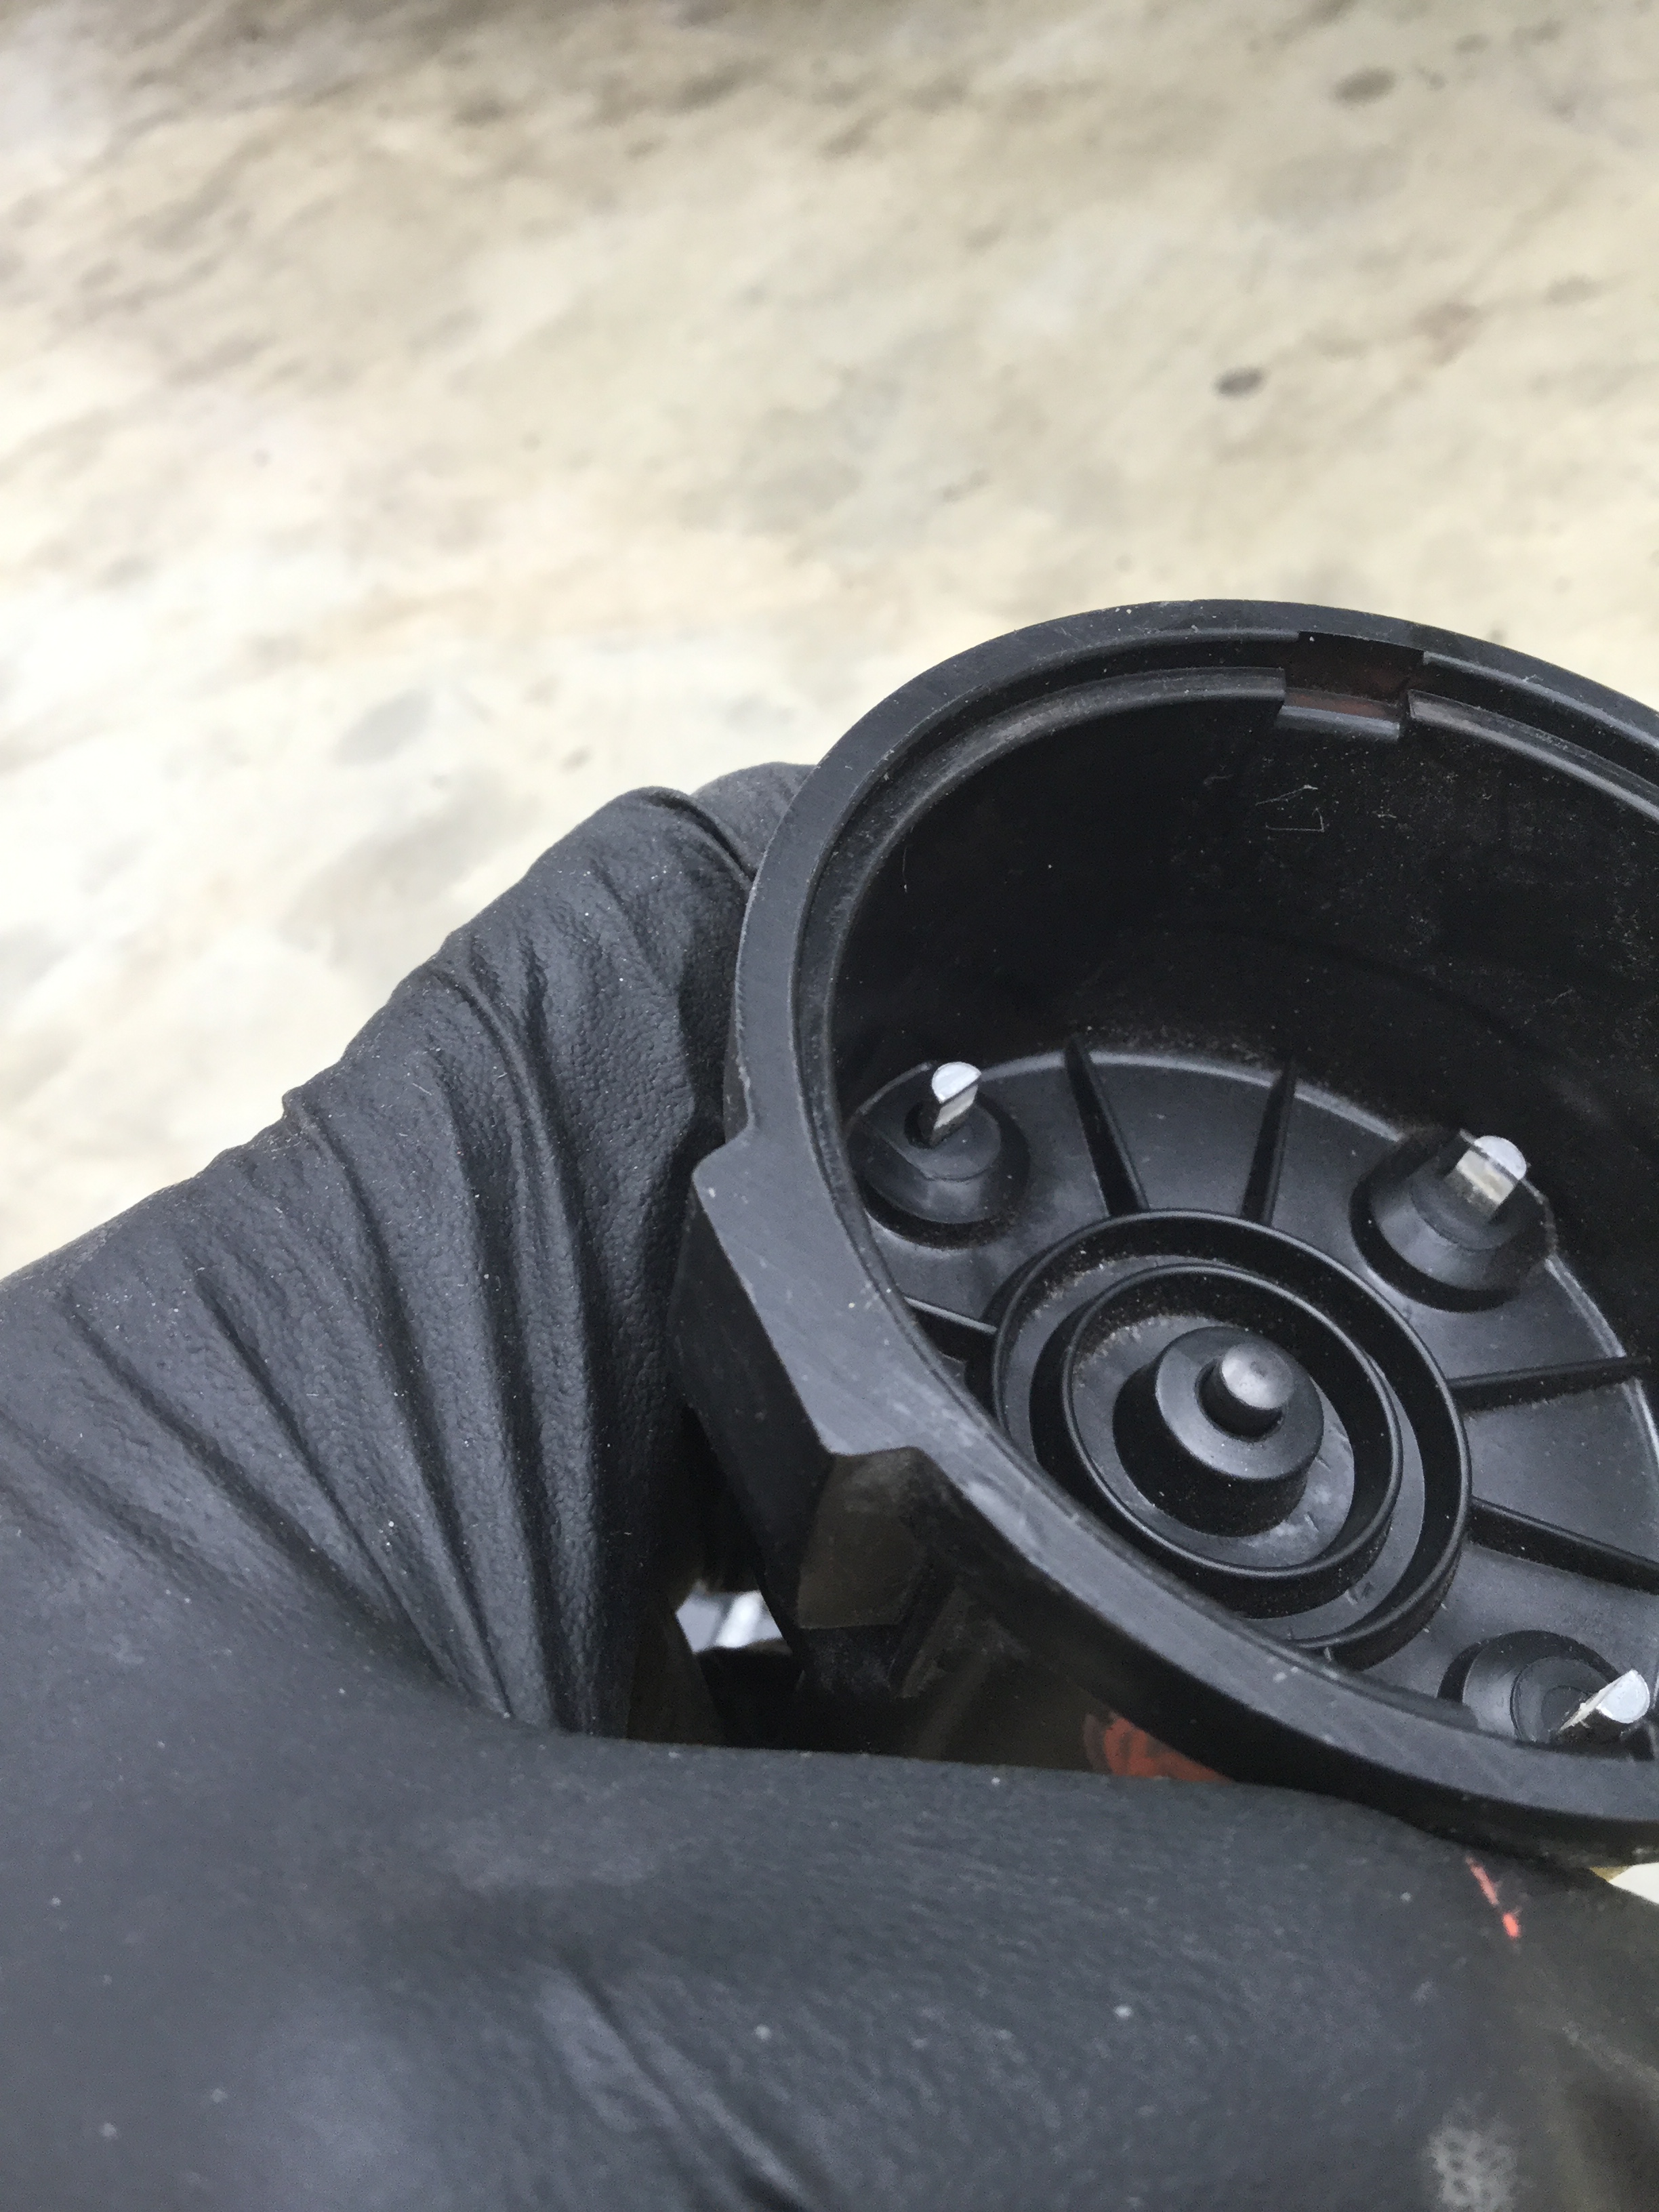
Second cap however … showed signs of light dusting .. looked like it could have been powdered rust .. but not much at all … on removing the rotor arm I could see the same just under the arm. After a brief a message with PHS we felt it worth checking the Service Bulletins as these may shed light .. I know there was one earlier for Defective Jabiru rotor arms but this looks like it may be the drive shaft may be ‘dry’
Will investigate online
(Later update .. got email from Gary C and it looks like it might simply be excess glue used hold the arm in place..very stiff pushing the new one back on so all good)


– The she definitely needs a wash again

Leave a comment